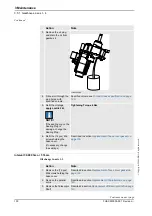
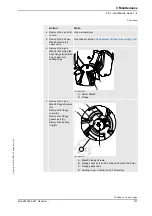
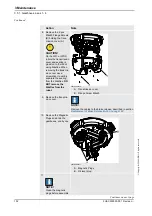
background image

3 Maintenance

3.3.10. Movable plate with swivel

93

3HAC030005-001  Revision: -     

© 

Copyri

ght 200

6 ABB

All ri

ghts res

erved.

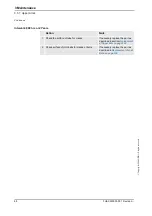
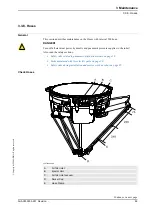
3.3.10. Movable plate with swivel

General

This section describes maintenance on the Movable plate, with interval 500 hour.

DANGER!

Turn off all electrical power, hydraulic and pneumatic pressure supplies to the robot!

Also read the safety sections:

Safety risks related to pneumatic/hydraulic systems on page 18

Risks associated with live electric parts on page 20

Safety risks during installation and service work on robot on page 15

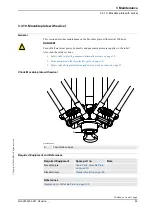
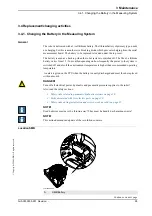
Check Movable plate with swivel

xx0700000502

Required Equipment and References

A

Tool interface axis 4

Required Equipment 

Spare part no.

Note

Movable plate

Spare Parts, Movable Plate 
on page 223

.

Standard tools

Standard toolkit on page 196

.

References

Replacement of Movable Plate on page 130

Continues on next page

Summary of Contents for IRB 360/3

Page 1: ...Product manual Parallel robot IRB 360 IRB 360 3 IRB 360 1 800 M2004 ...

Page 2: ......

Page 3: ... Copyright 2008 ABB All rights reserved Product manual IRB360 IRB360 3 IRB360 1 800 M2004 Document ID 3HAC030005 001 Revision ...

Page 4: ...sons or property fitness for a specific purpose or the like In no event shall ABB be liable for incidental or consequential damages arising from use of this manual and products described herein This manual and parts thereof must not be reproduced or copied without ABB s written permission and contents thereof must not be imparted to a third party nor be used for any unauthorized purpose Contravent...

Page 5: ... during work with gearbox oil 27 2 Installation and Commissioning 29 2 1 Introduction 29 2 2 Structure Manipulator 30 2 3 Unpacking 31 2 3 1 Weight specifications 31 2 3 2 Transport 32 2 3 3 Pre installation procedure 33 2 3 4 Assemble the robot IRB360 36 2 3 5 Working range and type of motion 38 2 4 On site installation 40 2 4 1 Lifting robot with fork lift 40 2 4 2 Lifting robot with roundslings...

Page 6: ... 4 2 2 Mounting instructions for seals 112 4 2 3 Screw joints 114 4 3 Complete robot 116 4 3 1 Replacement of base cover gasket 116 4 3 2 Replacement of Serial Measurement Board Unit 118 4 3 3 Replacement of Parallel Arms 120 4 3 4 Replacement of Upper Arm 124 4 3 5 Replacement of Bearing Rings 127 4 3 6 Replacement of Movable Plate 130 4 3 7 Replacement of Telescopic Shaft 133 4 3 8 Replacement o...

Page 7: ...ht specifications 195 7 6 Standard toolkit 196 7 7 Special tools 197 7 8 Lifting equipment and lifting instructions 198 7 9 Oil and Grease specification 199 8 Spare parts and exploded views 203 8 1 Spare Parts in Robot Base 203 8 1 1 Spare parts gear units axis 1 3 203 8 1 2 Spare parts Gear Unit axis 4 205 8 1 3 Spare parts transmission cover 207 8 1 4 Spare parts cable harness 209 8 1 5 Spare Pa...

Page 8: ...Table of Contents 6 3HAC030005 001 Revision Copyright 2008 ABB All rights reserved ...

Page 9: ...of mechanical and electrical installation repair maintenance work Organization of chapters The manual is organized in the following chapters Chapter Contents Safety Safety information that must be read through before performing any installation or service work on the robot Contains general safety aspects as well as more specific information on how to avoid personal injuries and damage to the produ...

Page 10: ...robot with reference numbers to the part list Circuit diagram Circuit diagram for the robot Chapter Contents Reference Document ID Product specification IRB 360 3HAC029963 001 Product manual Controller IRC5 3HAC021313 001 Operating manual IRC5 with Flexpendant 3HAC16590 1 Operating manual Calibration pendulum 3HAC16578 1 Operating manual Service Information System 3HAC025709 001 Application manual...

Page 11: ... including spare parts Additional procedures if any calibration decommissioning Reference information article numbers for documentation referred to in Product manual procedures lists of tools safety standards Part list Foldouts or exploded views Circuit diagrams Technical reference manuals The following manuals describe the robot software in general and contain relevant reference information RAPID...

Page 12: ...st hand operational contact with the robot that is production cell operators programmers and trouble shooters The group of manuals includes Emergency safety information General safety information Getting started IRC5 and RobotStudio Online IRC5 with FlexPendant RobotStudio Online Introduction to RAPID Trouble shooting IRC5 for the controller and robot Continued ...

Page 13: ...ude references to equipment spare parts tools etc required for the different actions in the procedure The equipment is marked with italic text in the procedures and completed with a reference to the section where the equipment is listed with further information that is article number dimensions The denomination in the procedure for the component or attachment point corresponds to the denomination ...

Page 14: ...How to read the product manual 3HAC030005 001 Revision 12 Copyright 2006 ABB All rights reserved ...

Page 15: ... attend to before performing any service or installation work on the controller These are applicable for all service work and are found in section General safety information specific safety information pointed out in the procedure at the moment of the danger How to avoid and eliminate the danger is either detailed directly in the procedure or further detailed in separate instructions found in sect...

Page 16: ... and handling of the industrial robot described in the applicable documents for example Operating Manual IRC5 with FlexPendant M2004 Product Manual Connection of external safety devices Apart from the built in safety functions the robot is also supplied with an interface for the connection of external safety devices Via this interface an external safety function can interact with other machines an...

Page 17: ... crossed before admittance must be set up in front of the robot s working space Light beams or sensitive mats are suitable devices Turntables or the like should be used to keep the operator out of the robot s working space The axes are affected by the force of gravity when the brakes are released In addition to the risk of being hit by moving robot parts you run the risk of being crushed by the pa...

Page 18: ...n burns too Removed parts may result in collapse of robot WARNING Take any necessary measures to ensure that the robot does not collapse as parts are removed e g secure the lower arm with fixtures if removing motor axis 2 Safety risk Description Cable packs are sensitive to mechanical damage CAUTION The cable packs are sensitive to mechanical damage They must be handled with care especially the co...

Page 19: ...ely turn off tools such as milling cutters etc Make sure that guards remain closed until the cutters stop rotating It should be possible to release parts by manual operation valves Safe design Grippers end effectors must be designed so that they retain workpieces in the event of a power failure or a disturbance of the controller CAUTION Ensure that a gripper is prevented from dropping a workpiece ...

Page 20: ...pneumatic and hydraulic systems Residual energy Residual energy may be present in these systems After shutdown particular care must be taken The pressure in pneumatic and hydraulic systems must be released before starting to repair them Safe design Gravity may cause any parts or objects held by these systems to drop Dump valves should be used in case of emergency Shot bolts should be used to preve...

Page 21: ...d out professionally and in accordance with the applicable safety regulations Care must be taken at all times Qualified personnel Corrective maintenance must only be carried out by qualified personnel who are familiar with the entire installation as well as the special risks associated with its different parts Extraordinary risks If the working process is interrupted extra care must be taken due t...

Page 22: ...nergy DC link Ultracapacitor bank unit in the controller Units such as I O modules can be supplied with power from an external source The mains supply mains switch The transformers The power unit The control power supply 230 VAC The rectifier unit 400 480 VAC and 700 VDC Note Capacitors The drive unit 700 VDC The drive system power supply 230 VAC The service outlets 115 230 VAC The customer power ...

Page 23: ...or example contact with high voltage electrical units explosion or fire risk risk of poisonous gases risk of crushing impact fall from height etc warning WARNING Warns that an accident may occur if the instructions are not followed that can lead to serious injury possibly fatal and or great damage to the product It applies to warnings that apply to danger with for example contact with high voltage...

Page 24: ...rostatic discharge ESD symbol indicates electrostatic hazards which could result in severe damage to the product Note NOTE Note symbols alert you to important facts and conditions Tip TIP Tip symbols direct you to specific instructions where to find additional information or how to perform a certain operation in an easier way Symbol Designation Signification Continued ...

Page 25: ... located within the working range of the robot Elimination Action Note 1 Before attempting to run the robot make sure all emergency stop equipment is correctly installed and connected Emergency stop equipment such as gates tread mats light curtains etc 2 If possible use the hold to run function whenever possible The hold to run function is used in manual mode not in automatic mode How to use the h...

Page 26: ...take into consideration before the first test run Elimination Follow the procedure below when performing the first test run after a service activity repair installation or maintenance Action 1 Remove all service tools and foreign objects from the robot and its working area 2 Install all safety equipment properly 3 Make sure all personnel are standing at a safe distance from the robot that is out o...

Page 27: ...itive electronics Elimination Location of wrist strap button The wrist strap button is located in the right corner as shown in the illustration below xx0600003249 Action Note 1 Use a wrist strap Wrist straps must be tested frequently to ensure that they are not damaged and are operating correctly 2 Use an ESD protective floor mat The mat must be grounded through a current limiting resistor 3 Use a...

Page 28: ...1 Safety 1 3 4 WARNING The unit is sensitive to ESD 3HAC030005 001 Revision 26 Copyright 2006 ABB All rights reserved xx0500002171 A Wrist strap button Continued ...

Page 29: ... opening Do not overfill the gearbox when filling Do not overfill Overfilling of gearbox oil can lead to internal over pressure inside the gearbox which in turn may damage seals and gaskets completely press out seals and gaskets prevent the robot from moving freely Make sure not to overfill the gearbox when filling with oil After filling check the correct oil level Do not mix types of oil Mixing t...

Page 30: ...1 Safety 1 3 5 WARNING Safety risks during work with gearbox oil 3HAC030005 001 Revision 28 Copyright 2006 ABB All rights reserved ...

Page 31: ...ed 2 Installation and Commissioning 2 1 Introduction General This chapter contains information for installing the robot to the working site More detailed technical data such as load diagram permitted extra loads equipment and location of extra loads equipment may be found in the Product Specification for the robot ...

Page 32: ...ructure Manipulator Manipulator structure The figure shows the manipulator structure and components xx0700000451 A Upper arm axis 1 B Upper arm axis 2 C Upper arm axis 3 D Motor axis 4 E SMB Unit F Telescopic shaft axis 4 G Bar H Movable plate with swivel I Vacuum Kit optional J Medium house set optional K Large house set optional ...

Page 33: ...etimes specified All components exceeding 22 kg 50 lbs are high lighted in this way To avoid injury ABB recommends the use of lifting equipment when handling components with a weight exceeding 22 kg A wide range of lifting tools and devices are available for each manipulator model Example Below is an example of how a weight specification is presented inside a procedure table Action Note CAUTION Th...

Page 34: ...he transport shall be made by qualified personnel and should conform to all national and local codes Transport position Whenever the manipulator is transported it must be in mounting position it s not allowed to turn the manipulator up side down When air transport is used the robot must be located in a pressure equalized area xx0700000434 A Robot delivery box B Securing point x3 C Robot delivery n...

Page 35: ...allowed to perform the installation 2 Make sure the robot has not been damaged by visually inspecting its exterior Check especially following items Composite arms upper arms and bar system no hacks Joint balls no scratches Ventilation hose no holes 3 Make sure the lifting device to be used is dimensioned to handle the weight of the robot 4 If the robot is not to be installed directly it must be st...

Page 36: ...ll rights reserved Loads on foundation The table below shows the various forces and torques working on the robot during different kinds of operation xx0700000586 Force N Max load in operation Fx 330 Fy 260 Fz 1500 170 Torque Nm Max load in operation Mx 200 My 230 Mz 100 X Y Y Z Z X Continued Continues on next page ...

Page 37: ... N referring to the z direction in the base coordinate system regarding coordinate system see the Product Specification for IRB 340 A robot frame is not included in the delivery Storage conditions The table below shows the allowed storage conditions for the robot Operating conditions The table below shows the allowed operating conditions for the robot Protection classes The table below shows the p...

Page 38: ... lift on page 40 Lifting robot with roundslings on page 41 Pre installation procedure on page 33 3 Securing the robot according to section Orienting and securing the robot on page 46 4 Assemble the parallel arms according to section Replacement of Parallel Arms on page 120 5 Assemble the Movable Plate according to section Replacement of Movable Plate on page 130 6 Connecting the controller to the ...

Page 39: ... rights reserved CAUTION Before mounting external equipment on the robot first read the section Fitting equipment on robot on page 53 Assemble options To facilitate cleaning it is possible to use the spring units without the rubber bellows if that is preferred due to hygienic or other reasons xx0700000707 Continued ...

Page 40: ...n and Commissioning 2 3 5 Working range and type of motion 3HAC030005 001 Revision 38 Copyright 2006 ABB All rights reserved 2 3 5 Working range and type of motion Motion Pattern xx0700000448 Continues on next page ...

Page 41: ...ning 2 3 5 Working range and type of motion 39 3HAC030005 001 Revision Copyright 2006 ABB All rights reserved Working range xx0700000473 Model Dimensions A mm ØB mm ØC mm D mm IRB 360 250 1132 967 50 IRB 360 800 200 800 Continued ...

Page 42: ...obot with fork lift WARNING Never walk under a suspended load Lifting robot xx0700000434 Recommended equipment Lifting A Robot package top B Robot package securing point x3 C Delivery note Equipment Art no Note Fork lift Action Note 1 CAUTION The delivery package weighs 200 kg All lifting equipment used must be sized accordingly 2 Lift the robot package to the mounting site ...

Page 43: ...t with roundslings WARNING Never walk under a suspended load The best way to lift the manipulator is to use lifting straps and a traverse crane The lifting strap dimensions must comply with the applicable standards for lifting Lifting position xx0700000433 Recommended equipment A L 500 mm 20 inch A Equipment Art no Note Roundslings Continues on next page ...

Page 44: ...opyright 2006 ABB All rights reserved Lifting the robot with roundslings Action Note 1 Attach the roundslings to the robot base box see figure Lifting position on page 41 CAUTION The IRB 360 weighs 120 kg Std and 145 kg WDS All lifting equipment used must be sized accordingly xx0700000466 Continued ...

Page 45: ...ght 2006 ABB All rights reserved 2 4 3 Amount of required space Required space The amount of space required to operate the manipulator is illustrated in Figure xx0700000489 Dimensions Model Dim mm A B C D E F G H IRB 360 1115 865 646 370 275 389 5 28 50 362 5 IRB 360 800 1160 960 480 370 275 247 5 ...

Page 46: ...ils how to orient and secure the robot cage at a horizontal level at the installation site in order to run the robot safely WARNING Make sure that the robot cage is secured before mounting the robot Illustration xx0700000469 Required equipment and references A Spirit level B Chemical or Mechanical Expander bolts C Shim Equipment Spare Part No Note Spirit level Shim Shim Drawing on page 45 Continue...

Page 47: ...rd toolkit on page 196 References Pre installation procedure on page 33 Equipment Spare Part No Note Action Note 1 Make sure the installation site for the robot conforms to the specifications in section Pre installation procedure on page 33 2 Prepare the installation site 3 Use a Water level to level the robot cage Use shim for leveling Example of shim shown in Shim Drawing on page 45 4 Secure the...

Page 48: ...nting and securing the robot General This section details how to orient and secure the robot at a horizontal level at the installation site Illustration xx0700000444 Required equipment A Screw M12 B Bonded seal washer rubber metal C Bushing D Sealing Equipment etc Spare part no Note Standard Tools Standard toolkit on page 196 Continues on next page ...

Page 49: ...5 001 Revision Copyright 2006 ABB All rights reserved Hole configuration base xx0700000467 The three support points of the manipulator base box shall be mounted against three flat surfaces with a flatness within the specification Use shims if necessary Continued Continues on next page ...

Page 50: ...he robot 3HAC030005 001 Revision 48 Copyright 2006 ABB All rights reserved Attachment bolts specification xx0700000522 A Screw M12 B Bonded seal washer rubber metal C Spacer metal D Washer EPDM rubber compressed 50 E Frame F Bracket Continued Continues on next page ...

Page 51: ...conforms to the specifications in section Pre installation procedure on page 33 2 Prepare the installation site Detailed in section Orienting and securing the robot cage on page 44 3 Lift the robot to the installation site Detailed in section Lifting robot with fork lift on page 40 and in section Lifting robot with roundslings on page 41 4 NOTE If use of ABB s vacuum system is intended make sure t...

Page 52: ...one with great care and only when absolutely necessary General This section details how to release the holding brakes of each axis motor Using the brake release unit when the robot is connected to the controller This section details how to release the holding brakes using the internal brake release unit xx0700000625 Action Note 1 On the flex pendant tap Program Stop A in figure 2 On the controller...

Page 53: ...button twinkle en0400000795 4 The internal brake release unit is located at the base of the robot xx0700000435 A Brake release button 5 Release the holding brake on the robot axis by pressing the brake release button on the internal brake release panel and keeping it depressed The brake will function again as soon as the button is released Action Note Continued Continues on next page ...

Page 54: ...s not connected to the controller xx0700000441 NOTE Be careful not to interchange the 24 V and 0 V pins If they are mixed up electrical components can be damage Action Note 1 Connect an external power 24V supply to the FCI connector pin 13 to 0V and pin 15 to 24V See cable harness in section Spare parts cable harness on page 209 2 Release the holding brake on the robot axis by pressing the brake r...

Page 55: ...3 3HAC030005 001 Revision Copyright 2006 ABB All rights reserved 2 4 7 Fitting equipment on robot Overview This section details how to fit equipment on the IRB 360 Mechanical interface STD xx0700000471 A Free space depth 6 B R1 4 C Ø14 H8 depth 4 Continues on next page ...

Page 56: ...005 001 Revision 54 Copyright 2006 ABB All rights reserved Mechanical interface 3D xx0700000709 Required equipment D Key grip Width 22 mm Height 5 5 mm E Ø25 h8 depth 6 Equipment Spare part no Note Standard Tools Standard toolkit on page 196 Continued Continues on next page ...

Page 57: ...R1 4 xx0700000490 CAUTION Never drill a hole in the manipulator without first consulting maintenance staff or the design department at ABB Open end spanner 22 mm Equipment Spare part no Note A Mounting Flange B Tool Fitting R1 4 C Open end spanner 22 mm Action Note 1 Attach the tool to the mounting flange Fitting R1 4 Continued Continues on next page ...

Page 58: ...pen end spanner 22 m or similar on the mounting flange when tightening 3 NOTE If axial tool movement using axis 4 is intended use a locking liquid or a lock screw to prevent rotation of tool If a high frequent use of linear tool movement is intended use a tool with mounting flange Action Note A 4 pcs Screws M4 Action Note 1 Attach the tool to the mounting flange Continued Continues on next page ...

Page 59: ...BB All rights reserved Attachment screws 2 CAUTION Always use an open end spanner 22 mm or similar on the mounting flange when tightening Action Note Attachments Note Suitable screws lightly lubricated M4 Length depending on tool Suitable washer Tightening torque See section Screw joints on page 114 Continued ...

Page 60: ...oad should be defined If neither the vacuum system nor the medium sized hose is chosen and both M1 and M2 are less than 175 g each the robot can run with full performance and no extra load should be defined and M1 is more than 175 g an extra load should be defined in the load definition The extra load should be M1 175 g Maximum extra load allowed is 175 g M1 max 350g and M2 is more than 175 g an e...

Page 61: ...atic pressure supplies to the robot Also read the safety sections Safety risks related to pneumatic hydraulic systems on page 18 Risks associated with live electric parts on page 20 Safety risks during installation and service work on robot on page 15 Location xx0700000546 Required Equipment and References A Warning Lamp B Screw M8 of suitable length Equipment Spare Part No Note Standard Tools Sta...

Page 62: ...y Lamp Connectors R3 H1and R3 H2 B Lead through in optional customer connection plate C Connection plate gasket D 4pcs Screw M6x20 Action Note 1 Remove the base cover Described in section Replacement of base cover gasket on page 116 2 Replace the cover plate with the optional safety lamp connection plate Tightening torque 4 Nm 3 Locate the connectors R3 H1 R3 H2 and connect the Safety Lamp harness...

Page 63: ... General This section details installation of customer connections DANGER Turn off all electrical power hydraulic and pneumatic pressure supplies to the robot Also read the safety sections Safety risks related to pneumatic hydraulic systems on page 18 Risks associated with live electric parts on page 20 Safety risks during installation and service work on robot on page 15 Location en0700000642 Con...

Page 64: ... R1 CP 11 13 11 TQ Conductor to cut off 12 GY XP5 Earth 19 R1 CP 12 13 2 SHELD XP5 Earth Ref DP shield 20 Earth shield 0V ground 1 Signals Pair 1 1 1 WH XP5 B5 4 R1 CS 1 15 1 2 1 BU XP5 C5 4 R1 CS 2 15 2 1 2 WH XP5 D5 4 R1 CS 3 15 2 2 2 OG XP5 A6 4 R1 CS 4 15 3 1 3 WH XP5 B6 4 R1 CS 5 15 3 2 3 GN XP5 C6 4 R1 CS 6 15 4 1 4 WH XP5 D6 4 R1 CS 7 15 4 2 4 BN XP5 A7 4 R1 CS 8 15 5 1 5 WH XP5 B7 4 R1 CS ...

Page 65: ... XP5 C10 4 R1 CS 22 15 12 1 12 BK XP5 D10 4 R1 CS 23 15 12 2 12 OG Conductor to cut off 13 1 13 BK Conductor to cut off 13 2 13 GN Conductor to cut off 14 1 Conductor to cut off 14 2 Conductor to cut off 15 1 Conductor to cut off 15 2 Conductor to cut off 16 1 Conductor to cut off 16 2 Conductor to cut off Shield XP5 Earth Ref DP shield 20 0V Ground 1 Connection point A Connection point B Wire Spe...

Page 66: ...all electrical power hydraulic and pneumatic pressure supplies to the robot Also read the safety sections Safety risks related to pneumatic hydraulic systems on page 18 Risks associated with live electric parts on page 20 Safety risks during installation and service work on robot on page 15 Locations xx0700000654 A Ejector unit B R1 CS C Exhaust air D Vacuum In E Compressed air in max 6 bar F Vacu...

Page 67: ...B All rights reserved Mechanical Installation Ejector xx0700000545 A Attachment B Bracket C Hexagon head screw M8x35 Steel 8 8 A2F D Ejector Unit E Hexagon bolt with flange M6 x 20 A2 DIN6921 Action Note 1 Follow the Refitting instructions in section Replacement of Ejector Unit on page 162 Continued Continues on next page ...

Page 68: ...000710 Electrical Installation Action Note 1 Follow the Refitting instructions in section Replacement of Vacuum Hoses on page 158 Action Note 1 Assemble the Customer cable 3HAC14860 X X Depending on length see section Manipulator Cables IRB360 on page 70 2 Use connection R1 CS on the front of the ejector unit and the other end to the XP5 socket on the controller Continued ...

Page 69: ... 3HAC030005 001 Revision Copyright 2006 ABB All rights reserved 2 6 Electrical connections 2 6 1 Connections General This section details connections between manipulator and controller For information about controller connections see Product Manual IRC 5 ...

Page 70: ...ide of axis 1 upper arm Connecting the controller to the manipulator is further described in the produktmanual for the controller WARNING Before starting to connect any cable to the controller make sure that the line voltage cable is disconnected Controller Connections xx0700000476 The cables are connected to the front side of the cabinet using an industrial connector and a Burndy connector see Fi...

Page 71: ...2 Installation and Commissioning 2 6 2 Connecting the controller to the manipulator 69 3HAC030005 001 Revision Copyright 2006 ABB All rights reserved Robot Connections xx0700000565 Continued ...

Page 72: ...described in the Product Manual Panel Mounted Controller Cable category Description Robot Power Cables Handles power supply to the robot s motors Robot Signal Cables Handles signals from the controller to the robot s motors as well as feedback from the serial measurement board Customer cables option Handles communication with equipment fitted on the robot by the customer low voltage signals and hi...

Page 73: ...l Signals cables for vacuum optional and can not be combined with customer connections Cable Art no Customer control cable 3 m 3HAC030198 001 Customer control cable 7 m 3HAC030198 002 Customer control cable 15 m 3HAC030198 003 Customer control cable 22 m 3HAC030198 004 Customer control cable 30 m 3HAC030198 005 Cable Art no Customer control cable 3 m 3HAC14860 7 Customer control cable 7 m 3HAC1486...

Page 74: ...2 Installation and Commissioning 2 6 3 Manipulator Cables IRB360 3HAC030005 001 Revision 72 Copyright 2006 ABB All rights reserved ...

Page 75: ...ies including intervals and refers to procedures for the activities Each procedure contains all information required to perform the activity that is required tools and materials The procedures are gathered in different sections and divided according to the maintenance activity Safety information Before any service work is commenced it is extremely important that all safety information is observed ...

Page 76: ...s inspected concerning the following parts Nevertheless certain routine checks and preventative maintenance must be carried out at specified periodic intervals as shown in the table below Inspect regularly Note Telescopic shaft Spring Units Bars Universal Joints Preventative Maintenance Note The robot should be cleaned As described in section Cleaning of Robot Standard and Wash Down on page 105 Ch...

Page 77: ...tween the control cabinet and robot is not damaged Wear of plain bearings in telescopic shaft Wash down protection Cleaning Cleaning Clean the robot exterior with a cloth when necessary Do not use aggressive solvents which may damage paint or cabling see section Cleaning of Robot Standard and Wash Down on page 105 Cleaning instructions for Wash Down version see section Cleaning of Robot Standard a...

Page 78: ...h interval 500 and 4000 hour DANGER Turn off all electrical power hydraulic and pneumatic pressure supplies to the robot Also read the safety sections Safety risks related to pneumatic hydraulic systems on page 18 Risks associated with live electric parts on page 20 Safety risks during installation and service work on robot on page 15 NOTE The wear on the bearings depends on the payload cycle envi...

Page 79: ...crew dog point Required Equipment Note Standard tools Standard toolkit on page 196 References Replacement of Telescopic Shaft on page 133 Spare Parts Telescopic shafts on page 220 Action Note 1 Check and retighten the set screws in the Universal Joints Described in section Replacement of Telescopic Shaft on page 133 Action Note 1 Change the Telescopic Shaft and the Universal Joints Described in se...

Page 80: ...umatic pressure supplies to the robot Also read the safety sections Safety risks related to pneumatic hydraulic systems on page 18 Risks associated with live electric parts on page 20 Safety risks during installation and service work on robot on page 15 NOTE The wear on the bearings depends on the payload cycle environment and lubrication Telescopic Shaft xx0700000717 Required Equipment and Refere...

Page 81: ... Action Note 1 Check and retighten set screws 2 If the linear bushings are worn out or if the backlash is excessive change the Telescopic Shaft and the Universal Joints Described in section Replacement of Telescopic Shaft on page 133 Action Note 1 Change the Telescopic Shaft and the Universal Joints Spare Parts Telescopic shafts on page 220 Continued ...

Page 82: ...l power hydraulic and pneumatic pressure supplies to the robot Also read the safety sections Safety risks related to pneumatic hydraulic systems on page 18 Risks associated with live electric parts on page 20 Safety risks during installation and service work on robot on page 15 NOTE The wear on the bearings depends on the payload cycle environment and lubrication Telescopic Shaft xx0700000498 A Te...

Page 83: ...andard tools Standard toolkit on page 196 References Spare Parts Telescopic shafts on page 220 Replacement of Telescopic Shaft on page 133 Action Note 1 Check and retighten the set screws in the Universal Joints 2 Lubricate the linear bushing using a shot lubricator 3 If the linear bushing are worn out or if the backlash is excessive replace the Telescopic Shaft Described in section Replacement of...

Page 84: ...ricated air DANGER Turn off all electrical power hydraulic and pneumatic pressure supplies to the robot Also read the safety sections Safety risks related to pneumatic hydraulic systems on page 18 Risks associated with live electric parts on page 20 Safety risks during installation and service work on robot on page 15 Vacuum System xx0700000499 A Air filter inlet B Ejector Unit C Air filter inlet ...

Page 85: ...it on page 162 Draining of water separation filter on page 160 Action Note 1 Empty air filter and check the position of the clamps for the hose Described in section Draining of water separation filter on page 160 2 Correct the positions on the outer clamps Positions shown in figure 3 Check that the air supply is dry and clean Particle size must not exceed 5 µm Action Note 1 Replace pneumatic valve...

Page 86: ...aulic systems on page 18 Risks associated with live electric parts on page 20 Safety risks during installation and service work on robot on page 15 NOTE The wear on the bearing rings depends on the payload number of cycles and environment CAUTION The spring units must be removed according to description in section Replacement of Parallel Arms on page 120or they will be damaged Bar system wear xx07...

Page 87: ... Years References Replacement of Bearing Rings on page 127 Action Note 1 Check for wear on bearing rings listen for screeching If necessary change bearing rings described in section Replacement of Bearing Rings on page 127 Action Note 1 Check surface of tube for cracks or damages change if damage Replacement of Bearing Rings on page 127 Continued ...

Page 88: ...s on page 18 Risks associated with live electric parts on page 20 Safety risks during installation and service work on robot on page 15 Check joint balls xx0700000500 Required Equipment and References Interval 4 000 hrs or 2 Years A Movable Plate B Joint Balls Required Equipment Spare part no Note Standard tools Standard toolkit on page 196 Pliers for Parallel Arms 3HAC6194 1 References Replacemen...

Page 89: ...ead the safety sections Safety risks related to pneumatic hydraulic systems on page 18 Risks associated with live electric parts on page 20 Safety risks during installation and service work on robot on page 15 Check upper arm xx0700000501 Required Equipment and References A Upper arm tube B Joint Balls A B Required Equipment Spare part no Note Standard tools Standard toolkit on page 196 References...

Page 90: ...4 000 hrs or 2 Years Action Note 1 Check the surface of tube for cracks If necessary replace the part as described in section Replacement of Upper Arm on page 124 2 Check surface of joint balls for cracks or burrs If necessary replace the part as described in Replacement of Joint Balls on page 138 Continued ...

Page 91: ...al power hydraulic and pneumatic pressure supplies to the robot Also read the safety sections Safety risks related to pneumatic hydraulic systems on page 18 Risks associated with live electric parts on page 20 Safety risks during installation and service work on robot on page 15 Check Hoses xx0700000499 A Air filter inlet B Ejector Unit C Air filter inlet vacuum D Swivel Cup E Hose Clamp Continues...

Page 92: ...Interval 500 hrs Required Equipment Spare part no Note Standard tools Standard toolkit on page 196 References Replacement of Vacuum Hoses on page 158 Action Note 1 Check the entire hose so that there are no folds or surface damage If necessary exchange the part as described in Replacement of Vacuum Hoses on page 158 Continued ...

Page 93: ... associated with live electric parts on page 20 Safety risks during installation and service work on robot on page 15 CAUTION The spring units must be removed according to description in section Replacement of Parallel Arms on page 120or they will be damaged Check Spring Units xx0700000497 Required Equipment and References A Hook B Spring C Rubber Bellow G Greasing points A B C G Required Equipmen...

Page 94: ... 500 hrs References Replacement of Parallel Arms on page 120 Action Note 1 Check the forks for wear If necessary exchange the part as described in Replacement of Parallel Arms on page 120 2 If necessary if the spring units make a grinding sound apply grease to all wear surfaces Shown in figure as G Continued ...

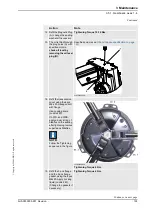
Page 95: ...Also read the safety sections Safety risks related to pneumatic hydraulic systems on page 18 Risks associated with live electric parts on page 20 Safety risks during installation and service work on robot on page 15 Check Movable plate with swivel xx0700000502 Required Equipment and References A Tool interface axis 4 Required Equipment Spare part no Note Movable plate Spare Parts Movable Plate on ...

Page 96: ... swivel or tool interface without first releasing the brakes it will damage the telescopic shaft Action Note 1 Release the holding brakes on the robot axis 4 As described in section Manually releasing the brakes on page 50 2 Check axis 4 so that the rotation is smooth If necessary replace the Movable plate as described in Replacement of Movable Plate on page 130 Continued ...

Page 97: ...from 12 36 months depending on how frequently the power to the system is switched off and also if the environment temperature is higher than recommended operating temperature An alert is given on the TPU when the battery is nearly discharged and must then be replaced within a month DANGER Turn off all electrical power hydraulic and pneumatic pressure supplies to the robot Also read the safety sect...

Page 98: ...96 Battery retainer strap References Updating revolution counters on page 182 Replacement of base cover gasket on page 116 Action Note 1 Remove the 12pcs M6 screws holding the base cover Described in section Replacement of base cover gasket on page 116 2 Remove the base cover 3 Disconnect the battery from the serial measurement board Connection X3 NOTE Voltage of batteries measured at power off Mi...

Page 99: ... measurement board Connection X3 xx0700000520 6 Refit the battery to the SMB using a strap 7 Check the base cover gasket Replace if damaged 8 Refit the base cover using the 12pcs M6 screws Described in section Replacement of base cover gasket on page 116 9 Update the revolution counters Described in section Updating revolution counters on page 182 Action Note A Continued ...

Page 100: ... take necessary measures to collect the oil DANGER Turn off all electrical power hydraulic and pneumatic pressure supplies to the robot Also read the safety sections Safety risks related to pneumatic hydraulic systems on page 18 Risks associated with live electric parts on page 20 Safety risks during installation and service work on robot on page 15 Location of gearboxes xx0700000505 A Gearbox axi...

Page 101: ...ion cover on page 207 Spare parts gear units axis 1 3 Spare parts gear units axis 1 3 on page 203 Spare parts gear units axis 4 Spare parts Gear Unit axis 4 on page 205 Locking liquid Loctite 243 Sikaflex 521FC 3HAC031493 001 References Replacement of base cover gasket on page 116 Replacement of Parallel Arms on page 120 Replacement of Telescopic Shaft on page 133 Replacement of Upper Arm on page ...

Page 102: ...e sealing ring on the Sealing Plug is damage change the Sealing Plug Tightening Torque 4 Nm 6 Refit the 12 pcs M6 screws holding the base cover If necessary change the sealings Described in section Replacement of base cover gasket on page 116 Action Note Action Note 1 Remove the 12 pcs M6 screws holding the base cover Described in section Replacement of base cover gasket on page 116 2 Remove the p...

Page 103: ...e 124 6 Remove the 6 pcs M6x20 A holding the 3 pcs flange B and the 3 pcs upper arm sealing rings xx0700000509 A Screw M6x20 B Flange 7 Remove the 3 pcs M6x20 Flange Screws A Remove the flange cover B Remove the flange gasket ax 4 C Remove the sealing ring D xx0700000647 A M6x20 Flange Screws B Flange cover ax 4 in 3D version without center hole C Flange gasket ax 4 D Sealing ring w dust lip not i...

Page 104: ...cover use a screwdriver to carfuly separate the sealing from the Sikaflex DO NOT remove the Sikaflex from the robot xx0700000510 A Transmission cover B Flange Screw M6x20 9 Remove the transmis sion cover NOTE Remove the cables to the brake release described in section Replacement of Brake Release Button on page 167 10 Remove the Magnetic Plugs and drain the gearboxes one by one xx0700000511 A Magn...

Page 105: ...ase specification on page 199 xx0700000729 14 Refit the transmission cover using the 6pcs M6 x 20 Hexagon bolt with flange Use Locking liquid Loctite 243 On WD and WDS apply a 5mm string of Sikaflex on the sealing after tightening remove superfluous Sikaflex NOTE Follow the Tightening sequence in the figure xx0800000024 Tightening Torque 4 Nm 15 Refit the 3 pcs flange and the 3 pcs flange gasket u...

Page 106: ...tite 243 Described in section Replacement of Upper Arm on page 124 18 Mount new VK covers on the upper arms Apply Locking liquid Loctite 243 19 Refit all parallel arms Described in section Replacement of Parallel Arms on page 120 20 Refit the Telescopic Shaft Described in section Replacement of Telescopic Shaft on page 133 21 Refit base cover CAUTION The base cover has sharp edges use protective g...

Page 107: ...ed into water to fulfil the following conditions The water surface should be min 150 mm above the highest part of the capping The lowest part of the capping should be at least 1 m below the water surface The length of the test should be at least 30 min The water temperature should not deviate more than 5 C from the temperature of the material This requirement could be changed by the technical comm...

Page 108: ... for IRB 360 WD and IRB 360 WDS versions DANGER Always read the instructions following the high pressure washer and the detergents used in the cleaning procedure A Base cover gasket B Brake release button C Transmission cover gasket D Axis 4 sealing ring E Movable plate F Upper arm sealing rings Action Note 1 Flush with water max 60 C low pressure see Figure for sensitive points Continued Continue...

Page 109: ...Time concentration and water temperature are chosen to reach the desired effect Concentration 1 2 Temperature 10 40 C Time approx 20 min 6 Flush thoroughly with water Sealings should be lubricated after cleaning for good function ality 7 After cleaning bearing races and swivel cup sealing lubricate them with provision classified grease 8 Due to the risk of damaging the ball bearing do not clean wi...

Page 110: ...05 001 Revision 108 Copyright 2006 ABB All rights reserved Optional assemble To facilitate cleaning it is possible to use the spring units without the rubber bellows xx0700000707 To remove the rubber bellows see section Replacement of Parallel Arms on page 120 Continued ...

Page 111: ...s are gathered in sections divided according to the component location on the robot Required equipment All equipment required to perform a specific repair activity is listed together with the current procedure The equipment is also gathered in different lists in the chapter Reference information Safety information Before any service work is commenced it is extremely important that all safety infor...

Page 112: ...Note Grease Oil and Grease spec ification on page 199 Action Note 1 To avoid contamination let a new bearing remain in its wrapping until it is time for fitting 2 Ensure that all parts included in the bearing fitting are free from burrs grinding waste and other contamination Cast components must be free from foundry sand 3 Bearing rings inner rings and roller elements must under no cir cumstances ...

Page 113: ...itting the bearing may be totally filled with grease when mounted as excessive grease will be pressed out from the bearing when the robot is started During operation the bearing should be filled to 70 80 of the available volume Ensure that grease is handled and stored properly to avoid contamination Grease the different types of bearings as detailed below Grooved ball bearings must be filled with ...

Page 114: ...ver threads keyways etc Equipment etc Art no Note Grease Oil and Grease specification on page 199 Action Note 1 Check the seal to ensure that the seal is of the correct type provided with cutting edge there is no damage to the sealing edge feel with a fingernail 2 Inspect the sealing surface before mounting If scratches or damage are found the seal must be replaced as it may result in future leaka...

Page 115: ... occur 2 Clean the surfaces properly and in accordance with ABB recommendations 3 Distribute the sealing compound evenly over the surface preferably with a brush 4 Tighten the screws evenly when fastening the flange joint Action Note 1 Ensure that the correct o ring size is used 2 Check the o ring for surface defects burrs shape accuracy etc Defective o rings may not be used 3 Check the o ring gro...

Page 116: ...er a standard tightening torque or special torque is to be applied The standard torques are specified in the tables below Any special torques are specified in the Repair Maintenance or Installation procedure descriptions Any special torque specified overrides the standard torque Use the correct tightening torque for each type of screw joint Only use correctly calibrated torque keys Always tighten ...

Page 117: ...he recommended standard tightening torque for water and air connectors when one or both connectors are made of brass Dimension Tightening torque Nm Class 10 9 Molycote lubricated Tightening torque Nm Class 12 9 Molycote lubricated M8 28 35 M10 55 70 M12 96 120 M16 235 280 M24 790 950 Dimension Tightening torque Nm Nominal Tightening torque Nm Min Tightening torque Nm Max 1 8 12 8 15 1 4 15 10 20 3...

Page 118: ...e cover gasket DANGER Turn off all electrical power hydraulic and pneumatic pressure supplies to the robot Also read the safety sections Safety risks related to pneumatic hydraulic systems on page 18 Risks associated with live electric parts on page 20 Safety risks during installation and service work on robot on page 15 Location xx0700000553 A Base Cover B Base Cover Gasket C 12 pcs Flange screw ...

Page 119: ...N The base cover has sharp edges use protective gloves 3 Remove the base cover gasket and check it If necessary change it 4 Remove the 12 pcs plastic washers and check them If necessary change them Action Note 1 Refit the base cover gasket NOTE Do not lubricate the o ring for the top cover it may slip out of its position in the cleaning process 2 Refit the base cover CAUTION The base cover has sha...

Page 120: ...ctrical power hydraulic and pneumatic pressure supplies to the robot Also read the safety sections Safety risks related to pneumatic hydraulic systems on page 18 Risks associated with live electric parts on page 20 Safety risks during installation and service work on robot on page 15 NOTE This action demands an update of the revolution counters Location xx0700000519 A SMB Unit B Bracket SMB Unit C...

Page 121: ... on page 214 If damaged Plastic washer Spare parts in the base on page 214 If damaged Refereces Circuit Diagram 3HAC028647 009 Updating revolution counters on page 182 Replacement of base cover gasket on page 116 Action Note 1 Remove the base cover Described in section Replacement of base cover gasket on page 116 2 Remove the three 3 Flange screws holding the bracket for the SMB Unit Use Standard ...

Page 122: ... DANGER Turn off all electrical power hydraulic and pneumatic pressure supplies to the robot Also read the safety sections Safety risks related to pneumatic hydraulic systems on page 18 Risks associated with live electric parts on page 20 Safety risks during installation and service work on robot on page 15 Location xx0700000488 A Upper arm B Parallel bars C Spring Unit D Bearing ring Continues on...

Page 123: ...ng the springs Only work on one side or the spring will be overstressed Removal xx0700000525 By hand xx0700000555 Using tool Equipment Spare part no Note Standard tools Standard toolkit on page 196 Pliers for Parallel Arms 3HAC6194 1 Parallel Arms Spare parts Parallell arm system IRB 360 on page 222 References Spring Units on page 91 Special tools on page 197 Continued Continues on next page ...

Page 124: ...ol left or right side not both By hand or tool according to figures 2 Remove the springs By hand A Axis 4 calibration mark Action Note 1 Mount the springs on the parallel bars By hand Apply grease according to section Spring Units on page 91 2 Refit the parallel arm to the upper arm by hand or using tool left or right side not both By hand or tool according to figures NOTE Press with the tool on t...

Page 125: ...right 2006 ABB All rights reserved 3 Refit the parallel arm to the movable plate by hand or using tool left or right side not both By hand or tool according to figures NOTE Always mount the movable plate with the axis 4 calibration mark in direction axis 1 Action Note Continued ...

Page 126: ...er hydraulic and pneumatic pressure supplies to the robot Also read the safety sections Safety risks related to pneumatic hydraulic systems on page 18 Risks associated with live electric parts on page 20 Safety risks during installation and service work on robot on page 15 Location xx0700000595 A VK Cover B 6x Hex socket head cap screw M6 x 40 12 9 Gleitmo and 6x Plain washer 6 4x12x1 6 Steel A2 F...

Page 127: ...pare parts upper arm IRB 360 on page 218 Locking liquid Loctite 243 References Standard toolkit on page 196 Replacement of Parallel Arms on page 120 Mounting instructions for seals on page 112 Action Note 1 Remove the Parallel Arm on the specific upper arm Described in section Replacement of Parallel Arms on page 120 2 Remove the VK Cover Use a screwdriver 3 Remove the six screws 6x Hex socket hea...

Page 128: ...Note 1 Refit the Flange with the new mounted sealing ring using the two screws with Loctite 243 and the new flange gasket TIP Mounting instructions for seals on page 112 Tightening Torque 4 Nm 2 Refit the upper arm using the 6x Hex socket head cap screw M6 x 40 12 9 Gleitmo and 6x Plain washer 6 4x12x1 6 Steel A2 F Tightening Torque 11 Nm 3 Mount a new VK Cover By hand 4 Refit the Parallel Arm Des...

Page 129: ... service work on robot on page 15 Required equipment and References CAUTION Never use unnecessary force when removing the springs Only work on one side or the spring will be overstressed Removal Equipment Spare part no Note Standard tools Standard toolkit on page 196 Drifter Special tools on page 197 Dolly Special tools on page 197 Bearing ring Spare parts Parallell arm system IRB 360 on page 222 ...

Page 130: ...s 3HAC030005 001 Revision 128 Copyright 2006 ABB All rights reserved Refitting xx0700000524 2 Remove the bearing ring using a screwdriver xx0700000486 Action Note A Parallel bar B Bearing ring C Drifter D Dolly Continued Continues on next page ...

Page 131: ...side or the spring will be overstressed Action Note 1 Place a new bearing ring into the joint socket 2 Place the parallel bar in the dolly 3 Put the drifter into the bearing ring and knock it gently down to its resting position 4 Refit the parallel arms to the upper arm left or right side not both By hand or using tool according to section Replacement of Parallel Arms on page 120 Continued ...

Page 132: ...hydraulic and pneumatic pressure supplies to the robot Also read the safety sections Safety risks related to pneumatic hydraulic systems on page 18 Risks associated with live electric parts on page 20 Safety risks during installation and service work on robot on page 15 Location xx0700000532 Required equipment and References A Universal joint B Set screw dog point Equipment Spare part no Note Stan...

Page 133: ... Plate on page 223 References Replacement of Parallel Arms on page 120 Replacement of Vacuum Hoses on page 158 Equipment Spare part no Note Action Note 1 Remove all Air Vaccum hoses from the Swivel Cup on the movable plate Described in section Replacement of Vacuum Hoses on page 158 2 Remove all tree parallel arms from the movable plate Described in section Replacement of Parallel Arms on page 120...

Page 134: ...one side or the spring will be overstressed Action Note 1 Refit the Set screw B locking the Universal joint Use standard tools and Loctite 243 2 Refit the parallel arm to the movable plate Described in section Replacement of Parallel Arms on page 120 3 Refit the Air Vaccum hoses to the Swivel Cup on the movable plate Described in section Replacement of Vacuum Hoses on page 158 Continued ...

Page 135: ... 18 Risks associated with live electric parts on page 20 Safety risks during installation and service work on robot on page 15 General This section describes how to change the Telescopic Shaft Location xx0700000538 Required equipment and References A Telescopic Shaft B Set screw Equipment Spare part no Note Standard tools Standard toolkit on page 196 Telescopic Shaft Spare Parts Telescopic shafts ...

Page 136: ...eferences Action Note 1 Remove the Parallel Arms Described in section Replacement of Parallel Arms on page 120 2 Remove the Movable Plate Described in section Replacement of Movable Plate on page 130 3 Remove the upper Set screw xx0700000612 TIP Use a 90 angled bit holder 4 Remove the Telescopic Shaft Action Note 1 Refit the Telescopic Shaft Continued Continues on next page ...

Page 137: ...et screw use locking liquid Loctite 243 xx0700000613 TIP Use a 90 angled bit holder Tightening Torque 7 Nm 3 Refit the Movable Plate use locking liquid Loctite 243 Described in section Replacement of Movable Plate on page 130 4 Refit the Parallel Arms Described in section Replacement of Parallel Arms on page 120 Action Note Continued ...

Page 138: ...ions Safety risks related to pneumatic hydraulic systems on page 18 Risks associated with live electric parts on page 20 Safety risks during installation and service work on robot on page 15 Location xx0800000020 Required equipment and References Removal Equipment Spare part no Note Standard tools Standard toolkit on page 196 Locking liquid Loctite 243 Universal joint Spare Parts Telescopic shafts...

Page 139: ...n the telescopic shaft Use standard tools 3 Remove the universal joint Action Note Action Note 1 Refit the universal joint Use locking liquid Loctite 243 2 Refit the set screw locking the universal joint on the telescopic shaft Use locking liquid Loctite 243 Tightening Torque 7 Nm 3 Refit the telescopic shaft See section Replacement of Telescopic Shaft on page 133 Continued ...

Page 140: ... Joint Balls DANGER Turn off all electrical power hydraulic and pneumatic pressure supplies to the robot Also read the safety sections Safety risks related to pneumatic hydraulic systems on page 18 Risks associated with live electric parts on page 20 Safety risks during installation and service work on robot on page 15 Location xx0700000534 A Joint Ball B Joint Ball Continues on next page ...

Page 141: ... page 196 Joint Ball Spare Parts Movable Plate on page 223 Pliers for Parallel Arms 3HAC6194 1 Locking liquid Loctite 243 Activator Loctite 7649 References Replacement of Parallel Arms on page 120 Replacement of Movable Plate on page 130 A Movable Plate B Joint Ball Movable Plate Action Note 1 Remove the Parallel Arms Described in section Replacement of Parallel Arms on page 120 2 Remove the Movab...

Page 142: ... on one side or the spring will be overstressed Action Note 1 Refit the Joint Balls using Loctite 243 For the best result use spray Activator Loctite 7649 on the stainless Joint Balls Tightening Torque 11 Nm 2 Refit the Movable Plate Described in section Replacement of Movable Plate on page 130 3 Refit the Parallel Arms Described in section Replacement of Parallel Arms on page 120 Continued ...

Page 143: ... 172 DANGER Turn off all electrical power hydraulic and pneumatic pressure supplies to the robot Also read the safety sections Safety risks related to pneumatic hydraulic systems on page 18 Risks associated with live electric parts on page 20 Safety risks during installation and service work on robot on page 15 General This section describes Replacing Gearbox 1 3 with Motor Gearbox Unit Location x...

Page 144: ...ansmission cover on page 207 Gaskets Spare parts in the base on page 214 References Gearboxes axes 1 4 on page 98 Circuit Diagram 3HAC028647 009 Calibration methods on page 172 Action Note 1 Remove arm system Described in section Gearboxes axes 1 4 on page 98 Method 2 2 Disconnect the motor connectors R3 FB1 3 and R3 MP1 3 3 Remove the four Hex socket head cap screw M10 x 30 with washers WARNING T...

Page 145: ...et head cap screw M10 x 30 with washer 16 5x20x2 steel A3F NOTE Gearbox unit weight 16 Kg Tightening Torque 33 Nm 2 Connect the motor connectors R3 FB1 3 and R3 MP1 3 Described in section Circuit diagram 3HAC028647 009 3 Refitting the arm system Described in section Gearboxes axes 1 4 on page 98 Method 2 4 Calibrate the robot Described in section Calibration methods on page 172 Continued ...

Page 146: ...n methods on page 172 DANGER Turn off all electrical power hydraulic and pneumatic pressure supplies to the robot Also read the safety sections Safety risks related to pneumatic hydraulic systems on page 18 Risks associated with live electric parts on page 20 Safety risks during installation and service work on robot on page 15 Location xx0700000547 A Gearbox Motor axis 4 B Hexagon socket head scr...

Page 147: ...ors R3 FB4 and R3 MP4 3 Remove the Telescopic Shaft Described in section Replacement of Telescopic Shaft on page 133 4 Remove the 3x Hexagon socket head screw M6x25 with plain washer 6 4x12x1 6 steel A2F B Shown in figure 5 Remove the Gearbox Unit axis 4 6 Remove the Sealing ring w dust lip Action Note 1 Refit a new Sealing ring apply grease See section Grease on sealings on page 201 2 Refit the a...

Page 148: ...ation of the robot Described in section Calibration methods on page 172 DANGER Turn off all electrical power hydraulic and pneumatic pressure supplies to the robot Also read the safety sections Safety risks related to pneumatic hydraulic systems on page 18 Risks associated with live electric parts on page 20 Safety risks during installation and service work on robot on page 15 Location xx070000054...

Page 149: ... ring Spare parts gear units axis 1 3 on page 203 AC Motor Spare parts gear units axis 1 3 on page 203 Locking liquid Loctite 243 References Replacement of Gearbox Unit 1 3 on page 141 Oil and Grease specification on page 199 Action Note 1 Remove the gearbox unit 1 3 Described in section Replacement of Gearbox Unit 1 3 on page 141 2 Unscrew the three screws C holding the motor Shown in figure Loca...

Page 150: ... ring E onto the motor flange lubricate the o ring with grease FM222 Shown in figure Location on page 146 2 Insert the new motor do not tighten the screws CAUTION Fit the motor making sure the motor pinion is properly mated to the gear wheel do not use force or the motor pinion may get damaged 3 Remount the upper arm temporarily to be used to feel the backlash A B Continued Continues on next page ...

Page 151: ...sure that the gear is kept absolutely still Apply Loctite 243 and tighten the screws C Shown in figure Location on page 146 Tightening Torque 9Nm 6 Check through the upper oil level hole that gear wheel B is axially movable Shown in figure Refitting on page 148 7 Fill the gearbox with oil Specified in section Oil and Grease specification on page 199 8 Refit the gearbox unit 1 3 Described in sectio...

Page 152: ... of the robot Described in section Calibration methods on page 172 DANGER Turn off all electrical power hydraulic and pneumatic pressure supplies to the robot Also read the safety sections Safety risks related to pneumatic hydraulic systems on page 18 Risks associated with live electric parts on page 20 Safety risks during installation and service work on robot on page 15 Location xx0700000615 A G...

Page 153: ...base cover gasket on page 116 Replacement of Gearbox Unit 4 on page 144 Standard toolkit on page 196 Oil and Grease specification on page 199 Action Note 1 Remove base cover Described in section Replacement of base cover gasket on page 116 2 Remove gear box with motor Described in section Replacement of Gearbox Unit 4 on page 144 3 Remove motor DANGER Oil will be running out of the motor attachmen...

Page 154: ...y moving the outgoing axis B back and forward xx0700000621 4 Ensure that the gear is kept absolutely still Apply Loctite 243 and tighten the screw D in figure Location on page 150 Tightening Torque 9 Nm 5 Check the play again If there is a backlash loosen the screws D and go back to step 3 6 Fill the gearbox with oil Lubrication specified in section Oil and Grease specification on page 199 7 Refit...

Page 155: ...els 153 3HAC030005 001 Revision Copyright 2006 ABB All rights reserved 4 3 14 Replacement of labels General This section details replacement and positioning of labels on the IRB 360 Label positioning xx0700000691 Continues on next page ...

Page 156: ...ght 2006 ABB All rights reserved xx0700000692 1 Label Flex Picker red 190x23 2 ABB Logotype 69x157 3 Calibration values 5 Instruction plate brake release 6 Warning sign 24x21 electric warning 7 Rating label 8 UL label 70x35 9 UL label 70x35 Continued Continues on next page ...

Page 157: ...pyright 2006 ABB All rights reserved Required equipment and References Assemble Equipment Spare part no Note Label set Spare parts transmission cover on page 207 Action Note 1 Make sure the surface is clean 2 Assemble the labels according to the illustrations Continued ...

Page 158: ...GER Turn off all electrical power hydraulic and pneumatic pressure supplies to the robot Also read the safety sections Safety risks related to pneumatic hydraulic systems on page 18 Risks associated with live electric parts on page 20 Safety risks during installation and service work on robot on page 15 Location xx0800000008 A Dowel for Calibration mark B Calibration mark plastic C 2 pcs M5 Prevai...

Page 159: ...References Remove Refitting Equipment Spare Part No Note Standard tools Standard toolkit on page 196 Calibration mark Spare parts in the base on page 214 Action Note 1 Remove the two M5 nuts Use standard tools 2 Remove the calibration mark Action Note 1 Refit a new calibration mark 2 Refit the two M5 nuts Tightening torque 4Nm Continued ...

Page 160: ...NGER Turn off all electrical power hydraulic and pneumatic pressure supplies to the robot Also read the safety sections Safety risks related to pneumatic hydraulic systems on page 18 Risks associated with live electric parts on page 20 Safety risks during installation and service work on robot on page 15 Location xx0700000499 A Air filter inlet B Ejector Unit C Air filter inlet vacuum D Swivel Cup...

Page 161: ...ut from the swivel 3 Pull the hose out from the air filter Action Note 1 Mount a new hose on the swivel 2 Fix the hose do not tighten against the three clamps on the parallel arm 3 Twist the hose and mount it on the air filter 4 Adjust the hose 5 Tighten the straps 6 Make a small program low velocity and check that the hose runs freely 7 Mount a new hose on the swivel 8 Fix the hose do not tighten...

Page 162: ...ter separation filter DANGER Turn off all electrical power hydraulic and pneumatic pressure supplies to the robot Also read the safety sections Safety risks related to pneumatic hydraulic systems on page 18 Risks associated with live electric parts on page 20 Safety risks during installation and service work on robot on page 15 Location xx0700000544 A Air filter comp B Air filter Vac C Water separ...

Page 163: ... 4 4 2 Draining of water separation filter 161 3HAC030005 001 Revision Copyright 2006 ABB All rights reserved Removal water Action Note 1 Drain the water separation filter opening the bottom nipple C Continued ...

Page 164: ...ies to the robot Also read the safety sections Safety risks related to pneumatic hydraulic systems on page 18 Risks associated with live electric parts on page 20 Safety risks during installation and service work on robot on page 15 Location xx0700000545 Required Equipment and References A Attachment B Bracket C Hexagon head screw M8x35 Steel 8 8 A2F D Ejector Unit E Hexagon bolt with flange M6 x ...

Page 165: ... Spare Parts Ejector unit on page 225 References Spare Parts Ejector unit on page 225 Replacement of base cover gasket on page 116 Equipment Spare Part No Note A Hexagon bolt with flange M6x20 A2 DIN6921 B Nuts for the air nozzles C Ejector Unit D Front plate E Gasket F Pressure guard nut G Pressure guard cap Continued Continues on next page ...

Page 166: ...uard nut 5 Remove the Ejector Unit inwards direction 6 Remove the 4x Hexagon bolt with flange M6x20 holding the front plate and remove the plate and the gasket Action Note 1 Refit the front plate and the gasket using the 4x Hexagon bolt with flange M6x20 if needed replace the gasket Tightening torque 4 Nm 2 Refit the Ejector Unit from the inside 3 Refit all the nuts for the air nozzles pressure gu...

Page 167: ...lete Cable harness DANGER Turn off all electrical power hydraulic and pneumatic pressure supplies to the robot Also read the safety sections Safety risks related to pneumatic hydraulic systems on page 18 Risks associated with live electric parts on page 20 Safety risks during installation and service work on robot on page 15 Location xx0700000562 A R1 MP 1 3 B R1 MP 4 6 C R3 MP2 D R3 MP4 Continues...

Page 168: ...ences Replacement of base cover gasket on page 116 Circuit diagram 3HAC028647 009 Action Note 1 Remove the base cover Described in section Replacement of base cover gasket on page 116 2 Remove the cable straps holding the cable harness using a cut off pliers 3 Disconnect all connections 4 Remove the cable harness Action Note 1 Refit the new cable harness 2 Connect all connections Described in sect...

Page 169: ...e IRB 360 DANGER Turn off all electrical power hydraulic and pneumatic pressure supplies to the robot Also read the safety sections Safety risks related to pneumatic hydraulic systems on page 18 Risks associated with live electric parts on page 20 Safety risks during installation and service work on robot on page 15 Location xx0700000650 A Cover B Brake Release Button C Plastic nut D Contact E Loc...

Page 170: ...All rights reserved Required equipment and references Removal xx0700000644 Equipment Spare Part No Note Standard tools Standard toolkit on page 196 References Spare Parts Brake Release Button on page 216 A Brake Release Contact B Cable locking screw C Locking device Continued Continues on next page ...

Page 171: ...s 2 Remove the contact A from the push button pushing in the locking device C in figure TIP Use a screw driver to push in the locking device 3 Loosen the plastic nut and remove the push button from the transmission cover Use standard tools Action Note 1 Refit the push button to the transmission cover using the plastic nut A NOTE Make sure to mount the button cover or the robot will not fulfill the...

Page 172: ...pyright 2006 ABB All rights reserved 2 Press to refit the contact xx0800000011 TIP Refit the cables to the contact before this step 3 Refit the base cover Replacement of base cover gasket on page 116 CAUTION The base cover has sharp edges use protective gloves Action Note Continued ...

Page 173: ...described in section Calibration methods on page 172 and further detailed in separate Calibration manuals The resolver values will change when parts affecting the calibration position are replaced on the robot for example motors or parts of transmission Contents of the revolution counter memory are lost If the contents of the revolution counter memory are lost the counters must be updated as detai...

Page 174: ...n IRB 360 axis 1 3 on page 175 Type of calibra tion Description Calibration method Standard calibration The robot is positioned at calibration position that is the axes positions angles are set to 47 for std 44 8 for 800 for axis 1 3 and 0 for axis 4 Standard calibration data is found in the file calib cfg supplied with the robot at delivery The file identifies the correct resolver motor position ...

Page 175: ...When calibrating the axis must consistently be run towards the calibration position in the same direction in order to avoid position errors caused by backlash in gears etc Positive directions are shown in the figure below Calibration movement and Jogging directions The figure below shows the positive and negative directions for each axis and the linear directions when jogging the robot xx070000044...

Page 176: ...ved 5 4 Calibration scales and correct axis position Introduction This section specifies the calibration scale positions and or correct axis position for all robot models Calibration scales and positions IRB360 The figure below shows the calibration marks of the axes 1 4 xx0700000569 A Calibration mark Axis 4 B Calibration marks Axis 1 3 ...

Page 177: ... General This section is valid for IRB 360 all models It details how to perform the actual fine calibration of axis 1 3 NOTE Calibration should be performed by specially trained personell Axis moving directions xx0700000448 Required equipment and references Equipment Note References Fine calibration procedure on FlexPendant on page 181 Continues on next page ...

Page 178: ...6 ABB All rights reserved Calibration steps xx0700000624 Action Note 1 On the flex pendant tap Program Stop A in figure 2 On the controller set the key switch into Manual position xx0700000625 3 Check the Motors off button make sure that the button flashes en0400000795 Continued Continues on next page ...

Page 179: ...tly against the calibration device A NOTE Always calibrate one axis a time starting with axis 1 xx0700000626 6 When the upper arm reaches the calibration device apply the brake The upper arm is now in calibration position 7 Store the resolver value by executing the following commands on the Flex Pendant Described in section Fine calibration procedure on FlexPendant on page 181 Action Note Continue...

Page 180: ... 360 axis 1 3 3HAC030005 001 Revision 178 Copyright 2006 ABB All rights reserved 8 NOTE Release the brakes and gently draw the calibrated upper arm in to a horizontal position 9 Return to step 4 and proceed with axis 2 and 3 Action Note Continued ...

Page 181: ...IRB 360 all models It details how to perform the actual fine calibration of axis 4 Location xx0700000629 Required equipment and references Calibration steps A Syncmark ax 4 Equipment Note FlexPendant References Fine calibration procedure on FlexPendant on page 181 Checking the calibration position on page 187 Action Note 1 In manual mode Tap Jogging in the ABB menu Continues on next page ...

Page 182: ...is 4 5 or 6 4 Jog axis 4 with the Flex Pendant joystick so that the calibration marks is in line See figure in Location on page 179 5 Store the resolver value by executing the following commands on the Flex Pendant Described in section Fine calibration procedure on FlexPendant on page 181 6 Check the position Described in section Checking the calibration position on page 187 Action Note Continued ...

Page 183: ...th their calibration status 2 Tap to select the mechanical unit A screen is displayed tap Calib Parameter en0400001127 3 Tap Fine Calibration A warning that updating the revolution counters may change programmed robot positions is also displayed Tap Yes to proceed Tap No to cancel 4 Select the axis to calibrate by ticking the box to the left 5 Tap Calibrate A dialog box is displayed warning that c...

Page 184: ...ring the revolution counter setting with the FlexPendant This procedure details the second step when updating the revolution counter storing the revolution counter setting with the FlexPendant RobotWare 5 0 Action Note 1 Manually moving the robot to the calibration position axis 1 3 Described in section Calibration IRB 360 axis 1 3 on page 175 step 1 to 6 2 Manually moving the robot to the calibra...

Page 185: ... the axis to have its revolution counter updated by Ticking in the box to the left Tapping Select all to update all axes Then tap Update 5 A dialog box is displayed warning that the updating operation cannot be undone Tap Update to proceed with updating the revolution counters Tap Cancel to cancel updating the revolution counters Tapping Update updates the ticked revolution counters and removes th...

Page 186: ...rage capability the SMB must be replaced SMB data update If then the flash disk or mass memory or the complete controller is new or replaced by an unused spare part the data stored in the SMB is automatically copied to the controller memory the SMB is replaced by a new unused spare part SMB the data stored in the controller memory is automatically copied to the SMB memory the flash disk or the com...

Page 187: ...nu tap Calibration and select a mechanical unit 2 Tap SMB memory and then tap Show status The data is displayed with status on the SMB and on the controller Action Info 1 On the ABB menu tap Calibration and select a mechanical unit 2 Tap SMB memory and then tap Update 3 Tap the button Cabinet or manipulator has been exchanged A warning is displayed Tap Yes to proceed or No to cancel It is vital th...

Page 188: ...ap to select a mechanical unit 2 Tap SMB memory and then tap Advanced The following functions are available Clear Cabinet Memory Clear SMB Memory 3 Tap Clear Cabinet Memory if the controller should be replaced and used as a spare part A list of the SMB data stored in the controller is displayed Tap Clear to delete the memory for the selected robot Repeat the procedure for all robots in the control...

Page 189: ...g the jogging window on the FlexPendant IRC5 xx0700000627 NOTE A position were all tree axis are in calibration position at the same time like in figure is not possible Check or calibrate one axis a time then set the calibrated axis horizontal A Calibration position for axis 1 3 47 for std and 44 8 for 800 Action Note 1 In manual mode Tap Jogging in the ABB menu Manual mode described in section Ca...

Page 190: ...er arm axis 1 3 very gently against the calibration device A NOTE Always check one axis a time starting with axis 1 xx0700000626 6 Check that the position of axes 1 is 47 00 for std and 44 80 for 800 xx0700000628 7 If the axis position is not ok Calibrate the axis shown in section Calibration IRB 360 axis 1 3 on page 175 8 If the axis position is ok return to step 4 and check axis 2 and 3 Action N...

Page 191: ...rials General All used grease oils and dead batteries must be disposed of in accordance with the current legislation of the country in which the robot and the control unit is installed If the robot or the control unit is partially or completely disposed of the various parts must be grouped together according to their nature that is all iron together and all plastic together and disposed of accordi...

Page 192: ...rds Recycling information No additional recycling information is available for the product but the materials are located as follows Material Example application Yes No Quantity unit Lead Batteries cables Cadmium Batteries switches additive in lead Mercury Batteries switches Beryllium Contact springs Brominated flame retardants such as PBB PBDE TBBPA Additive in plastics or rubber HCFCs such as R22...

Page 193: ...fies the article numbers of the product manuals for all controller models The part number 001 is the English version Operating manual The operating manual contains instructions for daily operation of robot systems The table below specifies the article numbers of the operating manuals for different robot systems Calibration manuals Additional documentation Document name Document ID Product specific...

Page 194: ...ntroduction 3HAC030005 001 Revision 192 Copyright 2006 ABB All rights reserved 7 2 Introduction General This chapter includes general information complementing the more specific information in the different procedures in the manual ...

Page 195: ...ion systems safety of integrated manufacturing systems Basic requirements prEN 999 Safety of machinery The positioning of protective equipment in respect of approach speeds of the human body Standards robot cell The following standards are applicable when the robot is part of a robot cell EN 294 Safety of machinery Safety distance to prevent danger zones being reached by the upper limbs EN 349 Saf...

Page 196: ...006 ABB All rights reserved 7 4 Unit conversion Converter table Use the table below to convert units used in this manual Quantity Units Length 1 m 3 28 ft 39 37 in Weight 1 kg 2 21 lb Pressure 1 bar 100 kPa 14 5 psi Force 1 N 0 738 lbf Moment 1 Nm 0 738 lbf tn Volume 1 L 0 264 US gal ...

Page 197: ...ied All components exceeding 22 kg 50 lbs are high lighted in this way To avoid injury ABB recommends the use of lifting equipment when handling components with a weight exceeding 22 kg A wide range of lifting tools and devices are available for each manipulator model Example Below is an example of how a weight specification is presented inside a procedure table Action Note CAUTION The motor weigh...

Page 198: ... listed directly in the procedures while all the tools that are considered standard are gathered in the Standard toolkit and defined in the table below This way the tools required are the sum of the Standard Toolkit and any tools listed in the instruction Contents standard toolkit Qty Tool 1 Ring open end spanner 7 35mm 1 Socket head cap 3 5 8 mm 1 Torque wrench 4 33 Nm 1 Small screwdriver 1 Plast...

Page 199: ... in section Standard toolkit on page 196 and of special tools listed directly in the instructions and also gathered in this section Special tools IRB360 The table below specifies the special tools required during service procedures The tools are also specified directly in concerned procedures for repair Item Description Art no Note A Drifter for mounting wear rings 3HAC4184 1 B Dolly for joint soc...

Page 200: ...ral Many repair and maintenance activities require different pieces of lifting equipment which are specified in each procedure The use of each piece of lifting equipment is not detailed in the activity procedure but in the instruction delivered with each piece of lifting equipment This implies that the instructions delivered with the lifting equipment should be stored for later reference ...

Page 201: ...on Oil in gearboxes xx0700000721 Pos For Type Spare part no Amount Liter Gallons A Gearbox 1 Mobil DTE FM 220 3HAC031493 001 0 9l 0 237 Gallons B Gearbox 2 Mobil DTE FM 220 3HAC031493 001 0 9l 0 237 Gallons C Gearbox 3 Mobil DTE FM 220 3HAC031493 001 0 9l 0 237 Gallons D Gearbox 4 Mobil DTE FM 220 3HAC031493 001 0 08l 0 021 Gallons Continues on next page ...

Page 202: ...005 001 Revision 200 Copyright 2006 ABB All rights reserved Grease in robot xx0700000725 Pos For Type Spare part no Amount E Telescopic shaft WDS Food accepted FM 222 3HAC029132 001 F Spring Units Food accepted FM 222 3HAC029132 001 Continued Continues on next page ...

Page 203: ...se specification 201 3HAC030005 001 Revision Copyright 2006 ABB All rights reserved Grease on sealings xx0700000706 Pos For Type Spare part no Amount G O rings in gear units Food accepted FM 222 3HAC029132 001 Continued Continues on next page ...

Page 204: ... 001 Revision 202 Copyright 2006 ABB All rights reserved xx0800000003 xx0800000004 Pos For Type Spare part no Amount I Grease in svivel Food accepted FM 222 3HAC029132 001 Pos For Type Spare part no Amount J Grease in ax 4 Food accepted FM 222 3HAC029132 001 Continued ...

Page 205: ...e parts gear units axis 1 3 203 3HAC030005 001 Revision Copyright 2006 ABB All rights reserved 8 Spare parts and exploded views 8 1 Spare Parts in Robot Base 8 1 1 Spare parts gear units axis 1 3 Illustration xx0700000667 Continues on next page ...

Page 206: ...sion 204 Copyright 2006 ABB All rights reserved Spare part list Part Description Spare part no Note Qty 1 Motor and Gear unit ax 1 3 3HAC028017 001 3 pcs 1 1 Motor with pinion ax1 3 3HAC023938 001 3 pcs 1 2 O ring O ring 67 5x3 0 3HAB3772 22 3 pcs 1 3 Magnetic plug 2522122 1 9 pcs Continued ...

Page 207: ...parts and exploded views 8 1 2 Spare parts Gear Unit axis 4 205 3HAC030005 001 Revision Copyright 2006 ABB All rights reserved 8 1 2 Spare parts Gear Unit axis 4 Illustration xx0700000668 Continues on next page ...

Page 208: ...01 Revision 206 Copyright 2006 ABB All rights reserved Spare part list Part Description Spare part no Note Qty 1 Motor and gearbox unit ax 4 3HAC028018 001 1 pcs 1 1 Motor with pinion ax 4 3HAC021799 001 1 pcs 1 2 O ring 3HAB3772 81 1 pcs 1 3 Sealing Plug 3HAC9353 1 2 pcs Continued ...

Page 209: ...ts and exploded views 8 1 3 Spare parts transmission cover 207 3HAC030005 001 Revision Copyright 2006 ABB All rights reserved 8 1 3 Spare parts transmission cover Illustration xx0700000670 3 Continues on next page ...

Page 210: ... list Parts Description Spare part no Note Qty 1 Base Cover 3HAC028899 001 Without labels 1 pcs 2 Sealing ring 3HAC3934 1 3 pcs 3 Flange Gasket ax 1 3 3HAC4309 1 3 pcs 4 Lable set 3HAC029746 001 18 pcs Label FlexPicker red 3 pcs ABB Logotype 3 pcs Instruction plate 2 pcs Warning sign 2 pcs Rating label 1 pcs UL label 1 pcs UR label 1 pcs Continued ...

Page 211: ...ts and exploded views 8 1 4 Spare parts cable harness 209 3HAC030005 001 Revision Copyright 2006 ABB All rights reserved 8 1 4 Spare parts cable harness Illustration Power Cable xx0700000672 Continues on next page ...

Page 212: ...art Description Spare part no Note 1 Cable harness power IRB 360 3HAC029695 001 1 1 R1 MP1 3 Motor Power 1 2 R1 MP4 6 Motor Power 1 3 R1 H1 Signal lamp Option 1 4 S1 Brake release 1 5 R3 MP1 Motor Power 1 6 R3 MP3 Motor Power 1 7 R3 MP4 Motor Power 1 8 R3 MP2 Motor Power 1 9 R3 H1 Signal lamp Option 1 10 R3 H2 Signal lamp Option Continued Continues on next page ...

Page 213: ... Spare parts and exploded views 8 1 4 Spare parts cable harness 211 3HAC030005 001 Revision Copyright 2006 ABB All rights reserved Illustration Signal Cable xx0700000673 Continued Continues on next page ...

Page 214: ...able harness 3HAC030005 001 Revision 212 Copyright 2006 ABB All rights reserved Spare part list Signal Cable Part Description Spare part no Note 1 Cable harness Signal IRB 360 3HAC1762 1 1 1 R2 FB1 4 1 2 R3 FB2 1 3 R3 FB4 1 4 R3 FB3 1 5 R3 FB1 Continued ...

Page 215: ... 213 3HAC030005 001 Revision Copyright 2006 ABB All rights reserved 8 1 5 Spare Parts SMB Unit Illustration xx0700000666 Sparepart list 1 1 2 Part Description Spare part no Note Qty 1 Serial measurement unit 3HAC17396 1 1 pcs 1 2 Battery pack 3HAC16831 1 1 pcs ...

Page 216: ...pare parts and exploded views 8 1 6 Spare parts in the base 3HAC030005 001 Revision 214 Copyright 2006 ABB All rights reserved 8 1 6 Spare parts in the base Illustration xx0700000685 Continues on next page ...

Page 217: ...are part list Part Description Spare part no Note Qty 1 Gasket top cover 3HAC029556 001 1 pcs 2 Screw 3HAC029879 001 M6x20 12 pcs 3 Washer 3HAC029877 001 Nylon 12 pcs 4 Gasket 3HAC028972 001 3 pcs 5 Flange gasket 3HAC028959 001 1 pcs 6 Sealing ring 3HAB3701 27 1 pcs not in 3D version 7 Calibration mark 3HAC029997 001 3 pcs Continued ...

Page 218: ...s and exploded views 8 1 7 Spare Parts Brake Release Button 3HAC030005 001 Revision 216 Copyright 2006 ABB All rights reserved 8 1 7 Spare Parts Brake Release Button Illustration xx0700000718 Continues on next page ...

Page 219: ...lease Button 217 3HAC030005 001 Revision Copyright 2006 ABB All rights reserved Spare Part List Brake Release Button Part Description Spare Part No Note Qty A Membrane SK615503 2 1 pcs B Push button 1SFA611100R1006 1 pcs C Holder 1SFA611605R1100 1 pcs Continued ...

Page 220: ...ded views 8 2 1 Spare parts upper arm IRB 360 3HAC030005 001 Revision 218 Copyright 2006 ABB All rights reserved 8 2 Spare Parts Arm System 8 2 1 Spare parts upper arm IRB 360 Illustration xx0700000663 Continues on next page ...

Page 221: ...ts reserved Spare part list Part Description Spare part no Note Qty 1 Upper arm 3HAC029743 001 800 3pcs 1 1 Joint ball 3HAC5176 1 12pcs 2 Upper arm 3HAC021121 001 Standard 3pcs 2 1 Joint ball 3HAC5176 1 12pcs 3 Upper arm 3HAC029454 001 Stainless 3pcs 3 1 Joint ball 3HAC028080 001 12pcs 4 VK cover 3HAC2166 21 3 pcs Continued ...

Page 222: ...arts and exploded views 8 2 2 Spare Parts Telescopic shafts 3HAC030005 001 Revision 220 Copyright 2006 ABB All rights reserved 8 2 2 Spare Parts Telescopic shafts Illustration xx0700000677 Continues on next page ...

Page 223: ...erved Spare Part List Part Description Spare part no Note 1 Telescopic shaft 3HAC029293 001 1pcs Std Without joints 2 Telescopic shaft 3HAC029425 001 1 pcs WDS Without joints 3 Telescopic shaft 3HAC030013 001 1 pcs WD Without joints 4 Universal joint 3HAC028132 001 2 pcs Std 4 Universal joint 3HAC030512 001 2 pcs WDS WD Continued ...

Page 224: ...opyright 2006 ABB All rights reserved 8 2 3 Spare parts Parallell arm system IRB 360 Illustration xx0700000665 Spare part list 1 2 1 2 Part Description Spare part no Note Qty 1 Bar 3HAC029024 001 6 pcs Std 1 Bar 3HAC029893 001 6 pcs WDS 1 2 Bearing ring 3HAC028087 001 12 pcs 2 Spring unit 3HAC028530 001 6 pcs ...

Page 225: ...re parts and exploded views 8 2 4 Spare Parts Movable Plate 223 3HAC030005 001 Revision Copyright 2006 ABB All rights reserved 8 2 4 Spare Parts Movable Plate Illustration xx0700000662 Continues on next page ...

Page 226: ...reserved Spare part list Part Description Spare part no Note Qty 1 Movable plate with swivel 3HAC028021 001 Std 1pcs 1 1 Joint ball 3HAC5176 1 6 pcs 2 Movable plate with swivel WDS 3HAC029423 001 WDS 1 pcs 2 1 Joint ball 3HAC5176 1 6 pcs 3 Movable plate 3D 3HAC029745 001 3 DOF 1 pcs 2 1 Joint ball 3HAC5176 1 6 pcs Continued ...

Page 227: ...AC030005 001 Revision Copyright 2006 ABB All rights reserved 8 3 Spare Parts Customer options 8 3 1 Spare Parts Ejector unit Illustration xx0700000684 Spare part list Part Description Spare part no Note Qty 1 3HAC029648 001 Ejector unit 1 pcs 2 3HAC028972 001 Gasket 1 pcs ...

Page 228: ...iews 8 3 2 Spare parts customer options Signal lamp IRB 360 3HAC030005 001 Revision 226 Copyright 2006 ABB All rights reserved 8 3 2 Spare parts customer options Signal lamp IRB 360 Illustration xx0700000719 Continues on next page ...

Page 229: ... options Signal lamp IRB 360 227 3HAC030005 001 Revision Copyright 2006 ABB All rights reserved Spare Part List Part Description Spare Part No Note Qty A Lamp unit Compl 3HAC022235 005 1 pcs B Indicator lamp 3HAC9249 1 1 pcs C O ring 3HAB3772 21 1 pcs Continued ...

Page 230: ...8 Spare parts and exploded views 8 3 2 Spare parts customer options Signal lamp IRB 360 3HAC030005 001 Revision 228 Copyright 2006 ABB All rights reserved ...

Page 231: ...9 Circuit diagram 8 3 2 Spare parts customer options Signal lamp IRB 360 229 3HAC030005 001 Revision Copyright 2006 ABB All rights reserved 9 Circuit diagram ...

Page 232: ...rs that may appear in this document Except as may be expressly stated anywhere in this document nothing herein shall be construed as any kind of guarantee or warranty by ABB for losses damages to persons or property fitness for a specific purpose or the like In no event shall ABB be liable for incidental or consequential damages arising from use of this document This document and parts thereof mus...

Page 233: ...AGE Title page cover sheet Status Document no 3HAC028647 009 Plant Location Sublocation Rev Ind Manipulator 00 Page Next Total 2 3 13 APPROVED 2008 04 04 Manufacture Type Control cabinet Mains voltage Supply Control voltage Year of construction RMM Type of installation Customer Control cabinet Drawing number Drawing version Manipulator Project start Project manager Last revision Designed by Design...

Page 234: ...f contents Status Document no 3HAC028647 009 Plant Location Sublocation Rev Ind Manipulator 00 Page Next Total 3 4 13 APPROVED 2008 04 04 Table of contents Comment Page Page description ABB Contents1 1 COPYRIGHT page 2 TITLE PAGE 3 Table of contents 1 109 4 Revision note 5 Legend 6 Connection point location 103 Serial measuring board 104 Motor axis 1 3 105 Motor axis 4 OPTION LED lamp 106 Feed bac...

Page 235: ...hird parties without express authority is strictly forbidden Copyright 2003 ABB Latest revision Prepared by date Approved by date Lab Office Revision note Text view Status Document no 3HAC028647 009 Plant Location Sublocation Rev Ind Manipulator 00 Page Next Total 4 5 13 APPROVED 2008 04 04 REVISION NOTE Rev 00 New ...

Page 236: ...xpress authority is strictly forbidden Copyright 2003 ABB Page 5 13 Total 3HAC028647 009 Latest revision Approved by date Legend Location Plant Sublocation IRB360 Manipulator Document no Next Rev Ind 00 Lab Office Status APPROVED 2008 04 04 1 2 3 4 5 6 7 8 M B PTC R Motor Brake Temp sensor PTC resistor Resolver Protective Earth Twisted wires Screened wires ...

Page 237: ...e to third parties without express authority is strictly forbidden Copyright 2003 ABB Page 6 13 Total 3HAC028647 009 Latest revision Approved by date Connection point location Location Plant Sublocation IRB360 Manipulator Document no Next Rev Ind 00 Lab Office Status APPROVED 2008 04 04 1 2 3 4 5 6 7 8 XP 2 R2 FB R2 FB R1 MP XP 1 ...

Page 238: ...board Location Plant Sublocation IRB360 Manipulator Document no Next Rev Ind 00 Lab Office Status APPROVED 2008 04 04 1 2 3 4 5 6 7 8 SMB 106 1 107 2 G R2 G 1 1 2 2 0V 7 2V 0V EXC1 EXC1 Y1 X1 Y2 X2 Y3 X3 1 1 2 2 3 3 4 4 5 5 6 6 7 7 8 8 1 1 2 2 3 3 4 4 5 5 6 6 7 7 8 8 0V EXC2 EXC2 Y4 X4 Y5 X5 Y6 X6 R2 SMB 9 9 2 2 3 3 4 4 5 5 6 6 7 7 8 8 A D CONVERTER SERIAL COMMUNICA TION SDI SDI N SDO SDO N 0V 24V...

Page 239: ...tion IRB360 Manipulator Document no Next Rev Ind 00 Lab Office Status APPROVED 2008 04 04 1 2 3 4 5 6 7 8 MU1 MU2 MU3 M1 M 3 U1 V1 W1 PE M1 M 3 U1 V1 W1 PE M1 M 3 U1 V1 W1 PE R1 1 2 R1 1 2 R1 1 2 B B B R3 MP1 1 1 3 3 5 5 9 9 10 10 11 11 12 12 R3 MP2 1 1 3 3 5 5 9 9 10 10 11 11 12 12 R3 MP3 1 1 3 3 5 5 9 9 10 10 11 11 12 12 109 6 M1R 109 6 M1S 109 6 M1T 109 6 0V PTC 109 6 M2R 109 6 M2S 109 6 M2T 10...

Page 240: ...otor axis 4 OPTION LED lamp Location Plant Sublocation IRB360 Manipulator Document no Next Rev Ind 00 Lab Office Status APPROVED 2008 04 04 1 2 3 4 5 6 7 8 MU4 B M1 M 3 U1 V1 W1 PE R1 1 2 104 2 PTC34 109 6 M4R 109 6 M4S 109 6 M4T R3 MP4 1 1 2 2 3 3 5 5 6 6 7 7 8 8 109 7 PTC4 OPTION LED LAMP R R3 H2 1 1 R3 H1 1 1 109 7 EXT LAMP S1 3 4 109 7 BRAKE PB 109 6 BRAKE REL 109 6 BRAKE REL 104 2 BRAKE REL 1...

Page 241: ...09 Latest revision Approved by date Feed back axis 1 2 Location Plant Sublocation IRB360 Manipulator Document no Next Rev Ind 00 Lab Office Status APPROVED 2008 04 04 1 2 3 4 5 6 7 8 SMB 103 3 R2 FB1 4 2 2 3 3 4 4 5 5 6 6 7 7 14 14 15 15 16 16 17 17 18 18 19 19 FB1 FB2 R3 FB1 6 6 2 2 3 3 1 1 8 8 7 7 R3 FB2 6 6 2 2 3 3 1 1 7 7 8 8 X1 0V X1 Y1 0V Y1 0V EXC1 EXC1 EXC1 X2 0V X2 Y2 0V Y2 0V EXC1 Resolv...

Page 242: ...atest revision Approved by date Feed back axis 3 4 Location Plant Sublocation IRB360 Manipulator Document no Next Rev Ind 00 Lab Office Status APPROVED 2008 04 04 1 2 3 4 5 6 7 8 SMB 103 3 R2 FB1 4 9 9 21 21 10 10 22 22 8 8 20 20 11 11 23 23 12 12 24 24 13 13 25 25 FB3 FB4 1 1 2 2 3 3 8 8 7 7 R3 FB3 6 6 1 1 2 2 3 3 8 8 7 7 R3 FB4 6 6 Resolver Resolver X3 0V X3 Y3 0V Y3 0V EXC1 0V EXC2 EXC1 EXC2 X4...

Page 243: ...ithout express authority is strictly forbidden Copyright 2003 ABB Page 108 13 Total 3HAC028647 009 Latest revision Approved by date OPTION Ejector unit Location Plant Sublocation IRB360 Manipulator Document no Next Rev Ind 00 Lab Office Status APPROVED 2008 04 04 1 2 3 4 5 6 7 8 R1 CS A A B B D D E E G G J J H H P VACCUM BLOW RELEASE PRESSURE SWITCH ...

Page 244: ... D4 D4 B1 B1 B4 B4 B3 B3 C2 C2 B2 B2 C1 C1 A10 A10 A9 A9 A8 A8 A7 A7 D10 D10 D9 D9 D8 D8 D7 D7 B10 B10 C9 C9 C8 C8 C10 C10 B9 B9 B7 B7 B8 B8 C7 C7 R1 MP 1 3 1 1 2 2 3 3 18 18 5 5 16 16 7 7 15 15 9 9 10 10 11 11 12 12 13 13 17 17 M1T 104 2 M2T 104 2 M2S 104 2 M2R 104 2 M4T 105 2 M4S 105 2 M4R 105 2 0V PTC 104 2 R1 MP 4 6 1 1 2 2 3 3 4 4 5 5 6 6 7 7 8 8 9 9 10 10 11 11 12 12 13 13 14 14 15 15 M1S 10...

Page 245: ...ation 33 L Lift the robot 40 lifting equipment 31 40 41 195 lifting eyes 41 lithium battery 95 Loads 58 M manipulator cables customer cables 70 power cables 70 signal cables 70 Movable Plate 130 N negative directions axes 173 O oil change safety risks 27 operators manual article number 191 P position robot 174 positive directions axes 173 product manual controller article number 191 product specif...

Page 246: ...Index 232 3HAC030005 001 Revision Copyright 2008 ABB All rights reserved ...

Page 247: ......

Page 248: ...ABB AB Robotics Products S 721 68 VÄSTERÅS SWEDEN Telephone 46 0 21 344000 Telefax 46 0 21 132592 3HAC030005 001 Revision en ...
Reviews: