


ACH550-UH User’s Manual
1-17
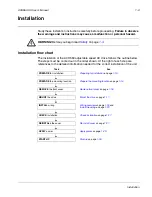
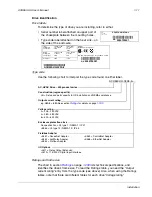
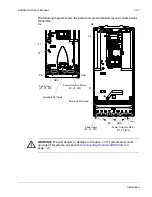
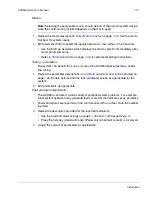
Installation
Mount the drive
R1…R6,
UL type 1
1. Position the ACH550 onto the mounting screws
or bolts and securely tighten in all four corners.
Note:
Lift the ACH550 by its metal chassis.
2. Non-English speaking locations: Add a warning
sticker in the appropriate language over the
existing warning on the top of the module.
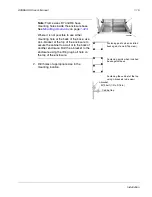
R1…R6,
UL type 12
For the UL type 12 enclosures, rubber plugs are required in the holes provided for
access to the drive mounting slots.
1. As required for access, remove the rubber plugs.
Push plugs out from the back of the drive.
2. R5 & R6: Align the sheet metal hood (not shown)
in front of the drive’s top mounting holes. (Attach
as part of next step.)
3. Position the ACH550 onto the mounting screws
or bolts and securely tighten in all four corners.
Note:
Lift the ACH550 by its metal chassis
(frame size R6 by the lifting holes on both sides
at the top).
4. Re-install the rubber plugs.
5. Non-English speaking locations: Add a warning sticker in the appropriate language
over the existing warning on the top of the module.
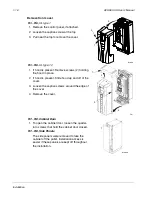
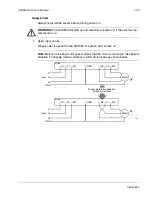
R7…R8
1. Use a hoist to move the cabinet into position.
Note:
If the cabinet location does not provide access to
the cabinet sides, be sure to re-mount side panels before
positioning cabinet.
2. Install and tighten mounting bolts.
IP2002
1
2
2
1, 3
FM
PC00003
30
o
Summary of Contents for ACH550-UH HVAC
Page 2: ......
Page 8: ...1 8 ACH550 UH User s Manual Table of contents ...
Page 32: ...1 32 ACH550 UH User s Manual Installation ...
Page 66: ...1 66 ACH550 UH User s Manual Application macros ...
Page 186: ...1 186 ACH550 UH User s Manual Parameters ...
Page 333: ...ACH550 UH User s Manual 1 333 Technical data ...


