


70
V6100 and V7122 User Guide
4
Insert the TP-260 board into the chosen PCI slot. Ensure that the front panel (bracket) of
the TP-260 board fits correctly into the opening in the rear panel of the PC's chassis.
Also, check that the edge of the PCI retainer bracket fits correctly into the PC’s PCI slot.
5
Secure the front panel of the TP-260 board into the chassis frame with a standard screw.
This also ensures chassis ground to the TP-260 board.
6
Replace and secure the PC's cover.
7
Power up the PC.
8
When using Windows
TM
operating systems, the PC prompts that new hardware has been
found. The driver for the TP-260 is found in the supplied software package
(
260_UNSeries.inf
).
Note that since the TP-260 PCI gateway operates independently and relies on the host’s
PCI only for its power, the driver is only used to prevent the Found new Hardware Wizard
to reappear each time the host PC restarts.
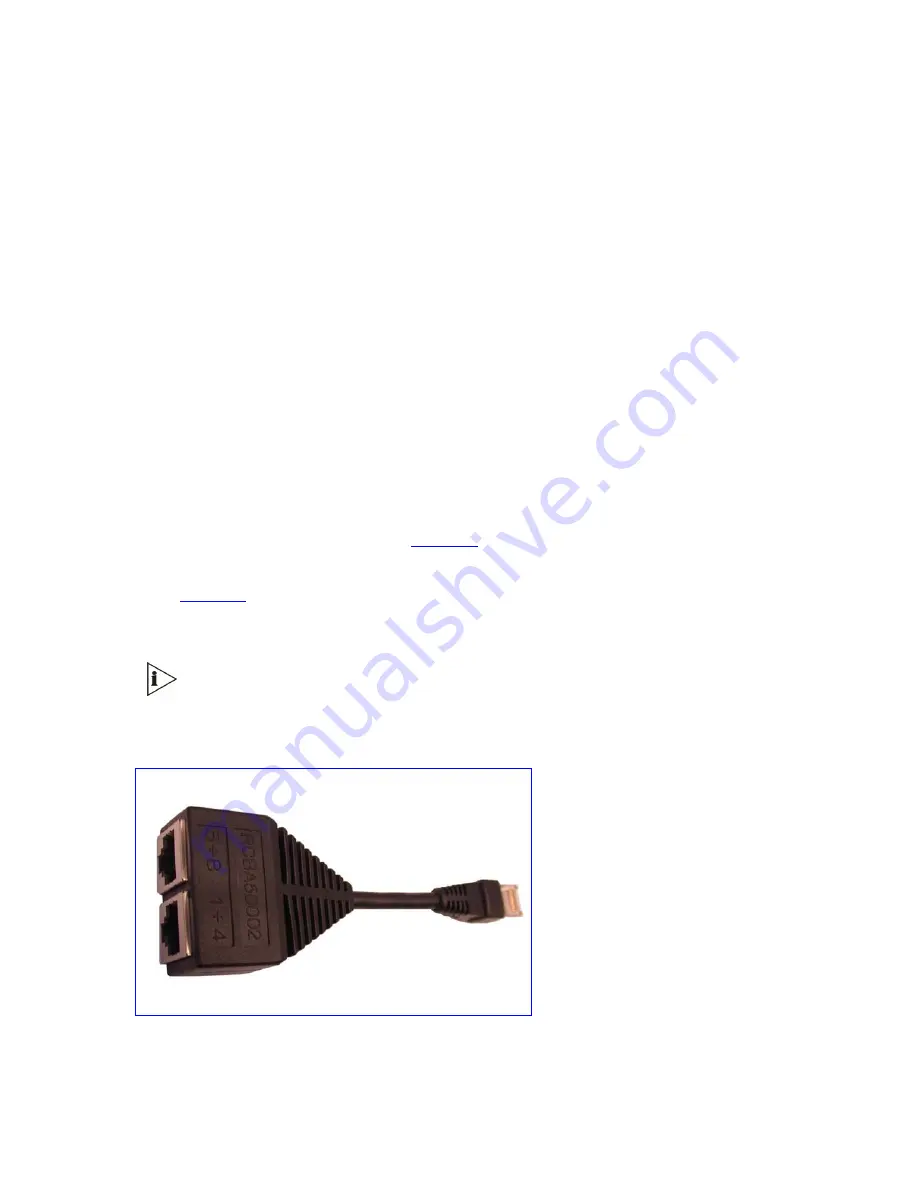
Cabling the TP-260
To cable the TP-260:
1
Connect the TP-260 E1/T1 interfaces to your E1/T1 trunks by using the four supplied TP-
260 E1/T1 cable splitters (shown in
Figure 31
). Connect a splitter to each of the four RJ-
48 connectors labeled Trunks 1/5, 2/6, 3/7 and 4/8 on the TP-260 front panel. Each
splitter distributes each RJ-48 connector into two separate connectors (wired according
to
Figure 15
): the first connector (labeled 1/4) on each splitter supports each of the first
four trunks, the second connector (labeled 5/8) on each splitter supports each of the last
four trunks.
The TP-260 E1/T1 cable splitter is part of the 8-span TP-260 product and is PSTN
certified. When using a
non
-3Com E1/T1 cable splitter, 3Com cannot guarantee
compliance with PSTN homologations.
Figure 31
TP-260 E1/T1 Cable Splitter
Summary of Contents for TP-1610
Page 28: ...28 V6100 and V7122 User Guide Reader s Notes ...
Page 48: ...48 V6100 and V7122 User Guide Reader s Notes ...
Page 72: ...72 V6100 and V7122 User Guide Reader s Notes ...
Page 80: ...80 V6100 and V7122 User Guide Reader s Notes ...
Page 152: ...152 V6100 and V7122 User Guide Reader s Notes ...
Page 262: ...262 V6100 and V7122 User Guide Reader s Notes ...
Page 284: ...284 V6100 and V7122 User Guide Reader s Notes ...
Page 291: ...V6100 and V7122 User Guide 291 Figure 95 V7122 Startup Process ...
Page 324: ...324 V6100 and V7122 User Guide Reader s Notes ...
Page 354: ...354 V6100 and V7122 User Guide Reader s Notes ...
Page 374: ...374 V6100 and V7122 User Guide Reader s Notes ...
Page 382: ...382 V6100 and V7122 User Guide Figure 130 Example of a User Information File Reader s Notes ...
Page 392: ...392 V6100 and V7122 User Guide Reader s Notes ...
Page 409: ...V6100 and V7122 User Guide 409 Reader s Notes ...
Page 413: ...V6100 and V7122 User Guide 413 Reader s Notes ...
Page 425: ...V6100 and V7122 User Guide 425 Figure 145 UDP2File Utility Reader s Notes ...
Page 431: ...V6100 and V7122 User Guide 431 Reader s Notes ...
Page 447: ...V6100 and V7122 User Guide 447 Reader s Notes ...
Page 483: ...V6100 and V7122 User Guide 483 Reader s Notes ...