


34
Visualize recorded data
As a consequence of the analysis, notice that the Timeline bar is now filled with vertical lines whose col
-
ors indicate the degree of the overall detected activity (averaged on the entire MEA) along the temporal
axis. A blue-color indicates a relatively low activity, while a red-color a relatively high activity around that
time position.
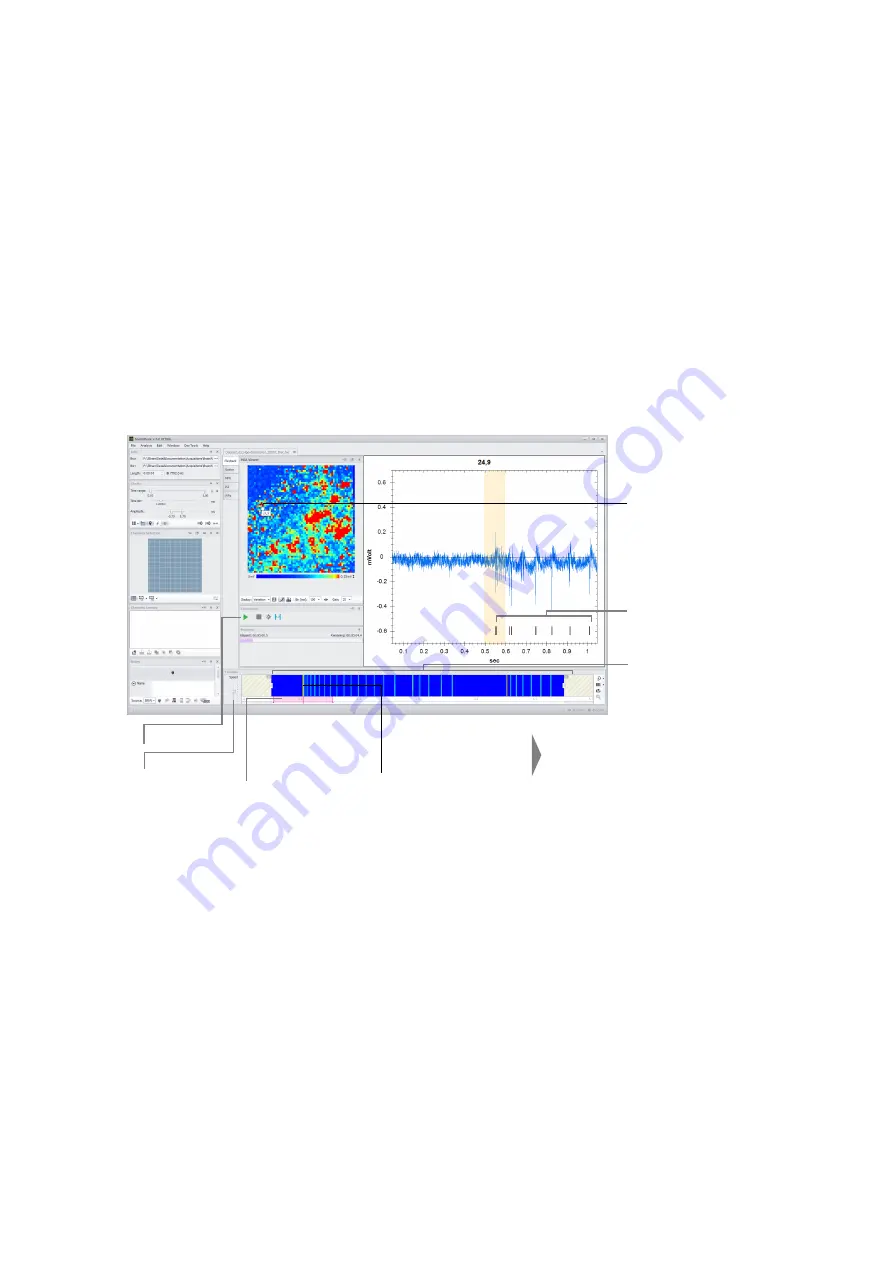
To browse your Experiment for signals:
1. Click the MEA Viewer on channel [24, 9] to open its chart
2.
Click the Timeline bar in correspondence of the first red vertical line (near 0.5s). You will see the
activity around the selected time position for the entire MEA in the MEA Viewer and the data for the
channel [24, 9] in its chart.
Timeline bar
is filled with vertical
colored lines indicating
the level of activity.
Chart bars
indicating detected
spikes
Play button
Speed control
Timeline cursor
a red overlaying rect-
angle with central, left
and right markers
2. Click Timeline bar
in corrispondence of the
red line (near 0.5s).
1. Click MEA Viewer
on channel [24, 9] to
open its chart.
The timeline cursor centers at that
position. MEA Viewer and chart
refresh accordingly.
Try to move to other spatial positions in the MEA by selecting other channels in the MEA Viewer (in
particular red channels) and to other time positions by clicking or dragging on the Timeline bar. To move
along the time axis, you can also click Play (Stop) in order to automatically playback (stop) the data
stream or alternatively you can use the Left and Right Arrow keys on the keyboard. When Play is on or
you use the arrow keys, the speed at which data is refreshed is given by the Speed control under the
Timeline panel. Speed can also be adjusted with the Up and Down Arrow keys.
Summary of Contents for BioCAM X
Page 1: ...1 Welcome to ...
Page 2: ...2 Last updated 25 09 2019 User Guide Essentials ...
Page 5: ...Introduction 1 ...
Page 8: ...At a glance 2 ...
Page 15: ...Precautions 3 ...
Page 20: ...Get started 4 ...
Page 24: ...24 Quick guide to your first use 5 ...
Page 39: ...39 Troubleshooting 6 ...


