


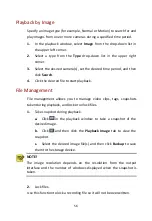


58
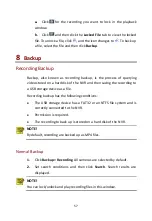
3.
Select the desired recording(s) and then click
Backup
.
4.
Select a destination in the USB storage device and then click
Backup
. The recording(s) will be saved to the specified directory.
NOTE!
You may want to create a new folder for the recording(s) by clicking
New Folder
.
By clicking
Format
you can format a connected USB device into a
FAT32 file system.
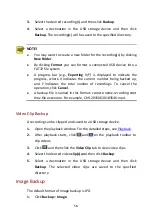
A progress bar (e.g.,
Exporting
X
/
Y
) is displayed to indicate the
progress, where
X
indicates the current number being backed up,
and
Y
indicates the total number of recordings. To cancel the
operation, click
Cancel
.
A backup file is named in this format:
camera name-recording start
time
.file extension. For example, Ch9-20150630183546.mp4.
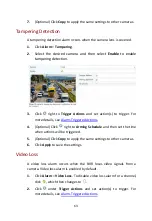
Video Clip Backup
A recording can be clipped and saved to a USB storage device.
1.
Open the playback window. For the detailed steps, see
2.
After playback starts, click
and
on the playback toolbar to
clip videos.
3.
Click
and then click the
Video Clip
tab to view video clips.
4.
Select the desired video
clip(s) an
d then click
Backup
.
5.
Select a destination in the USB storage device and then click
Backup
. The selected video clips are saved to the specified
directory.
Image Backup
The default format of image backup is JPG.
1.
Click
Backup
>
Image
.


