43
Draw or Edit a Schedule
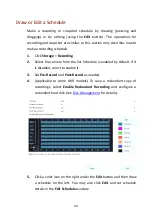
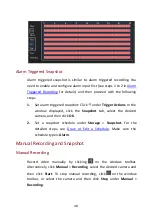
Make a recording or snapshot schedule by drawing (pressing and
dragging) or by editing (using the
Edit
button). The operations for
recording and snapshot are similar, so this section only describes how to
make a recording schedule.
1.
Click
Storage
>
Recording
.
2.
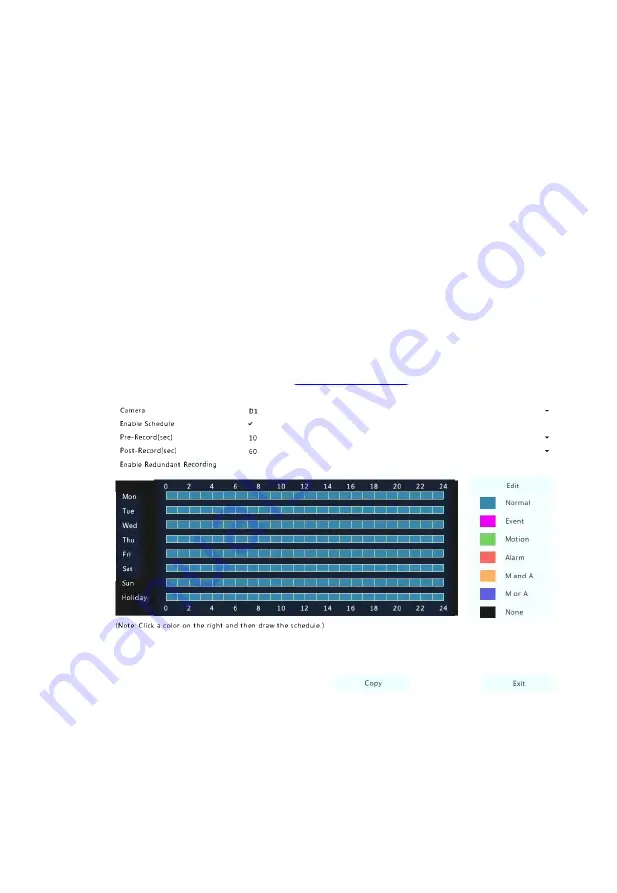
Select the camera from the list. Schedule is enabled by default. If it
is disabled, select to enable it.
3.
Set
Pre-Record
and
Post-Record
as needed.
4.
(Applicable to some NVR models) To save a redundant copy of
recordings, select
Enable Redundant Recording
and
configure a
redundant hard disk (see
for details).
5.
Click a color icon on the right under the
Edit
button and then draw
a schedule on the left. You may also click
Edit
and set schedule
details in the
Edit Schedule
window.

