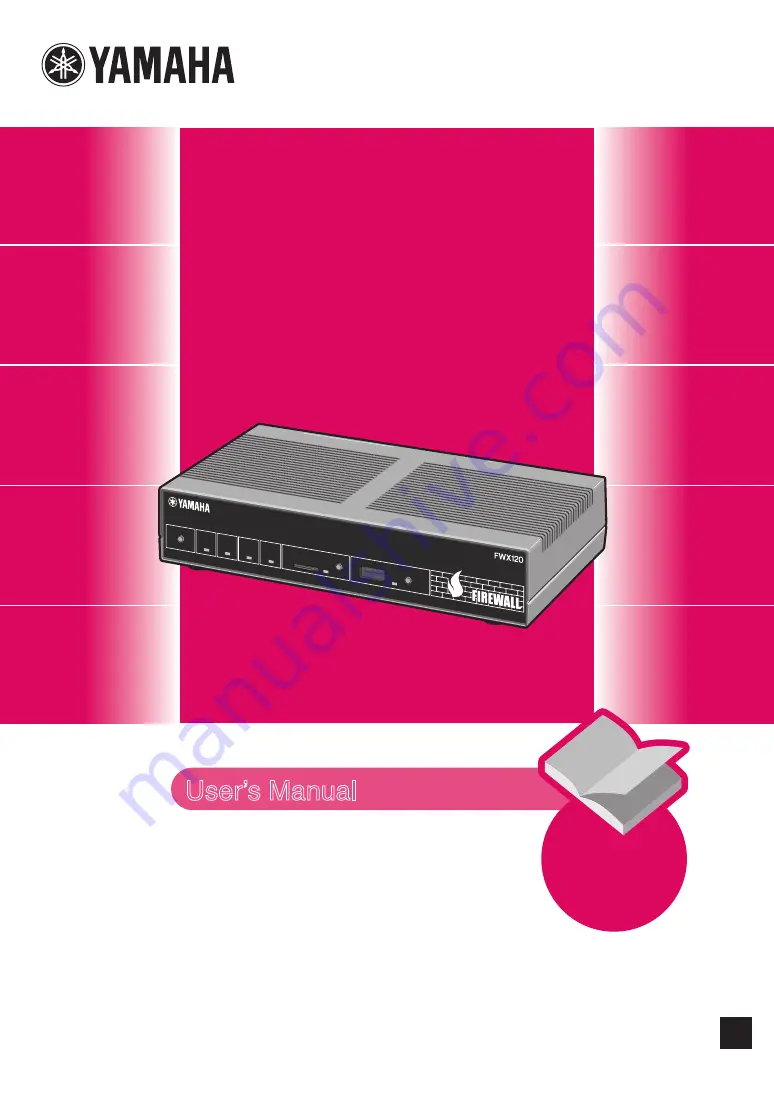
background image

Firewall

FWX120

User’s Manual

Thank you very much for purchasing Yamaha FWX120.

Please carefully read this manual before use to ensure 

appropriate installation and configuration.

Please be sure to follow all the warnings and precautions 

provided in this manual to ensure appropriate and safe use.

Please retain this manual in a safe place for future 

reference.

Please


read


this manual


first

DOWNLOAD

POWER

STATUS

LAN 1

LAN 2

microSD

USB

LAN2

4

3

2

1

ON

STANDB

Y

CONSOL

E

LAN1

EN

Summary of Contents for FWX120

Page 1: ...ropriate installation and configuration Please be sure to follow all the warnings and precautions provided in this manual to ensure appropriate and safe use Please retain this manual in a safe place f...

Page 2: ...eded to fully utilize the product Command Reference included in the attached CD ROM Provides information on detailed configurations available through console commands Help on the Basic configuration p...

Page 3: ...low in this manual Yamaha FWX120 The product this product 10BASE T 100BASE TX 1000BASE T cable LAN cable Concerning detailed technical information Detailed knowledge of the Internet and networks may b...

Page 4: ...t to use any staples to fix the cord in place Ensure not to apply excessive force to the cord Ensure to keep the cord away from anything hot Ensure to only use the specified power supply voltage Use o...

Page 5: ...could result in fire or damage to the product Ensure not to cover the product with a cloth or tablecloth Ensure the product does not get pushed into a narrow poorly ventilated place Ensure the ventil...

Page 6: ...which could then result in damage to the product Ensure to leave the product for a while until it has dried off with the power turned off if any condensation has occurred Ensure not to stack the produ...

Page 7: ...e system any use of it with an improper configuration could be charged for under the measured rate system Please note that Yamaha cannot assume any responsibility for any damage resulting from imprope...

Page 8: ...on record and verify whether any unintended communications have taken place In addition we strongly recommend that you periodically visit the Yamaha Network Devices website http www yamaha com product...

Page 9: ...of RSA Security Inc in the U S and other countries Open source software used in the product PCRE MT19937 OpenSSL Original SSLeay Net SNMP Please refer to Operation Manual included in the attached CD R...

Page 10: ...AGREEMENT applies to the SOFTWARE which YAMAHA provides you and the installed copy thereof subject to the provision of 1 1 herein into the PRODUCT or personal computer owned by you 1 GRANT OF LICENSE...

Page 11: ...s herein and continues in effect unless or until terminated in accordance with the provision of 6 2 or 6 3 herein 6 2 You may terminate this AGREEMENT by deleting the SOFTWARE installed into the PRODU...

Page 12: ...entication function When terminals are configured as allowed terminals registered terminals or not allowed terminals unregistered terminals the function can check if the terminals are allowed to acces...

Page 13: ...ansfer them from a PC USB memory stick or microSD card Compliance with various external memories The configuration file and log of the product can be saved in commercially available USB memory sticks...

Page 14: ...y USB devices please be sure to cancel the connection by pressing and holding down the USB button for two seconds NOTE Do not connect a USB device other than a USB memory stick and a USB data communic...

Page 15: ...e link concerned SPEED lamp Off 100BASE TX 10BASE T or lit up 1000BASE T according to the speed of the connection e LAN2 port This port is connected to a modem router or hub with a LAN cable You can f...

Page 16: ...time Page 27 Preparation 5 Configuring the IP address on the LAN1 side of the product Page 29 Preparation 6 Changing the IP addresses of PCs in the LAN Page 31 Preparation 7 Configuring provider info...

Page 17: ...10BASE T 100BASE TX or 1000BASE T Information regarding the network to which the product is connected Predetermine the IP address to be assigned to the LAN side of the product NOTE To connect the pro...

Page 18: ...nect the LAN port of your cable modem ADSL modem or ONU to the LAN2 port of the product with a LAN cable Please also refer to the document provided by your provider and instruction manuals for ADSL mo...

Page 19: ...ed to your PC or hub If the LAN1 lamp does not light up or flash Check that the LAN cable is correctly connected and your PC or hub is powered on The LAN1 lamp does not light up or flash unless all th...

Page 20: ...use Internet Explorer 11 screens as examples For other environments you have slightly different screen displays though operations stay the same Tip If you enter commands in a console window using Tel...

Page 21: ...he top page of the Basic configuration page appears NOTE Enter the user name and password if you have set them If the top page of the Basic configuration page does not appear Refer to Setting failed w...

Page 22: ...swords to provide security measures Once a password is set anyone trying to access the product must enter it which makes it difficult for third parties to modify the configurations of the product It i...

Page 23: ...5 Click 1 Click 2 Click 4 Fill in 3 Fill in FWX120 User s Manual 23...

Page 24: ...assword Each password character entered is represented by a black dot 4 Retype the password you entered in Step 3 5 Click Submit A confirmation screen appears 6 Click Submit The password you have set...

Page 25: ...9 Click 13 Fill in 14 Click 11 Click 10 Click 12 Fill in FWX120 User s Manual 25...

Page 26: ...Click Configure to the right of Nameless user The Configure nameless user screen appears 12 Type the login password in login password Each password character entered is represented by a black dot 13...

Page 27: ...Preparation 4 Setting the date and time In the Configure machine screen configure the date and time for the product 1 Click 2 Click 3 Select 4 Fill in 5 Click FWX120 User s Manual 27...

Page 28: ...ead and click Submit simultaneously with a time signal 5 Click Submit A confirmation screen appears 6 Click Return to top The top page of the Basic configuration page reappears To automatically set th...

Page 29: ...PC NOTE If a different network address has already been configured give the product the IP address and netmask according to that network address Make sure the product has an IP address that does not o...

Page 30: ...k address you determined and select the netmask For more details on the settings click Help on the setup screen and refer to the description displayed 4 Click Submit A confirmation screen appears 5 Cl...

Page 31: ...addresses and netmasks For information on setting these devices please refer to their instruction manuals NOTE If you do not change the network address of the LAN to which the product is attached you...

Page 32: ...l NOTE After canceling changing your provider contract please be sure to delete or reconfigure the connection configuration of the product Failure to observe this could result in unexpected charges fr...

Page 33: ...egal access or attack via the Internet Be sure to use the product with extra attention to your network security Refer to Enhancing security Operation Manual for more details The descriptions in this m...

Page 34: ...page The broadband line auto distinction function works to show the screen for the connection mode selected for the connected line NOTE Note that the broadband line auto distinction process takes plac...

Page 35: ...line appears The following configurations vary depending on the connected line For details refer to the description for the connection line you selected If no line was chosen Failed to automatically d...

Page 36: ...tify it when it needs to be modified Enter the user ID Enter the connection user ID specified by the provider Be sure to check the relevant document when entering it Enter your connect password Enter...

Page 37: ...elect it If the DNS server address is assigned by your provider Click The contract with the provider stipulates a DNS server address designation to select it and then set the following addresses Prima...

Page 38: ...from page 35 Ensure that the entries displayed on the screen agree with the information provided by your provider If an incorrect setting has been made click Back to bring up the necessary setting scr...

Page 39: ...tions are completed Configuration settings for your Internet connection are now complete A Terminal broadband connection over PPPoE from page 35 Click Connect TheproductconnectstotheInternetandshowsth...

Page 40: ...If the DHCP client identification name is assigned by your provider enter that identification name in the DHCP client identification name there is no need to enter it if it is not assigned by your pr...

Page 41: ...der to select it If the DNS server address is assigned by your provider Click The contract with the provider stipulates a DNS server address designation to select it and then set the following address...

Page 42: ...dband connection over DHCP or static IP address from page 35 Ensure that the entries displayed on the screen agree with the information provided by your provider If an incorrect setting has been made...

Page 43: ...communication time and communications traffic for each connection or on a cumulative basis Please use it as necessary A constant Internet connection increases the risk of illegal access or attack via...

Page 44: ...the USB data communication terminal is connected For details on the buzzer sound refer to Changing the buzzer settings Operation Manual For a list of the latest USB data communication terminals that...

Page 45: ...onnection mode 1 Click 2 Click 3 Click 1 2 3 Click Configure provider on the top page of Basic configuration page The Configure provider 1 4 screen appears Click Mobile Internet connection Click Next...

Page 46: ...rmined automatically If not connect a USB data communication terminal and then try again Enter the configuration name Enter a descriptive destination name It is a good idea to name the configuration s...

Page 47: ...password character entered is represented by a black dot Select outgoing restrictions Configure the outgoing restrictions based on the cumulative send received data and the cumulative connection peri...

Page 48: ...t with the provider stipulates a DNS server address designation to select it and then set the following addresses Primary DNS server address Enter the DNS server address assigned by your provider in n...

Page 49: ...entries displayed on the screen agree with the information provided by your provider If an incorrect setting has been made click Back to bring up the necessary setting screen to set it correctly Clic...

Page 50: ...Internet by viewing the status of Internet connection on the lower part of the screen 50 FWX120 User s Manual If you cannot connect to the Internet Check 1 Check the connection between the product and...

Page 51: ...tion LAN2 interface Ethernet RJ 45 10BASE T 100BASE TX 1000BASE T 1 port Straight Cross auto distinction Serial interface DTE fixed cross cable for connecting to a PC Number of ports 1 Asynchronous se...

Page 52: ...Printed in China ZU60240 Manual Development Department 2016 Yamaha Corporation Contact page http www yamaha com products en network support Published 03 2016 AB A0...

Reviews: