Natural Sound Compact Disc Player
Lecteur de disque audionumérique de la série “Natural Sound”
Thank you for selecting this YAMAHA Compact Disc Player.
Nous vous remercions d’avoir porté votre choix sur ce lecteur de disque.
CDX-10
OWNER’S MANUAL
MODE D’EMPLOI
FEATURES
•
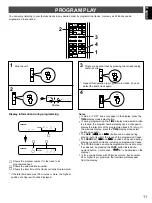
Random Access Programmable Play
•
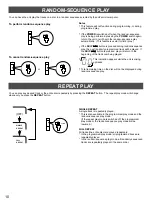
Random-Sequence Play
•
Single Track/Entire Disc Repeat Play
•
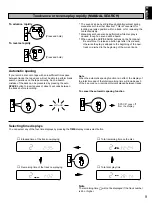
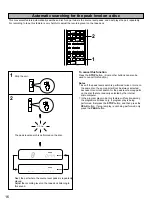
Automatic Spacing Capability
•
Automatic Programming for Recording to
Tape
•
Automatic Peak Level Searching Capability
•
CD Synchronized Recording with a
Compatible YAMAHA Tape Deck
•
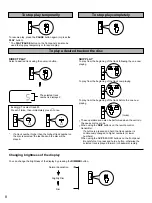
Display Brightness Changing Capability
•
Remote Control Capability
•
Optical Digital Output
CONTENTS
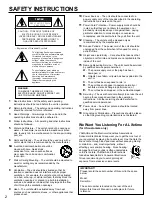
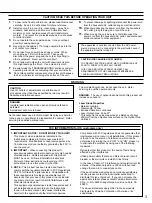
Safety Instructions ............................................... 2
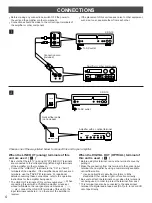
Connections ......................................................... 4
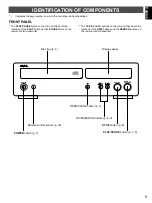
Identification of Components ............................... 5
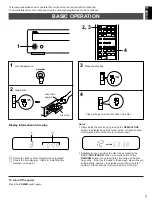
Basic Operation ................................................... 7
Random-Sequence Play .................................... 10
Repeat Play ....................................................... 10
Program Play ..................................................... 11
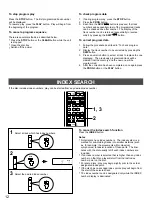
Index Search ...................................................... 12
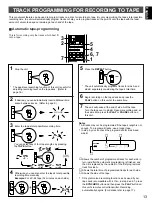
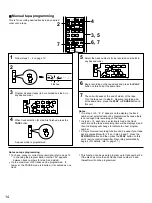
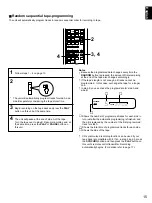
Track Programming for Recording to Tape ....... 13
CD Synchronized Recording ............................. 17
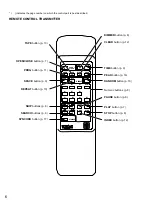
Notes about the Remote Control
Transmitter ......................................................... 18
Notes about Handling Compact Discs ............... 18
Troubleshooting.................................................. 19
Specifications..................................................... 19
CARACTERISTIQUES
•
Lecture programmable à accès direct
•
Lecture en séquence aléatoire
•
Lecture répétée de plage unique/disque entier
•
Fonction d’espacement automatique
•
Programmation automatique de pour
l’enregistrement
•
Fonction de recherche automatique du niveau
de crête
•
Enregistrement synchronisé de disque
audionumérique avec un magnétophone à
cassettes compatible YAMAHA
•
Fonction de modification de luminosité de
l’affichage
•
Fonctionnement par télécommande
•
Sortie numérique optique
TABLE DES MATIERES
Attention ............................................................. 20
Connexions ......................................................... 21
Identification des composants ............................ 22
Fonctionnement de base .................................... 24
Lecture en séquence aléatoire ........................... 27
Lecture repetée .................................................. 27
Lecture programmée .......................................... 28
Recherche d’index .............................................. 29
Programmation des plages pour
enregistrement sur bande .................................... 30
Enregistrement synchronise d’un
disque audionumérique ........................................34
Remarques concernant la télécommande .......... 35
Remarques concernant la manipulation des disques ... 35
Dépistage de pannes .......................................... 36
Caractéristiques techniques ............................... 36


