DRUM
TRIGGER
MODULE
DRUM
TRIGGER
MODULE
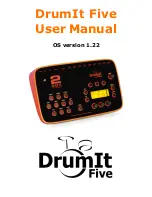
OWNER’S MANUAL
ENDING
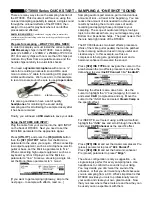
CLICK
CLICK
KICK/MISC.
ACCOMP
ACCOMP
SNARE/CYMBAL
AUX IN
AUX IN
MIN
MIN
MAX
MAX
MASTER VOL.
MASTER VOL.
MUTE
MUTE
MUTE
MUTE
MAIN A
MAIN B
FILL AB
FILL BA
INTRO
ENDING
3
OFF
DRUM
KIT
CHAIN
PAT
TERN
SONG
MIS
C.
SN
AR
E
KIC
K
CYM
BA
L
TEMPO
BEAT
MEASURE
INPUT
QUANT.
CLICK
DRUM
DRUM
KIT
KIT
BASS
BASS
TMP TR
CHORD
CHORD
CHO TR
RH
YTH
M
RHYTHM
PAT TR
VOICE
VOICE
UTILITY
UTILITY
STORE
STORE
PATTE
RN
TTERN
SONG
SONG
CHAIN
CHAIN
CLICK
PAGE
AGE
ERASE
SHIFT
SHIFT
SOLO
SOLO
TR1
TR1
TR2
TR2
+
1/YES
1/YES
-
1/NO
1/NO
TEMPO
TEMPO
CYMBAL
MISC.
SNARE
MAIN B
FILL BA
MAIN A
FILL AB
INTRO
KICK
PAGE
AGE
TR
IGG
ER
TRIGGER
DRUM TRIGGER MODULE
Version 2.0
YAMAHA DRUM TRIGGER MODULE DTX VERSION2.0 OWNER’S MANUAL
DR
UM
T
RIG
GE
R
MODU
LE
Ve
rsio
n
2.0
Summary of Contents for 2.0
Page 4: ......
Page 32: ...28 Getting Started ...
Page 174: ...D T M T YAMAHA DRUM TRIGGER MODULE DTX VERSION2 0 OWNER S MANUAL ...