background image


MAX-209S 

Freestanding Combi Steamer Instruction Manual 

座檯式蒸焗爐使用手冊


Summary of Contents for MAX-209S

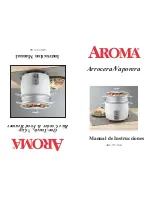
Page 1: ...1 MAX 209S Freestanding Combi Steamer Instruction Manual 座檯式蒸焗爐使用手冊 ...

Page 2: ...品作商業或其它用途 3 確保家中使用的電壓與產品標籤上的電壓一致 4 確保產品沒有損壞 如產品出現下列情況 請勿操作本產品 例如電源線或插頭受損 產品無法正常操 作 產品受損或曾墜落 5 切勿把電源線或插頭浸入水中 並避免電源線接觸高溫的表面 以免發生觸電 火災或其他意外 6 此座檯式蒸焗爐只設計作座檯式使用 不可以作嵌入式安裝 7 此產品很重 必須將產品放置在堅固及平穩的表面 8 確保爐的四周有足夠的通風空間 爐兩旁應與牆壁距離至少 5 厘米 爐背應與牆壁距離至少 10 厘米 9 請勿阻擋或堵塞爐具的散熱通風口 以免對爐具造成損壞 10 切勿在爐頂放置任何物件並與頂部壁櫃距離至少 20 厘米 11 在使用爐具前 以 消毒 模式進行 20 分鐘的消毒清潔 12 生產商不承擔一切由於客戶不正確使用本產品以產生的問題 ...

Page 3: ...冒煙 請將 爐門關上並關掉蒸焗爐 同時拔掉電源線並將裝設有漏電斷路器的插座電源切斷 5 切勿在爐內使用腐蝕性化學品或氣體 此爐具專為加熱食物或烹煮食物而設計 並不適合工業或實驗用 途 6 此產品並非設計給身體 感官或精神上能力不足 或經驗及知識不足的人士使用 包括兒童 除非監 護其安全的負責人監督或指引其使用 7 當完成烹調並待蒸爐冷卻後 請抹走可能凝固於爐腔內的殘留物 爐腔頂部最容易出現燒焦情況 應將 爐腔頂部擦洗乾淨 為確保食物得到最佳烹調效果 請保持爐腔完全乾透 8 從蒸焗爐內提取食物及器皿時 應使用隔熱手套 以免燙傷 9 切勿將爐腔作存放物件之用 10 奶樽或嬰兒食物器皿中的食物或飲料加熱後 請務必在餵食前將食物或飲料加以攪拌 並檢查食物的 溫度 確保熱力分佈均勻 以避免燙傷或灼傷嬰兒 11 當使用 蒸焗模式烹調 模式或 熱風對流烹調 模式後 應等待 5 10 分鐘才進行其他烹調模...

Page 4: ...保衛生 並防止冷凝水在蒸爐內積聚 請於每次使用後清空水箱 15 烹調過程中儘量不要打開爐門 以免蒸氣流失 影響烹調效果 16 烹調過程中如需翻轉食物或因其它需要必須打開爐門時 請盡量不要靠近爐門 特別是臉部 以免燙 傷 17 維修操作應該由專業人員進行 除專業人員外 任何維修操作均可能帶來危險 18 如發現爐門或爐門封邊損壞時 請停止使用產品並儘快聯絡惠而浦客顧服務部 19 產品操作時 可接觸部份的溫度可能較高 此時切勿讓兒童靠近 20 通電後 切勿用濕手或腳觸摸本產品 產品之電源線或插頭 21 切勿放置或懸掛任何物件於爐門或門上的把手柄 以免影響門的開關及損壞門鉸 22 除清水外 切勿使用儲水箱盛載其他液體 ...

Page 5: ... 2 安全裝置 防止爐門未關上時蒸焗爐可以運作 3 儲水箱 盛載清水以產生蒸氣 4 層架 支撐用作烹調食物的托盤 5 控制面板 用於操作蒸焗爐 6 發熱管 產生熱能烹調食物 7 排氣閥 排出爐腔內多餘的水蒸氣 8 對流風扇 使熱量平均分佈在爐腔內 9 進氣閥 讓蒸氣進入爐腔內 10 水盤 盛載開門後流出的倒汗水 11 蒸盤 有疏氣孔 主要用於 蒸煮模式 時使用 其疏孔的設計亦可用於其他煮食模 式 如需進行多層煮食 建議將此蒸盤放於較底層的位置 可使爐腔 內空氣更流通 讓爐腔溫度更平均 ...

Page 6: ...6 12 蒸焗盤 滴油盤 主要用於 蒸焗模式 時使用 或於烹調肉類時放於底層 盛載煮 食中滴下來的油 13 燒烤網架 主要用於 燒烤模式 或 蒸焗模式 時使用 如需進行多層煮食 建議將此蒸盤放於較底層的位置 可使爐腔 內空氣更流通 讓爐腔溫度更平均 14 隔熱手套 由蒸焗爐拿出食物或托盤時使用 15 海綿 用於清潔爐腔內的水蒸氣 ...

Page 7: ...7 操作面板 圖標 圖標說明 預校烹調時間 時間顯示 時鐘 響鬧 水位指示 溫度顯示 蒸煮模式 燒烤模式 熱風對流模式 蒸焗模式 消毒 保溫 發酵 解凍 兒童安全鎖 ...

Page 8: ...時 50 110 燒烤模式 20 分鐘 180 5 180 分鐘 3 小時 120 230 熱風對流模式 20 分鐘 180 5 180 分鐘 3 小時 120 230 蒸焗模式 20 分鐘 180 5 180 分鐘 3 小時 120 230 消毒 20 分鐘 110 默認設置 默認設置 保溫 發酵 20 分鐘 40 5 180 分鐘 3 小時 默認設置 解凍 20 分鐘 60 5 180 分鐘 3 小時 默認設置 建議煮食時間 編號 菜式 類別 工作模式 溫度 時間 分鐘 1 鱸魚 約半斤 海鮮 蒸煮 110 8 分鐘 2 菜芯 約半斤 蔬菜 蒸煮 110 5 分鐘 3 蒸水蛋 1 隻蛋 2 份水 蛋 蒸煮 100 7 分鐘 4 蒸白飯 五穀 蒸煮 100 25 分鐘 5 豉汁蒸帶子 約 1 斤 海鮮 蒸煮 100 10 分鐘 6 蒸滑雞 約 1 斤 肉 蒸煮 100 45 分鐘 ...

Page 9: ...汁蒸排骨 約 1 斤 肉 蒸煮 100 20 分鐘 8 牛油蛋糕 8 寸 糕點 熱風對流 180 25 分鐘 9 烤全雞 肉 熱風對流 180 40 分鐘 10 原隻薯仔 蔬菜 燒烤 200 25 分鐘 11 麵包 8 個 麵包 熱風對流 180 15 分鐘 12 梳乎厘 6 杯 甜品 熱風對流 180 15 分鐘 13 燒春雞 肉 蒸焗模式 220 40 分鐘 14 蘋果豬排 肉 蒸焗模式 200 22 分鐘 ...

Page 10: ...10 操作說明 調校時間 例如 調校時間為 13 時 20 分 操作步驟 1 在待機狀態下 按 鍵 2 小時雙位數值閃爍 按 鍵直到顯示 13 00 按 鍵確定 3 分鐘雙位數值閃爍 按 鍵直到顯示 13 20 按 鍵確定 4 成功調校時間 ...

Page 11: ... 操作步驟 1 在待機狀態下 按 鍵直到螢幕顯示此蒸煮模式圖示 按 鍵確定 2 按 鍵直到顯示 00 20 按 鍵確定 3 按 鍵直到顯示烹調溫度為 90 C 按 鍵確定 4 確定水箱巳裝水 成功設定蒸煮模式 設定燒烤模式 例如 設定燒烤時間為 30 分鐘 溫度為 150 C 的程式 操作步驟 1 在待機狀態下 按 鍵直到螢幕顯示此燒烤模式 圖示 按 鍵確定 2 按 鍵直到顯示 30 00 按 鍵確定 3 按 鍵直到顯示烹調溫度為 150 C 按 鍵確定 4 成功設定燒烤模式 ...

Page 12: ...12 設定熱風對流模式 例如 設定熱風對流烤焗時間為 35 分鐘 溫度為 190 C 的程式 操作步驟 1 在待機狀態下 按 鍵直到螢幕顯示此熱風對流烤焗模式 圖示 按 鍵確定 2 按 鍵直到顯示 00 35 按 鍵確定 3 按 鍵直到顯示烹調溫度為 190 C 按 鍵確定 4 成功設定熱風對流烤焗模式 ...

Page 13: ...直到螢幕顯示此蒸焗模式 圖示 按 鍵確定 2 按 鍵直到顯示 00 45 按 鍵確定 3 按 鍵直到顯示烹調溫度為 200 C 按 鍵確定 4 成功設定蒸焗模式 設定預校功能 例如 時間為 13 時 30 分 預校蒸煮時間為 40 分鐘 溫度為 100 C 結束時間為 15 時 10 分的程式 操作步驟 1 在待機狀態下 按 鍵直到螢幕顯示此蒸煮功能 圖示 按 鍵確定 2 按 鍵一次 3 設置當時時間 小時雙位數值閃爍 按 鍵直到顯示 13 00 按 鍵確定 4 分鐘雙位數值閃爍 按 鍵直到顯示 13 30 按 鍵確定 ...

Page 14: ...14 5 設置烹調時間 按 鍵直到顯示 40 00 按 鍵確定 6 設置烹調結束時間 分鐘雙位數值閃爍 按 鍵直到顯示 15 00 按 鍵確定 7 分鐘雙位數值閃爍 按 鍵直到顯示 15 10 按 鍵確定 8 設定溫度 按 鍵直到顯示烹調溫度為 100 C 按 鍵確定 ...

Page 15: ...15 注意 可以按 鍵一次 檢查預校功能結束時間 ...

Page 16: ...16 如要結束預校功能 按 鍵 然後按 鍵 設定消毒功能 例如 對餐具進行消毒 操作步驟 1 在待機狀態下 按 鍵直到螢幕顯示此消毒功能 圖示 按 鍵確定 2 按 鍵兩次 啟動此功能 3 成功設定消毒功能 ...

Page 17: ...17 設定解凍功能 例如 設置解凍時間為 15 分鐘的程式 操作步驟 1 在待機狀態下 按 鍵直到螢幕顯示此解凍功能 圖示 按 鍵確定 2 按 鍵直到顯示 00 15 按 鍵確定 3 再按 鍵確定 4 成功設定解凍功能 設定保溫功能 例如 保溫食物 50 分鐘 操作步驟 1 在待機狀態下 按 鍵直到螢幕顯示此保溫功能 圖示 按 鍵確定 2 按 鍵直到顯示 00 50 按 鍵確定 3 成功設定保溫功能 ...

Page 18: ...18 設定兒童安全鎖功能 作用 用來防止兒童在沒有成人指導的情況下使用蒸焗爐 設置兒童安全鎖步驟 1 在待機狀態下 按 鍵 3 秒 2 當螢幕顯示此兒童安全鎖 圖示 蒸焗爐將不能操作 ...

Page 19: ...19 解除兒童安全鎖步驟 1 在待機狀態下 按 鍵 3 秒 2 螢幕顯示的兒童安全鎖 圖示消失 蒸焗爐則可以繼續操作 ...

Page 20: ...表面粗糙的抹布 否則會對操作面板 蒸焗盤 蒸 焗爐內壁及爐身表面造成損害 應以沾有溫和洗潔精的海綿或軟布或染上玻璃清潔劑的廚房紙巾進行清 潔 每次使用後 確保爐腔 包括爐腔底部 是乾透 6 鹽份是具侵蝕性的物質 一旦積聚在爐腔內 將形成銹漬 一些帶酸性的醬汁 例如茄汁 芥末和醃製 食品含有氯和酸的化學成份 而該等成份會對鋼表面造成影響 7 切勿讓油脂及食物碎屑殘留於爐門及爐門封邊上 假如爐門封邊清潔處理不善 或會影響蒸爐操作時爐 門無法完全關上 繼而導致機前方及兩側部份損壞 8 每次使用後 清理蒸焗爐門底下的黑色水盤的積水 以防止積水滿瀉 濺濕及弄髒檯面 黑色水盤是可 以拆下的 它會盛載每次蒸煮後玻璃門開門時滴下的倒汗水 9 清理殘留在儲水箱未用完的水 10 每次使用後 打開爐門 10 15 分鐘 以風乾爐腔及門框 ...

Page 21: ...水箱 ii 加入一些檸檬汁或少量食用醋 約 10 毫升 把水箱完整推進到位 iii 關上爐門 iv 先按爐燈鍵 再同時按住預校鍵 大約 25 秒 水會開始從爐腔內的蒸汽出口流出 v 如發現吐出的水有白色粉末 水垢 是正常的 vi 以隨機附送的海棉抹擦流出的水 vii 如爐腔非常骯髒 可再次注入清水 重覆步驟 iv 13 建議使用新鮮的自來水作烹調用 14 儲水箱必須每月至少檢查一次 如有需要 取出儲水箱 擦洗乾淨後再放回原處 15 若長時間不使用本產品時 應拔掉電源插頭 保持爐腔清潔 並將蒸焗爐放置在通風 乾燥及沒有腐蝕 性氣體的環境中 16 更換爐燈前必須關掉電源 更換的爐燈必須採用由製造商提供的原廠零件 17 請用海綿或軟布清潔蒸盤 滴油盤 切勿使用含金屬成份的清潔布 磨砂型潔具 鋼刷 表面粗糙的抹 布清潔 ...

Page 22: ...22 18 每次使用後 應清潔和風乾爐腔 包括爐腔頂部 左右兩側和底部 如爐底有變黃的情況 可以使用不 銹鋼清潔劑去除污漬 例如 Wpro 不銹鋼清潔劑 ...

Page 23: ...23 層架與內隔熱罩拆卸 1 順時針方向旋出固定在左 右層架的 4 顆螺母 分別取出左 右層架 2 順時針方向旋出固定在內隔熱罩的 4 顆螺絲 取出內隔熱罩 3 清洗層架和內隔熱罩 清洗後 重覆步驟 1 和 2 重新裝回層架和內隔熱罩 ...

Page 24: ...頭沒有插好 重新插好電源插頭 爐門沒有關好 重新關閉爐門 儲水箱沒有放置妥善 重新放回儲水箱 電路版損壞 與客戶服務部聯絡 兒童安全鎖被鎖住 解除兒童安全鎖 3 顯示屏顯示異常 顯示屏損壞 與客戶服務部聯絡 電路板損壞 4 烹調期間大量排出水或蒸氣 爐門沒有關上 重新把爐門關上 爐門封邊損壞 與客戶服務部聯絡 5 爐燈不亮 爐燈損壞 更換爐燈 主機電腦板損壞 與客戶服務部聯絡 6 風扇不能正常運作 風扇電機損壞 與客戶服務部聯絡 主機電腦板損壞 7 按鍵失靈 導電橡膠按鍵裝置錯誤或損壞 與客戶服務部聯絡 主機電腦板損壞 8 無蒸氣噴出 水管被折疊 堵塞或損壞 與客戶服務部聯絡 水泵損壞 ...

Page 25: ...水 沒有把儲水箱完整推進到位 錯誤代碼解說 代碼 代碼解釋 可能成因 ER1 啟動了爐腔高溫保護裝置 爐腔溫度超過安全設定 ER2 啟動了蒸盤高溫保護裝置 蒸盤溫度超過安全設定 ER3 啟動了爐腔低溫保護裝置 連續工作 3 分鐘而爐溫度低於 30 C ER4 啟動了蒸盤低溫保護裝置 連續工作 3 分鐘而爐溫度低於 30 C ER5 感測器連接發生故障 連接爐腔或蒸盤的感測器斷路 ER6 感測器感應發生故障 連接爐腔或蒸盤的感測器發生短路 ...

Page 26: ...not working properly or if it has been damaged or dropped 5 Do not immense the power cord or plug in water Keep the cord away from hot surfaces Electrical shock fire or other hazards may result Make sure the power cord is away from the hot surfaces of the oven to avoid leakage fire or other hazards may result 6 This combi steamer is designed for free standing application Do not install as built in...

Page 27: ...ot designed for industrial or laboratory use 6 This appliance is not intended for use by persons including children with reduced physical sensory or mental capabilities unless used under supervision of a person responsible for their safety 7 WIPE OFF ANY RESIDUAL CONDENSATION that may be present in the cooled oven after cooking Don t forget the cavity ceiling which is easily overlooked Some foods ...

Page 28: ...od turning or other reasons during cooking avoid close contact near the oven door especially the face 17 It is dangerous to fix the appliance by anyone except professionally qualified person 18 If the oven door or door s sealing ring is damaged please stop using the appliance and call Whirlpool customer service 19 Accessible parts may become hot during use young children should be kept away 20 Do ...

Page 29: ...am to enter the cavity 10 Drip tray To collect excess water during cooking 11 Steaming Tray with holes Mainly for Steam program Its ventilation holes are designed for steam and other cooking programs For multi layers cooking it is recommended to use this tray in the lowest position in order to allow air circulation inside the cavity and provide an even temperature cooking 12 Steaming baking Tray O...

Page 30: ...30 14 Insulated Gloves To handle hot food or tray out of the oven 15 Sponge To clean the water in the cavity after using the oven ...

Page 31: ...NEL SIGNS FUNCTION Preset cooking time Time display Clock Alarm Water level display Temperature display Steam mode Grill mode Convection mode Convection Steam mode Sterilization Keep warm proving Defrost Child Lock ...

Page 32: ...tes 100 5 180 Mins 3hrs 50 110 Grill Mode 20 Minutes 180 5 180 Mins 3hrs 120 230 Convection Mode 20 Minutes 180 5 180 Mins 3hrs 120 230 Convection Steam Mode 20 Minutes 180 5 180 Mins 3hrs 120 230 Sterilization 20 Minutes 110 Default Setting Default Setting Keep Warm Proving 20 Minutes 40 5 180 Mins 3hrs Default Setting Defrost 20 Minutes 60 5 180 Mins 3hrs Default Setting SUGGESTED RECIPES Code D...

Page 33: ... Grilled whole chicken Meat Convection 180 40 Minutes 10 Baked Potato Whole Veggie Grill 200 25 Minutes 11 Bread 8pcs Pastry Convection 180 15 Minutes 12 Soufflé 6 cups Dessert Convection 180 15 Minutes 13 Grilled Spring Chicken Meat Convection Steam 220 40 Minutes 14 Apple pork chop Meat Convection Steam 200 22 Minutes ...

Page 34: ...time to 13 20 Steps 1 In standby mode press the button once 2 The hour digits flash press the button until 13 00 Press the button to confirm 3 The minute digits flash press the button until 13 20 Press the button to confirm 4 Time is set successfully ...

Page 35: ...ct cooking temperature 90 C Press the button to confirm 4 Make sure the water tank is filled with water The general steam mode is set successfully Setting of grill mode Example 30 minutes of grilling at 150 C Steps 1 In standby mode press the button to the grill icon which will flash Press the button to confirm 2 Press the button to reflect 00 30 Press the button to confirm 3 Press the button to r...

Page 36: ... at 190 C Steps 1 In standby mode press the button to the convection icon which will flash Press the button to confirm 2 Press the button to reflect 00 35 Press the button to confirm 3 Press the button to reflect cooking temperature 190 C Press the button to confirm 4 The convection mode is set successfully ...

Page 37: ...s the button to confirm 4 The convection steam mode is set successfully Setting of preset function Example Time is 13 30 now Need to preset 40 minutes of steaming at 100 C Target to finish at 15 10 Steps 1 In standby mode press the button to the steam icon Press the button to confirm 2 Press the button once 3 Set the current time The hour digits flash press the button to 13 00 Press the button to ...

Page 38: ...he ending time The hour digits flash press the button to 15 00 Press the button to confirm 6 The minute digits flash press the button to 15 10 Press the button to confirm 7 Set the temperature Press the button to 100 C Press the button to confirm 8 The preset function is set successfully ...

Page 39: ...39 Note Preset ending time can be checked by pressing the button once If the preset function has to be ended press the button and then press the button ...

Page 40: ... the button twice to start this function 3 The sterilization function is set successfully Setting of defrost function Example 15 minutes of defrosting Steps 1 In standby mode press the button to the defrost icon which will flash Press the button to confirm 2 Press the button to reflect 00 15 Press the button to confirm 3 Press the button again 4 The defrost function is set successfully ...

Page 41: ...ep the food warm for 50 minutes Steps 1 In standby mode press the button to the keep warm icon which will flash Press the button to confirm 2 Press the button to reflect 00 50 Press the button to confirm 3 The keep warm function is set successfully ...

Page 42: ...f child lock function Function To prevent children from using the oven without adult s supervision Steps 1 In standby mode press the button for 3 seconds 2 The child lock icon will show and oven cannot be operated ...

Page 43: ...upply before carrying out any cleaning or maintenance 4 Cleaning is required after each use especially if spill over have occurs 5 Do not use metal scoring pads abrasive cleansers steel wool pads gritty washcloths etc to clean which can damage the control panel baking and steaming pans and interior and external or appliance surfaces Use a sponge or soft cloth with a mild detergent or a paper towel...

Page 44: ...r 20 minutes to dissolve grease before cleaning Please clean the oven after cooling Please repeat above steps if there is any stubborn stain Never USE METAL SCOURING PADS ABRASIVE CLEANSERS steel wool pads gritty washcloths etc to clean oven 12 Clean oven regularly clean the oven at least once per month If oven is frequently used please clean oven frequently i Fill up the water tank ii Add some le...

Page 45: ...ean the food plate and oil collector plate Do not use METAL SCOURING PADS ABRASIVE CLEANSERS steel wool pads gritty washcloths etc to clean oven 18 Oven cavity top side and bottom should be cleaned and air dry after each use or cavity may be stained and turn yellow Stain can be removed with stainless steel cleanser eg Wpro Stainless Steel Cleanser SIDE RACKS AND BACK PANEL CLEANING 1 Unscrew the 4...

Page 46: ... is damaged Contact after sales service Parts in circuit board are damaged 4 Water or steam leaks out during cooking Oven door is not closed tightly Close the oven door tightly again Sealing ring on door is damaged Contact after sales service 5 Oven lamp fails to light Lamp is damaged Replace lamp Master C P B is damaged Contact after sales service 6 Fan motor fails to work Motor is damaged Contac...

Page 47: ...ow temperature protection Continue working for 3 minutes but temperature of cavity is lower than 30O C ER4 Steam plate low temperature protection Continue working for 3 minutes but temperature of cavity is lower than 30O C ER5 Sensor connection failure Sensor connection failure causing of open circuit ER6 Sensor sense failure Sensor sense failure causing of short circuit Whirlpool Hong Kong Ltd 17...

Reviews: