background image

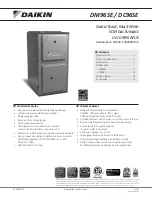
93% AND 95% 2-STAGE VARIABLE-SPEED GAS FURNACE 

INSTALLATION INSTRUCTIONS

These furnaces comply with requirements embodied in the 
American National Standard/National Standard of Canada ANSI 
Z21.47-CSA-2.3 Gas Fired Central Furnaces.

WPIO-368B

Tradewinds Distributing Company, LLC

14610 Breakers Drive

Jacksonville, Florida  32258

Whirlpool Gold

®

 Models

WGFD295,WGFM295

ATTENTION INSTALLATION PERSONNEL

As a professional installer, you have an obligation to know the product better than the customer. This includes all 
safety precautions and related items. Prior to actual installation, thoroughly familiarize yourself with this instruction 
manual. Pay special attention to all safety warnings. Often during installation or repair, it is possible to place 
yourself in a position which is more hazardous than when the unit is in operations. 

Remember, it is your responsibility to install the product safely and to know it well enough to be able to instruct a 
customer in its safe use. Safety is a matter of common sense...a matter of thinking before acting. Most dealers have 
a list of specific good safety practices...follow them.

The precautions listed in this installation manual are intended as supplemental to existing practices. However, if 
there is a direct conflict between existing practices and the content of this manual, the precautions listed here take 
precedence.

Placeholder

for Bar

Code

Summary of Contents for Gold WGFD295

Page 1: ...familiarize yourself with this instruction manual Pay special attention to all safety warnings Often during installation or repair it is possible to place yourself in a position which is more hazardous than when the unit is in operations Remember it is your responsibility to install the product safely and to know it well enough to be able to instruct a customer in its safe use Safety is a matter o...

Page 2: ... 21 Horizontal Installations Right Side Down 21 Horizontal Installations Left Side Down 22 Horizontal Drain Trap Mounting Left or Right Side Panel 23 ELECTRICAL CONNECTIONS 23 Wiring Harness 23 115 Volt Line Connections 23 Junction Box Relocation 23 24 Volt Thermostat Wiring 24 24 Volt Dehumidistat Wiring 25 Fossil Fuel Applications 25 115 Volt Line Connection of Accessories Humidifier and Electro...

Page 3: ...be performed by a qualified installer service agency or the gas supplier WARNING Goodman 45 This product contains or produces a chemical or chemicals which may cause serious illness or death and which are known to the State of California to cause cancer birth defects or other reproductive harm WARNING Goodman 47 Heating unit should not be utilized without reasonable routine inspection maintenance ...

Page 4: ...tic electricity by moving or shuffling your feet or touching ungrounded objects If you touch an ungrounded object repeat Step 2 before touching the control or wires 4 Follow steps 1 through 3 before removing a new control from its container or installing the control on a furnace Return any old or new controls to their containers before touching any ungrounded object ToTheInstaller Before installin...

Page 5: ...e rating plate 100 outside air is provided for combustion air requirements during construction Temporary ducting can be used NOTE Do not connect the temporary duct directly to the furnace The duct must be sized for adequate combustion and ventilation in accordance with the latest edition of the National Fuel Gas Code NFPA 54 ANSI Z223 1 or CAN CSA B149 1 Installation Codes The furnace heat exchang...
Page 6: ...equate supply of combustion air vent from a nearby uncontaminated room or from outdoors Refer to Combustion and Ventilation Air Requirements for details If the furnace is used in connection with a cooling coil unit install the furnace upstream or in parallel with the cooling coil unit Premature heat exchanger failure will result if the cooling coil unit is placed ahead of the furnace If the furnac...

Page 7: ...lding 4 Close fireplace dampers 5 Turn on clothes dryers and any appliance not connected to the venting system Turn on any exhaust fans such as range hoods and bathroom exhausts so they shall operate at maximum speed Do not operate a summer exhaust fan 6 Follow the lighting instructions Place the appliance being inspected in operation Adjust thermostat so appliance shall operate continuously 7 Tes...

Page 8: ...ctwork connections flue and combustion air pipe connections etc The basic application of this furnace as a horizontal furnace differs only slightly from an upright installation When installing a furnace horizontally additional consideration must be given to the following Drain trap and lines Leveling the furnace Alternate vent flue and combustion air connections Alternate electrical and gas line c...

Page 9: ...must cover the entire area under the furnace and air conditioning coil if applicable FreezeProtection Refer to Horizontal Applications and Conditions Drain Trap and Lines FurnaceSuspension If the furnace is installed in a crawl space it must be suspended from the floor joist or supported by a concrete pad NOTE Never install the furnace on the ground or allow it to be exposed to water Refer to Loca...

Page 10: ...turer s instructions for cutting cleaning and solvent cementing of PVC The use of Schedule 40 PVC Cellular Core Foam Core plastic pipe is also acceptable as a flue vent and intake pipe material PVC primer meeting ASTM F656 and PVC solvent cement meeting ASTM D2564 specifications must be used Fittings must be DWV type fittings meeting ASTM D2665 and ASTM D3311 Carefully follow the manufactures inst...

Page 11: ...ft 121 9 cm below 4 ft 121 9 cm horizontally from or 12 30 5 cm above any door window or gravity air inlet into any building The vent termination of a direct vent application must terminate at least 12 30 5 cm from any opening through which flue gases may enter a building door window or gravity air inlet The vent termination of vent pipe run vertically through a roof must terminate at least 12 30 ...

Page 12: ...clamps provided with the unit The counterflow rubber coupling allows service removal of air intake piping internal to the furnace blower compartment NOTE Because of probable material conflicts do not use other commercially available no hub connectors The combustion air intake pipe can also be secured directly to the counterflow unit air intake pipe coupling CombustionAirPipe NondirectVentInstallat...

Page 13: ...nt flue location base pan Plug remaining hole in the blower deck with the plastic plug included in the drain kit bag Upflow and Counterflow Units 8 Insert the cut section of the vent flue pipe and coupling into the alternate vent flue location 9 Attach the vent flue pipe and coupling to the induced draft blower using a rubber coupling and worm gear hose clamps provided in the drain kit bag 10 Secu...

Page 14: ...tallations secure field supplied combustion air intake pipe directly to the air intake coupling NOTE A PVC coupling or elbow is required on counterflow furnaces Alternate Combustion Air Intake Location Counterflow NondirectVent SinglePipe Piping Nondirect vent installations require only a vent flue pipe The vent pipe can be run horizontally with an exit through the side of the building or run vert...

Page 15: ... required for 2 5 1 cm diameter pipe A 3 7 6 cm diameter hole is required for a 2 6 4 cm pipe A 3 8 9 cm diameter hole is required for 3 7 6 cm diameter pipe To secure the pipe passing through the wall and prohibit damage to the piping connections a coupling should be installed on either side of the wall and solvent cemented to a length of pipe connecting the 2 couplings The length of pipe should ...

Page 16: ... on termination constructions For details concerning connection of pipes to the furnace refer to the Standard Furnace Connections or Alternate Furnace Connections in this section Vent FlueandCombustionAirPipe Lengthsand Diameters Refer to the following table for applicable length elbows and pipe diameter for construction of the vent flue and combustion air intake pipe systems of a direct vent dual...

Page 17: ...50 15 2 Alternate 2 or 2 5 12 or 6 4 58 17 7 55 16 8 52 15 8 49 14 9 46 14 43 13 1 40 12 2 37 11 3 70 000 Standard 2 or 2 5 12 or 6 4 49 14 9 46 14 43 13 1 40 12 2 37 11 3 34 10 4 31 9 5 28 8 5 3 7 6 71 21 6 68 20 7 65 19 8 62 18 9 59 18 56 17 1 53 16 2 50 15 2 Alternate 2 or 2 5 12 or 6 4 36 11 33 10 1 30 9 2 27 8 2 24 7 3 21 6 4 18 5 5 15 4 6 3 7 6 57 17 4 54 16 5 51 15 5 48 14 6 45 13 7 42 12 8...

Page 18: ...e Horizontal Vent Terminations Dual Pipe Standard Horizontal Terminations Dual Pipe Above Highest Anticipated Snow Level A 12 30 5 cm minimum B Combustion air intake pipe C 90º medium radius elbows D Tee E Vent flue pipe F 24 61 cm maximum 3 7 6 cm minimum G Screen H 12 30 5 cm minimum to roof or highest anticipated snow level E D C B G F A H E C B G F A H A 24 61 cm maximum 3 7 6 cm minimum B 12 ...

Page 19: ...installations the furnace s drain hoses may exit either the right or left side of the furnace NOTE If the alternate vent flue outlet is utilized in an upright installation the drain trap and drain connections must be located on the same side as the alternate vent flue outlet In horizontal installations the drain hoses will exit through the bottom down side of the furnace with the drain trap suspen...

Page 20: ...nt Flue Drain Hose Connections Upright installations using the alternate vent flue outlet will require right side only drain hoses to be connected as follows Refer to Vent Flue Pipe and Combustion Air Pipe for details on alternate vent flue pipe connection 1 Remove the rubber plug cap from the right side drain port on the front cover Save the rubber plug for later use 2 Secure Hose A to the drain ...

Page 21: ... the side panel NOTE Drain tubes must reach the bottom of the drain trap 2 Secure the drain trap to the side panel at the mounting holes dimples or crosshairs on counterflow models located below the grommet drain holes 3 Attach the PVC drain line to the drain trap outlet with either a 90 elbow or coupling HorizontalInstallations RightSideDown Horizontal installations with the right side down requi...

Page 22: ... to the down side to guard against blocked drain conditions Cut the hose to the appropriate length to minimize sagging Plug the right unused pressure tap with the rubber plug removed from the left side 3 Secure Hose A to the front cover drain port with a red hose clamp 4 Route Hose A to the rear left down side panel grommet holes NOTE For left side drainage grommets must be relocated to the left s...

Page 23: ...o Liquid Tight or by applying non reactive UL Listed CSA approved sealant to bushing Line polarity must be observed when making field connections Line voltage connections can be made through either the right or left side panel The furnace is shipped configured for a right side left side for counterflows electrical connection with the junction box located inside the burner compartment To make elect...

Page 24: ...uire a jumper between Y1 and O and Y1 and DEHUM respectively Thermostat R required if outdoor unit is equipped with a Comfort AlertTM module Thermostat Wiring Diagram Single Stage Thermostat Application NOTE Place jumper between Y1 and O for proper dehumidification operation and proper ramping profile operation NOTE To apply a single stage heating thermostat the thermostat selector switch on the i...

Page 25: ...s 5 Turn on power to furnace To enable the dehumidify function on the integrated control module set the dehumidification DEHUM DIP switch from Off to On Once the switch is set the dehumidify function is enabled during a combination call for cooling T Stat and dehumidification DEHUM Stat FossilFuelApplications This furnace can be used in conjunction with a heat pump in a fossil fuel application A f...

Page 26: ...nstallation altitude and usage of either Natural or propane gas Contact your distributor for a tabular listing of appropriate altitude ranges and corresponding manufacturer s high altitude Natural propane gas and or pressure switch kits NOTE Do not derate the furnace by adjusting the manifold pressure to a lower pressure than specified on the furnace rating plate The combination of the lower air d...

Page 27: ... joint unions Install a drip leg to trap dirt and moisture before it can enter the gas control valve The drip leg must be a minimum of 3 7 6 cm long Install a NPT pipe plug fitting accessible for test gage connection immediately upstream of the gas supply connection to the furnace Always use a backup wrench when making the connection to the gas control valve to keep it from turning NOTE The orient...

Page 28: ...s line hole D Gas control valve E Manifold F Burners G Ground joint pipe union H Grommet in standard gas line hole I Drip leg J Height required by local codes A B C D E G H I J F A B C D E F G H I J A Gas control valve B Ground joint pipe union C Manual shutoff valve upstream from ground joint pipe union D Drip leg E Grommet in standard gas line hole F Drain trap G Plug in alternate gas line hole ...

Page 29: ...g warning system All propane gas equipment must conform to the safety standards of the National Board of Fire Underwriters NBFU Manual 58 For satisfactory operation propane gas pressure must be 11 W C at the furnace manifold with all gas appliances in operation Maintaining proper gas pressure depends on 3 main factors Vaporization rate depending on temperature of the liquid and wetted surface area...

Page 30: ...0 1 500 2 400 3 700 1 500 3 400 60 18 3 300 700 1 300 2 200 3 300 1 300 3 100 80 24 4 260 610 1 200 1 900 2 900 1 200 2 600 100 30 5 220 540 1 000 1 700 2 600 1 000 2 300 125 38 1 200 490 900 1 400 2 300 900 2 100 150 45 7 190 430 830 1 300 2 100 830 1 900 175 53 3 170 400 780 1 200 1 900 770 1 700 200 61 160 380 730 1 100 1 800 720 1 500 Propane Gas Piping Chart II Tubing Size O D Type L Nominal ...

Page 31: ...furnace is used in connection with a cooling unit the furnace should be installed in parallel with or on the upstream side of the cooling unit to avoid condensation in the heating element With a parallel flow arrangement the dampers or other means used to control the flow of air must be adequate to prevent chilled air from entering the furnace and if manually operated must be equipped with means t...

Page 32: ...tral return register or in the return air ductwork Minimum Filter Requirements Chart Upflow Cooling Airflow Requirement CFM Permanent Minimum Filter Area sq in Based On 600 ft 182 9 m Per Minute Filter Face Velocity Input Airflow 600 800 1 000 1 200 1 400 1 600 2 000 0453 376 384 480 576 0704 627 627 672 768 0905 836 836 836 960 1155 940 940 940 960 Counterflow Cooling Airflow Requirement CFM Perm...

Page 33: ... Precautions in this manual 8 If no gas odor is detected move the furnace gas control valve manual control to the On position 9 Replace the burner compartment door 10 Open the manual gas shutoff valve external to the furnace 11 Turn on the electrical power to the furnace 12 Adjust the thermostat to a setting above room temperature 13 After the burners are lit set the thermostat to the desired temp...

Page 34: ...supply to furnace 9 Turn off any unnecessary gas appliances started in Step 4 Measuring Inlet Gas Pressure Alternate Method GasManifoldPressureMeasurementand Adjustment Only small variations in gas pressure should be made by adjusting the gas control valve pressure regulator The manifold pressure must be measured with the burners operating To measure and adjust the manifold pressure use the follow...

Page 35: ...d to the furnace If the dial is a one cubic foot dial divide the number of seconds recorded in Step 2 by one If the dial is a 2 cubic foot dial divide the number of seconds recorded in Step 2 by 2 4 Calculate the furnace input in Btu per hour Btu h Input equals the sum of the installation s gas heating value and a conversion factor hours to seconds divided by the number of seconds per cubic foot T...

Page 36: ...the furnace model locate the high stage cooling airflow charts in the Specification Sheet applicable to your model Look up the cooling airflow determined in Step 2 and find the required cooling speed and adjustment setting Example A WGFM295070V4C furnace installed with a 2 5 ton air conditioning system The airflow needed is 1 000 CFM Looking at the cooling speed chart for WGFM295070V4C find the ai...

Page 37: ...tches 7 and 8 appropriately Verify CFM by noting the number displayed on the dual 7 segment LED display In general lower heating speeds will reduce electrical consumption lower operating sound levels of the blower and increase the outlet air temperature delivered to the home The speeds available allow the blower performance to be optimized for the particular homeowner s needs To Set Airflow 1 Sele...

Page 38: ...tinue on low stage If the call is for high heat the gas control valve and induced draft blower will change to high stage Circulator blower is energized on heat speed following a fixed 30 second blower on delay The circulator blower requires 30 seconds to ramp up to full speed Electronic air cleaner terminal is energized with circulator blower Furnace is now operating on the specified stage called ...

Page 39: ... circuit checks Circulator blower is energized on continuous fan speed 30 of the furnace s maximum airflow capability following a 5 second delay Electronic air cleaner terminal is energized Circulator blower runs integrated control module monitors safety circuits continuously R and G thermostat contacts open completing the call for fan Electronic air cleaner terminal and circulator blower are de e...

Page 40: ...ce Improper filter maintenance is the most common cause of inadequate heating or cooling performance Filters should be cleaned permanent or replaced disposable every 2 months or as required When replacing a filter it must be replaced with a filter of the same type and size Filter Removal Depending on the installation differing filter arrangements can be applied Filters can be installed in either t...

Page 41: ...the recuperator coil front cover to expose the coil tubes and turbulators 6 Remove the recuperator coil turbulators individually by slowly pulling each turbulator forward firmly 7 Clean the recuperator coil tubes using a long handle wire brush such as a gun cleaning brush 8 Clean the primary heat exchanger tubes using a wire brush attached to a length of high grade stainless steel cable such as dr...

Page 42: ...tively repeated faults are stored a maximum of 3 times For example a clogged return air filter causes the furnace limit to trip repeatedly The control will only store this fault the first 3 consecutive times the fault occurs ResettingfromLockout Furnace lockout results when a furnace is unable to achieve ignition after 3 attempts during a single call for heat It is characterized by a nonfunctionin...

Page 43: ...th current replacement parts LED display indicates OP OP Normal operation Normal operation None Normal operation Furnace fails to operate Integrated control module LED display provides E0 error code E0 Furnace lockout due to an excessive number of ignition retries 3 total Failure to establish flame Cause may be no gas to burners front cover pressure switch stuck open bad igniter or igniter alignme...

Page 44: ...control module LED display provides E3 error code E3 Primary limit or auxiliary limit circuit is open Rollout limit circuit is open Insufficient conditioned air over the heat exchanger Blocked filters restrictive ductwork improper circulator blower speed or failed circulator blower Flame rollout Misaligned burners blocked flue and or air inlet pipe or failed induced draft blower Loose or improperl...

Page 45: ... conditioned air lower than typical Integrated control module LED display provides E7 error code E7 Problem with igniter circuit Improperly connected igniter Shorted igniter Poor unit ground Igniter relay fault on integrated control module Check and correct wiring from integrated control module to igniter Replace shorted igniter Check and correct furnace ground wiring Check igniter output from con...

Page 46: ...ce or integrated module is reversed Poor furnace ground Review wiring diagram to correct polarity Verify proper ground Correct if necessary Check and correct wiring Turn off power prior to repair Furnace fails to operate Integrated control module LED display provides d0 error code d0 Data not yet on network Furnace does not contain any shared data Populate shared data set using memory card Turn of...

Page 47: ...lower motor horse power in shared data set does not match circulator blower motor horse power Incorrect circulator blower motor in furnace Incorrect shared data set in integrated control module Verify circulator blower motor horse power is the same specified for the specific furnace model Replace if necessary Verify shared data set is correct for the specific model Repopulate data using correct me...

Page 48: ...tage to furnace Low AC line voltage to furnace High ambient temperatures Check power to furnace Verify line voltage to furnace is within the range specified on the furnace rating plate See Product Description and Location Requirements and Considerations for furnace installation requirements Turn off power prior to repair Furnace fails to operate Integrated control module LED display provides b7 er...

Page 49: ...ermination On S3 Cooling Speed Tap A Off Off B On Off C Off On D On On Adjust Taps Normal Off Off 10 On Off 10 Off On Normal On On S4 Ramping Profiles A Off Off B On Off C Off On D On On Heating Speed Tap A Off Off B On Off C Off On D On On S5 DEHUM Disabled Off Unused Enabled On Unused Indicates factory setting Not applicable Goodman 118 Long HIGH VOLTAGE WARNING To avoid personal injury or death...

Page 50: ...R HUM 3 Manual Reset Auxiliary Limit Controls 40 VA Transformer Y2 14 IND LO Manual Reset Rollout Limit Controls 9 W N Humidifier Indoor Air Circulator Blower High Fire Pressure Switch 2 Stage Gas Control Valve C W PSO 7 2 HUM 2 Circuit Connector Y GND VAC W Chassis Ground 2 3 Low Fire Pressure Switch Door Switch W OR 2 MVC 8 Hot Surface Igniter R W 2 24V Humidifier Integrated Control Module LINE ...

Page 51: ...AT 5 GY BK GND 2 W2 DELAY 7 1 C W2 W 115VAC Junction Box 3 GND FS 1 4 R Gas Control Valve 24V Thermostat Connections BU TH 4 C HI 1 24V Humidifier G Y C TR 11 OR G Hot Surface Igniter PS2 12 1 Color Codes L BR Diagnostic LEDs PK NO O 3 DEHUM 10 BU NO N See Notes GY PR COOL 40VA Transformer Induced Draft Blower To Micro WARNING Disconnect Power Before Servicing WiringTo Unit Must Be Properly Polari...

Page 52: ...e number in your correspondence Or call toll free 1 866 944 7575 WPIO 368B 2010 All rights reserved Registered Trademark TM Trademark of Whirlpool U S A Manufactured under license by Tradewinds Distributing Company LLC Jacksonville Florida Warranty provided by manufacturer All other trademarks are owned by their respective companies COMFORT COMMITMENT is a trademark of Tradewinds Distributing Comp...

Reviews: