background image

0

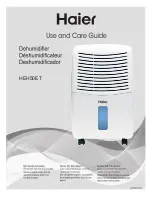
RAD-Y200H

RAD-Y250H

RAD-Y300H

<家庭用>

濾網安裝方法

Summary of Contents for RAD-Y200H

Page 1: ...0 RAD Y200H RAD Y250H RAD Y300H 家庭用 濾網安裝方法 ...

Page 2: ...如需維修請聯絡東芝服務中心 這様可能會造成短路或損壞電源線內部 ...

Page 3: ...會洩漏可燃性氣體 油的場所 抽 濕機附近有易燃氣體 可能 會導致火災和爆炸 桌上等高處 機體掉落時可能會損 壞 抽濕機及排水管周圍的溫度不可低 於冰點 排水管內的水可能會結冰 並在融化時弄濕傢俬 導致觸電 漏電或火災 水箱同時會破裂及漏 水 使用於藥物及化學品的場所 如翳院 抽濕機吹出的風不可直接對著燃燒 器具 可能會導致不完全燃燒 使用220V的交流電插座 擺放於平穩的地方或傾斜度2 以下的地方使用 ...

Page 4: ... 請檢查機體底部有沒有漏水 漏水會弄濕地板及造成附近物品損 毀 使用連續排水時應檢查排水管道 檢查排水管是否灣曲或接妥到機體 上 注水的容器例如花瓶 不可放置在 產品的上方 可能會導致觸電 漏 電 火災 請不要使用噴霧式殺蟲劑或揮發 性稀釋劑擦拭機體 可能因為破損導致傷害及漏水弄 濕屋內財物 或由於短路導致火 災或觸電 請不要坐或爬到機器上面 有可能 由於滑落 跌倒導致傷害 移動機器時 應先停止運轉 倒掉 水箱中的水 再握緊把手移動 待運轉停止後才拔出插頭 否則插 頭可能會受損 導致觸電 不可堵塞或放置濕衣服到進風口或 出風口 不可取下水箱的浮子 ...

Page 5: ...水箱 水箱把手 水箱蓋 前面板 後面板 頂蓋 導風葉 把手 繞線柱 排水口 過濾網 腳輪 三合一 多功能 過濾網 不能正常運作 ...

Page 6: ... 11 機內乾燥圖案 機內乾燥功能運作指示圖案 按下正負離子鍵顯示此圖 案 12 童鎖圖案 童鎖功能運作指示圖案 長按模式鍵3秒顯示此圖案 13 模式圖案 左邊為乾衣模式圖案 選擇乾衣模式時顯示此圖案 右邊為自 動除濕模式圖案 選擇自動除濕模式時顯示此圖案 14 風速圖案 上方為高風速圖案 選擇高風速時顯示此圖案 下方為低風速 圖案 選擇低風速時顯示此圖案 15 顯示屏 環境濕度顯示 濕度設置 以及定時狀態顯示定時時間 按鍵功能 1 功能鍵 機體內部乾燥功能 負離子功能 2 擺風鍵 擺風功能 3 睡眠鍵 睡眠模式 4 時間掣 定時設置 5 風速鍵 調整送風速度 6 電源鍵 開啟 關閉機器 7 濕度調節鍵 設定濕度 30 80 循環 8 模式鍵 自動抽濕模式 乾衣模式 ...

Page 7: ...9 啟動此模式 ...

Page 8: ...衣服 雅乾 正面迎厘吹 牛仔褲或裙 易乾 離機體較遠吹乾 薄衣服 易乾 遠離機體的地方吹 衣服乾燥俊要蛊快收起 潮渭季箭或下雨天氯 已乾燥的衣服需盄早收起 否削曾再次受潮 提示 以下情况峙 黑衣服比较雅乾 衣服多 衣服厚 嗯衣服的房陨大 衣服排放阁距小 房闹的溫度低 準借及榷韶 1 水箱的安装 I 水箱没有装好或满水峙 榄醴将不能湮韓 取出方法 將手伸進側面水箱上方的 把手 輕輕取出水箱 安装方法 將水箱蓋裝上 水箱把手旋轉放下 把水箱輕輕地放回正確位 置 再重新開啟抽濕機 講把水 箱把手整理好 把 水 箱 轻轻 地 装 回 原 位 oo 水箱盔 水箱排水口唯蛁已装 好 否剧可能曾漏水 水滿時請把水箱中的水清空 勹 厂 8 ...

Page 9: ...濾網安裝方法 將三合一多功能過濾網安裝於過濾網框 這樣可以淨化空氣 將配備的三合一多功能過濾網裝入過濾網框 將過濾網框裝回機體上 加上濾網後抽濕性能會下降 您可在抽濕時除下三合一多功能濾網 以達致最佳 抽濕效果 前置過濾網 三合一多功能過濾網 ...

Page 10: ......

Page 11: ...鍵 睡眠鍵 按下此鍵可開啟 關閉睡眠模式 按住為按鍵3秒可關 開啟屏顯功能 在運轉過程操作時間掣按鍵 可設定定時關機時間 ...

Page 12: ...沾在排水口周圍水可能 會滴下 請擦掉 ...

Page 13: ...排水管規格 ...

Page 14: ...水 水 頑固的污垢要用中性清潔劑沾濕軟布 扭乾後擦拭 ...

Page 15: ... Y300H 過濾網 零件編號 41226233 三合一多功能過濾網 2周1次 過濾網的髒物可用吸塵機吸乾淨 把吸塵機的吸力調低 取下過濾網框 取出三合一多功能過濾網 三合一多功能過濾網的灰塵 用吸塵機吸乾淨 然後水 洗 用毛巾擦乾後 放在通風的地方吹乾 充分吹乾後在安裝 三合一多功能過濾網禁止事項 a 不 可以用自來水以外的水清洗 b 不可揉 搓濾網 c 不可以加熱乾燥 d 不要直接陽光照射乾燥 e 乾燥時候不能施加物理壓力 三合一多功能 過濾網 過濾網 ...

Page 16: ......

Page 17: ...17 ...

Page 18: ...18 RAD Y200H RAD Y250H RAD Y300H 使用溫度範圍 5 32 3 15A 安裝三合一多功能過濾網後除濕性能會下降 ...

Page 19: ...ration and Confirmation Filter installation method How to Operate Continuous Drainage Maintenance Tips Operation Performance Troubleshooting Specifications 5 6 7 8 8 9 10 12 13 14 15 16 17 18 Table of Contents RAD Y200H RAD Y250H RAD Y300H 2 4 Family use Instruction Manual ...

Page 20: ...ock or injury Stop using the Dehumidifier immediately if abnormality or malfunction takes place Abnormal operation of the Dehumidifier may result in fire electric shock or injury that the Unit should be switched off and unplugged immediately then contact Toshiba Repairing Service Parts Centre for check up and repair Examples of abnormality Short circuit Foreign objects or liquid inserted Water lea...

Page 21: ...Do not operate the Dehumidifier in the following abnormal situations Prohibited Do not plug in or unplug the Dehumidifier with wet hand Doing so could result in electric shock No Wet Hand A place where it is likely to come into contact with water such as bathroom This could cause electric shock electric leakage and fire Where the unit may be subject to oil or flammable gas leakage The flammable ga...

Page 22: ...t in electric shock electric leakage and fire Check to ensure the drain hose is free of bent and properly inserted Do not put objects filled with water such as vase on the Unit This may cause electric shock electric leakage and fire Do not tilt or drop the Dehumidifier or it may result in damage leakage electric shock and malfunction Do not remove the Float from the Water Tank This may cause inter...

Page 23: ...mise the frequency of opening and closing doors and windows to save energy Keep enough space around the Dehumidifier Allow at least 50cm of air space above the Unit and at least 20 cm on four sides as shown in the diagram Operating noise It is recommended to place the Dehumidifier on top of a mat or rubber slab to reduce vibration and noise which may also prevent creating carpet depression or dent...

Page 24: ...tank is full 11 Drying icon inside the machine this icon indicating the operation of drying function inside the machine press the negative ion key to activate the function 12 Child lock icon this icon indicating the on off of child lock function long press the mode button for 3 seconds to display the icon 13 Mode icon these icons are indicate the operating mode correspondingly the left icon is the...

Page 25: ...d the Fan starts operating with the preset Fan Speed When the current humidity is lower than the preset humidity level by 5 the compressor stops operating Fan stops running When the current humidity is within the 5 range of the preset humidity level the Unit operates at the default operation mode with the humidity level preset at 50 Select high or low fan speed Place the laundry at the spot where ...

Page 26: ...aken down as soon as it is dry or otherwise it will absorb moisture from the air Tips The drying time will be longer in the following situations Insufficient space between the laundry Preparation and Confirmation Water Tank Insertion The Unit cannot operate if the Water Tank is not properly inserted or when it is full of water Taking out the Tank Put your hand into the clasp above the side tank an...

Page 27: ...purified Cont 9 Remove the filter frame behind the fuselage Install the 3 in 1 Multi function filter into the filter frame Put the filter frame back into the machine Note The dehumidification performance will be decreased after adding the filter You can remove the 3 in 1 Multi function filter during dehumidification to achieve the best dehumidification result ...

Page 28: ... Press the switch to turn on or off the Dehumidifier Choose between Automatic Mode and Laundry Drying Mode when turning on the Dehumidifier The corresponding indicator of the Mode chosen will illuminate The Child Lock function can be activated and deactivated by pressing and holding the switch for 3 seconds Humidity Selector The hum心ty level can be set in Automatic Mode with increment or decrement...

Page 29: ... set up Timer for switching the Unit on and off at specific times within a 24 hour period The Unit can be set to turn on and off at specific times during the operation of the unit The Unit can be set to turn on at specific time when it is not operating Timer setting can be cancelled by pressing the Timer button when asked to confirm the Timer setting The On and Off Timer can be set within a 24 hou...

Page 30: ...Coil up the power cord when moving the Dehumidifier 12 Insert the Water Tank back ...

Page 31: ......

Page 32: ...er Tank Handle and Lid to ensure proper installation 5 Insert the Water Tank back into the Unit No Wet Hand Unplugging Do not plug in or unplug the Dehumidifier with wet hand Doing so could result in electric shock Turn off the Unit and unplug the power cord before cleaning it to prevent electric shock Prohibited Do not remove the Float from the Water Tank Doing so could result in inoperability le...

Page 33: ...er with a towel and dry it in a well ventilated place Install after fully drying Prohibited items for 3 in 1 Multi function filter a Do not use water other than tap water for dry cleaning b Do not rub the filter c Can not be heated and dried d Don t dry it under direct sunlight e Do not apply physical pressure when dry Product Model RAD Y200H RAD Y250H RAD Y300H Filter Item No 41226233 3 in 1 Mult...

Page 34: ...ng increases with increasing humidity level and vice versa Eg Humidity level at 60 When the Unit operates at the preset Humidity Level it stops Dehumidifying Operation and the Fan runs at Low Speed The amount of moisture removed may be small in such a situation but this is not a malfunction How does a dehumidifier work The Unit draws moist air from the environment and cools it with evaporator 1 2 ...

Page 35: ...e Is the Air Intake blocked Clear the items blocking the Air Intake The sound of flowing water This is caused by the flow of refrigerant inside the Unit The drain hose is loosely attached Securely insert the drain hose The Drainage system is blocked Unclog the hose Frosted up This is not a malfunction that defrosting operation could be activated by the Drying Inside Operation 2 Error message code ...

Page 36: ...Operating temperature range 5 32 50 300 The dehumidification performance will be decreased after adding the 3 in 1 Multi function filter 18 ...

Reviews: