background image

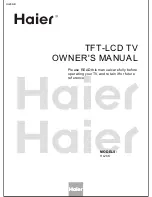
TELEVISION/VCR COMBINATION

Before operating the unit, please read this manual thoroughly.

MV13P2

OWNER’S MANUAL

ATTENTION

If you purchase a universal remote control from your local retailer, please
contact the remote manufacturer for the required programming code.

TV/CABLE MODE SELECTION

When shipped from the factory, the TV/CABLE selection is set to the “CABLE”
(Cable Television) position.
If not using Cable TV, set this selection to the “TV” position.

 5L80101C COV-IN

20/4/04, 16:18

1

Summary of Contents for MV13P2

Page 1: ... universal remote control from your local retailer please contact the remote manufacturer for the required programming code TV CABLE MODE SELECTION When shipped from the factory the TV CABLE selection is set to the CABLE Cable Television position If not using Cable TV set this selection to the TV position 5L80101C COV IN 20 4 04 16 18 1 ...

Page 2: ... not installed and used in accordance with the instructions may cause harmful interference to radio communications However there is no guarantee that interference will not occur in a particular installation If this equipment does cause harmful interference to radio or television reception which can be determined by turning the equipment off and on the user is encouraged to try to correct the inter...

Page 3: ...openings must not be blocked or covered The openings should never be blocked by placing the unit on a bed sofa rug or other similar surface This unit should never be placed near or over a radiator or heat source This unit should not be placed in a built in installation such as a bookcase or rack unless proper ventilation is provided or the manufacturer s instructions have been adhered to 10 POWER ...

Page 4: ...cable system is grounded to provide some protection against voltage surges and built up static charges Section 810 of the National Electrical Code NEC ANSI NFPA 70 provides information with respect to proper grounding of the mast and supporting structure grounding of the lead in wire to an antenna discharge unit size of grounding conductors location of antenna discharge unit connection to groundin...

Page 5: ...rounding system of the building as close to the point of cable entry as practical EXAMPLE OF ANTENNA GROUNDING AS PER THE NATIONAL ELECTRICAL CODE ANTENNA LEAD IN WIRE GROUND CLAMP ANTENNA DISCHARGE UNIT NEC SECTION 810 20 ELECTRIC SERVICE EQUIPMENT GROUNDING CONDUCTORS NEC SECTION 810 21 GROUND CLAMPS NEC NATIONAL ELECTRICAL CODE POWER SERVICE GROUNDING ELECTRODE SYSTEM NEC ART 250 PART H S2898A ...

Page 6: ...correct speed When a tape reaches its end during play back recording except during OTR and Timer Record and fast forward it will automatically stop rewind stop and eject the tape Programmable ON OFF Timer Allows you to automatically turn on or off the TV VCR at a set time Programmable TV Sleep Timer Operable from the remote control the TV can be programmed up to 120 minutes to turn off automatical...

Page 7: ...AND UNLOADING A VIDEO CASSETTE 33 PLAYBACK 35 SPECIAL PLAYBACK 37 RECORDING RECORDING A TV PROGRAM 39 ONE TOUCH TIMER RECORDING OTR 41 TIMER RECORDING 42 OTHER FUNCTIONS FOR THE TIMER RECORDING 44 ADDITIONAL INFORMATION USING THE REAL TIME TAPE COUNTER 45 USING ZERO RETURN 46 VIDEO INDEX SEARCH SYSTEM TO MONITOR A TV PROGRAM 47 DUPLICATING A VIDEO TAPE 48 RECEPTION DISTURBANCES 49 PROBLEM AND TROU...

Page 8: ...MOISTURE CONDENSATION DO NOT OPERATE ANY FUNCTIONS ON THIS UNIT FOR AT LEAST THREE HOURS WHEN MOISTURE IN THE AIR CONDENSES ON IT LET THE UNIT STAND WITH POWER ON SEE BELOW WHAT IS MOISTURE CONDENSATION When a cold liquid is poured into a glass for example water vapor in the air will condense on the surface of the glass This is called moisture condensation MOISTURE WILL CONDENSE ON THE UNIT IN THE...

Page 9: ...and disconnect the antenna TO USE AC POWER Use the AC polarized line cord provided for operation on AC Insert the AC cord plug into a standard 120V 60Hz polarized AC outlet NOTES Never connect the AC line cord plug to anything other than the specified voltage 120V 60Hz Use the attached power cord only If the polarized AC cord does not fit into a nonpolarized AC outlet do not attempt to file or cut...

Page 10: ...able from the antenna or Cable TV service to this jack 16 AC power cord Connect to a 120V 60Hz outlet 15 FRONT 1 Cassette loading slot To insert or remove a video tape 2 POWER button Press to turn the TV VCR on or off 3 TIMER REC indicator Lights when the unit is in the Timer Record Mode 4 REC indicator Lights up when the TV VCR is recording 5 PLAY button Press to play a prerecorded tape 6 REW Rew...

Page 11: ...annel set into memory Press the button to change to a lower numbered channel set into memory cursor Selects an item in the menu 14 PAUSE STILL button During recording this button temporarily stops the tape During playback it stops the tape and displays a still image on the TV screen 15 FF Fast Forward button In the Stop mode this button rapidly winds the tape forward In the Play mode this button a...

Page 12: ...rge batteries not intended to be recharged they can overheat and rupture Follow battery manufacturer s directions EFFECTIVE DISTANCE OF THE REMOTE CONTROL REMOTE CONTROL CONTINUED Install two AAA batteries paying attention to the polarity diagram in the battery compartment Slide the battery compart ment cover in the direction of the arrow Replace the compartment cover 1 2 3 15 FEET NOTES When ther...

Page 13: ...ohm twin lead wire to the combiner not supplied Connect the VHF 300 ohm twin lead wire to the 300 75 ohm matching trans former Attach the transformer to the combiner then attach the combiner to the antenna jack Connect the VHF 75 ohm cable and UHF 300 ohm twin lead wire to the combiner not supplied Attach the combiner to the antenna jack Separate VHF UHF antennas 75 ohm VHF cable and 300 ohm UHF t...

Page 14: ...hannel of the converter descrambler box usually channel 3 or 4 and use the converter descrambler box to select channels FOR SUBSCRIBERS TO SCRAMBLED CABLE TV SERVICE ANT 75 ohm coaxial cable If you subscribe to a cable TV service in which basic channels are unscrambled and premium channels require the use of a converter descrambler box you may wish to use a signal splitter and an A B switch box av...

Page 15: ...Press or to select START then press ENTER If you select CANCEL and press ENTER the STARTING SETUP stops and changes to the TV screen 2 3 1 2 LANGUAGE IDIOMA LANGUE ENGLISH ESPAÑOL FRANCAIS ENTER CHANNEL PLAN TV CABLE ENTER AUTO SETUP START CANCEL ENTER AUTO CH MEMORY STOP CANCEL AUTO CLOCK STOP CANCEL A 1 1 CANCEL ENTER ENTER ENTER Press POWER The starting setup function begins and the Language se...

Page 16: ...o select option This TV VCR can display the on screen language in English Spanish or French Select the language you prefer first then proceed with the other menu options Press or to select LANGUAGE then press A 4 Press MENU repeatedly until the MENU screen is cleared Press or to select the desired language English ENGLISH Spanish ESPAÑOL or French FRANCAIS then press ENTER 2 1 4 1 LANGUAGE IDIOMA ...

Page 17: ...B A to select your time zone then press ENTER ATLANTIC GMT 4 hours GMT Greenwich Mean Time EASTERN GMT 5 hours CENTRAL GMT 6 hours MOUNTAIN GMT 7 hours PACIFIC GMT 8 hours ALASKA GMT 9 hours HAWAII GMT 10 hours AUTO AUTO SET 5 Press MENU repeatedly until the menu screen is cleared NOTE To be able to select the standard time the clock must first be set by AUTO CLOCK once When shipped from factory t...

Page 18: ...ght saving time in your area always select OFF in step 3 3 Press the or to select one of the options then press ENTER Press MENU repeatedly until the menu screen is cleared When you want to set the daylight saving time manually on the first Sunday in April you set to ON and on the last Sunday in October you set to OFF DAYLIGHT SAVING TIME SETTING You can set the daylight saving time automatically ...

Page 19: ...SET then press A NOTES After a power failure or disconnection of the power plug the time display will be lost In this case set the present time again if the auto clock did not set correctly To move cursor backward press 3 8 30 AM SAT EXAMPLE Setting the clock to 8 30 AM 27th SAT March 2004 4 Press B or A to set the month then press Set the day year and time as in step 3 then press ENTER After sett...

Page 20: ... is in the CABLE position channels can be selected as follows TO SELECT CABLE CHANNELS 1 9 Press 0 twice then 1 9 as needed Example to select channel 2 press 002 10 12 Press 0 then the remaining 2 digits Example to select channel 12 press 012 13 99 Press the 2 digits in order Example to select channel 36 press 36 100 125 Press the 3 digits in order Example to select channel 120 press 120 TV OPERAT...

Page 21: ...CR s sound will be silenced and MUTE will briefly appear on the screen The sound can be switched back on by press ing this button again or one of the VOL or CHANNEL MUTE MUTE Press and release CH or The channel automati cally stops at the next channel set into memory For proper operation before selecting channels they should be set into the memory See pages 23 and 24 To memorize channels CH 012 NO...

Page 22: ...yed back on a VCR with the closed captioned text intact The closed captioning text will disappear during cue rewind and pause modes or if the VCR tracking is not adjusted properly Closed captioned text is only displayed in locations where it is available If the call display is on the closed captioning text will not appear SLEEP CAPTION CH 1 CH 012 SLEEP 120 To set the TV VCR to turn off after a pr...

Page 23: ...a VCR with the closed captioned text intact The closed captioned text will disappear during cue fast forward search review eewind search and pause modes or if the VCR tracking is not adjusted properly TO VIEW CLOSED CAPTIONS Press CLOSED CAPTION on the remote control to switch between normal TV and the two closed caption modes captions and full screen text Captions This closed caption mode will di...

Page 24: ...RR SSS TTT UUU VVV WWW XXX YYY ZZZ 86 87 88 89 90 91 92 93 94 95 96 97 98 99 100 101 102 103 104 105 106 107 108 109 110 111 112 A 5 A 4 A 3 A 2 A 1 100 101 102 103 104 105 106 107 108 109 110 111 112 113 114 115 116 117 118 119 120 121 122 123 124 125 01 113 114 115 116 117 118 119 120 121 122 123 124 125 5A TV CABLE SELECTION This TV VCR is equipped with a channel memory feature which allows cha...

Page 25: ...T T V M O N I T O R S K I P S E A R C H EJECT V O L V O L C H C H R E C Press MENU Press B or A to select option Press or to select AUTO CH MEMORY then press A AUTOMATIC MEMORY TUNING 2 4 Press MENU repeatedly until the menu screen is cleared The TV VCR will begin memorizing all the channels available in your area Channel numbers will remain red until auto memorizing is complete 1 4 MENU TV CABLE ...

Page 26: ...O ADD DELETE CHANNELS Select the desired channel to be memorized or deleted using or Direct channel selection 0 9 TV CABLE AUTO CH MEMORY ADD DELETE MENU CABLE Press B or A to select ADD or DELETE If you select an unmemorized channel the channel indication will be red If you select ADD the channel indication changes from red to green and the channel will be memorized If you select a memorized chan...

Page 27: ...W PASSWORD Ð Ð Ð Ð 0 9 ENTER CANCEL MENU V CHIP SET NEW PASSWORD Ð Ð Ð Ð Enter the same password again for safety then press ENTER 4 0 9 ENTER CANCEL MENU V CHIP SET NEW PASSWORD 0 9 ENTER CANCEL MENU V CHIP SET CONFIRM PASSWORD TO REGISTER PASSWORD SETTING THE V CHIP 5 Press B or A to select option Press MENU appears instead of the number V CHIP SET menu appears 1 2 3 4 1 2 3 4 2 1 5 4 An age lim...

Page 28: ...signal TO SET THE V CHIP Press or to select TV RATING then press B or A to display the desired setting In the V CHIP menu press or to select V CHIP SET then press A 2 When you select TV Y7 TV PG TV 14 or TV MA press CALL to explain the rating Press or to select the desired rating you want Press B or A to select the set ting ON or OFF OFF TV RATING is not set TV Y All children TV Y7 7 years old and...

Page 29: ...o V CHIP menu screen Press or to select V CHIP Press B or A to display ON ENTER MENU TV Y7 PG 13 V CHIP SET TV RATING MOVIE RATING 4 5 V CHIP V CHIP SET CHANGE PASSWORD MENU OFF 6 V CHIP V CHIP SET CHANGE PASSWORD MENU ON 7 OFF MOVIE RATING is not set G All ages PG Parental guidance PG 13 Parental guidance less than 13 years old R Under 17 years old Parental guidance suggested NC 17 17 years old a...

Page 30: ... using Direct channel selection 0 9 then press ENTER 5 Press or to select CHANGE PASSWORD then press A 6 Enter the new password using Direct channel selection 0 9 then press ENTER 7 Enter the same password again to confirm then press ENTER 8 Press MENU repeatedly until the menu screen is cleared SETTING THE V CHIP CONTINUED MENU V CHIP SET PASSWORD Ð Ð Ð Ð V CHIP SET PASSWORD 0 9 ENTER CANCEL MENU...

Page 31: ...rect the desired setting Press B or A to set the desired hour then press Set the desired minute channel and daily or weekly timer date as in step 4 TO SET THE ON TIMER ON TIMER 7 00AM CH 001 SUN SAT OFF TIMER 12 00AM ENTER MENU CANCEL CANCEL ON TIMER 7 00AM CH 012 MON FRI OFF TIMER 12 00AM ENTER MENU CANCEL CANCEL 4 5 SET CANCEL ON TIMER 7 00AM CH 012 MON FRI OFF TIMER 12 00AM ENTER MENU Press B o...

Page 32: ...gram the OFF TIMER once the TV VCR will automatically turn off at the same time everyday ON TIMER 12 00AM CH 001 SUN SAT OFF TIMER 11 00PM ENTER MENU CANCEL CANCEL Press B or A to set the de sired hour then press ON TIMER 12 00AM CH 001 SUN SAT OFF TIMER 11 30PM ENTER MENU CANCEL SET ON TIMER 12 00AM CH 001 SUN SAT OFF TIMER 11 30PM ENTER MENU CANCEL CANCEL 6 5 4 Press B or A to select SET then pr...

Page 33: ...them at any time PICTURE CONTROL ADJUSTMENTS 2 Press or to select PICTURE then press A 1 Press MENU repeatedly until the menu screen is cleared NOTE To reset the picture adjustments to the factory settings press CANCEL in the PICTURE menu All settings reset to the factory settings Press MENU Press B or A to select option Press or until the item you want to adjust is highlighted then press B or A t...

Page 34: ...EX STOP P L A Y FF REW C O U N T E R R E S E T T V M O N I T O R S K I P S E A R C H E J E C T V O L V O L C H C H R E C Press MENU Press B or A to select option Press or to select PICTURE PREFERENCE then press A Press or to select the desired picture mode then press ENTER ADJUSTING THE PICTURE PREFERENCE 1 3 2 You can select four picture modes Sports Standard Movie and Memory as described in the ...

Page 35: ...IDEO CASSETTE UNLOADING Pull the cassette out 1 LOADING AUTOMATIC EJECT If the TV VCR automatically rewinds the tape to the beginning AUTO REWIND FEATURE the tape will be ejected automatically See NOTE on page 40 NOTES Always eject the tape when not in use The cassette tape can be ejected even if the POWER is OFF OR To unload a video cassette press EJECT on the remote control or press STOP EJECT o...

Page 36: ...record over the tape Cover the hole with adhesive tape Be careful the tape does not extend past the edges of the video cassette housing VIDEO CASSETTE TAPE TAPE SPEED AND MAXIMUM PLAYBACK RECORDING TIME TO PREVENT ACCIDENTAL ERASURE TO RECORD AGAIN SP Standard Play SLP Super Long Play Adhesive tape Erase prevention tab Screwdriver LOADING AND UNLOADING A VIDEO CASSETTE CONTINUED 5L80101C P34 43 20...

Page 37: ... O L V O L C H C H R E C TO START PLAYBACK 1 2 PLAYBACK To play a prerecorded tape To turn on the TV VCR press POWER Load a prerecorded tape When loading a cassette tape without the erase prevention tab playback will start automatically 3 1 TO STOP PLAYBACK 3 Press PLAY to begin playback will appear on the screen NOTE This TV VCR selects the playback tape speed SP or SLP automatically Press STOP o...

Page 38: ...ICTURE SEARCH If you want to see the tape during REW or FF mode press and hold REW or FF The backward or forward visual search picture will be seen on the screen Release to return to the REW or FF mode MANUAL TRACK Ð DIGITAL TRACKING CONTROLS DIGITAL TRACK When a tape is played the digital auto tracking system automatically adjusts the tracking to obtain the best possible picture If noise bars app...

Page 39: ... fast forward a tape press STOP and then press REW or FF SPEED SEARCH TIMES PICTURE SEARCH SPEED PRESS TWICE 5 X 15 X TAPE SPEED PRESS ONCE 3 X 9 X SP Standard Play SLP Super Long Play NOTES Best results during speed search and still playback can be obtained with video cassettes recorded in the SLP mode The audio output is muted during speed search and still A few noise bars will appear on the TV ...

Page 40: ... ON Press MENU Press B or A to select option Press or to select AUTO REPEAT Press MENU repeatedly until menu screen is cleared If you press PLAY the tape will play over and over until the repeat mode is canceled Press B or A to select ON NOTE To cancel auto repeat function follow above steps 1 and 2 then press B or A to select OFF Press MENU to return to the TV The auto repeat function is canceled...

Page 41: ... TV PROGRAM RECORDING A TV PROGRAM TV VHF UHF channels CABLE Cable TV channels To turn on the TV VCR press POWER 00 00 00 SP 2 4 3 1 Press SPEED to select the desired tape speed SP or SLP The counter and SP or SLP will ap pear on the screen about 4 seconds Set the TV CABLE selection to the appropriate position see page 22 NOTES If power is switched off during recording the TV set goes off and the ...

Page 42: ...ged to the stop mode after five minutes to prevent damage to the tape CH 012 or REC REC Press STOP to stop recording will appear on the screen NOTES AUTO REWIND FEATURE This TV VCR will automatically rewind the video cassette when the tape has ended except during OTR and timer recording It will also eject the video cassette If the erase prevention tab is removed the tape will eject when both REC a...

Page 43: ... 2 00 10 times NORMAL REC 6 times 3 00 7 times 4 00 8 times 5 00 Press Recording time OR Press SPEED to select the desired tape speed SP or SLP SP or SLP will appear on the screen The One touch Timer Recording feature provides a simple and convenient way to make a timed recording ONE TOUCH TIMER RECORDING OTR 00 00 00 SP 2 Press Direct channel selection 0 9 or CH or to select the channel to be rec...

Page 44: ...e TV VCR will automatically turn on Set the TV CABLE selection to the appropriate position see page 22 Press or to select TIMER REC SET then press A Press MENU Press B or A to select option 1 4 3 TIMER REC SET DATE 2 3 THU START 8 3 0AM END Ð Ð Ð Ð CH 0 1 2 SPEED MENU S P ENTER MENU NOTES If programming is performed without a tape in the TV VCR or with a tape without an erase prevention tab the ti...

Page 45: ... resumption of power In this case reset the clock see pages 15 17 and reprogram any timer recordings 3 6 To set the timer for another program repeat steps 3 to 6 to set the second program 5 Set the start time end time channel and tape speed as in step 4 8 7 2 3 T H Ð Ð Ð Ð Ð Ð Ð Ð Ð Ð Ð Ð Ð Ð Ð Ð Ð Ð Ð Ð Ð Ð Ð Ð Ð Ð Ð Ð Ð Ð Ð Ð Ð Ð Ð 7 0 0PM 9 3 0PM 0 0 7 Ð Ð Ð Ð Ð Ð Ð Ð Ð Ð Ð Ð Ð Ð Ð Ð Ð Ð Ð Ð Ð ...

Page 46: ...ge 42 press B repeatedly The setting changes as follows TO CONFIRM THE SETTINGS Press PROGRAM once The TV screen displays the timer program list Press PROGRAM again The TV screen displays the ON OFF timer setting Press PROGRAM 3 times The screen returns to the normal screen TO CANCEL A PROGRAM Select option in the menu Press or to select TIMER REC SET then press A Press or to select the unnecessar...

Page 47: ...reset to 00 00 00 The counter does not function on nonrecorded blank sections of the tape When you rewind fast forward or play tapes through blank sections the counter stops 1 2 Press COUNTER RESET to set the counter to 00 00 00 Begin playback or recording the counter will display the elapsed time When you wish to make the counter disappear press CALL again 8 40AM THU 00 00 00 SP CH 012 00 30 50 S...

Page 48: ...AM THU CH 012 4 The zero return function provides a convenient method of rapidly returning to the starting point of recording or playback The starting point can be indexed for any location on the tape by pressing COUNTER RESET and ZERO RETURN USING ZERO RETURN Press CALL Before playback or recording press COUNTER RESET to set the counter to 00 00 00 9 00AM THU 00 00 00 SP CH 012 Press STOP Begin p...

Page 49: ...g temporarily the INDEX mark is not recorded on the tape The index search function automatically records an INDEX mark on the tape whenever a recording is initiated Index search Press INDEX or during stop or play mode For succeeding programs Press INDEX For preceding programs Press INDEX Additional press increases the INDEX No up to 9 When the INDEX or is pressed the unit starts searching the INDE...

Page 50: ...nnect the TV VCR to another VCR or Camcorder you can duplicate a previously recorded tape Make all connections before turning on the power To AUDIO OUT To VIDEO OUT Playback VCR Audio Video cable not supplied To Video Audio In Audio Video cable not supplied To AV jack Recording TV VCR CONNECTION TO CAMCORDER For duplicating a previously recorded tape from a camcorder follow the camcorder manufactu...

Page 51: ... such as drills or hair dryers SNOW If the TV VCR is located far from the TV station in a fringe reception area where the signal is weak small dots may appear in the picture If the signal is extremely weak the installation of a larger external antenna may be necessary RADIO FREQUENCY INTERFERENCE RFI Caused by two way radios this type of interference produces moving ripples or diagonal streaks in ...

Page 52: ...tor is not connected or possible local interference TV station experiencing problems Picture control is not adjusted Possible local interference Antenna CABLE connector is not connected or possible local interference TV station experiencing problems Antenna CABLE connector is not connected or possible local interference Cable TV channel is scrambled CABLE connector is not connected TV CABLE select...

Page 53: ...the TIMER REC buttons The TIMER REC indicator is lit Tape is old or worn Tracking adjustment is beyond range of automatic tracking circuit Video heads are dirty Replace the tape Adjust tracking manually using the TRACKING or button on the remote control Clean the video heads Aim the remote control at the remote sensor Operate within 15 feet or reduce the light of the room Clear the path of the bea...

Page 54: ...LEANING VIDEO HEAD CLOGGING The video heads are the means by which the TV VCR reads the picture from the tape during playback In the unlikely event that the heads become dirty enough to be clogged no picture will be played back This can easily be deter mined if during playback of a known good tape there is good sound but no picture picture is extremely snowy If this is the case use a high quality ...

Page 55: ...are responsible for all transportation and insurance charges for the set to and from the Service Station Rental Units The warranty for rental units begins with the first rental or thirty 30 days from the date of shipment to the rental firm whichever comes first Commercial Units Products sold and used for commercial use have a limited ninety 90 day warranty for all parts labor and picture tube Owne...

Page 56: ...n implied warranty lasts when an action may be brought or the exclusion or limitation of incidental or consequential damages so the above provisions may not apply to you ATTENTION CANADIAN CONSUMERS Canadian consumers are requested to complete the special Canadian Warranty Registration Form enclosed and forward this completed form with a copy of bill of sale to TOSHIBA OF CANADA to Register and Va...

Reviews: