Toshiba 55 X98 Series, Operating Instructions Manual
The Toshiba 55 X98 Series user manual, specifically the Operating Instructions Manual, is available for free download at manualshive.com. Get comprehensive guidance and essential insights on operating this incredible product hassle-free, ensuring optimal performance and an unparalleled viewing experience. Access the manual now and unlock the full potential of your Toshiba 55 X98 Series.
Share
Download


Reviews:
No comments
Related manuals for 55 X98 Series
SBB-MBOX
Brand: Samsung Pages: 2
UN85S9AF
Brand: Samsung Pages: 2
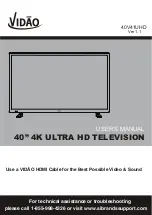
40V41UHD
Brand: Vidao Pages: 36

G50UW40A
Brand: SONIQ Pages: 24
U750CV-UMR
Brand: Sceptre Pages: 58
MD 31435
Brand: Medion Pages: 69
ULTRAVIEW UV492
Brand: peerless-AV Pages: 72
eiq-43UHDT2SMH
Brand: ElectrIQ Pages: 44
55BL00H7-01
Brand: Bolva Pages: 35
ATV60UHDW-1122
Brand: Bauhn Pages: 56
UA49MU7500
Brand: Samsung Pages: 44
UE55HU8500T
Brand: Samsung Pages: 99
UN43TU8000F
Brand: Samsung Pages: 165
HG43CU700 Series
Brand: Samsung Pages: 30
QA75Q60RAWXXY
Brand: Samsung Pages: 24
Crystal UHD UA50TU8500J
Brand: Samsung Pages: 44
HJ690W Series
Brand: Samsung Pages: 62
HG43BU800A
Brand: Samsung Pages: 56


