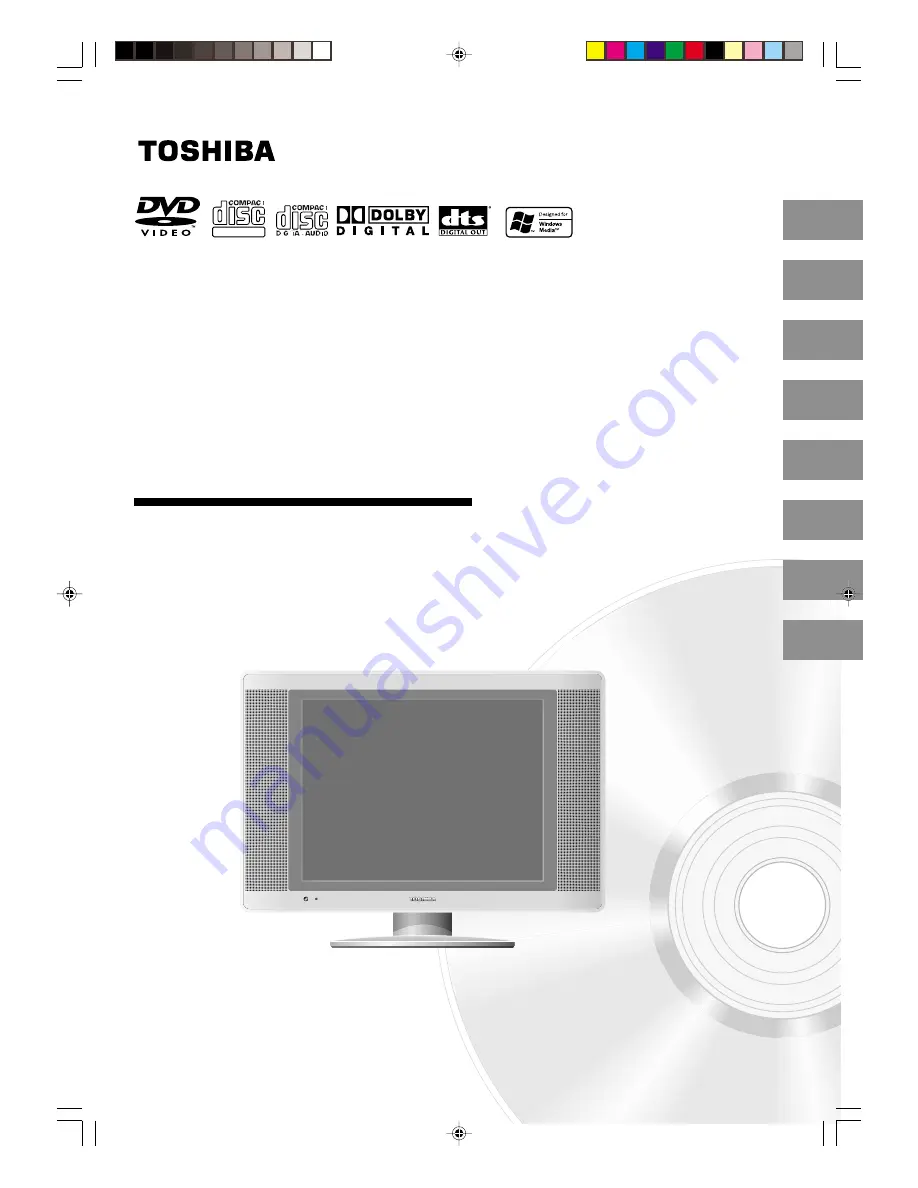
background image

14DLV75

OWNER’S MANUAL

2

14

21

31

34

43

Introduction

Connections

Basic setup

Basic playback

Advanced playback

Function setup

DIGITAL VIDEO

47

Others

23

TV operation

©2005 Toshiba Corporation
Before operating the unit, please read this manual thoroughly.

14-inch Diagonal LCD TV/DVD
COMBINATION

*Screen size is approximate.

*

J5N00621A [E] (Cover)

14/01/2005, 7:42 PM

1

Summary of Contents for 14DLV75

Page 1: ...Basic playback Advanced playback Function setup DIGITAL VIDEO 47 Others 23 TV operation 2005 Toshiba Corporation Before operating the unit please read this manual thoroughly 14 inch Diagonal LCD TV DVD COMBINATION Screen size is approximate J5N00621A E Cover 14 01 2005 7 42 PM 1 ...

Page 2: ... and found to comply with the limits for a Class B digital device pursuant to Part 15 of the FCC Rules These limits are designed to provide reasonable protection against harmful interference in a residential installation This equipment generates uses and can radiate radio frequency energy and if not installed and used in accordance with the instructions may cause harmful interference to radio comm...

Page 3: ...tion and to ensure reliable operation of the unit and to protect it from overheating These openings must not be blocked or covered The openings should never be blocked by placing the unit on a bed sofa rug or other similar surface This unit should never be placed near or over a radiator or heat source This unit should not be placed in a built in installation such as a bookcase or rack unless prope...

Page 4: ... electric shock Never spill or spray any type of liquid into the unit 17 OUTDOOR ANTENNA GROUNDING If an outside antenna or cable system is connected to the unit be sure the antenna or cable system is grounded to provide some protection against voltage surges and built up static charges Section 810 of the National Electrical Code NEC ANSI NFPA 70 provides information with respect to proper groundi...

Page 5: ...olume sound it may cause hearing damage 25 LASER BEAM Do not look into the opening of the disc slot or ventilation opening of the product to see the source of the laser beam It may cause sight damage 26 DISC Do not use a cracked deformed or repaired disc These discs are easily broken and may cause serious personal injury and product malfunction 27 LCD Do not press hard or jolt the LCD panel It may...

Page 6: ... unit may become warm after a long period of use This is not a malfunction When the unit is not in use be sure to remove the disc and turn off the power If you do not use the unit for a long period the unit may not function properly in the future Turn on and use the unit occasionally Notes on locating Place the unit on a level surface Do not use it on a shaky or unstable surface such as a wobbling...

Page 7: ...er limited viewing uses only unless otherwise authorized by Macrovision Reverse engineering or disassembly is prohibited On handling discs Do not touch the playback side of the disc For example handle the disc so that it is shown in figure below Do not attach paper or tape to discs On cleaning discs Fingerprints and dust on the disc cause picture and sound deterioration Wipe the disc from the cent...

Page 8: ...ome of these discs may be incompatible Notes on discs continued About this owner s manual This owner s manual explains the basic instructions of this unit Some DVD video discs are produced in a manner that allows specific or limited operation during playback As such the unit may not respond to all operating commands This is not a defect in the unit Refer to instruction notes of discs may appear on...

Page 9: ... control adjustment 30 Stereo and Second Audio Program SAP 30 Basic playback Playing a disc 31 Advanced playback Zooming 34 Locating desired scene 34 Repeat playback 35 A B Repeat playback 35 Program playback 36 Random playback 36 Changing angles 37 Title selection 37 DVD menu 37 Changing soundtrack language 38 Subtitles 38 Karaoke playback 39 Disc status 39 To turn off the PBC 39 MP3 WMA JPEG CD ...

Page 10: ... of controls See the page in for details POWER button 21 31 STOP button 32 EJECT button 23 VOLUME buttons PLAY button Remote sensor 31 POWER indicator CHANNEL 4 3 buttons 22 SKIP buttons 33 Front J5N00621A E P08 13 14 01 2005 7 43 PM 10 ...

Page 11: ...N L R LINE 1 IN jacks S VIDEO LINE 1 IN jack COMPONENT VIDEO IN Y PB CB PR CR jacks Approx 5 Approx 15 Side Rear Adjusting the angle of the base You can adjust the angle of the TV screen for 5 forward or for 15 backward from vertical angle Hold the base of the TV while adjusting the angle Left Side Right Side J5N00621A E P08 13 14 01 2005 7 43 PM 11 ...

Page 12: ...MODE button 35 MENU button 21 SETUP button 43 TOP MENU button 37 PLAY button 31 STOP button 31 ANGLE button 37 AUDIO button 30 TV DVD button 31 INPUT SELECT button 16 GAME button 16 Direct channel selection buttons 0 9 23 SKIP buttons 33 REV button 33 FWD button 33 SLOW buttons 33 POWER button 21 CH RTN button 24 ZOOM button 34 MUTE button 24 CANCEL button 26 37 RETURN button 43 PAUSE button 32 25...

Page 13: ...ries into a fire Notes Be sure to use AAA size batteries Dispose of batteries in a designated disposal area Attention should be drawn to the environmental aspects of battery disposal Do not mix different battery types or combine used batteries with new ones If the remote control does not operate correctly or if the operating range becomes reduced replace both batteries with new ones If the batteri...

Page 14: ...mbiner not supplied Connect the VHF 300 ohm twin lead wire to the 300 75 ohm matching transformer Attachthetransformertothecombiner then attach the combiner to the antenna jack on the back of the TV DVD Connect the VHF 75 ohm cable and UHF 300 ohm twin lead wire to the combiner not supplied Attach the combiner to the antenna jack on the back of the TV DVD Combination VHF UHF antenna Separate VHF a...

Page 15: ...rvice which requires the use of a converter descrambler box connect the incoming 75 ohm coaxial cable to the converter descrambler box Using another 75 ohm coaxial cable connect the output jack of the converter descrambler box to the antenna jack on the TV DVD Follow the connections shown below Set the TV DVD to the output channel of the converter descrambler box usually channel 3 or 4 and use the...

Page 16: ...e video games that involve shooting a gun type of joystick at on screen target may not work on this TV DVD Signal flow Signal flow Signal flow Using the audio video inputs Press INPUT SELECT repeatedly to select the desired mode LINE1 LINE2 GAME COMPONENT or TV channel will display on the screen for 4 seconds Note In the DVD mode this key will not operate LINE 1 To Audio Video OUT yellow red white...

Page 17: ...terlaced high definition signals If you connect a high definition set top receiver 720p progressive scan DVD player or other similar device to the unit s ColorStream inputs YOU MUST SWITCH THE DEVICE S OUTPUT TO 480i INTERLACED OR 480p PROGRESSIVE MODE FIRST Failure to do this will cause a poor or no picture to display Rear lower left of the TV Ex DVD player with Component video Audio cable not su...

Page 18: ... in Connecting to an amplifier equipped with a Dolby Digital decoder Refer to that amplifier s owner s manual and set the amplifier so you can enjoy Dolby Surround Pro Logic sound With an amplifier not equipped with a Dolby Digital Connect the equipment as follows This connection is only suitable for Video CDs and Audio CDs Amplifier equipped with a Dolby Surround Pro Logic Connect one or two rear...

Page 19: ...TV DVD Connect the COAXIAL DIGITAL AUDIO OUT jack of the TV DVD to the COAXIAL input of a Receiver or Processor Refer to the owner s manual of the connected equipment as well When you connect the TV DVD to other equipment be sure to turn off the power and unplug all of the equipment from the wall outlet before making any connections The output sound of the TV DVD has a wide dynamic range Be sure t...

Page 20: ...COULD CAUSE FIRE ELECTRIC SHOCK OR DAMAGE CAUTION DO NOT USE THE AC ADAPTER IF IT IS COVERED BY A CLOTH ETC OR PRESSED INTO A NARROW AREA THIS RESULTS IN POOR DISSIPATION OF HEAT AND MAY CAUSE FIRE ELECTRIC SHOCK OR DAMAGE WHEN THIS UNIT IS NOT USED FOR A LONG TIME E G AWAY ON A TRIP IN THE INTEREST OF SAFETY BE SURE TO UNPLUG IT FROM THE WALL OUTLET DO NOT PLUG UNPLUG THE PLUG WHEN YOUR HANDS ARE...

Page 21: ...IS then press ENTER 3 Press MENU then press or to select option 2 Press MENU repeatedly until the menu screen is cleared 4 Setting the language This TV DVD can display the on screen language in English Spanish or French in the TV mode Select the language you prefer first then proceed with the other menu options Setting the language LANGUAGE IDIOMA LANGUE ENGLISH ESPAÑOL FRANCAIS ENTER MENU LANGUAG...

Page 22: ...p to 113 Cable TV channels To use this TV DVD with an antenna set the TV CABLE selection to the TV position When shipped from the factory this selection is in the CABLE position 0 9 To ADD DELETE channels Press or to select the AUTO CH MEMORY then press The TV will begin memorizing all the channels available in your area Automatic memory tuning Press or to select ADD DELETE then press 1 Press or t...

Page 23: ...Power indicator on the front of the main unit will light POWER VOL TV VHF UHF channels CABLE Cable TV channels CABLE mode direct channel selection When the TV CABLE selection is in the CABLE position channels can be selected as follows TO SELECT CABLE TV CHANNELS 1 9 Press 0 twice then 1 9 as needed Example to select channel 2 press 002 10 12 Press 0 then the remaining 2 digits Example to select c...

Page 24: ...110 10 0 After the sleep time is programmed the display will appear briefly every ten minutes to remind you that the sleep timer is operating To confirm the sleep timer setting press SLEEP and the remain ing time will be displayed for a few seconds To cancel the sleep timer press SLEEP repeatedly until the display turns to 0 GAME MODE After connecting a TV Game to the unit see page 16 press GAME T...

Page 25: ...ed captions look in your TV guide for the closed captions symbol CC TO VIEW CLOSED CAPTIONS Press CLOSED CAPTION to switch between normal TV and the two closed caption modes captions and full screen text Closed captioning will display text on the screen for hearing impaired viewers Closed captions WHAT IS CLOSED CAPTIONING This television has the capability to decode and display closed captioned t...

Page 26: ...nds to TV RATING and MOVIE RATING To use the V Chip function you must register a password To change password Enter the new password using Number buttons 0 9 then press ENTER 2 Repeat steps 1 3 in To register password as left then press or to select CHANGE PASSWORD then press 1 Enter the same password again using Number buttons 0 9 for safety then press ENTER 3 Press MENU repeatedly until the menu ...

Page 27: ...ot set G All ages PG Parental guidance PG 13 Parental guidance less than 13 years old R Under 17 years old Parental guidance suggested NC 17 17 years old and above X Adult only Press or to display ON Now your settings were set into the memory 6 Press MENU repeatedly until the menu screen is cleared 7 To use after the TV is protected When the program applied to the V Chip setting is received enter ...

Page 28: ...sing BRIGHTNESS darker lighter CONTRAST lower higher COLOR paler deeper TINT reddish greenish SHARPNESS softer sharper CANCEL PICTURE AUDIO PICTURE PREFERENCE COLOR TEMPERATURE CANCEL MENU BRIGHTNESS CONTRAST COLOR TINT SHARPNESS 0 32 0 0 0 To return all adjustments to the factory preset levels Press CANCEL while making picture adjustments Picture control adjustment Adjusting the picture preferenc...

Page 29: ...ress or to select COLOR TEMPERATURE then press 1 2 Press MENU then press or to select option Mode Picture quality COOL Bluish MEDIUM Neutral WARM Reddish PICTURE AUDIO PICTURE PREFERENCE COLOR TEMPERATURE MENU PICTURE AUDIO PICTURE PREFERENCE COLOR TEMPERATURE MENU COLOR TEMPERATURE COOL MEDIUM WARM ENTER MENU ENTER Selecting the color temperature MENU J5N00621A E P26 30 14 01 2005 7 43 PM 29 ...

Page 30: ...liminated Press it again to return to the stereo sound Listening to SAP Second Audio Program When the TV is turned on or a channel selection is made make certain the SAP appears on the screen This means that the Second Audio Program broadcasting is available MONO SOUND MAIN SAP SOUND STEREO SAP BROADCASTING STEREO SOUND MAIN MONO SOUND MAIN SAP SOUND Sound control adjustment Press or to select AUD...

Page 31: ...dy loaded playback will start automatically 3 Load the disc in the disc slot Basic playback Load the disc in the disc slot with the label side facing forward If the disc has a label Hold the disc without touching either of its surfaces align it with the guides and place it in position Note When you play the 8cm disc you need an adapter not supplied A menu screen will appear on the TV screen if the...

Page 32: ...designed some playback features may not be available Also refer to the instructions supplied with the DVDs Do not move the unit during playback Doing so may damage the disc Use the EJECT button to unload and eject the disc Do not push the disc while it is moving Doing so may cause the unit to malfunction Do not put any objects other than discs on the disc slot Doing so may cause the unit to malfun...

Page 33: ...k Each time you press the button the slow motion speed changes To resume normal playback Press PLAY Notes The sound is muted during slow motion playback The Video CD cannot play Reverse Slow Press SKIP or repeatedly to display the chapter or track number you want Playback starts from the selected chapter or track To locate succeeding chapters or tracks Playback starts from the beginning of the cur...

Page 34: ...e chapter and time press RECALL 1 2 Note In case of the Video CD playback with PBC the JUMP does not work To turn off PBC see page 39 Locating desired scene DVD VCD CD Press Number buttons 0 9 to change the number If you input a wrong number press CANCEL Refer to the package supplied with the disc to check the numbers Press ENTER Playback starts When you change the title playback starts from Chapt...

Page 35: ...epeat does not work with an interactive DVD MP3 WMA JPEG CD A B Repeat is prohibited when PBC is on To resume normal playback Press REPEAT A B again Off appears on the screen A A B 1Press PLAY MODE during playback or stop mode Press PLAY MODE again to make the screen disappear 3 2 Notes Some discs may not work with the repeat operation In case of Video CD with PBC repeat functions are prohib ited ...

Page 36: ...playback The program is cancelled when you eject the disc or turn the power off To change the program 1 In the program mode press to select the track number 2 Press Number buttons 0 9 to select the track number to be replaced To clear the program one by one In the program mode press to select the track number Then press CANCEL To clear all the programs In the program mode press to select Clear The...

Page 37: ...n the DVD you may not be able to select the title Depending on the DVD a title menu may simply be called a menu or title in the instructions supplied with the disc 2 Press DVD MENU during playback The DVD menu appears on the screen Press DVD MENU again to resume playback at the scene when you pressed DVD MENU Press to select the desired item Some DVDs allow you to select the disc contents using th...

Page 38: ...no sound will be heard from the TV DVD s speakers In case of Video CD playback Audio type changes as follows each time you press AUDIO When playing back a disc recorded with subtitles you can select the subtitle language or turn the subtitle off To turn off the subtitle press SUBTITLE until Off appears The on screen display will disappear after a few seconds 1 Notes Depending on the DVD you may no...

Page 39: ...ff recorded on the DVD KARAOKE Notes The vocal output feature is used during playback of Dolby Digital multi channel recorded DVD KARAOKE discs This feature allows you to turn off vocal audio tracks or restore them for background accompaniment When playing Karaoke connect appropriate audio equipment such as an amplifier to the TV DVD Karaoke playback On The primary vocal is output when it is recor...

Page 40: ...per disc MP3 WMA JPEG CDs cannot be used for the purpose of recording If the CD has both audio tracks and MP3 WMA JPEG files only audio tracks are played It may take more than one minute for this unit to read MP3 WMA JPEG files depending on its structure Music recorded by Joliet Recording Specification can be played back the file name is displayed within 16 letters on the screen Long file names wi...

Page 41: ... first file is an MP3 WMA file only MP3 WMA files are played back in order If the first file is a JPEG file the first JPEG file is played back 3 Press ENTER The selected file starts playing back 4 Press STOP to end playback The unit records the stopped point appears on the screen Press PLAY to resume playback from the scene point If you press STOP again or unload the disc the unit will clear the s...

Page 42: ... the screen If you want to watch the other file repeat steps 3 4 5 JPEG CD playback Select your desired starting file for the slide show in the step 3 as left Press ENTER to start slide show from the selected file If you press PAUSE during the slide show the slide show stops temporary 8 appears briefly on the picture If the picture appears upside down or sideways press ANGLE repeatedly until it s ...

Page 43: ...l setting To select a preferred language for on screen display Customizing the function settings You can change the default settings of the DVD mode to customize perfor mance to your preference Setting procedure DVD VCD CD Press SETUP during stop mode The following on screen display appears 1 2 3 To make SETUP screen disappear press SETUP or RETURN 5 Enter Setup Return Language Picture Parental Ot...

Page 44: ... automatically cut off Note If the DVD disc is not formatted in the pan scan style it displays 4 3 style Display On screen display can be switched on or off when you press the buttons On On screen displays appear when you press the buttons factory setting Off On screen displays do not appear when you press any buttons JPEG Interval You can continuously play back all JPEG files automati cally After...

Page 45: ... want 6 Press ENTER Now the parental level is changed and locked Parental Other Note If each setup pages 44 and 45 has been completed the unit can always be worked under the same conditions espe cially with DVD discs Each setup will be retained in the memory even if you turn the power off If you forget the password 1 Press EJECT 2 Remove the disc after the disc comes out 3 No Disc appears on the s...

Page 46: ...ct Cancel Picture The setting screen will disappear Press EJECT to remove the disc Reading ENTER RETURN 0 9 EJECT Temporary disabling of rating level by DVD disc Depending on the DVD disc the disc may try to temporarily cancel the rating level that you have set It is up to you to decide whether to cancel the rating level or not Note This temporary cancellation of rating level will be kept until th...

Page 47: ...hai 3018 Bihari 1218 Hungarian 1831 Oriya 2528 Tibetan 1225 Breton 1228 Icelandic 1929 Panjabi 2611 Tigrinya 3019 Bulgarian 1217 Indonesian 1924 Pashto Pushto 2629 Tonga 3025 Burmese 2335 Interlingua 1911 Persian 1611 Turkish 3028 Byelorussian 1215 Irish 1711 Polish 2622 Turkmen 3021 Cambodian 2123 Italian 1930 Portuguese 2630 Twi 3033 Catalan 1311 Japanese 2011 Quechua 2731 Ukrainian 3121 Chinese...

Page 48: ...or drifts Station or Cable TV may have problems try another station Make sure channels are set into memory Cable TV company is scrambling signal Check antenna orientation No CATV reception Check all Cable TV connections Set TV CABLE selection to the CABLE position Station or Cable TV system problems try another station Make sure TV CABLE selection is in the appropriate position If using antenna ch...

Page 49: ... playback The picture will be distorted occasionally Stopping playback search slow motion play repeat play or program play etc cannot be performed Some discs may not do some of the functions No on screen display Select Display On The remote control does not function Aim the remote control at the remote sensor Operate within approx 5 meters or reduce the light in the room Clear the path of the beam...

Page 50: ... drift Usually caused by interference from automobile ignition systems neon lamps or AC powered tools and appliances such as drills or hair dryers SNOW If the TV DVD is located far from the TV station in a fringe reception area where the signal is weak small dots may appear in the picture If the signal is extremely weak the installation of a larger external antenna may be necessary RADIO FREQUENCY...

Page 51: ...cable disc 1 DVD 12cm 8cm with Disc adapter 2 CD 12cm 8cm with Disc adapter Pickup 1 Lens 2 Beams System DVD CD Player Remote control DC LB1 1 Batteries R03 AAA 2 AC adapter AD 25U 1 AC cord for AC adapter 1 300 75 Ω matching transformer 1 Owner s manual this booklet 1 Accessories S Video input Y 1 0 V p p 75 Ω negative sync Mini DIN 4 pin x 1 C 1 0 V p p 75 Ω Component video input Y 1 0 V p p 75 ...

Page 52: ...y 90 days thereafter Owner s Manual and Product Registration Card Read this owner s manual thoroughly before operating this LCD TV DVD Combination Complete and mail the enclosed Product Registration Card or register your product on line at www tacp toshiba com service as soon as possible By registering your product you will enable TACP to bring you new products specifically designed to meet your n...

Page 53: ...EES AGREEMENTS AND SIMILAR OBLIGATIONS OF TACP WITH RESPECT TO THE REPAIR OR REPLACEMENT OF ANY PARTS IN NO EVENT SHALL TACP BE LIABLE FOR CONSEQUENTIAL OR INCIDENTAL DAMAGES INCLUDING BUT NOT LIMITED TO LOST PROFITS BUSINESS INTERRUPTION MODIFICATION OR ERASURE OF RECORDED DATA CAUSED BY USE MISUSE OR INABILITY TO USE THIS PRODUCT No person agent distributor dealer or company is authorized to cha...

Page 54: ...54 Printed in Thailand ColorStream is registered trademark of Toshiba America Consumer Products L L C J5N00621A E P52 Back 14 01 2005 7 43 PM 54 ...

Reviews: