Siemens SITRANS LG270, Operating Instructions Manual
The Siemens SITRANS LG270 is a state-of-the-art device designed for accurate measurement of liquids and gases. Its Operating Instructions Manual is the perfect companion, providing comprehensive guidance on its features and functionality. Download the manual for free at manualshive.com and unlock the full potential of this exceptional product.
Share
Download


Reviews:
No comments
Related manuals for SITRANS LG270
R20
Brand: Raytheon Pages: 22
R40
Brand: Raytheon Pages: 135

A111
Brand: Acconeer Pages: 34

DH-PFR5QI-E60
Brand: Dahua Pages: 33
151
Brand: Davis Instruments Pages: 3
RT2
Brand: gatso Pages: 11
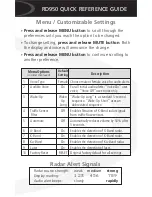
rd950
Brand: K40 Pages: 2

RLS2
Brand: K40 Pages: 2

VEGAPULS 67
Brand: Ohmart Vega Pages: 28

R60AMP1
Brand: MicRadar Pages: 13
Speedster
Brand: Bushnell Pages: 9
MAX Ci 360
Brand: Escort Pages: 28

A111-003
Brand: Acconeer Pages: 36

Easy Locator
Brand: Vivax Pages: 32

Quantum Radome
Brand: Raymarine Pages: 54

SP-POWER-1
Brand: SpotterRF Pages: 2
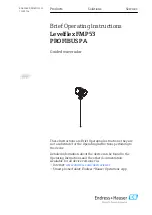
Levelflex FMP53 PROFIBUS PA
Brand: Endress+Hauser Pages: 36
DS-PR1-60
Brand: HIKVISION Pages: 71


