background image

Building Technologies

Fire Safety & Security Products


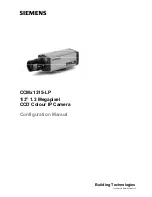
CCMx1315-LP 

1/3” 1.3 Megapixel  
CCD Colour IP Camera 

Configuration Manual 

Summary of Contents for CCMX1315-LP

Page 1: ...Building Technologies Fire Safety Security Products CCMx1315 LP 1 3 1 3 Megapixel CCD Colour IP Camera Configuration Manual ...

Page 2: ...roducts GmbH Co oHG confers upon the purchaser the right to use the software It is not permitted to reproduce this document in whole or in part or translate it into another language without our written consent Trademarks CCMx1315 LP is a trademark of Fire Security Products GmbH Co oHG Microsoft is a registered trademark and Windows a trademark of Microsoft Corporation All other products or company...

Page 3: ...reset buttons 12 6 Installing the camera 13 6 1 Precautions 13 6 2 Concept of the network camera 14 6 3 Setting network camera environment 14 6 4 Connecting the camera and personal computer via network 15 6 5 Using the camera search application IpFinder 17 6 6 Using the camera search application Web cam IP manager 18 6 7 Log in screen 19 6 8 Viewing and listening 19 7 Configuration 22 7 1 Compress...

Page 4: ...strator 49 7 8 2 User list 49 7 9 Firewall 50 7 9 1 IP Address Filter 50 7 9 2 Forbidden Ports 50 7 9 3 Forbidden Protocol 51 7 10 System 51 7 10 1 Setting 51 7 10 2 Update 51 7 10 3 Configuration 52 7 10 4 Backfocus 53 7 10 5 Remote 53 7 10 6 Temperature 53 7 11 Log 54 7 12 Notice 54 8 Utility program application 55 8 1 NAS player setup 55 8 2 Audio record setup 55 8 3 Firmware update setup 56 9 ...

Page 5: ...5 Siemens Building Technologies Fire Safety Security Products 01 2009 ...

Page 6: ...s document on together with the product z Please also take into account any additional country specific local safety standards or regulations concerning project planning operation and disposal of the product z Follow all warnings and instructions marked on the device Liability claim z Do not make any changes or modifications to the device unless they have been approved by the manufacturer z Use on...

Page 7: ...nd on the mains adapter z Make sure the device is permanently connected to the electricity supply a readily accessible disconnect device must be provided z This device is designed to work with 12 V DC 24 V AC systems or PoE Do not connect the device to any other power systems 1 2 3 Cleaning Do not touch the imaging surface of sensor Use a soft cloth moistened with alcohol to clean the surface if i...

Page 8: ...tion of conformity is available from Siemens Building Technologies Fire Security Products GmbH Co oHG 76181 Karlsruhe Germany European Directive 2004 108 EC Electromagnetic Compatibility Compliance with the European Directive 2004 108 EC has been proven by testing according to the following standards Emitted interference EN 61000 6 3 EN 55022 Class B Resistance to interference EN 50130 4 ...

Page 9: ...larm out 1 x B W switch in RS 485 Yes SD card slot Support up to 2 GB SD card 2 GB SD card included at delivery Internal Microphone Yes Motion detection MD window selected by mouse 3 level sensitivity Power Supply Power requirement 12 V DC 24 V AC 50 Hz or PoE Power consumption CCMC1315 LP 7 W CCMS1315 LP 8 5 W Power connector Screw less terminal block Environment Operating temperature 10 to 50 Op...

Page 10: ...3 8 S54561 B300 A1 1 3 Megapixel varifocal lens direct drive iris F1 0 3 8 mm 0 08 kg CLVM1316 3 8 S54561 B301 A1 1 3 Megapixel varifocal lens manual iris F1 0 3 8 mm 0 07 kg CLVD1316 5 50 S54561 B302 A1 1 3 Megapixel varifocal lens direct drive iris F1 4 5 50 mm 0 08 kg CLVM1316 5 50 S54561 B303 A1 1 3 Megapixel varifocal lens manual iris F1 4 5 50 mm 0 06 kg 4 1 Package contents z CCD IP camera ...

Page 11: ... 1 Camera part definition 1 Back focus adjust ring 10 Digital I O terminal 2 Back focus lock screw 11 IP TV selection 3 RJ45 Ethernet connector 12 SD card slot 4 Audio input φ3 5mm 13 SD card protection 5 Audio out φ3 5mm 14 1 4 inch tripod mount hole 6 SW for default 15 BNC connector 7 SW for reset 16 IRIS connector 8 Power indicator 17 Microphone 9 DC12V AC24V power terminal ...

Page 12: ...al output port for telemetry control COM AO Alarm output port GND Al1 External alarm input 1 5 2 2 DC Auto Iris port PIN 1 Damp PIN 2 Damp PIN 3 Drive PIN 4 Drive 5 2 3 Power IN connector RED Power WHITE Power Power 12 V DC or 24 V AC 5 2 4 Video output connector Video Signal Output Composite video output 5 2 5 IP TV switch IP Video out through Ethernet TV BNC composite video out for installation ...

Page 13: ...ry card is recommended for loop recording z Do not use a memory card containing the data recorded by another device with the camera as this may result in the camera not functioning correctly z Do not modify overwrite the data or change the folder name of an SD memory card It may result in the camera not functioning correctly z Data recorded with the camera do not comply with the image file format ...

Page 14: ... camera environment Items needed for network camera monitoring system z Administrator s personal computer The personal computer that is given all authorities for setting operating monitoring and other functions with the network camera is called the administrator s personal computer in this manual z Recommended personal computer operating conditions Windows Vista or XP as OS Internet Explorer Versi...

Page 15: ...ruction manuals of the network system equipment such as the router hub and modem also carefully When entering the IP address manually set DHCP ON OFF to OFF in Network Basic Settings and enter the IP address subnet mask default gateway primary DNS and secondary DNS Connection configuration Two configurations are available for connection of network cameras z Crossover connection z Connection via a ...

Page 16: ...ping 192 168 0 10 and press the Enter key If the Reply from message appears the connection is correctly established 4 Search the camera by IpFinder explained and view a camera image Start IpFinder and click the Search button Confirm that the camera name nwcam05 is displayed in the camera list Click nwcam05 to select The camera name IP address and HTTP port no are displayed in the Network Camera Li...

Page 17: ...r if it is operated by other OS Do not install IpFinder with other OS Using IpFinder Web Cam IP Manager Version 3 0 to search for a camera 1 Start the Web Cam IP Manager by loading IP Manager exe This application is found on the CD included with delivery Î The Web Cam IP Manager program window will open 2 Click the Start button Î The Web Cam IP Manager program window will now display a list of all...

Page 18: ...ment where the device is located SSDP Simple Service Discovery Protocol network protocol 1 Start the Web Cam IP Manager by loading IP Manager exe This application is found on the CD included with delivery Î The Web Cam IP Manager program window will open 2 Click the Start button Î The Web Cam IP Manager program window will now display a list of all the devices available for communication along wit...

Page 19: ...ge screen will appear And the administrator log in ID and password are set to admin and to admin respectively by default IMPORTANT Administrator Log in allows rewriting of all settings Be certain to change the administrator log in ID and password already set in the camera by default to ensure camera security Keep the new administrator log in ID and password handy for future use To change the admin...

Page 20: ...ion with the network camera is recommended 1 Launch the browser 2 Choose Internet option on the tool menu 3 Click Connect tab 4 Click LAN Setting Î The screen for setting a local area network LAN will appear 5 Check if the checkbox Will use a proxy server is checked If the checkbox is not ticked The browser is not set to use a proxy server Click Cancel and quit setting If the checkbox is checked C...

Page 21: ...e E this function is PTZ control and preset setting Microphone alarm out stop Speaker alarm in stop Pause passed live image Play show live image Language standard setting is English Website supports 10 different languages for end user choice PTZ operating panel the PTZ operating panel enables a pan tilt zoom drive and the current pan tilt position is stored under the selected position number Up to...

Page 22: ...lution Configure resolution Higher resolution results in larger image Possible settings 1280 960 4 VGA 640 480 VGA 320 240 QVGA z Compression Ratio Set quality of delivered images The size of image files JPEG files varies in accordance with compression ratio Five options are available from Low to High Low compression This setting produces highest image quality The file size increases Mid compressi...

Page 23: ...el Unicast Streaming Ready for MPEG4 and JPEG streaming z RTSP Port Number specify the port number you would like to use for RTSP protocol default is 554 z VIDEO Port Number specify the port number you would like to use for video streaming default is 5000 Multicast Streaming Ready for MPEG4 and JPEG streaming z Multicast Address specify the multicast address z RTSP Port Number specify the port num...

Page 24: ... data streaming first then execute the application program This application is found on the CD included with delivery z Using VLC media player 1 Select Open then click the Network tab 2 Click RTSP then fill in web address rtsp IP address rtsp_port livestream 3 Click OK For example rtsp 192 168 0 194 554 livestream Regarding default value of RTSP port it s based on which stream you select VCL media...

Page 25: ...Security Products 01 2009 z Using Quicktime 1 Select Open URL 2 Fill in rtsp IP address rtsp_port livestream 3 Click OK For example rtsp 192 168 0 194 554 livestream Regarding default value of RTSP port it s based on which stream you select Quicktime livestream ...

Page 26: ...your IP address here when you select DHCP off Subnet Mask Please use default number 255 255 255 0 Default Gateway Leave blank as default setting It is not necessary to enter Default Gateway if it is not used Ask your Network Administrator for Default Gateway information Primary DNS Same as above Secondary DNS Same as above Port Stream1 Stream2 cropping1 5 We recommend to use the default if it need...

Page 27: ...NS provider Select ON to enable the DDNS function input your DDNS server User ID password and password confirm and then click Save to save your settings To transmit the camera s host name to a DHCP server you have to configure this in the DDNS Settings 7 2 3 FTP Server If you wish to enable the FTP function select ON to activate the FTP function Input your Login ID password password confirm and th...

Page 28: ... delay settings 0 5 10 15 30 s are available for selection to avoid error induced by instantaneous lighting change This allows the delay time for the day night function to be set Day Night leve 3 level settings high mid low are available for selection The switching point from colour to black white mode depends on the ambient light conditions Basic items such as the size and quality of delivered im...

Page 29: ...ure time becomes longer and frame rate becomes smaller Blurred images sometimes are prominent with moving objects Back Light Compensation Set an area for backlight compensation If backlight compensation is activated the camera performs the exposure control only within the specified area Backlight compensation is a function that achieves the brightness of a selected area to an optimum image level T...

Page 30: ...e the flip function Picture Mirror Set image to be left or right Select ON or OFF to activate or deactivate the mirror function 7 3 2 Camera mask zone settings 1 Tick the checkbox ON then click Set Mask Zone to start mask setting 2 Use the mouse to drag a mask rectangle on the screen click OK to complete the selection 3 Click Save to enable the mask setting 1 OFF 2 Upper 2 3 Area designation 3 Low...

Page 31: ...E Max 8 masks can be set on the screen The mask function is not supported when the cropping function is on 7 3 3 Camera cropping settings 1 Tick the ENABLE checkbox and fill in the name then click Set Cropping Area to start cropping setting Î A cropping setting screen will pop up as shown ...

Page 32: ...will appear on the screen 3 To select the cropping area move the mouse to the preferred position on the screen then click the left button Î The red mesh rectangle will jump to that position 4 Click OK to finish the settings and return to the Cropping menu 5 Click SAVE to enable the settings NOTE Up to 5 cropping areas can be set on the screen The MPEG4 function is not supported when the cropping f...

Page 33: ...ge OSD will be overlaid in red Masking is only possible when the OSD is off Make sure not to select the same position for alarm text and date time display 7 4 Alarm External alarms and motion sensors can be set Connecting a sensor or other device to the alarm input terminal signals an alarm when the sensor detects trouble For example mounting a sensor on a door notifies an alarm each time the door...

Page 34: ... alarm can be displayed on screen if this item is set to ON z Enter Text for alarm message Max 24 characters can be entered z Set Audio out for alarm message An audio alarm message can be sent to an external speaker if this item set to ON NOTE A speaker with integrated amplifier can be connected to the AUDIO out jack on the rear panel z Select EVENT Pre recorded voice files with extension wav that...

Page 35: ...changes in brightness within the defined area Mid Intermediate between High and Low Low An alarm will be triggered with a major change in brightness within the defined area z Text Enable Select ON or OFF to define whether an additional alarm text defined in the Text field is to be overlaid on the video image z Text Define an individual text for alarm overlay z Audio Output Select ON or OFF to defi...

Page 36: ...t will be triggered immediately as well z Output hold time Set a time to hold alarm output Choose either 0 5 10 15 or 30 seconds This function is used when connecting to alarm output terminals and activating a siren buzzer or emergency light 7 4 5 Audio Event You can choose which audio wav file you want to upload as a voice alarm message to the SD card from your PC There are 4 audio events availab...

Page 37: ...FTP recording conditions You can store your image files based on your scheduled recording or recording by alarm or recording by motion z Scheduled Recording Determine the recording condition STOP all day schedule 1 or schedule 2 from the recording schedule table for all days from Monday to Sunday z Recording by Alarm z Configure Alarm input setting first Then select the recording format Record Sou...

Page 38: ...Record file name Under transfer image section the file name arranged by FTP server is time stamp based With Time Stamp based the record file name will be formatted with the desired file name time and date as the file name You can enter the file name or leave it blank z Recording by Motion Configure Motion Detection Setting first All the other settings are same as recording by alarm as above FTP Se...

Page 39: ...thod You can choose to save your image files to either FTP server 1 2 or automatically switching servers SD Card Back Up if FTP Fail The network camera automatically stores images in the SD card when images cannot be recorded in the server due to a network failure or other trouble The stored images can be transferred to the FTP server when the network status or other troubles are resolved Function...

Page 40: ...re the individual settings as described below z Overwrite ON Records are overwritten beginning with old records when the capacity of the SD memory card becomes full during recording OFF Recording is stopped when the capacity of the SD memory card becomes full during recording z Scheduled Recording Determine the recording condition STOP all day schedule 1 or schedule 2 from the recording schedule t...

Page 41: ... 10 30 60 90 120 s can be selected for JPEG format no need for MPEG4 format Recording time If MPEG4 is selected please set the recording time to 2 5 or 10 s z Recording by Motion Perform Motion Detection Setting first All the other settings are same as recording by alarm as above z Recording by Network Loss Select network recording After network loss the network camera automatically stores images ...

Page 42: ...il account password z Password Confirm confirm your e mail password z Administrator E mail Address input your e mail address Click the save test e mail button to save your settings and to test your e mail setting Condition settings for sending e mail by schedule Setup E mail condition to Schedule z Subject input your subject title for sending e mail z Message input the alarm message as a notificat...

Page 43: ...ur subject title for sending e mail z Message input the alarm message as a notification z Attach Image attach image files to your e mail notification Condition settings for sending e mail by motion Setup E mail condition to Motion All the other settings are similar to alarm Mail to Address List You can send e mails to multiple users when schedule alarm in or motion detection occurred ...

Page 44: ...d MPEG format are available for Alarm and Motion conditions 2 After the recording condition has been selected the corresponding detailed recording field appears There you can select further conditions which you need to complete the record condition setup 3 Select NAS mode two modes NFS and CIFS are available NFS is for network storage device operating in UNIX systems CIFS is for Windows systems 4 ...

Page 45: ...e recorded immediately after an alarm occurs Images of the moment when an alarm occurs are not included 1 2 5 10 30 and 60 frames can be selected if JPEG format selected No need for MPEG4 format Recording cycle Set a time interval for alarm recording 1 2 5 10 30 60 90 120 s can be selected for JPEG format no need for MPEG4 format Recording time If MPEG4 is selected please set the recording time to...

Page 46: ...rophone input or integrated microphone is deactivated z Audio Input Level HIGH Increased audio input level LOW Reduced audio input level Audio output z Audio Output ON The audio output is activated OFF The audio output is deactivated z Audio Output Level HIGH Increased audio output level MIDDLE Adjusts the audio output level to a medium level LOW Reduced audio output level NOTE Please use an exter...

Page 47: ...Input the date and time to set up system time NTP You can also enable Network Time Protocol NTP by NTP server Input a host name for NTP server select time adjustment period and click the save and test button to start testing NTP function Synchronization from PC System date time can be synchronized from PC setting z Daylight Select ON to active Daylight saving function if you are in Daylight saving...

Page 48: ...Configuration 48 Siemens Building Technologies Fire Safety Security Products 01 2009 7 8 Access protection ...

Page 49: ...can adjust your own Admin ID and password in this field z Language English There are 10 languages for end user selection 7 8 2 User list Besides the administrator general users can be authorized by the system administrator to access the camera The administrator can add additional ID and password in the User Settings field User level z Advanced user can see the live picture and do basic operation l...

Page 50: ...ress field Up to 10 addresses can be set Enable the IP address which is going to be processed by the firewall filter Choose Allowed or Denied or OFF z Allowed all the IP addresses enabled in the list are allowed to access the camera z Denied all the IP addresses enabled in the list shall be rejected by the firewall 7 9 2 Forbidden Ports All the ports listed and enabled will be forbidden to pass th...

Page 51: ...commands Otherwise it s not necessary for the login data if you choose OFF 7 10 2 Update You can update system firmware once the update file is available It is the customer s responsibility to update firmware All camera motions will shut down during firmware update Close any other screens before starting a firmware update Never disconnect power and LAN cable during the firmware update process Rebo...

Page 52: ...ectory to save file in your computer z Import Click on Import button and select the configuration setting file to start importing file to your network camera z Factory Default Clicking the Default button in the setup screen the configuration Information resets all values to factory default NOTE Basic network settings will not be reset z Network camera reboot Click the Reboot button and a the confi...

Page 53: ... wheel at the front of the camera see Fig 1 Click the close button to exit the screen when finishing the session 7 10 5 Remote Set the baud rate and address of the telemetry device for control via the RS485 port 7 10 6 Temperature There are two display types for temperature The internal temperature of the camera is displayed If a temperature notification interval has been set an e mail notice will...

Page 54: ...s 01 2009 7 11 Log Event Log Select Log in the Configuration menu You can click the icons on the bottom to see and process the logs such as display all logs display system logs display user logs 7 12 Notice This dialog shows all licenses information for the camera Information ...

Page 55: ...op button 8 2 Audio record setup This application is found on the CD included in the delivery You can record a new voice file then upload it to the network camera It can make an alarm out event After you finish audio record please perform alarm audio setting Perform audio recording in the following sequence 1 Execute audio record setup first 2 Click on the cross cursor button and choose the path w...

Page 56: ...ulti network cameras synchronously Perform firmware update in the following sequence 1 Execute firmware update setup first 2 Select filter SW version 3 Click on the network camera you want to update 100 pcs network camera are supported for firmware update 4 Click on the Browser button and choose the network camera SW version 5 Click on the Upload button for firmware update Î The update is now fini...

Page 57: ...overnment or the local authorities If this symbol showing a crossed out trash can is displayed on a product that product is subject to the EU Directive 2002 96 EC The correct disposal and separate collection of your old appliance will help prevent potential negative consequences for the environment and human health It is a precondition for reuse and recycling of used electrical and electronic equi...

Page 58: ...2 Default Gateway 26 DHCP 26 Digital I O terminal 12 Dimensions 9 E Effective pixels 9 Electronic shutter 9 E mail Server POP 42 E mail Server SMTP 42 Emailing recording 42 Ethernet 9 EU directives 8 EV Adjustment 29 Event Log 54 F Factory Default 52 Firewall 50 Firmware update setup 56 Forbidden Ports 50 Forbidden Protocol 51 Frame Rate 22 FTP recording 37 FTP Server 27 G Gamma 29 GOP 23 H Hazard...

Page 59: ...26 Q Quicktime 25 R Remote 53 Reset Button 12 Resolution 22 RJ45 Ethernet connector 11 RTSP Port Number 23 S Safety information 6 Safety precautions 6 SD Card slot 11 SD recording 40 Secondary DNS 26 Sharpness 29 Shutter Speed 29 Signal words 7 Slow Speed Shutter 29 Storage temperature 9 Subnet Mask 26 Sync system 9 Synchronization mode 47 System 51 T Temperature 53 U Unicast Streaming 23 User lis...

Page 60: ...rity Products GmbH Co oHG D 76181 Karlsruhe www buildingtechnologies siemens com 2009 Copyright by Siemens Building Technologies Data and design subject to change without notice Supply subject to availability Document no A6V10236123 Edition 15 01 2009 ...

Reviews: