background image

DELTA miro 

Flush-Type-Radio  


5TC1 …

Operating and installation instructions

12/2008

251653.41.19 DS02

GB

Summary of Contents for 5TC1 series

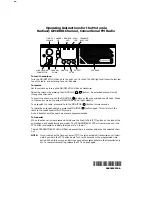
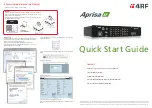
Page 1: ...DELTA miro Flush Type Radio 5TC1 Operating and installation instructions 12 2008 251653 41 19 DS02 GB ...

Page 2: ......

Page 3: ...3 1 Step 1 9 3 2 Step 2 10 3 3 Step 3 11 4 Operation and functions 12 4 1 Radio mode radio ON 12 Station memory 13 Setting the alarm 14 4 2 Alarm mode 15 4 3 Idle state radio OFF 16 4 4 Activating the sleep timer 17 Operating the sleep timer 18 5 Setup menu 19 5 1 Activating the Setup menu 19 5 2 Setting the time 20 5 3 Setting the contrast 21 5 4 Brightness in radio mode 22 5 5 Reception setting ...

Page 4: ...sily set by pressing buttons Settings and current information are shown in the lit display e g time radio functions and alarm function FM RDS radio 87 5 to 108 0 MHz Extension function Station memory 6 stations Vertical or horizontal installation with rotatable display unit Time display 2 flush boxes necessary Alarm function 230 V 50 Hz connection necessary Sleep timer ...

Page 5: ...aler to which the end user may be entitled as a result of the sales transaction In the event of a justified and properly established claim SIEMENS shall exercise its prerogative to either repair or replace the defective device Further claims or liability for consequential damages are explicitly excluded A justifiable deficiency is one in which the device exhibits a structural manufacturing or mate...

Page 6: ...on the mains network and the device may only be done by an authorised electrician Remove power from the device Check that the device is powered off Secure the device against being powered on again Close the housing securely before applying power The following must be observed Prevailing statutes standards and regulations The device s operating instructions State of the art technology at the time o...

Page 7: ...ifications Reception frequency 87 5 108 0 MHz Power supply 230V 50 Hz Own consumption 1 5 W standby Temperature range 0 50 C Test specifications EN 55020 EN 55013 EN 60065 Marking CE Protection class IP 20 Dimensions in mm 161 x 90 x 45 ...

Page 8: ...ode Alarm ON Alarm OFF Alarm ON with alarm time Setting the alarm Setup menu Setting the time Setting the contrast Setting the brightness Reception setting Configuring the extension 6 7 00 2 2 Layout and symbols Loudspeaker Display 7 ON OFF button 6 1 Function buttons ...

Page 9: ...tion The radio can be switched on and off by an extension An extension can be a button a switch or a motion detector The extension is connected to terminal 1 at the back of the display unit Extension Function Button Press button D Turn radio on off Switch Switch ON D Turn radio on Switch OFF D Turn radio off Motion detector On signal D Turn radio on Off signal D Turn radio off Description ...

Page 10: ...it interferences Check circuit breaker and power supply only electrician Check connection lines only electrician Install the radio at a location where the radio reception is better only electrician Contact Telephone 49 0 0180 50 50 222 Fax 49 0 0180 50 50 223 Internet www siemens de delta Email support automation siemens com Note Before installation check whether there is a good radio reception at...

Page 11: ...n wall installation electrical outlets are needed with 60 mm Ø Notes The safety instructions page 4 must be observed at installation Before installation check whether there is a good radio reception at the installation site Install in wall installation electrical outlets at the suitable location vertically or horizontally Insert base with loudspeaker into the electrical outlet and screw tight ...

Page 12: ...ine side wise into the socket of the display unit 2 Snap display unit into the base 3 To disassemble the display unit snap out the display unit by pressing lightly and take out Notes During the installation to the mains 230 V 50 Hz the electrical system has to be without voltage Secure the power line 230 V 50 Hz with a circuit breaker max 16 A Please note Ensure phase balance of the extension 2 3 ...

Page 13: ...Step 3 Snap the frame with the loudspeaker cover into the base on the side Screw the frame to the base with the enclosed hexagon socket screw key 2 mm aligned with the loudspeaker cover Assembly and installation ...

Page 14: ...tly delayed or fail to appear Mode 10 44 1LIVE 1 104 7 4 1 3 2 5 6 7 3 Functions Displays Press button briefly about 1 sec a Activate memory page 13 Press button longer about 8 sec a Allocate memory page 13 Search downwards for radio station Search upwards for radio station Press Mode button a Setting the alarm page 14 Volume quieter Volume louder Radio OFF ON 2 3 4 5 6 7 1 108 0 87 5 MHz 87 5 108...

Page 15: ...dio switches into radio mode automatically after about 10 seconds Press briefly about 1 sec 1 104 7 10 44 1LIVE 3 1 Mode 3 2 4 5 6 7 1 3 2 4 6 5 1 Mode 3 2 SAVE 4 5 6 7 1 3 2 4 6 5 1LIVE Activate memory Press button 1 6 Cancel Press button 7 Allocate memory Press button 1 6 Cancel without saving Press button 7 Press long about 8 sec Radio mode Button ...

Page 16: ...ity the radio switches into radio mode automatically after about 10 seconds h m 8 00 Mode 1 3 2 4 6 5 00 Mode 1 104 7 10 44 1LIVE 3 Press a Setting the alarm Radio mode Mode button 00 8 45 15 9 7 00 8 Functions Displays Select hour or minute Alarm time backwards Alarm time forwards Press Mode button a Radio mode Alarm OFF ON Cancel 1 2 3 5 4 6 ...

Page 17: ...uder Radio OFF and alarm mode ON 2 3 4 5 1 SNOOZE 30 1 1 30 4 2 Alarm mode The alarm mode last 1 hour If the snooze function is activated the alarm mode is switched off for 10 minutes After that the alarm mode is switched on again Mode SNOOZE 10 44 1LIVE 2 3 4 5 3 1 Note Press the button and button 3 4 to set the volume of the radios for the alarm mode ...

Page 18: ...DS signal is low or the radio station lies in another time zone set the clock manually page 20 Functions Displays Activate sleep timer Page 17 Press Mode button briefly about 1 sec a Alarm OFF ON with alarm time Press Mode button longer about 8 sec a Setup menu Page 19 Brightness of the display during idle state darker Brightness of the display during idle state lighter Radio ON OFF 7 00 10 44 6 M...

Page 19: ...tate To use this function the radio needs to be turned off idle state The radio is switched on for the duration of the sleep time Without any activity the radio switches into idle state automatically after about 10 seconds 1 6 7 1 Mode 3 2 Sleep timer 4 5 6 7 5 15 10 30 90 60 Pressa Activating the sleep timer 7 00 10 44 6 Idle state Button ...

Page 20: ... 7 3 6 Functions Displays Press button briefly about 1 sec a Activate memory page 13 Press button longer about 8 sec a Allocate memory page 13 Search downwards for radio station Search upwards for radio station Press Mode button a Setting the alarm page 14 Volume quieter Volume louder Sleep timer OFF 2 3 4 5 6 7 1 108 0 87 5 MHz 87 5 108 0 MHz 1 6 30 1 1 30 ...

Page 21: ... page 23 Configure the extension page 24 Cancel 5 1 Activating the Setup menu in idle state To use this function the radio needs to be turned off idle state Without any activity the radio switches into idle state automatically after about 10 seconds Press long about 8 sec a Setup menu Mode 7 00 10 44 6 1 2 3 5 4 6 7 Mode 1 3 2 4 5 6 7 Version x xx Idle state Mode button ...

Page 22: ...e Cancel Setup menu 5 2 Setting the time setup menu 5 Notes When the RDS signal is low or the radio station lies in another time zone set the time manually Without any activity the radio switches into idle state automatically after about 10 seconds Press a Setting the time h m 8 00 Mode 1 3 2 4 6 00 Version x xx 1 2 3 5 4 6 00 8 45 15 9 7 00 8 R D S R D S Setup menu Button R D S ...

Page 23: ...button a Setup menu Cancel Press a Setting the contrast 10 Mode 2 1 3 4 1 2 3 4 30 0 0 30 Version x xx Note Without any activity the radio switches into idle state automatically after about 10 seconds 5 3 Setting the contrast setup menu Setup menu Button Setup menu ...

Page 24: ... The and buttons 1 2 are used to set the brightness of the display during idle state Without any activity the radio switches into idle state automatically after about 10 seconds Pressa Brightness in radio mode 06 Mode 2 1 3 4 1 2 3 4 7 0 0 7 Version x xx 5 4 Brightness in radio mode setup menu Setup menu Button ...

Page 25: ... Reception of weak stations Press Mode button a Setup menu Cancel Press a Reception setting 2 Mode 3 4 2 1 1 2 1 3 4 2 Version x xx Note Without any activity the radio switches into idle state automatically after about 10 seconds 5 5 Reception setting setup menu Setup menu Button Setup menu ...

Page 26: ... function of the extension page 7 Without any activity the radio switches into idle state automatically after about 10 seconds Press a Configuring the extension ON OFF Mode 2 3 1 ON OFF Push 1 3 2 A motion detector has to be configured as a switch Version x xx 5 6 Configuring the extension setup menu Setup menu Button Setup menu ...

Page 27: ......

Page 28: ...Tel 49 0 0180 50 50 222 Fax 49 0 0180 50 50 223 e mail support automation siemens com Internet www siemens de delta ...

Reviews: