background image

05/5/30


WA-MP100_110H_SEEG_Front.fm

WA-MP100_110H TINSZA068SJZZ

MIC

NAVI

DEUTSCH

FRANÇAIS

ESPAÑOL

SVENSKA

ITALIANO

NEDERLANDS

PORTUGUÊS

ENGLISH

....

....

....

....

....

....

....

....

Siehe Seiten i bis x und 
D-1 bis D-50.
Se reporter aux pages i à x et 
F-1 à F-50.
Consulte las páginas i a x y 
S-1 a S-50.
Hänvisa till sidorna i till x och 
V-1 till V-50.
Leggere le pagine i a x e 
I-1 a I-50.
Raadpleeg de bladzijden i t/m x en 
N-1 t/m N-50.
Favor consultar as páginas i a x e 
P-1 a P-50.
Please refer to pages i to x and 
E-1 to E-50.

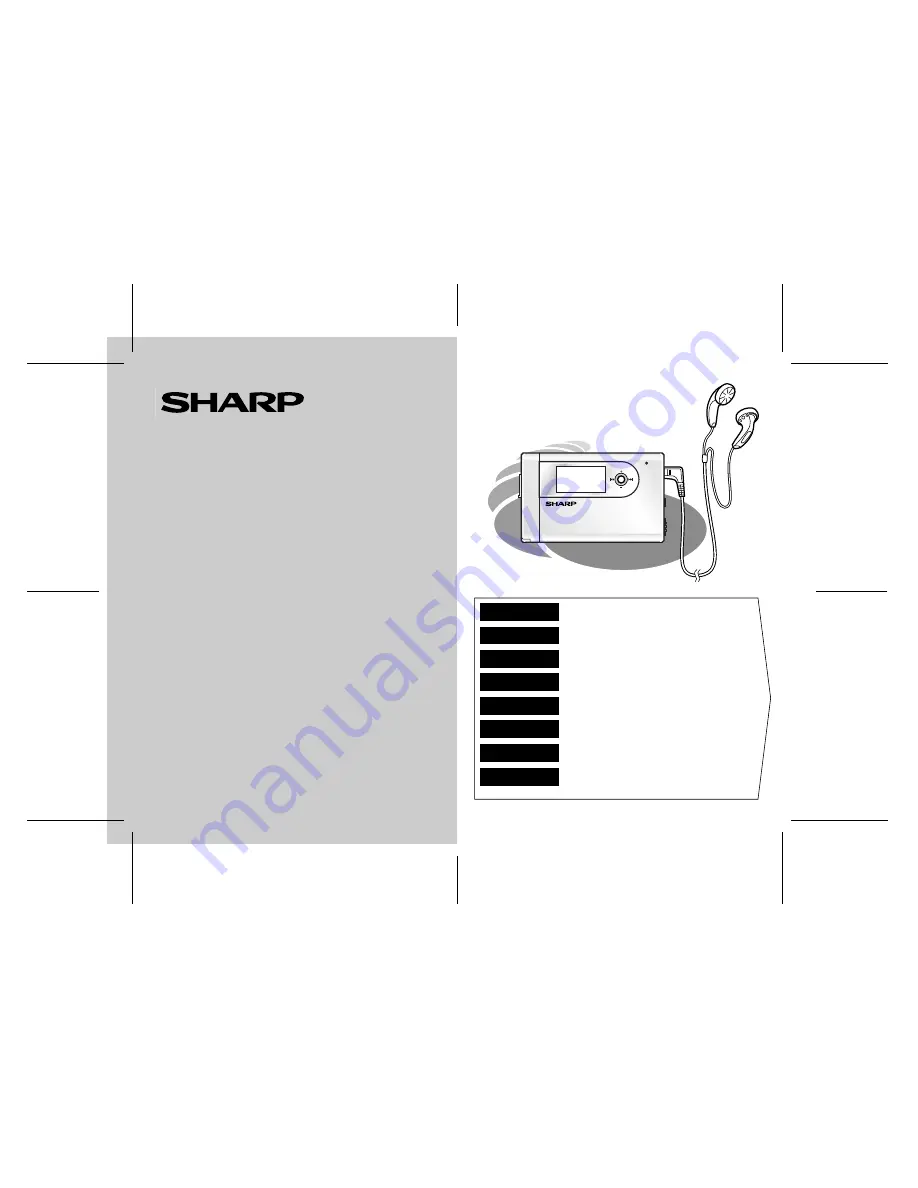
PORTABLER DIGITAL AUDIO PLAYER
BALADEUR MÉMOIRE FLASH
REPRODUCTOR DE AUDIO DIGITAL PORTÁTIL
PORTABELT DIGITAL AUDIOSPELARE
LETTORE AUDIO DIGITALE E PORTATILE
DRAAGBARE DIGITALE AUDIOSPELER
EQUIPAMENTO DE ÁUDIO DIGITAL PORTÁTIL
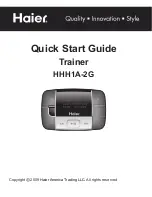
PORTABLE DIGITAL AUDIO PLAYER

MODELL
MODÈLE
MODELO
MODELL

MODELLO
MODEL
MODELO
MODEL

WA-MP100H
WA-MP110H

BEDIENUNGSANLEITUNG
MODE D’EMPLOI
MANUAL DE MANEJO
BRUKSANVISNING

MANUALE DI ISTRUZIONI
GEBRUIKSAANWIJZING
MANUAL DE OPERAÇÃO
OPERATION MANUAL

Summary of Contents for WA-MP100H

Page 1: ... en N 1 t m N 50 Favor consultar as páginas i a x e P 1 a P 50 Please refer to pages i to x and E 1 to E 50 PORTABLER DIGITAL AUDIO PLAYER BALADEUR MÉMOIRE FLASH REPRODUCTOR DE AUDIO DIGITAL PORTÁTIL PORTABELT DIGITAL AUDIOSPELARE LETTORE AUDIO DIGITALE E PORTATILE DRAAGBARE DIGITALE AUDIOSPELER EQUIPAMENTO DE ÁUDIO DIGITAL PORTÁTIL PORTABLE DIGITAL AUDIO PLAYER MODELL MODÈLE MODELO MODELL MODELLO...

Page 2: ...utorizzazione del possessore del copyright Si prega di attenersi alle leggi in vigore sul territorio nazionale Audio visueel materiaal kan worden beschermd door auteursrechten in welk geval het niet mag worden opgenomen zonder de toestemming van de auteurs rechthouder Zie voor nadere informatie de betreffende wetten in het land van gebruik DENNA APPARAT ÄR ANSLUTEN TILL 230 V VÄXELSTRÖM NÄR STICKP...

Page 3: ... CEE Denna utrustning uppfyller kraven enligt riktlinjerna 89 336 EEC och 73 23 EEC så som kompletteras av 93 68 EEC Quest apparecchio è conforme ai requisiti delle direttive 89 336 EEC e 73 23 EEC come emendata dalla direttiva 93 68 EEC Dichiarazionediconformità La società SHARP ELECTRONICS EUROPE GmbH dichiaracheilprodottoSHARPLETTOREAUDIODIGITALE E PORTATILE WA MP100H WA MP110H è costruito in c...

Page 4: ...re goutte Ne pas poser sur l appareil un récipient contenant du liquide Advertencia Para evitar incendios y descargas eléctricas no exponga el aparato a goteo o salpicadura de líquidos No deberán ponerse encima del aparato objetos que estén llenos de líquido como por ejemplo un florero Varning Utsätt inte enheten för dropp eller stänk för att förhindra brand eller elektriska stötar Inga vätskefyll...

Page 5: ...h the law in case of using it with the SHARP earphones model number RPHOHA002SJSA or RPHOHA002SJSB Order proper earphones if the supplied ones become damaged VORSICHT Längeres Abspielen einer tragbaren Stereoanlage mit voller Leistung kann das Gehör des Benutzers beschädigen Im Falle der Verwendung mit dem SHARP Ohrhörer Modell nummer RPHOHA002SJSA oder RPHOHA002SJSB ent spricht das Modell dem Ges...

Page 6: ...s un der längre tid Avvertenza L adattatore CA fornito in dotazione non contiene parti idonee al servizio da parte dell utente Non rimuovere mai le coperture se non si è qualificati a farlo All interno dell adattatore è presente un voltaggio che può essere pericoloso Rimuovere sempre la spina del cavo di alimentazione dalla presa di rete prima di eseguire qualsiasi operazione di assistenza tecnica...

Page 7: ...ente El funcionamiento y las especificaciones no quedan afectados Bokstäver inom parantes i modellnumret anger endast produktfärgen Handhavande och tekniska data påverkas inte Le lettere tra parentesi contenute nel numero di modello indicano solo il colore del prodotto Il funzionamento e i dati tecnici rimangono invariati De tussen haakjes aangegeven letters van het modelnummer tonen uitsluitend d...

Page 8: ...n des utilisateurs privés ménages 1 Au sein de l Union européenne Attention si vous souhaitez mettre cet appareil au rebut ne le jetez pas dans une poubelle ordinaire Les appareils électriques et électroniques usagés doivent être traités séparément et conformément aux lois en vigueur en matière de traitement de récupération et de recyclage adéquats de ces appareils Suite à la mise en oeuvre de ces...

Page 9: ...os equipos eléctricos y electrónicos usados Tras la puesta en práctica por parte de los estados miembros los hogares de particulares dentro de los estados de la Unión Europea pueden devolver sus equipos eléctricos y electrónicos a los centros de recogida designados sin coste alguno En algunos países es posible que también su vendedor local se lleve su viejo producto sin coste alguno si Ud compra u...

Page 10: ...ek tronische appara tuur niet samen met het normale huisafv al mogen worden weggegooid Er bestaat een afzon derlijk inzamelings systeem voor deze producten Informatie over verantwoorde verwijdering A Informazioni sullo smaltimento per gli utenti privati 1 Nell Unione europea Attenzione Per smaltire il presente dispositivo non utilizzare il normale bidone della spazzatura Le apparecchiature elettri...

Page 11: ...identifica do com este sím bolo Significa que os produtos eléctri cos e electrónicos não devem ser mis turados com o lixo doméstico comum Existe um sistema de recolhas específi co para estes pro dutos WEEE_0502_P Informação sobre Eliminação de Produtos WEEE_0502_E A Information on Disposal for Users private households 1 In the European Union Attention If you want to dispose of this equipment pleas...

Page 12: ...t For the best performance read this manual carefully It will guide you in operating your SHARP product This product uses Windows Media Player 9 Series or 10 to transfer audio data from a PC to the unit If Windows Media Player is not installed on the PC or if its version is earlier visit Microsoft Web site to download the programme http www microsoft com Supply of this product does not convey a li...

Page 13: ... data from PC to the unit 16 19 Deleting audio data stored on the unit 20 Playback Disconnecting the unit 21 Playing transferred audio data 22 26 Advanced playback 27 28 Playing to all data recorded with the unit 29 Playing selected data 30 Page FM Radio Listening to the FM radio 31 34 Recording Recording with the built in microphone 35 Recording from the external equipment 36 38 Recording from th...

Page 14: ...laying audio data on the unit see pages 22 23 Windows Media Player If you use a PC running Windows 98 Second Edition install a USB driver from the supplied CD ROM see page 12 Windows Media Player Use Windows Media Player 9 Series or 10 to transfer au dio data from a PC to the unit This operation manual describes how to rip audio data from audio CDs to a PC and how to transfer the audio data from t...

Page 15: ...the above accessories are included The AC adaptor and the USB cable may differ from illustrations shown above Use the supplied earphones only Use the supplied USB cable only Use the supplied audio cable If you use commercially available audio cables they should be shorter than 3 m Earphones x 1 Rechargeable Nickel Metal Hydride battery AD N55BT x 1 Battery carrying case x 1 AC Adaptor RADPAA005SJZ...

Page 16: ... to vibration Places where sand can easily enter the inside of the unit beaches etc If the unit is used near radio tuners or TVs noise and or picture interference may result If you experience these problems move the unit away from such devices Copyright Copyright laws protect sounds images computer pro grammes databases other materials and copyright holders Duplicated material is limited to privat...

Page 17: ...ion Indicator 22 4 Battery Indicator 9 5 Menu Button 7 11 24 6 Microphone 35 7 Earphones Socket 22 8 Neck Strap Hole 6 9 Battery Cover 8 10 Character Information Indicator 10 11 22 11 Play Pause Stop Power Button 10 23 12 Hold Switch 10 Attaching the neck strap Note To protect the USB port cover it with the USB cap when not in use MIC NAVI 012 001 00 03 File name1 Artist name1 LINE IN OPEN POWER H...

Page 18: ...u move the menu button toward Fast forward tuning recalling a station selecting a menu etc If you move the menu button toward Volume down switching FM search preset stations selecting a menu etc If you press the menu button Opening a menu setting A B repeat play executing functions etc If you hold down the menu button Opening closing a menu 1 2 3 4 5 Computer IBM PC AT compatible not operable with...

Page 19: ...e is almost the same as when the AC adaptor is used When charging the ventilation should not be impeded by covering the ventilation openings with items such as newspapers tablecloths curtains etc Battery removal Open the battery cover and pull the battery Do not force the battery cover open too far O P E N HOLD Release Cancel the hold function beforehand see page 10 MIC NAVI Insert the side AC 110...

Page 20: ...ending on the operation being performed This is normal Notes Charge the battery within the range of 5 C 35 C 41 F 95 F After the rechargeable battery is charged or used it will get slightly warm This is normal When charging battery for the first time or after a long period of disuse battery life may be shorter Repeat charge discharge cycle 4 to 5 times to restore the full capacity The unit can be ...

Page 21: ...e safety position direction indicated by the arrow Note If the hold function is active when the unit is turned off the unit cannot be turned on by mistake and the battery will not be drained Press the POWER button In the play or pause mode 1 Press the POWER button for 0 5 seconds or more to exit the mode 2 Hold down the POWER button for 2 seconds or more In the stop menu or FM mode Hold down the P...

Page 22: ...menu button for 0 5 seconds or more to return to the play mode 3 Within 10 seconds move the menu button toward or to select SETUP and press it English Deutsch Français Español Português Italiano Nederlands Svenska POWER SOUND SETUP 4 Within 10 seconds move the menu button toward or to select System and press it 5 Within 10 seconds move the menu button toward or to select Language and press it 6 Wi...

Page 23: ...d CD ROM The installation is not necessary for a PC running Win dows Millennium Edition Windows 2000 Professional Windows XP Professional or Windows XP Home Edi tion 1 Insert the supplied CD ROM into your CD ROM drive 2 Open the wa mp100_50 folder on the CD ROM and double click setup 3 Install the driver following the on screen instruc tions Click the Next button Click the Yes button Click the Nex...

Page 24: ...eration cannot be guaran teed We do not guarantee operation of the unit with self built PCs or PCs with modified motherboards Make sure to use the supplied USB cable Use of other cables two way cables extension cables etc degrades the quality of connection and may cause a malfunction Notes The buttons on the unit do not work if it is connected to a PC Disconnect the PC to operate on the unit see p...

Page 25: ...rring audio data from the PC For Windows Media Player 9 Series Note For details on Windows Media Player refer to its Users Guide 6 7 5 2 1 Launch Windows Media Player Example Start All Programs Windows Media Player 2 On the Tools menu click Options and then Copy Music and select Copy protect music 3 Click OK 4 Insert an audio CD into the PC The audio CD may play automatically depending on settings...

Page 26: ...efer to its Users Guide 6 7 5 2 1 Launch Windows Media Player Example Start All Programs Windows Media Player 2 On the Tools menu click Options and then Rip Music and select Copy protect music 3 Click OK 4 Insert an audio CD into the PC The audio CD may play automatically depending on settings on the PC In this case stop playback 5 Click Rip on the taskbar to show tracks on the audio CD 6 Select t...

Page 27: ...e desired folder to transfer audio data Note You can create subfolders if necessary refer to the Win dows Media Player Users Guide Create them in the lev el indicated in About folder tree When using Windows Media Player 10 create the MUSIC folder beforehand to create subfolders with an artist or album name automatically Note To create subfolders with an artist or album name auto matically click to...

Page 28: ...unit by transferring audio data from the PC 3 5 6 8 4 1 Connect the unit to a PC see page 13 2 Launch Windows Media Player Example Start All Programs Windows Media Player 3 Click Copy to CD or Device on the taskbar 4 From the drop down list of Items to Copy win dow select a list with desired audio data 5 Select the check boxes of audio data to transfer 6 Set the unit as a destination 7 Select a fo...

Page 29: ...or album name auto matically click to display properties and select Create folder hierarchy on device 3 6 5 4 7 1 Connect the unit to a PC see page 13 2 Launch Windows Media Player Example Start All Programs Windows Media Player 3 Click Sync on the taskbar 4 From the drop down list of All Music select a list with desired audio data 5 Select the check boxes of audio data to transfer 6 Set the unit ...

Page 30: ...ression format developed by Microsoft Corporation WAV PCM An audio format widely used in Windows About DRM Digital Rights Management This product supports Windows Media Digital Rights Management 9 Series Using Windows Media Player 9 Series or 10 you can transfer licensed WMA files to the unit for playback Some WMA files may not be playable transferable onto this product due to their license agreem...

Page 31: ... Windows Media Player 10 Caution A WMPInfo xml file and files with extensions of TBL and LMM are created automatically Never edit move or delete these files since they are necessary for the unit and Windows Media Player 3 4 5 3 5 4 1 Connect the unit to a PC see page 13 2 Launch Windows Media Player 3 Windows Media Player 9 Series Click Copy to CD or Device on the taskbar Windows Media Player 10 C...

Page 32: ...n and disconnect the USB cable from the PC Windows 2000 Professional 1 Click Unplug or Eject Hardware on the taskbar 2 Click Stop USB Disk Drive 3 Safe To Remove Hardware appears Click the OK button and disconnect the USB cable from the PC Windows XP Home Edition Professional 1 Click Safely Remove Hardware on the taskbar 2 Click Safely remove USB Mass Storage Device Drive 3 Safe to Remove Hardware...

Page 33: ...ta Notes The unit will restart the FM radio or the data recorded with this unit which you were listening to last time To listen to the transferred audio data see page 23 See page 24 to adjust the volume level and sound quality R L HOLD Release Cancel the hold function beforehand see page 10 Right channel Left channel MIC NAVI 1 Press the POWER button to turn the power on see page 10 2 Playback sta...

Page 34: ...Resume play When you turn off the unit and turn it back on playback starts from the beginning of the audio data which was stopped When listening to the FM radio or data recorded with the unit you can listen to all the transferred audio data as follows 1 Hold down the menu button for 0 5 seconds or more Hold down the menu button for 0 5 seconds or more to return to the play mode 2 Within 10 seconds...

Page 35: ...e control To move to the beginning of the next audio data Move the menu button toward To replay the current audio data Move the menu button toward For fast forward Hold the menu button toward For fast reverse Hold the menu button toward Whilst the playback screen is open hold the menu but ton toward or to increase or decrease the volume Volume level indi cator At extra loud volumes other people ma...

Page 36: ...he menu button toward or to select SETUP and press it 3 Within 10 seconds move the menu button toward or to select Playback and press it SOUND SETUP SETUP Playback RECORD FM 4 Within 10 seconds move the menu button toward or to select EQ and press it 5 Within 10 seconds move the menu button toward or to select an equaliser setting and press it Normal The sound is not modified Rock For rock music J...

Page 37: ...seconds move the menu button toward or to select User and press it 3 Within 10 seconds move the menu button toward or to select the frequency 62 Bass setting 250 1K Midrange setting 4K 16K Treble setting EQ User 62 250 1K 4K 16K 10 0 10 4 Within 10 seconds move the menu button toward or to increase or decrease the gain level 5 Repeat steps 3 and 4 to adjust each frequency 6 Within 10 seconds press...

Page 38: ... to the play mode 2 Within 10 seconds move the menu button toward or to select SETUP and press it 3 Within 10 seconds move the menu button toward or to select Playback and press it 4 Within 10 seconds move the menu button toward or to select REPEAT and press it SOUND SETUP SETUP Playback RECORD FM Playback REPEAT EQ 5 Within 10 seconds move the menu button toward or to select a play mode and press...

Page 39: ...eat is possible only within a single data 1 Perform steps 1 4 on page 27 2 Within 10 seconds move the menu button toward or to select IntroScan and press it 3 Within 10 seconds move the menu button toward or to select a time period and press it 10 30 Second The unit plays each data for a set time period The setting is completed The playback screen returns after 10 seconds REPEAT IntroScan Shuffle ...

Page 40: ...s or more When you press the button again the last played data plays from the beginning Resume play When you turn off the unit and turn it back on playback starts from the beginning of the data which was stopped 1 Press the POWER button to turn the power on see page 10 2 Hold down the menu button for 0 5 seconds or more Hold down the menu button for 0 5 seconds or more to return to the play mode 3...

Page 41: ... F001 mp3 F002 mp3 F999 mp3 Line in recordings L001 mp3 L002 mp3 L999 mp3 Microphone recordings M001 mp3 M002 mp3 M999 mp3 Maximum number 999 1 Press the POWER button to turn the power on see page 10 2 Hold down the menu button for 0 5 seconds or more Hold down the menu button for 0 5 seconds or more to return to the play mode 3 Within 10 seconds move the menu button toward or to select FOLDER and...

Page 42: ...shipped from the factory You can change the FM area to USA see page 34 1 Press the POWER button to turn the power on see page 10 2 Hold down the menu button for 0 5 seconds or more Hold down the menu button for 0 5 seconds or more to return to the play mode 3 Within 10 seconds move the menu button toward or to select FM TUNER and press it MIC NAVI POWER SOUND FM TUNER 4 Move the menu button toward...

Page 43: ...eset channel number Preset channel number 4 Within 5 seconds press the menu button to store that station in memory 5 Repeat steps 1 4 to set other preset stations or to change a preset station When a new station is stored in memory the station previously memorised will be erased Searching Save Channel P02 98 80MHz Stereo Searching Save Channel P07 98 80MHz Stereo Searching 98 80MHz Stereo 1 Perfor...

Page 44: ...re to return to the play mode 2 Within 10 seconds move the menu button toward or to select SETUP and press it 3 Within 10 seconds move the menu button toward or to select FM and press it SOUND SETUP SETUP Playback RECORD FM 4 Within 10 seconds move the menu button toward or to select AutoRecord and press it 5 Within 10 seconds move the menu button toward or to select On and press it The setting is...

Page 45: ...ds or more to return to the play mode 2 Within 10 seconds move the menu button toward or to select SETUP and press it 3 Within 10 seconds move the menu button toward or to select FM and press it SOUND SETUP SETUP Playback RECORD FM 4 Within 10 seconds move the menu button toward or to select FM Area and press it 5 Within 10 seconds move the menu button toward or to select an FM area and press it E...

Page 46: ...p3 L999 mp3 Microphone recordings M001 mp3 M002 mp3 M999 mp3 Maximum number 999 Newly saved files are numbered sequentially following the largest number among the existing file names It is recommended to delete or move files from one with the largest number To transfer data to a PC see To use as a USB storage device on page 45 1 Press the POWER button to turn the power on see page 10 2 Hold down t...

Page 47: ...he unit 2 Press the POWER button to turn the power on see page 10 3 Hold down the menu button for 0 5 seconds or more Hold down the menu button for 0 5 seconds or more to return to the play mode LINE IN External equipment To audio input socket Audio cable supplied Small side Big side POWER SOUND 4 Within 10 seconds move the menu button toward or to select RECORD and press it 5 Within 10 seconds mo...

Page 48: ...n the menu button for 0 5 seconds or more to return to the play mode 4 Within 10 seconds move the menu button toward or to select SETUP and press it POWER SOUND SETUP 5 Within 10 seconds move the menu button toward or to select RECORD and press it 6 Within 10 seconds move the menu button toward or to select Sync Record and press it 7 Within 10 seconds move the menu button toward or to select On an...

Page 49: ...s follows FM radio recordings F001 mp3 F002 mp3 F999 mp3 Line in recordings L001 mp3 L002 mp3 L999 mp3 Microphone recordings M001 mp3 M002 mp3 M999 mp3 Maximum number 999 Newly saved files are numbered sequentially following the largest number among the existing file names It is recommended to delete or move files from one with the largest number To transfer data to a PC see To use as a USB storag...

Page 50: ...Rate 128 kbps 1 Hold down the menu button for 0 5 seconds or more Hold down the menu button for 0 5 seconds or more to return to the play mode 2 Within 10 seconds move the menu button toward or to select SETUP and press it 3 Within 10 seconds move the menu button toward or to select RECORD and press it SOUND SETUP SETUP Playback RECORD FM 4 Within 10 seconds move the menu button toward or to selec...

Page 51: ...mber of bits taken per second when com pressing digital sound As the bit rate decreases data volume reduces and sound quality lowers MP3 When recording you can compress sound in MP3 for mat PCM When recording the sound is digitised but not com pressed 8 Repeat steps 6 7 for other setting For MP3 For PCM 1 BitRate cannot be set to 224 kbps when Sam pling is 48 000 Hz 2 Available for FM and LineIn 9...

Page 52: ... more to return to the play mode 2 Within 10 seconds move the menu button toward or to select FOLDER and press it 3 Within 10 seconds select data or Select a folder or data Open the selected folder Return to the previous level SOUND FOLDER Root VOICE File name1 File name2 4 Press the menu button 5 Move the menu button toward or to select Yes and press it Select No to cancel The playback screen ret...

Page 53: ...ld down the menu button for 0 5 seconds or more to return to the play mode 3 Within 10 seconds move the menu button toward or to select SETUP and press it POWER SOUND SETUP 4 Within 10 seconds move the menu button to ward or to select System and press it 5 Within 10 seconds move the menu button to ward or to select Turn Off and press it 6 Within 10 seconds move the menu button to ward or to select...

Page 54: ...ess it 3 Within 10 seconds move the menu button toward or to adjust contrast and press it The setting is completed The playback screen returns after 10 seconds System Contrast Backlight Turn Off 20 1 Perform steps 2 4 on page 42 2 Within 10 seconds move the menu button toward or to select Backlight and press it 3 Within 10 seconds move the menu button toward or to adjust the lighting time and pres...

Page 55: ... steps 2 4 on page 42 2 Within 10 seconds move the menu button toward or to select RESTORE and press it 3 Within 10 seconds move the menu button toward or to select Yes and press it Select No to cancel The playback screen returns after 10 seconds System Sleep Language RESTORE RESTORE Yes No 1 Hold down the menu button for 0 5 seconds or more Hold down the menu button for 0 5 seconds or more to ret...

Page 56: ...se as a USB storage device 1 Perform steps 2 4 on page 42 2 Within 10 seconds move the menu button toward or to select Sleep and press it 3 Within 10 seconds move the menu button toward or to adjust the time and press it 1 3 Hour The unit turns off after the set time elapses OFF Sleep operation does not work The setting is completed The playback screen returns after 10 seconds System Sleep Languag...

Page 57: ...se Agreement screen appears 4 Click the Yes button The Choose Destination Location screen appears 5 Click the Next button The Select Program Folder screen appears 6 Click the Next button When the installation is completed the InstallShield Wizard Complete screen appears 7 Click the Finish button 1 Visit our web site at http sharp world com worldwide index html and download a firmware update file 2...

Page 58: ...sted Is the unit connected to a PC with the USB cable Sound skipping or loss Is the battery exhausted The battery cannot be charged Is the rechargeable battery in the unit The operation is unstable whilst the PC and the unit are connected Are you using the USB cable that was purchased sep arately Is the unit correctly connected to the PC See page 13 The USB connection display does not appear Is th...

Page 59: ... If the plugs or sockets are dirty noise may be heard Cleaning will prevent noise Caution Do not use chemicals for cleaning petrol paint thin ner etc It may damage the cabinet finish Do not apply oil to the inside of the unit It may cause malfunctions ERROR MESSAGES MEANING Low Battery Can Not Record Recording is impossible due to low battery Recharge the battery Disk Is Full Can Not Record Memory...

Page 60: ...ag together with metal objects keys coins jewelry etc The battery may short out and generate significant amounts of heat Do not short circuit the terminals as they will become very hot and will damage the battery Do not drop or subject the battery to shock Do not insert objects metal etc into the battery com partment of this product or into the rechargeable bat tery Specifications As a part of our...

Page 61: ...B 2 0 and USB 1 1 System require ments Pentium 133 MHz or higher CD ROM drive 10 MB free hard disk space Microsoft Windows 98 Second Edition Millennium Edition 2000 Professional XP Professional XP Home Edition standard installation Notes A combination of sampling frequency and bit rate dif fers depending on audio format Continuous playback At 64 kbps in WMA format earphone output 5 mW 5 mW backlig...

Page 62: ...05 5 21 WA MP100_110H_SEEG_Back fm WA MP100_110H TINSZA068SJZZ SHARP CORPORATION TINSZA068SJZZ 05E R YT 1 ...

Page 63: ...05 5 21 WA MP100_110H_SEEG_Spine fm WA MP100_110H TINSZA068SJZZ WA MP100H 110H PORTABLE DIGITAL AUDIO PLAYER ...

Reviews: