background image

for UK (9JCG5230100042)

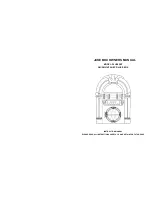
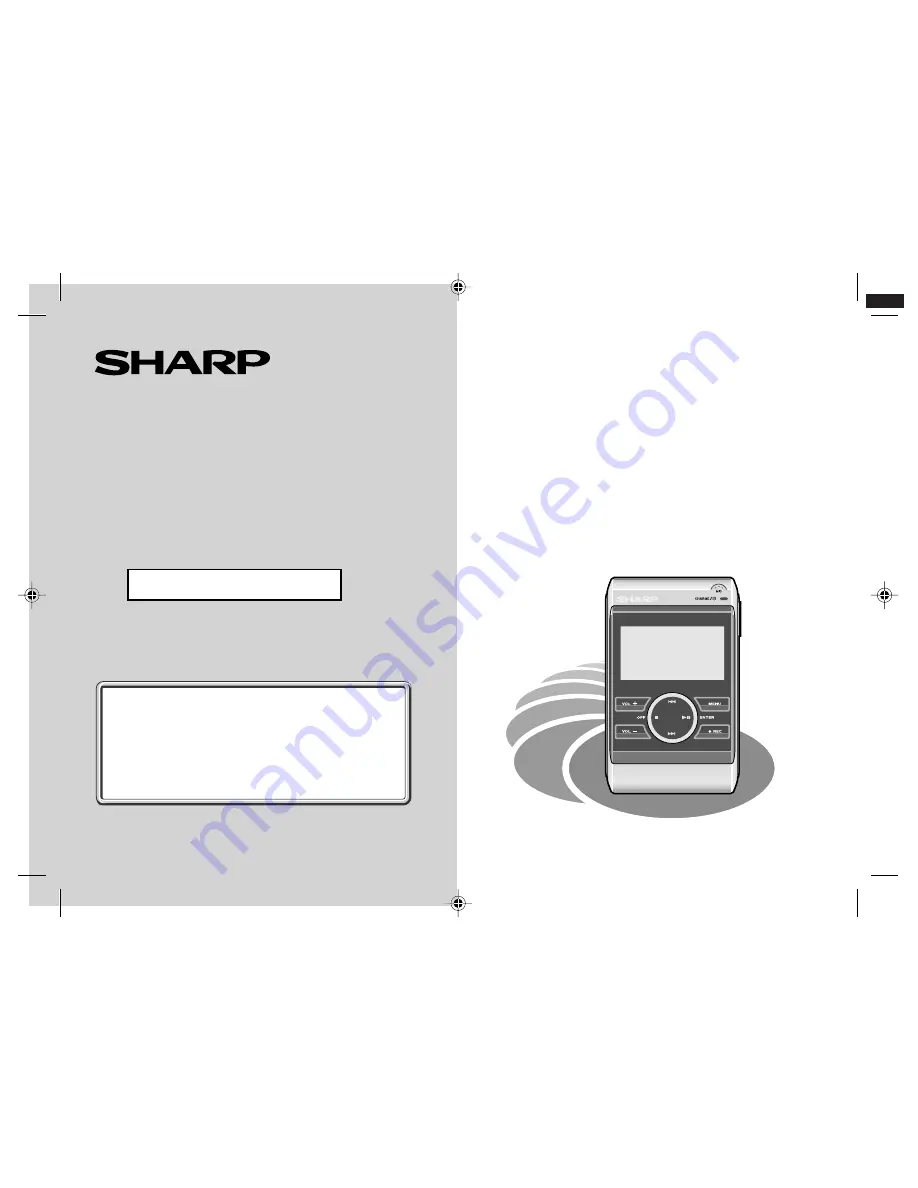
PORTABLE JUKEBOX RECORDER

HR-GB201

MODEL

OPERATION MANUAL

HR-GB201 9JCG5230100042

Thank you for purchasing this SHARP product.
For the best performance, read this manual carefully.
It will guide you in operating your SHARP product.

If you require any advice or assistance regarding 
your Sharp product, please visit our web-site 
www.sharp.co.uk/customersupport.
Customers without Internet access may telephone 
08705 274277 during office hours (or (01) 676 0648 
if telephoning from Ireland).

0101

1

Summary of Contents for GB201

Page 1: ...he best performance read this manual carefully It will guide you in operating your SHARP product If you require any advice or assistance regarding your Sharp product please visit our web site www sharp co uk customersupport Customers without Internet access may telephone 08705 274277 during office hours or 01 676 0648 if telephoning from Ireland 0101 1 ...

Page 2: ...CE INFORMATION In the unlikely event of your equipment requiring re pair please use the supplied postage paid label to send your unit to the Sharp repair centre or contact the dealer or supplier from whom it was purchased Where this is not possible please visit our web site www sharp co uk customersupport Customers without internet access may telephone 08705 274277 during office hours or 01 676 06...

Page 3: ... Act 1956 the Dramatic and Musical Performers Protection Act 1958 the Performers Protection Acts 1963 and 1972 and to any subsequent statutory enactments and orders This equipment complies with the requirements of Directives 89 336 EEC and 73 23 EEC as amended by 93 68 EEC About SHARP Music Manager SHARP Music Manager offers features to work with a hard disk drive These include Transfer of MP3 WMA...

Page 4: ...x 1 with the ear pads AC Adaptor 9JCRADPA8000AF x 1 Multi link Station Cradle x 1 Travel Pouch x 1 USB Connection Cable x 1 CD ROM x 1 Only the above accessories are included The AC adaptor may be different from the one in the drawing The AC adaptor supplied with the HR GB201 must not be used with other equipment Use only the supplied AC adaptor ...

Page 5: ... SHARP Music Manager 15 16 Transferring audio data 17 18 Editing playlists 19 20 Folder settings 21 Editing music information 22 Playing transferred audio data 23 24 Advanced playback 25 29 Page Voice Recording Recording with the built in microphone 30 Playing recorded voice data 31 32 Advanced playback 33 Recording from CD Recording from a CD player 34 35 Playing recorded music data 35 36 Advance...

Page 6: ...8 Volume Up Button 24 26 9 Stop Power Off Button 8 23 32 36 10 Volume Down Button 24 26 11 Microphone 30 12 Battery Charge Hard Disk Access Indicator 7 13 13 Repeat Random Indicator 33 14 Hold Switch 41 15 Character Time Information Indicator 8 23 30 34 43 The display varies depending on the operation 16 Menu Button 24 26 31 36 17 Play Pause Power On Enter Button 8 23 29 31 32 36 18 Record Button ...

Page 7: ...Up and Down Buttons 24 26 4 Hold Switch 41 5 Play Pause Power On Enter Button 8 23 29 31 32 36 6 Skip Up Skip Down Fast Forward Fast Reverse Buttons 23 25 31 36 7 Stop Power Off Button 8 23 32 36 Multi link station Cradle Reference page 1 Connection Terminal to Main Unit 7 2 Line Output Socket Variable 42 3 5 V DC Input Socket 7 4 USB Socket A type 37 5 USB Socket Mini B type 13 1 2 3 4 5 6 7 PC D...

Page 8: ...f the unit is used near radio tuners or TVs noise and or picture interference may result If you experience these problems move the unit away from such devices Copyright Copyright laws protect sounds images computer pro grammes databases other materials and copyright holders Duplicated material is limited to private use only Use of materials beyond this limit or without permission of copyright hold...

Page 9: ...e registered trademarks of Microsoft Corporation in the United States and or other countries MMX and Pentium are trademarks or registered trade marks of Intel Corporation All brand names and product names are trademarks or registered trademarks of their respective owners If a power failure occurs The content being recorded will be damaged if power failure occurs The content being played back may b...

Page 10: ...g battery for the first time or after a long period of disuse battery life may be shorter Repeat charge discharge cycle 4 to 5 times to restore the full capacity Built in battery The built in battery may discharge completely when this product is left unused for long periods Recharge the battery before use Charging time depends on the battery condition and ambient temperature At low temperatures co...

Page 11: ...umable item If it does not charge or the operating time is noticeably shorter than nor mal replace with a new battery Replacement should be carried out by qualified personnel only Contact your dealer or local SHARP service facility Never disassemble this product for this purpose Caution Pay attention to the environment when disposing of this product the built in battery should be handled sepa rate...

Page 12: ...minimum Memory 64 MB minimum 128 MB or more recommended for Windows XP Hard disk space 10 MB minimum required 3 Drive CD ROM drive Interface Available USB port USB 2 0 1 1 Display 1024 x 768 pixels or better high colour 16 bit or better 1 Operation is not guaranteed on all the compatible computers 2 Operation is not guaranteed on computers running upgraded OS or multiple OS with dual boot NTFS for...

Page 13: ...ransferring audio data 1 Transfer audio data to a PC using Windows Media Player etc For details refer to HELP of the software 2 Transfer the audio data to the unit see page 17 3 Play back the audio data see page 23 Notes Audio data transferred by SHARP Music Manager can only be played back on this unit This unit cannot play audio data transferred by other applications Audio data MP3 WMA WAV Conver...

Page 14: ...oup of ISO Audio data can be compressed to about one tenth to one twelfth its original size WMA Windows Media Audio WMA is an audio compression format developed by Microsoft or a file encoded in this format WAV Wave Sound file WAV is an audio file widely used in Windows Creating editing playlists 1 Transfer audio data to the unit 2 Create a playlist see page 19 3 Play audio data from the playlist ...

Page 15: ...hoose Destination Location screen appears 4 Click the Next button The Set Program Shortcuts screen appears 5 Click the Next button 6 Click the Next button When the installation is completed the Setup Com plete screen appears 7 Click the Finish button Check the Yes Launch the program file box After installation SHARP Music Manager starts Notes If the Software Installer screen does not appear in ste...

Page 16: ...ard disk access indicator green flashes Whilst the unit is connected to the PC the screen below appears Caution It is recommended to use the AC adaptor when con necting the unit to a PC Otherwise data on the unit may be corrupted when batteries run out Do not disconnect a USB connection cable or remove the unit from the cradle whilst transferring data from a PC Data on the unit may be corrupted No...

Page 17: ...from the PC Windows Millennium Edition 1 Click Remove Hardware on the taskbar 2 Click USB Disk Stop Drive 3 USB Disk can now be safely removed appears Click the OK button and disconnect the USB con nection cable from the PC Windows 2000 Professional 1 Click Unplug or eject hardware on the taskbar 2 Click USB Mass Storage Device Stop Drive 3 USB Mass Storage Device can now be safely removed appears...

Page 18: ...ou select a drive or folder the contents within are displayed in the file list To display or hide the lower folders Click the or indicator next to drive folder icons Standard bar Note You can also access the functions on the standard bar from the menu bar Menu bar 1 Menu bar 4 Folder tree 2 Standard bar 5 File list 3 Address bar 6 Status bar 3 1 6 2 4 5 1 Back 9 Edit Playlist 2 Forward 10 Edit Mus...

Page 19: ...elected folder file Send To Player Transfer audio data or folders containing audio data to the Jukebox_Sys folder ToolBars Display or hide the standard bar and ad dress bar Status Bar Display or hide the status bar Folder Tree Display or hide the folder tree Audio File Only Display all data or audio file only Back Display the previous folder Forward Display the next folder Up One Level Display the...

Page 20: ...n the Edit menu Audio data is transferred to the Jukebox_Sys folder on the SHARP drive Caution Once transferred to the unit audio data cannot be transferred back to the PC Keep the original data on the PC To disconnect the unit from the PC click the icon on the taskbar see page 14 Notes You can also transfer an entire folder up to 9 subfold ers Audio data are sorted alphabetically after being tran...

Page 21: ...rans ferred Deleting audio data from the unit 1 Start SHARP Music Manager The navigation window appears 2 Select audio data to delete and click Delete on the Edit menu The Confirm File Delete window appears 3 Click the Yes button Caution Are you sure you want to send file name to the Recycle Bin appears When you click Yes the audio data is permanently deleted not moved to the Recycle Bin Note Righ...

Page 22: ...the playlist and save it to the PLAYLIST folder on the SHARP drive 5 Click the Add button The Open File dialogue box appears 6 Select audio data to add to the playlist The data is added to the playlist Select from MP3 WMA and WAV files Only the audio data on the SHARP drive can be added Change the order with the Upward and Downward buttons Playback starts from the top of the playlist 7 Click the S...

Page 23: ...nu 4 Click the Open button and select a desired playlist The playlist edit window appears Only files with the extension m3u can be selected 5 Edit the playlist 6 Click the Save button The playlist is overwritten To change the name click the Save As button Click the Exit button to exit without saving changes 1 Move up audio data 2 Move down audio data 3 Add audio data to the playlist 4 Remove audio...

Page 24: ...on Opening assigned folders 1 Click Favorites menu 2 Select an assigned favourite name The folder of the favourite name opens Organising folders 1 Click Organize Favorites on the Favorites menu The My Favorites dialogue box appears 2 Select a favourite name to organise from the My Favorites dialogue box 3 Click the Done button The My Favorites dialogue box closes and the change is saved 1 Move up ...

Page 25: ...e box appears 4 Click the OK button The Music Information Editor dialogue box closes 5 Click Update Music Info on the Tools menu The information is refreshed Note There is an entry limit for each information Title 30 characters Artist 30 characters Album 30 characters Genre Select from the pull down menu 1 Select a folder 2 Select audio data MP3 format only 3 Enter information title artist name et...

Page 26: ...terrupt playback Press the button To resume playback press the button again To stop playback Press the button You can set the main unit to turn off automatically after a period of inactivity see POWERDOWN on page 40 Note Audio data formats are indicated by the following icons R Right channel Observe the correct direction for the plug Left channel Attaching ear pads Pull to cover Ear pads are easy ...

Page 27: ...ETUP and press the button 3 Select EQ BASS in the same way as step 2 4 Use the or button to select an equaliser mode 5 Press the MENU button The previous screen appears and the setting is com plete Note Whilst the playback window is open you can also use the EQ BASS button on the remote control to change the equaliser mode The mode changes with each press Customising USER mode 1 Select USER from e...

Page 28: ...on during playback Notes To skip some data at one time press the or button repeatedly until the desired audio data appears Operations skip etc may not be possible whilst accessing the hard disk indicator lights green Selecting audio data by information You can select audio data by title artist name etc Use SHARP Music Manager to name audio data and edit other information see page 22 1 Hold down th...

Page 29: ...sired data name and press the button You can specify up to the first 3 characters In the search field you can enter only characters used in data names 4 Use the or button to select data to play and press the button Playback starts Notes To cancel the operation press the MENU button main unit or EQ BASS button remote control for 2 sec onds or more This search is available only for audio data transf...

Page 30: ...use the EQ BASS button on the remote control 2 Use the or button to select SETUP and press the button 3 Select REPEAT in the same way as step 2 4 Select CLASS in the same way as step 2 5 Use the or button to select one of the fol lowing parameters and press the MENU button indicates default setting The previous screen appears and the setting is com plete 00 03 30 10 ALL Play back all audio data on...

Page 31: ...k starts in the selected play mode Notes In random play the unit selects and plays data auto matically After playing all the data once the unit stops automatically Repeat play continues until the stop button is pressed For normal operation cancel repeat play When ALL is selected playback starts from upper folders Numbers indicate a playback order OFF Normal playback ON Repeat play Repeat play is o...

Page 32: ...Go back to step 1 to add another bookmark Note To delete a bookmark select audio data with a book mark and press the button for 2 seconds or more To listen to the audio data in a playlist or audio data with bookmarks You can play bookmarked data or audio data in a playlist For details on playlist see page 19 1 Hold down the MENU button for 2 seconds or more You can also use the EQ BASS button on t...

Page 33: ...2 Hold down the REC button for 2 seconds or more Recording starts To interrupt recording Press the button To resume recording press the button again To stop recording Press the button Notes You can change the recording quality see page 40 Whilst recording with the built in microphone data is written to the hard disk at regular intervals about every 30 minutes at 64 kbps and every 15 minutes at 128...

Page 34: ...tton on the remote control 3 Use the or button to select RECORD and press the button 4 Select VOICE RECORD in the same way as step 3 5 Use the or button to select data to play and press the button Playback starts Adjust the volume and select a favourite equaliser see page 24 R Right channel Left channel L Attaching ear pads Pull to cover Ear pads are easy to tear Handle carefully Observe the corre...

Page 35: ...ume playback press the button again To stop playback Press the button You can set the main unit to turn off automatically after a period of inactivity see POWERDOWN on page 40 For further operations see Transferring from PC Page To locate the desired portion 25 To locate the beginning of voice data 25 Refer to the procedure for audio data Repeat play or Random play 27 28 ...

Page 36: ...S button on the remote control 5 Play the voice data steps 3 5 page 31 6 Press the button The start point A is created 7 Press the button again to enter the end point B A B repeat plays from the start point A to the end point B To normal playback Press the button To stop A B repeat play Press the button The A B repeat play setting remains even after play back To resume A B repeat play start playba...

Page 37: ...To interrupt recording When the CD player is stopped the music data num ber increases by one and the unit will enter the syn chro recording pause mode When playback is resumed recording will also resume If a silence lasts for 2 seconds or more the music data number increases by one and recording will be paused number does not increase for approximately 5 seconds after recording starts When the uni...

Page 38: ...3 Cancel the settings of synchro recording see page 40 4 Begin playback on the CD player 5 At the point you want to record hold down the REC button for 2 seconds or more Recording starts To interrupt recording Press the button To resume recording press the button again A new music data is created when recording resumes To stop recording Press the button Playingrecordedmusicdata 00 00 00 R Right ch...

Page 39: ...the or button to select data to play and press the button Playback starts Adjust the volume and select a favourite equaliser see page 24 To interrupt playback Press the button To resume playback press the button again To stop playback Press the button You can set the main unit to turn off automatically after a period of inactivity see POWERDOWN on page 40 For further operations see Transferring fr...

Page 40: ...t the AC adaptor to the DC IN 5V socket and place the unit on the cradle see page 7 4 Connect the USB cable of the digital camera into the USB socket A type 5 Turn on the digital camera 6 Use the or button scroll up down and the button enter the directory to browse the con tent of the flash card PC DSC IN LINE OUT Image data can only be directly transferred when us ing the USB Mass Storage Class B...

Page 41: ... the unit may be corrupted when batteries run out Do not disconnect the USB cable or remove the unit from the cradle whilst transferring data from a digital camera Otherwise data on the unit may be corrupted Notes Use the unit as data storage you cannot display images To view images retransfer data to the digital camera or copy to a PC The operation buttons on the main unit do not work if it is co...

Page 42: ...lso use the EQ BASS button on the remote control 2 Use the or button to select SETUP and press the button 3 Select a menu in the same way as step 2 Example SYSTEM is selected 4 Change the setting item in the same way as step 2 Example AUTO PLAY is selected 5 Press the MENU button The setting is complete Note Whilst selecting an item the MENU button lets you to return to the previous screen Change ...

Page 43: ... when signals break You do not need to press the REC and button repeatedly to record each track on the CD ENCODER Adjust the recording quality The higher the bit rate the better the quality of recordings VOICE Adjust the voice recording quality INITIALIZE Restore all settings to the default INFORMATION Check the firmware version total hard disk capacity shown in percent and the total number of dat...

Page 44: ...anguage to display the data name or the audio data information indicates default setting Hold function The operation can be kept even if other buttons are acci dentally pressed in a place such as a crowded train Use either the unit or remote control to activate the hold function Move the HOLD switch to the safety position direction indicated by the arrow English French Germany Hungarian Italian No...

Page 45: ...LINE OUT socket of the cradle to external equipment via an audio cable commer cially available 4 Connect the AC adaptor to the DC IN 5V socket and place the unit on the cradle see page 7 5 Start playback see pages 23 31 and 36 Notes The operation buttons on the main unit do not work if it is connected to a PC Disconnect the PC to operate on the unit see page 14 The LINE OUT output is coupled with ...

Page 46: ...gs MP3 files encoded at 128 kbps 4 minutes per data The following is a recommended folder structure to access the desired audio data quickly Folders on the unit Display Artist name 1 Album name 1 Audio data 1 Album name 2 Artist name 2 Audio data 2 Audio data 3 Audio data 1 Audio data 2 Audio data 3 Jukebox_Sys 0000 0004 0000 0004 0012 0000 ...

Page 47: ...s folder Many potential problems can be resolved by the owner with out calling a service technician If something seems to be wrong with this product check the following before calling your authorised SHARP dealer or service centre The unit does not turn on Is the AC adaptor disconnected Is the built in battery exhausted Is the unit in the hold mode Is the button pressed for 2 seconds or more Has c...

Page 48: ...p CD ROM installed The unit does not play 12 hours although it is specified in the operation manual 12 hours of playback is based on MP3 files encoded at a bit rate of 128 kbps Power consumption is minimised under this condition since the unit accesses the hard disk only once every 28 minutes Higher bit rate in creases the access and power consumption leading to less playback time In audio data in...

Page 49: ...aporate and unit will work properly Upgrading the firmware For possible firmware upgrades visit our support web site at http sharp world com products netmd index htm You can download firmware files to your PC to upgrade this product Caution Never format the hard disk on this product Functions may be disabled Maintenance Cleaning When the unit becomes dirty Clean it with a soft cloth When the unit ...

Page 50: ...cradle Power consumption 0 5 A switching type AC adaptor Output power RMS 10 mW 5 mW 5 mW Charging time Approx 4 hours fully charged when using the AC adaptor included with the unit Dimensions Width 63 4 mm 2 1 2 Height 19 1 mm 25 32 Depth 105 mm 4 5 32 Weight 157 g 0 35 lbs Sockets Main unit Earphones impedance 32 ohms remote control Audio line input Cradle Audio line output USB A type USB mini B...

Page 51: ... MP3 32 kbps Quality LOW Storage media 20 GB hard disk drive 1 8 inch Input sensitivity 2 V recording level 20 k ohms for LINE IN Output level Earphones 5 mW 5 mW maximum output level 32 ohms Line out 200 mV 12 dB 10 k ohms Battery life Continuous recording Approx 4 hours Continuous play Approx 12 hours Continuous recording Microphone recording at 64 kbps earphone output 0 5 mW 0 5 mW Line in reco...

Page 52: ...use fair wear and tear neglect tampering with the equipment or any attempt at ad justment or repair other than by a Service Facility ap pointed by Sharp 5 In the unlikely event of a defect occuring the product must be returned to the Company s repair centre with proof of purchase A postage paid label and a fault re port form are supplied with the product for this purpose It is your responsibility ...

Reviews: