background image

SPECIAL NOTE FOR USERS IN THE U.K.

The mains lead of this product is fitted with a non-rewireable (moulded) plug
incorporating a 3A fuse.
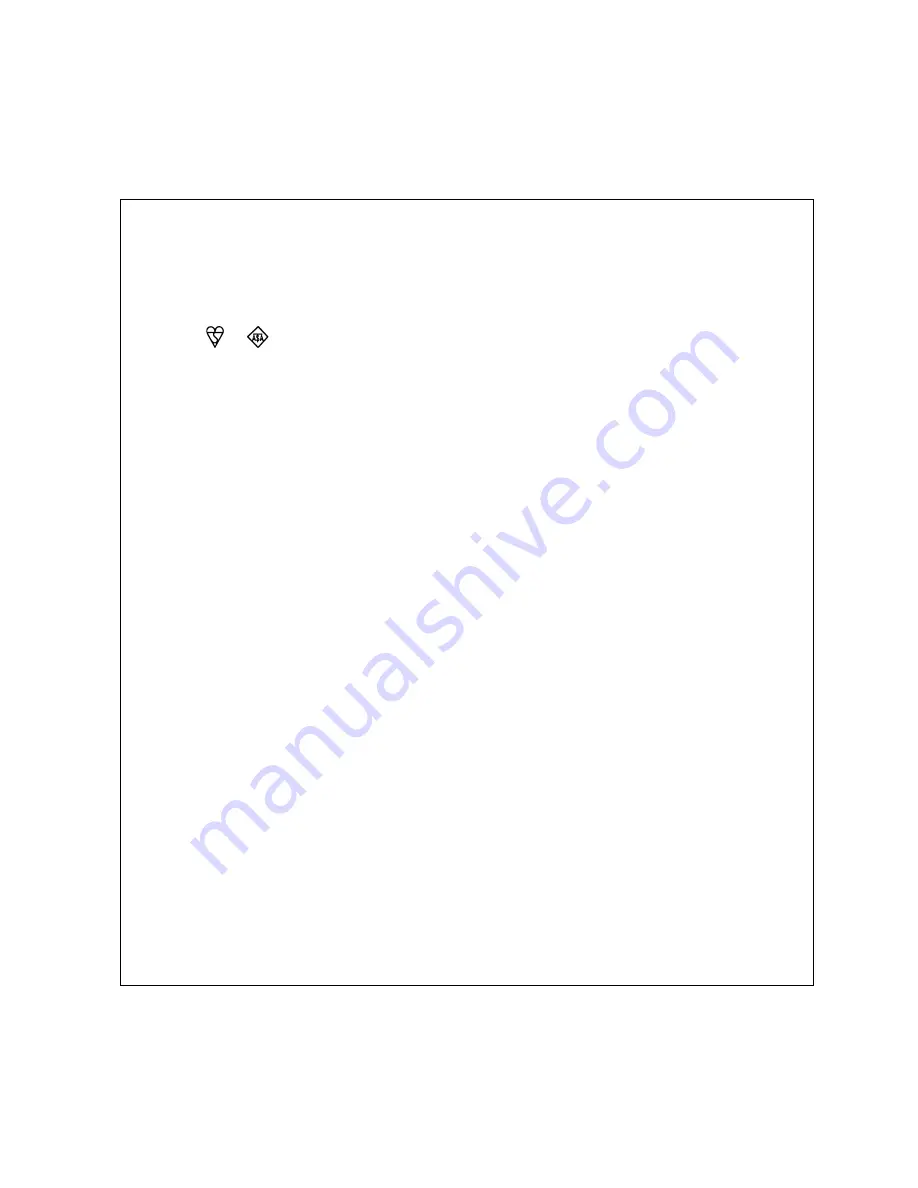
Should the fuse need to be replaced, a BSI or ASTA approved BS 1362 fuse
marked 

or 

and of the same rating as above, which is also indicated on the

pin face of the plug, must be used.
Always refit the fuse cover after replacing the fuse.  Never use the plug without
the fuse cover fitted.
In the unlikely event of the socket outlet in your home not being compatible with
the plug supplied, cut-off the mains plug and fit an appropriate type.

DANGER:

The fuse from the cut-off plug should be removed and the cut-off
plug destroyed immediately and disposed of in a safe manner.
Under no circumstances should the cut-off plug be inserted
elsewhere into a 13A socket outlet,  as a serious electric shock may
occur.

To fit an appropriate plug to the mains lead, follow the instructions below:

IMPORTANT:

The wires in the mains lead are coloured in accordance with the
following code:

Blue:

Neutral

Brown: Live

As the colours of the wires in the mains lead of this product may not correspond
with the coloured markings identifying the terminals in your plug, proceed as
follows:
—The wire which is coloured blue must be connected to the plug terminal which

is marked N or coloured black.

—The wire which is coloured brown must be connected to the plug terminal

which  is marked L or coloured red.

Ensure that neither the brown nor the blue wire is connected to the earth
terminal in your three-pin plug.
Before replacing the plug cover make sure that:
—If the new fitted plug contains a fuse, its value is the same as that removed

from the cut-off plug.

—The cord grip is clamped over the sheath of the mains lead and not simply

over the lead wires.

IF YOU HAVE ANY DOUBT, CONSULT A QUALIFIED ELECTRICIAN.

Summary of Contents for DV-L80S

Page 1: ...serious electric shock may occur To fit an appropriate plug to the mains lead follow the instructions below IMPORTANT The wires in the mains lead are coloured in accordance with the following code Blue Neutral Brown Live As the colours of the wires in the mains lead of this product may not correspond with the coloured markings identifying the terminals in your plug proceed as follows The wire whic...

Page 2: ...ion Manual Icon Meaning DVD DVD C D C D VIDEO VIDEO C D C D DVD RW DVD RW Icon Meaning Quick Start Guide the separate volume GENERAL INFORMATION SETTING UP procedure BASIC OPERATIONS SPECIAL FUNCTIONS OTHER INFORMATION Important Be sure to read this Operation Manual carefully before using the Player for the first time and keep it on hand for future reference when you experience operational problem...

Page 3: ... Capacity Indicator 32 Turning Power On and Off 33 Using the Remote Control 34 Installing the battery in the Remote 34 Operating range of the Remote 34 Switching Operation Buttons to Select Enter Buttons 36 Screen type and button functions 36 Operation Modes 38 Setup 39 Initial setup OSD LANGUAGE SETUP 39 TV MODE SETUP setting 40 PARENTAL SETUP setting 42 AUDIO SETUP setting 47 DISC LANGUAGE setti...

Page 4: ...79 Angle setting 80 Audio setting 81 VIRTUAL DOLBY QSURROUND setting 82 DIGITAL GAMMA setting 84 DIGITAL SUPER PICTURE setting 85 Zoom Function 86 Repeat Playback 87 Chapter repeat 87 Title repeat 87 Track Disc repeat 88 A B repeat 88 Programmed Playback 89 Title programmed playback 89 Chapter programmed playback 91 Track programmed playback 93 SelectingTitles from theTitle Menu 95 Setting Play Pa...

Page 5: ...THE EYES DO NOT ATTEMPT TO DISASSEMBLE THE CABINET REFER SERVICING TO QUALIFIED PERSONNEL ONLY WARNING TO REDUCE THE RISK OF FIRE OR ELECTRIC SHOCK DO NOT EXPOSE THIS PLAYER TO RAIN OR MOISTURE TO REDUCE THE RISK OF FIRE OR ELECTRIC SHOCK AND ANNOYING INTERFERENCE USE THE RECOMMENDED ACCESSORIES ONLY Laser Diode Properties for DVD DVD RW disc Play for CD Video CD disc Play Material AlGaInP Materia...

Page 6: ...LIG OCH OSYNLIG LASERSTRÅLNING NÄR DENNA DEL ÄR ÖPPNAD OCH SPÄRRAR ÄR URKOPPLADE STIRRA EJ IN I STRÅLEN OCH BETRAKTA EJ STRÅLEN GENOM OPTISKA INSTRUMENT VARO AVATTAESSA JA SUOJALUKITUS OHITETTAESSA OLET ALTTIINA NÄKYVÄÄ JA NÄKYMÄTÖN LASERSÄTEILYLLE ÄLÄ TUIJOTA SÄTEESEEN ÄLÄKÄ KATSO SITÄ OPTISEN LAITTEEN LÄPI ADVARSEL SYNLIG OG USYNLIG LASERSTRÅLNING NÅR DEKSEL ÅPNES OG SIKKERHEDSLÅS BRYTES STIRR I...

Page 7: ... Player through the gaps as this could cause serious damage possibly resulting in fire Do not place any object containing water or other liquids on the Player In the event that liquid should enter the cabinet unplug the Player immediately and contact the retailer or service centre approved by SHARP immediately Do not remove the Player cabinet Touching parts inside the cabinet could result in elect...

Page 8: ...turn off the Player Service Do not attempt to service this Player yourself Please refer any service to the nearest service centre approved by SHARP Copyright For the European Continent except the U K Audio visual material may consist of copyrighted works which must not be recorded without the authority of the owner of the copyright Please refer to relevant laws in your country For the U K Recordin...

Page 9: ...thorized by Macrovision Corporation Reverse engineering or disassembly is prohibited Recommended Measures for Optimum Picture Excellence The Player is a precision device that is constructed using extremely accurate technology Soiling or friction affecting the pickup lens or disc drive can impair the image quality At the worst neither video nor audio will be played back To obtain optimum picture qu...

Page 10: ...or adhesive labels to the disc If the Surface is Soiled C Wipe gently with a soft damp water only cloth When wiping discs always move the cloth from the centre hole toward the outer edge If you wipe the discs using a circular motion circular scratches are likely to occur which will cause noise If the playing surface of a disc is soiled or scratched the Player may display indicator on the screen an...

Page 11: ...lution 336 960 pixel LCD screen produces images of outstanding quality DIGITAL GAMMA correction and DIGITAL SUPER PICTURE provide more realistic image detail VIRTUAL DOLBY 1 QSURROUND ensures richer sound from two built in speakers AV input output optical digital output jack equipped as standard An optical digital output jack which doubles as the audio input output jack can be used to output a str...

Page 12: ...rd Connecting an amplifier with 5 1ch input jacks to the Player provides richer more powerful surround sound 1 QSURROUNDTM is a trademark of QSound Labs Inc 2 Manufactured under license from Dolby Laboratories Dolby Pro Logic and the double D symbol are trademarks of Dolby Laboratories Confidential Unpublished Works 1992 1997 Dolby Laboratories Inc All rights reserved 3 DTS and DTS Digital Surroun...

Page 13: ... unit OPERATE TITLE MENU SETUP ZOOM PROGRAM DISPLAY VIEW MODE DVD VIDEO PLAYER RETURN VIDEO ADJ ENTER SHIFT FUNCTION VOLUME INPUT DVD LCD ON OFF Supplied Accessories Optional Accessories Lithium ion battery pack BT L200S AC Cords For the European Continent except the U K and Eire For the U K and Eire Operation Manual Quick Start Guide Quick Start Guide ...

Page 14: ...gion number for this Player is 2 1 Players and discs are designed with region numbers which dictate the regions in which a disc can be played If the region number on the disc you want to play does not match the region number in your Player you will not be able to play the disc DVD 8cm 3 disc 12cm 5 disc DVD RW 8cm 3 disc 12cm 5 disc VIDEO CD 8cm 3 disc 12cm 5 disc Audio CD 8cm 3 disc 12cm 5 disc 1...

Page 15: ...ons given in this Operation Manual In this event follow the instructions given on the screen Discs that Cannot be Played The following types of discs cannot be played back on this Player In many cases attempting to play back such discs may result in malfunction and or damage to this Player Illegally produced or pirated discs Photo CD DVD Audio SACD DVD ROM CD ROM DVD R S VCD CVD or any other disc ...

Page 16: ...s on the other hand are subdivisions of titles Example DVD VIDEO CDs and Audio CDs are divided into tracks You can think of a track as one tune on an Audio CD Example VIDEO CD or Audio CD Numbers identify each title chapter and track on a disc Most discs have these numbers recorded on them but some do not Title 1 Title 2 Chapter 1 Chapter 2 Chapter 3 Chapter 1 Chapter 2 Track 1 Track 2 Track 3 Tra...

Page 17: ...yback on a PAL TV When playing an NTSC disc using a PAL TV please note the following The picture will shrink vertically to some degree as shown in the diagram but this does not indicate a malfunction in your TV or Player If your TV does not have a V HOLD control the picture may roll and be unwatchable However if you use a TV with V HOLD control you can stop the rolling by adjusting the V HOLD cont...

Page 18: ...T OPTICAL C SW SURROUND VIDEO IN OUT jack yellow Only PAL signal can be input NTSC signal cannot be input PHONES jack green AUDIO OUT CENTRE SUBWOOFER jack black AUDIO OUT SURROUND jack black AUDIO L R IN OUT jack white DIGITAL OUT OPTICAL jack white 22 23 21 26 26 23 24 25 27 DC IN 10V DC IN 10V DC IN jack 28 Numbers in refer to the main pages in this Operation Manual where the topic is explained...

Page 19: ...control sensor POWER G CHARGE R lamp 19 33 38 66 66 î OPEN 30 33 OPERATE INPUT DVD VOLUME VOLUME SETUP ADJ Display panel movement range 180 0 The operation buttons have the following Select Enter functions when Setup screen Function control screen or another type of setting screen is on the display 39 74 97 36 72 70 65 66 41 70 SHIFT RETURN à SKIP À SKIP Ë STOP û PLAY â STILL PAUSE Numbers in refe...

Page 20: ...g so can seriously damage the display panel and Player The range of movement for the disc compartment cover is 0 to 60 Never try to force it open past 60 Doing so can seriously damage the disc compartment cover and Player Battery connectors Anti tip stand Extending the anti tip stand protects against the Player tipping backwards while the display panel is open ...

Page 21: ... VIEW MODE 67 LCD ON OFF à SKIP À SKIP 73 è FWD 73 È REV Ë STOP û PLAY â STILL PAUSE 36 SHIFT 38 INPUT DVD 33 OPERATE 74 FUNCTION 95 TITLE 96 97 MENU VIDEO ADJ 39 SETUP 72 F ADV 72 SLOW 86 89 ZOOM PROGRAM 87 REPEAT 62 DISPLAY The operation buttons have the following Select Enter functions when Setup screen Function control screen or another type of setting screen is on the display Numbers in refer...

Page 22: ... 1 Connect the earphones that come with the Player to the PHONES jack The PHONES jack is a stereo mini jack Important Lower the volume level to minimum before you plug the supplied earphones or commercially available headphones Connecting the supplied earphones or commercially available headphones disables the Player s speakers 2 Use VOLUME and VOLUME to adjust the volume level Using Headphones PH...

Page 23: ...ith the Player to connect to the video input output and audio input output jacks Using other cables can cause malfunction Refer to the operation manual for the other equipment for details about its operation connecting procedures etc Do not use the S video cable for connecting to another device for input The S video cable is for output only VCR Camcorder VIDEO IN OUT AUDIO L R AUDIO OUT PHONES SUR...

Page 24: ...ntrol the Player while the display panel is closed You should turn off the LCD display by holding down LCD ON OFF for two or more seconds To watch Player images on the TV 1 Turn on the TV 2 Set the TV to channel where the Player is connected AV VIDEO etc 3 Turn on the Player and start play See page 64 for details on how to play a disc Connecting a TV with External Terminals VIDEO IN OUT AUDIO L R ...

Page 25: ...e Connection Connecting to Audio Equipment VIDEO IN OUT AUDIO L R AUDIO OUT PHONES SURROUND C SW DIGITAL OUT OPTICAL ANALOG INPUT L R White Red AUDIO L R Audio cable supplied Amplifier of stereo system etc To amplifier audio input jacks Jack and Plug Colours Audio Left White Audio Right Red After making the above connection 1 Set the SPEAKER in SPEAKER SETUP to 2ch see page 56 When connecting to a...

Page 26: ...digital connection illustrated above shows connection to audio equipment that is not equipped with a decoder Because of this it cannot produce any sound when playing a DVD whose audio track is recorded in Dolby Digital 5 1 channel Dolby Surround Pro Logic DTS or MPEG Audio To play the audio on such a DVD you must configure a digital connection with an audio processor or amplifier equipped with a d...

Page 27: ... 56 2 Set the DELAY in SPEAKER SETUP according to your speaker position See page 58 VIDEO IN OUT AUDIO L R AUDIO OUT PHONES SURROUND C SW DIGITAL OUT OPTICAL FL FR SL SR C SW 5 1ch INPUT AUDIO L R To AUDIO FRONT input jack AUDIO OUT SURROUND To AUDIO SURROUND input jack AUDIO OUT C SW To AUDIO CENTRE SUBWOOFER input jack Audio cable commercially available Audio cable commercially available Audio c...

Page 28: ...een page 96 or the Function control screen page 74 to select DTS audio After making the above connection 1 Set the SPEAKER in SPEAKER SETUP to 2ch see page 56 2 Set the DIGITAL in AUDIO SETUP to BITSTREAM see page 49 You need to purchase a commercially available optical digital cable to make the connection described above To play a disc recorded with DTS you need to use DTS processor or amplifier ...

Page 29: ...to unplug the AC adapter from the power outlet Do not leave the AC adapter in areas subject to high humidity or dust Such conditions create the danger of fire and electric shock CAUTION Never use any commercially available electronic transformer Connecting the AC adapter to an electronic voltage transformer of the type widely available at tourist shops can result in fire electrical shock or other ...

Page 30: ...rmly Important To prevent mis operation while attaching or removing the battery pack make sure that the Player s power is turned off Make sure that the battery pack is positioned correctly when you attach it to the Player Positioning it wrong can cause malfunction The battery pack needs time to initialize whenever you attach it to the Player Wait for about three seconds after attaching it to turn ...

Page 31: ...s charge a stored battery pack and use it to power the Player The battery pack becomes warm when charging This is normal and does not indicate abnormality If the POWER G CHARGE R lamp flashes red at high speed or does not light red when charging it could mean the battery pack is faulty See Troubleshooting on page 103 Using the AC adapter with the battery pack You can charge the battery pack while ...

Page 32: ...pe temperature battery condition and speaker volume To remove the battery pack from the Player Make sure the Player s power is turned off 1 Unplug the DC cord While holding the battery release button to the left slide the Player in the direction indicated by the arrow 2 Lift the Player in the direction indicated by the arrow Important Never remove the battery pack while a playback operation is in ...

Page 33: ...only Regardless of the display mode the low battery warning appears on the display whenever the battery is about to go dead The low battery warning does not appear when the display panel is closed When the POWER G CHARGE R lamp flashes green replace the battery pack with a charged one or switch to AC adapter power The low battery warning is being displayed until the battery goes dead When the batt...

Page 34: ...n you leave the Player in the DVD mode without a disc inserted or when playback is stopped for more than 5 minutes Power is also turned off if no signal is received for more than 5 minutes in INPUT mode When not in use unplug the AC adapter from the power outlet The power supply circuit performs an initialization routine immediately after you connect the AC adapter or a battery pack Because of thi...

Page 35: ...strong light Change the orientation of the light or the Player and try again If you do not plan to use the Remote for a long time remove its battery 1 Holding the release tab to the left slide the battery holder from the Remote with your fingernail catching the slit 2 Place a lithium battery into the battery holder and slide the battery holder back into place Make sure the side of the battery is f...

Page 36: ...A PHYSICIAN IMMEDIATELY FOR EMERGENCY TREATMENT BATTERY MAY EXPLODE IF MISTREATED DO NOT RECHARGE DISASSEMBLE OR DISPOSE OF IN FIRE Do not short circuit recharge disassemble or heat the lithium battery Should the lithium battery leak wipe the battery compartment and holder clean and then insert a new battery The lithium battery will last about six months to one year of normal usage Purchase the Re...

Page 37: ...he button functions as shown below Example SwitchingOperationButtonstoSelect EnterButtons ENTER ENTER ENTER Press SHIFT Press SHIFT Operation button functions Select Enter button functions Number input button functions Operation buttons Select Enter buttons Number input buttons Screen Player Remote Control DVD DVD DVD 1 ENTER à SKIP Ë STOP û PLAY â STILL PAUSE À SKIP ENTER ENTER ENTER ENTER ENTER ...

Page 38: ... one of the above screens is on the display toggles operation button functions between operation and select enter See the sections covering each of the above displays for full details While one of the above screens is on the display the operation buttons do not function as numeric input buttons You cannot change the button function while the Video adjust screen DVD RW menu screen or Program screen...

Page 39: ...power 2 Press INPUT DVD Each press of INPUT DVD toggles between the DVD mode and the INPUT mode Operation Modes INPUT mode DVD mode INPUT OPERATE TITLE MENU SETUP ZOOM PROGRAM DISPLAY VIEW MODE DVD VIDEO PLAYER RETURN VIDEO ADJ ENTER SHIFT FUNCTION VOLUME INPUT DVD LCD ON OFF OPERATE INPUT DVD SETUP ADJ SHIFT VOLUME ENTER PUSH TO CLOSE RETURN OPEN POWER G CHARGE R VID EO IN O UT DIGITALOUT O PTICA...

Page 40: ...hen you press SETUP the screen in the language that you selected in step 3 above appears immediately You can change OSD LANGUAGE whenever you want For details please refer to OSD LANGUAGE SETUP setting on page 55 OPERATE TITLE MENU SETUP ZOOM PROGRAM DISPLAY VIEW MODE DVD VIDEO PLAYER RETURN VIDEO ADJ ENTER SHIFT FUNCTION VOLUME INPUT DVD LCD ON OFF OPERATE INPUT DVD SETUP ADJ SHIFT VOLUME ENTER P...

Page 41: ...Player screen or connected TV see page 60 Viewing on a 4 3 Size TV Using Pan Scan Select PS 4 3 for wide DVD video output When playing a wide image disc the left and right sides of the image are cut pan scan to output a natural looking 4 3 size image A wide image disc without pan scan P S is played back in letter box A 4 3 disk is played as is in 4 3 Using Letter Box Select LB 4 3 for wide DVD vid...

Page 42: ...reen while a playback operation is in progress If a disc is playing stop playback first If you select 16 9 while a 4 3 TV is connected playing a 16 9 disc displays a vertical image screen Black bands appear at the top and bottom of the screen TV MODE SETUP TV MODE TV MODE SETUP TV MODE OPERATE TITLE MENU SETUP ZOOM PROGRAM DISPLAY VIEW MODE DVD VIDEO PLAYER RETURN VIDEO ADJ ENTER SHIFT FUNCTION VO...

Page 43: ...he parental level which controls the types of scenes that are played back from a disc CODE Allows selection of a country code available on a disc You can use the parental lock function only with DVDs that are equipped with the parental lock feature The parental level depends on countries If you do not set the country code correctly it fails to work correctly Player parental level settings Level 1 ...

Page 44: ...level during playback Setting the parental level for the first time USA CANADA JAPAN GERMANY FRANCE UK ITALY SPAIN SWISS SWEDEN HOLLAND NORWAY DENMARK FINLAND BELGIUM HONG KONG SINGAPORE THAILAND MALAYSIA INDONESIA TAIWAN PHILIPPINE AUSTRALIA RUSSIA CHINA Setup OPERATE TITLE MENU SETUP ZOOM PROGRAM DISPLAY VIEW MODE DVD VIDEO PLAYER RETURN VIDEO ADJ ENTER SHIFT FUNCTION VOLUME INPUT DVD LCD ON OFF...

Page 45: ...l level setting to view the original scenes When this prompt appears input the password to view the original scenes 5 Press ENTER to confirm your password re enter the numbers you entered in step 4 using or If you enter the wrong number three times in succession the normal screen reappears If you forget your password you can erase your current password by pressing F ADV four times 6 Press ENTER an...

Page 46: ...ETUP 3 Press ENTER to display the password verification screen 4 Use or to enter the 4 digit password that was set previously Press or to select the number Press or to move to the place where you enter the number When you have finished entering your 4 digit number changes to If you forget your password you can erase your current password by pressing F ADV four times 5 Press ENTER and then use or t...

Page 47: ...r than the current setting page 45 NO Does not change the parental level maintains the current level page 45 2 Press ENTER If NO was selected in step 1 the normal screen reappears If YES was selected in step 1 the screen shown on the right appears To temporarily change the parental level enter your password page 45 and confirm the password The setting automatically changes temporarily to the disc ...

Page 48: ... the audio on a DVD the average overall volume level of the audio is relatively lower than that produced by a VIDEO CD Audio CD This is to provide the widest possible dynamic range To counteract this your Player automatically raises the overall average volume level of a disc recorded using Dolby Digital to a level that is similar to that of a VIDEO CD Audio CD OFF Audio level recorded on disc is p...

Page 49: ...e of the OFF setting is recommended when the Player is connected to audio equipment 6 Press ENTER to confirm the setting To exit the Setup screen and return to the Startup screen press SETUP or RETURN AUDIO SETUP COMPRESSION OFF MPEG DIGITAL BITSTREAM BITSTREAM AUDIO SETUP COMPRESSION OFF MPEG ON OFF DIGITAL OPERATE TITLE MENU SETUP ZOOM PROGRAM DISPLAY VIEW MODE DVD VIDEO PLAYER RETURN VIDEO ADJ ...

Page 50: ... to select DIGITAL 4 Press ENTER to display the settings you can select 5 Use or to select BITSTREAM or D PCM BITSTREAM Use this setting for a digital connection of a receiver amplifier equipped with a Dolby Digital decoder D PCM Use this setting for a digital connection to the Down Mix PCM PCM digital input jack of a DAT or MD or for a digital connection to a receiver amplifier that does not have...

Page 51: ...a digital connection of a receiver amplifier equipped with an MPEG Audio decoder PCM Use this setting for a digital connection to the PCM digital input jack of a DAT or MD or for a digital connection to a receiver amplifier that does not have an MPEG Audio decoder 6 Press ENTER to confirm the setting To exit the Setup screen and return to the Startup screen press SETUP or RETURN When playing a dis...

Page 52: ...setting when playing a disc recorded in Dolby Pro Logic audio with the SPEAKER setting set to 5ch or 5 1ch OFF Use this setting when playing a disc not recorded in Dolby Surround Pro Logic with the SPEAKER setting set to 2ch 6 Press ENTER to confirm the setting To exit the Setup screen and return to the Startup screen press SETUP or RETURN Whenever the COMPRESSION setting is ON VIRTUAL DOLBY setti...

Page 53: ...E AUDIO and MENU languages from 8 languages 1 While a disc is stopped press SETUP to display the Setup screen 2 Use or to select the DISC LANGUAGE 3 Press ENTER and then use or to select SUBTITLE AUDIO or MENU You can set SUBTITLE AUDIO or MENU individually 4 After selecting the item press ENTER Setup OPERATE INPUT DVD SETUP ADJ SHIFT VOLUME ENTER PUSH TO CLOSE RETURN OPEN POWER G CHARGE R VID EO ...

Page 54: ...aans Use or to select A as the first letter use or to move to the second place then use or to select F When A is selected for the first letter only letters to the right of codes beginning with A can be selected as the second letter Refer to the codes beginning with A on Language code list for Disc Language see page 54 Example First letter A Second letter A B F M R S Y or Z OTHER AA OTHER AF 3 Pres...

Page 55: ...annada KO Korean KS Kashmiri KU Kurdish KY Kirghiz LA Latin LN Lingala LO Laothian LT Lithuanian LV Latvian Lettish Code Language Name MG Malagasy MI Maori MK Macedonian ML Malayalam MN Mongolian MO Moldavian MR Marathi MS Malay MT Maltese MY Burmese NA Nauru NE Nepali NL Dutch NO Norwegian OC Occitan OM Afan Oromo OR Oriya PA Panjabi PL Polish PS Pashto Pushto PT Portuguese QU Quechua RM Rhaeto R...

Page 56: ... SW SURROUND AUDIO L R AUDIO OUT PHONES OSD LANGUAGE SETUP setting 1 While a disc is stopped press SETUP to display the Setup screen 2 Use or to select the OSD LANGUAGE SETUP 3 Press ENTER to display the languages you can select 4 Use or to select the language you want to use 5 Press ENTER to confirm the setting To exit the Setup screen and return to the Startup screen press SETUP or RETURN OSD LA...

Page 57: ... 5 speakers No sound comes from the subwoofer When you want to listen using only 5 speakers you should use large speakers commercially available as the front speakers so that they cover the sound field of the subwoofer This will give more effective surround sound Using 2 Speakers Set the SPEAKER setting to 2ch when connecting to the audio input jacks on a stereo TV or to audio equipment that uses ...

Page 58: ...al Output Always use the 2ch setting if you are using the DIGITAL OUT OPTICAL jack 6 Press ENTER to confirm the setting To exit the Setup screen and return to the Startup screen press SETUP or RETURN OPERATE TITLE MENU SETUP ZOOM PROGRAM DISPLAY VIEW MODE DVD VIDEO PLAYER RETURN VIDEO ADJ ENTER SHIFT FUNCTION VOLUME INPUT DVD LCD ON OFF OPERATE INPUT DVD SETUP ADJ SHIFT VOLUME ENTER PUSH TO CLOSE ...

Page 59: ...ker delay time using the following procedure 1 While a disc is stopped press SETUP to display the Setup screen 2 Use or to select the SPEAKER SETUP 3 Press ENTER and use or to select DELAY 4 Press ENTER to display the screen on the right 5 Use or to select the speaker for which you want to match the delay Front Centre or Surround Rear 6 Use or to adjust the speaker distances Set the speaker distan...

Page 60: ...ttings The delay time settings are determined in accordance with the Dolby standards You cannot specify values in which the difference between the distances for the front and centre speakers exceeds 1 7 m 5 ms You cannot specify values in which the difference between the distances for the surround rear and front speakers exceeds 5 1 m 15 ms Setup ...

Page 61: ...e image DVD with the TV MODE item of the TV MODE SETUP set to 16 9 Wide 4 3 4 3 Letter Box Software Type Mode Screen stretched vertically to fit Left and right remain black Left and right remain black Letter Box Full Screen Above screen stretched horizontally to fit Screen stretched horizontally to fit Top and bottom remain black Top and Bottom Cut Above screen resided to fit with top and bottom c...

Page 62: ...CH The ZOOM mode uses a special process to stretch the image vertically Compared with the original image you may be able to notice some jagged lines or horizontal inside the stretched image This does not indicate malfunction S T M S A R T R E T C H OPERATE TITLE MENU SETUP ZOOM PROGRAM DISPLAY VIEW MODE DVD VIDEO PLAYER RETURN VIDEO ADJ ENTER SHIFT FUNCTION VOLUME INPUT DVD LCD ON OFF ...

Page 63: ...You can select auto on or off as the display mode The following shows what appears on the display when auto or on is selected DVD Mode DVD DVD RW VIDEO CD Audio CD INPUT Mode OPERATE TITLE MENU SETUP ZOOM PROGRAM DISPLAY VIEW MODE DVD VIDEO PLAYER RETURN VIDEO ADJ ENTER SHIFT FUNCTION VOLUME INPUT DVD LCD ON OFF 2 5 8 3 DVD 1 23 4 2 5 8 3 DVD RW 1 23 4 2 5 23 VCD 2 1 5 CD Operation indicator INPUT...

Page 64: ...e disc Loading data being read from disc Stop Play Pause Slow Fast Forward Fast Reverse When resume function can be used Appears when display mode is on Appears when display mode is on Appears when display mode is on Appears when display mode is on Appears when display mode is on 2 5 NO DISC 1 23 4 2 5 WRONG DISC TYPE 2 5 NOW LOADING DVD 1 5 8 3 DVD 1 23 4 1 5 8 3 DVD 1 23 4 1 5 1 2 8 3 DVD 1 23 4...

Page 65: ... SURROUND AUDIO L R AUDIO OUT PHONES DVD DVD DVD RW DVD RW C D C D VIDEO VIDEO C D C D To load a disc into the Player 1 Press îOPEN to open the disc compartment cover The disc compartment cover moves within a range of 0 to 60 degrees Never try to force the cover to move outside this range Doing so can damage the cover OP EN 2 Gently press down on the disc in the vicinity of the centre hole so it s...

Page 66: ... See page 68 for information on DVD RW playback CAUTION Never try to open the disc compartment cover and look inside the disc compartment at the laser while a disc is playing Doing so creates the danger of serious eye damage Do not leave the Player on your lap for a long time Heat generated by the Player can cause low temperature burning of the skin over time DVD 3 Close the disc compartment cover...

Page 67: ...he Player and take the proper corrective action Playing VIDEO CDs with Playback Control PBC Pressing û PLAY begins PBC playback Time display is not shown for some discs If you specify the track number to be played with playback stopped and press û PLAY normal playback not PBC playback begins To adjust the volume level Press VOLUME or VOLUME to adjust the volume level of the audio within a range of...

Page 68: ...e of the disc with your thumb 3 Close the disc compartment cover and press down at the corner marked PUSH TO CLOSE so it locks securely into place Important Keep the disc compartment cover closed except when loading or removing a disc Otherwise dust getting into the Player can lead to malfunction To turn off the LCD display 1 Hold down LCD ON OFF for two or more seconds Holding down LCD ON OFF tur...

Page 69: ... has original titles and a play list recorded on it DVD RW recorded using Video recording format can be played back You may not be able to play back a disc that is not finalized 1 Press OPERATE to turn on the Player 2 Press INPUT DVD to enter the DVD mode 3 Load a DVD RW disc and then press û PLAY This displays the DVD RW menu After a few seconds of playback the title screen appears on the display...

Page 70: ...playback automatically and displays the DVD RW menu Pressing MENU or TITLE during playback displays the DVD RW menu To exit the title selection screen press RETURN This returns to the previous screen You cannot select a play list if the disc does not contain a play list Playing a Disc ...

Page 71: ...KIP or À SKIP à SKIP skips to the next track À SKIP skips to the beginning of the current track Press À SKIP again to skip to the beginning of the previous track You may not be able to use track skip with certain discs OPERATE TITLE MENU SETUP ZOOM PROGRAM DISPLAY VIEW MODE DVD VIDEO PLAYER RETURN VIDEO ADJ ENTER SHIFT FUNCTION VOLUME INPUT DVD LCD ON OFF OPERATE INPUT DVD SETUP ADJ SHIFT VOLUME E...

Page 72: ...dio CD After you press Ë STOP to stop playback you can press Ë STOP again to resume playback from the beginning of the disc This resume operation may not work with certain types of discs This resume operation does not work in the following cases If you press Ë STOP twice If you press Ë STOP during auto playback If you remove a disc and then load another one OPERATE TITLE MENU SETUP ZOOM PROGRAM DI...

Page 73: ... C D VIDEO VIDEO Slow motion play 1 While a disc is playing press SLOW Three speeds are available Each time SLOW is pressed the speed of slow motion playback changes in the following sequence 1 2 1 8 1 16 2 Press û PLAY to return to the normal playback On some discs the slow motion playback functions are disabled Slow motion playback is disabled on Audio CDs DVD DVD DVD RW DVD RW C D C D VIDEO VID...

Page 74: ...erate this function by holding down à SKIP è FWD or À SKIP È REV on the Player for two or more seconds The speed of fast scan using the Player s à SKIP or À SKIP is only 8 2 Press û PLAY to return to normal playback When using 2 fast scan with a DVD certain discs or scenes are played back slower than double normal speed On some discs the fast scan function is disabled On DVD video discs and VIDEO ...

Page 75: ...ck setup screen on the display To exit the setup operation press RETURN This returns to the screen that was shown before the Setup screen was displayed Numbers in refer to the pages where the setting procedures are described 1 1 1 1 1 Direct title track skip 76 The number of the title track currently played back is displayed You can skip directly to the desired title track Using the Function Contr...

Page 76: ...unction provides rich surround sound by downmixing Dolby Digital 5 1 channel and Dolby Surround Pro Logic to 2 channel audio or TV You can toggle the setting between ON and OFF and change the level When COMPRESSION is ON this function is disabled which is indicated by xx To use the VIRTUAL DOLBY function set the COMPRESSION to OFF see page 47 8 8 8 8 8 DIGITAL GAMMA setting 84 You can make the ent...

Page 77: ...5 4 Press ENTER The played back image changes to the beginning of the specified title track You can exit the Function control screen by pressing FUNCTION or RETURN 2 5 8 3 1 3 8 2 ENGLISH 1 1 51ch ON ON ON DVD 5 DVD 5 5 DVD OPERATE TITLE MENU SETUP ZOOM PROGRAM DISPLAY VIEW MODE DVD VIDEO PLAYER RETURN VIDEO ADJ ENTER SHIFT FUNCTION VOLUME INPUT DVD LCD ON OFF OPERATE INPUT DVD SETUP ADJ SHIFT VOL...

Page 78: ...Direct chapter skip Use the following procedure to perform the Direct chapter skip 1 Press FUNCTION during playback The Function control screen appears 2 Use or to select and then press ENTER 3 Use or to select the chapter number to which you want to skip Example Selecting chapter 10 4 Press ENTER The played back image changes to the beginning of the specified chapter You can exit the Function con...

Page 79: ...the time to which you want to skip Press or to input the time Press or to select the place where you want to input the time 4 Press ENTER The played back image jumps to the point you specified You can exit the Function control screen by pressing FUNCTION or RETURN The number of times you can input depends on that of the times recorded on a disc you play The Direct time skip function does not opera...

Page 80: ... by pressing or 4 Press ENTER to confirm the setting You can exit the Function control screen by pressing FUNCTION or RETURN This function can only be used for discs on which subtitles have been recorded in multiple languages Some DVD discs are marked Forced Display indicating that the subtitling cannot be suppressed With such discs the subtitles will be displayed even when you select OFF display ...

Page 81: ...ayback The Function control screen appears 2 Use or to select and then press ENTER 3 Press or to select the angle number you want The number of recorded angles differs depending on the disc used 4 Press ENTER to confirm the setting You can exit the Function control screen by pressing FUNCTION or RETURN This function can only be used for discs on which scenes shot from multiple angles have been rec...

Page 82: ... about the types of audio format When playing a DVD RW VIDEO CD or Audio CD the audio playback changes in the following sequence L R L R 4 Press ENTER to confirm the setting You can exit the Function control screen by pressing FUNCTION or RETURN When you set the PRO LOGIC setting in AUDIO SETUP to ON see page 51 selecting an audio format that uses PRO LOGIC causes D PL to appear This function can ...

Page 83: ...R setting in SPEAKER SETUP to 2ch see page 56 Refer to the table below about the types of audio format with which VIRTUAL DOLBY QSURROUND works Use the following procedure to change the setting between ON and OFF and the level for the VIRTUAL DOLBY setting 1 Press FUNCTION during playback The Function control screen appears 2 Use or to select and then press ENTER Using the Function Control SPEAKER...

Page 84: ...you set the COMPRESSION setting in AUDIO SETUP to ON or set the SPEAKER setting in SPEAKER SETUP to 5ch or 5 1ch VIRTUAL DOLBY QSURROUND does not operate when you are using a Digital connection If the speaker mode is set to 2ch in SPEAKER the setting switches between 2ch down mix and ON depending on the audio modes recorded on the disc Dolby Digital and Pro Logic QSURROUND is a trademark of QSound...

Page 85: ...asier to see Use the following procedure to change the setting to ON OFF or AUTO and change the level for the DIGITAL GAMMA setting when ON is selected 1 Press FUNCTION during playback The Function control screen appears 2 Use or to select and then press ENTER 3 Press or to change the DIGITAL GAMMA setting to ON OFF or AUTO 4 While ON is selected use or to change the level setting 5 Press ENTER to...

Page 86: ...N and OFF 4 While ON is selected use or to change the level setting To see more detail in very intricate images set this setting to To obtain a subtle softening of the outlines of the displayed images set this setting to Moving the setting towards for DVD playback and towards for VIDEO CD playback improves image quality 5 Press ENTER to confirm the setting You can exit the Function control screen ...

Page 87: ...oomed you can press SHIFT and then use and to shift the view and display the part you want Press Press Press ZOOM Press Press An image may become distorted when zoomed You can cancel the zoom operation and return the image to normal size by pressing Ë STOP MENU TITLE È FWD è REV or FUNCTION The zoom setting is cancelled automatically whenever you display a DVD screen that enables you to change the...

Page 88: ...y not be able to use repeat play with some discs DVD DVD DVD RW DVD RW Title repeat Example To repeat play the title you are currently viewing 1 Play the title you want to repeat 2 Press REPEAT twice and then press û PLAY to start repeat play of the title To cancel repeat play press REPEAT again This clears the indicator from the display You may not be able to use repeat play with some discs DVD O...

Page 89: ...mmed play DVD DVD DVD RW DVD RW C D C D VIDEO VIDEO C D C D A B repeat 1 Press REPEAT three times This displays A repeat indicator 2 When play reaches the start point of the scene press û PLAY This registers the location at the start point A 3 When play reaches the end point of the scene press û PLAY again This starts A B repeat from the start point A to the end point B To cancel A B repeat press ...

Page 90: ...at the second digit until 1 is displayed and then press to move the highlighting to the first digit Use and to display 2 for the first digit and then press to move the highlighting to the next title number Pressing while is displayed for a digit enters 0 for the digit Repeat the procedure above if you want to input other title numbers You can input up to 20 titles in the sequence in which you want...

Page 91: ...s not work with a disc that disables programming The indicator ø is displayed when playing back such discs Play sequence programming does not work immediately after you load a disc into the Player It can be used only after the disc has been played even if only partially To stop programmed play 1 Press Ë STOP The number you input is not stored in memory if there is no corresponding title number on ...

Page 92: ...ng to the right For example to play the 12th title first Use and to cycle through numbers at the second digit until 1 is displayed and then press to move the highlighting to the first digit Use and to display 2 for the first digit and then press to move the highlighting to the chapter number Pressing while is displayed for a digit enters 0 for the digit Programmed Playback OPERATE TITLE MENU SETUP...

Page 93: ...cified Chapters are played in the sequence you specified Press RETURN if you want to exit the above screens You cannot program the play sequence while a disc is playing Play sequence programming does not work with a disc that does not include chapter information Play sequence programming does not work with a disc that disables programming The indicator ø is displayed when playing back such discs P...

Page 94: ...ss to move the highlighting to the first digit Use and to display 2 for the first digit and then press to move the highlighting to the next track number Pressing while is displayed for a digit enters 0 for the digit Repeat the procedure above if you want to input other track numbers You can input up to 20 tracks in the sequence in which you want them to play OPERATE TITLE MENU SETUP ZOOM PROGRAM D...

Page 95: ...sc that disables programming The indicator ø is displayed when playing back such discs Play sequence programming does not work immediately after you load a disc into the Player It can be used only after the disc has been played even if only partially To stop programmed play 1 Press Ë STOP The number you input is not stored in memory if there is no corresponding track number on the disc Make sure y...

Page 96: ...enu The procedure shown here provides only general steps The actual procedure for using the title menu depends on the disc you are using See the disc jacket for details The title menu does not appear immediately after you load a disc into the Player It appears only after the disc has been played even if only partially While a DVD RW is played back pressing TITLE causes DVD RW menu screen to appear...

Page 97: ...s in the language you have set Repeat the above procedure to make other disc menu settings The procedure shown here provides only general steps The actual procedure for using the disc menu depends on the disc you are using See the disc jacket for details The disc menu does not appear immediately after you load a disc into the Player It appears only after the disc has been played even if only parti...

Page 98: ...rols LCD backlight brightness 4 After you are finished press VIDEO ADJ The setting screen disappears from the display if you do not perform any operation for about 30 seconds The settings you make here are retained even when you turn off the Player While the VIDEO ADJUST screen is displayed other operations are disabled Adjusting Display OPERATE TITLE MENU SETUP ZOOM PROGRAM DISPLAY VIEW MODE DVD ...

Page 99: ...equipment Power is not supplied from the Player to a connected camcorder When not using the Player with external equipment be sure to disconnect all cables from the video input output and audio input output terminals The Player is turned off automatically when no video signal is input for about 5 minutes in the INPUT mode OPERATE TITLE MENU SETUP ZOOM PROGRAM DISPLAY VIEW MODE DVD VIDEO PLAYER RET...

Page 100: ...he Player and do not use or leave your Player in areas with excessive smoke steam or moisture Such environments can cause malfunctions or cause mildew to form on the lenses Be sure to keep the Player in a well ventilated location When using your Player in a cold environment the colour LCD screen often appears less bright immediately after the power is turned on This is not a malfunction To prevent...

Page 101: ...e fluorescent tube is about 10 000 hours of continuous use under normal temperatures If the display appears dark if it flickers or if it fails to light contact your original retailer or your nearest Sharp service centre for replacement Copyright Information Unauthorized copying broadcast public display transmission public performance and rental regardless of whether or not such activities are for ...

Page 102: ...the casing with a tightly wrung cloth dampened with a diluted neutral detergent Then wipe it again with a soft dry cloth Use a soft dry cloth to wipe finger marks and other soiling off the LCD screen Battery Pack Optional Accessory References Danger Be sure to observe the following precautions whenever handling the battery pack Failure to do so can result in battery pack leakage overheating smoke ...

Page 103: ... from escaping creating the danger of battery pack leakage overheating smoke emission fire or rupture 6 Keep the battery pack out of areas subject to large amounts of oil smoke steam moisture dust etc Never leave the battery pack in food preparation areas near heaters or in any other location where it can be exposed to oil smoke or steam Doing so creates the danger of fire and electric shock Do no...

Page 104: ...pointed at the remote sensor of the Player Make sure the Remote unit is not too far from the Player Make sure nothing is blocking the signal path between the Remote unit and Player Make sure video and audio cables are connected correctly Make sure the disc you are trying to play is a DVD Region 2 or ALL DVD RW VIDEO CD or Audio CD Use a disc that is free of dirt and scratches Make sure the disc is...

Page 105: ... connected to the headphones jack Connecting headphones disables the Player s speakers Make sure the SPEAKER setting of SPEAKER SETUP is not set to 5 1ch or 5ch When using the Player speakers or connecting to 2ch audio equipments set the SPEAKER setting to 2ch Make sure the Player is in the DVD mode and not the INPUT mode Use a disc that is free of scratches Make sure that the Player s built in sp...

Page 106: ...s connected to the Player while Player power is turned on A warm battery takes longer than normal to charge Wait until the battery cools to normal temperature before trying to charge it Replace the battery pack with a charged one or switch to AC adapter power Charging of a battery pack may become disabled and the POWER G CHARGE R lamp may fail to light whenever heat from the Player causes the inte...

Page 107: ...e end of its normal service life Make sure the DVD RW is recorded in the Video recording format You may not be able to play back a disc that is not finalized Make sure the connected audio equipment is turned on Make sure the DIGITAL setting in AUDIO SETUP is set to D PCM When the space between tracks of some discs is very short two tracks can be recorded as a single track which causes a mismatch o...

Page 108: ...er Meaning Battery charging is in progress Indicator flashes red slow when charging is complete Possible AC adapter or Player malfunction Possible battery pack malfunction or end of battery pack life Try using a different battery pack Power turned on while the LCD is turned off or while the LCD panel is closed Battery pack is not loaded correctly in the Player Player is turned on Charging cannot b...

Page 109: ...put Output Audio Output 0 8W 0 8W Headphones Output Output Jack Mini jack stereo Display Screen Size 8 inches 99 2 H 176 4 W mm Type Transmissive TN liquid crystal panel Drive TFT thin transistor active matrix Pixels 336 960 234 H 480 W 3 Effective Pixel Rate 99 99 minimum Speakers Two 28mm round speakers Light Source Internal fluorescent Video Signal Horizontal Resolution 500 lines DVD S N Ratio ...

Page 110: ...ght approx 170g Battery Pack Specifications Model BT L200S Type Lithium ion type DC output 7 4V Capacity 5600mAh Operating temperature 0 C to 40 C charging 10 C to 30 C Max Dimensions 193 W 144 D 13 7 H mm without protruding parts Weight approx 430g Specifications are subject to change without notice Weight and dimensions are approximate Digital Output Linear PCM The digital output format used in ...

Page 111: ...he Former Yugoslav Republic of Macedonia Malta Republic of Malta Common Names Names of Nations and Areas Monaco Principality of Monaco Netherlands Kingdom of the Netherlands Norway Kingdom of Norway Oman Sultanate of Oman Poland Republic of Poland Portugal Portuguese Republic Qatar State of Qatar Romania Romania San Marino Republic of San Marino Saudi Arabia Kingdom of Saudi Arabia Slovakia The Sl...

Page 112: ... 16 9 software on a connected 4 3 TV Screen size that cuts off the sides of the image to allow playing of Wide 16 9 software on a connected 4 3 TV A sound system developed by Dolby Laboratories Inc that gives movie theater ambience to audio output when the Player is connected to a processor or amplifier with Dolby Digital 5 1ch input jacks Theater audio system by Digital Theater Systems Inc Six au...

Page 113: ...CH ZOOM or SMART STRETCH Some DVDs have recordings from multiple angles so you can select a view angle when playing the disc Provides rich surround sound by downmixing Dolby Digital 5 1 channel and Dolby Surround Pro Logic to 2 channel audio Corrects for gradations in dark areas of images to make images clearer Enhances the fine detail of the image and outlines of the objects This function lets yo...

Reviews: