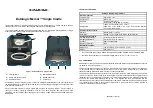
background image


DISPLA

Y

PTY

ASPM

RDS


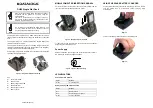
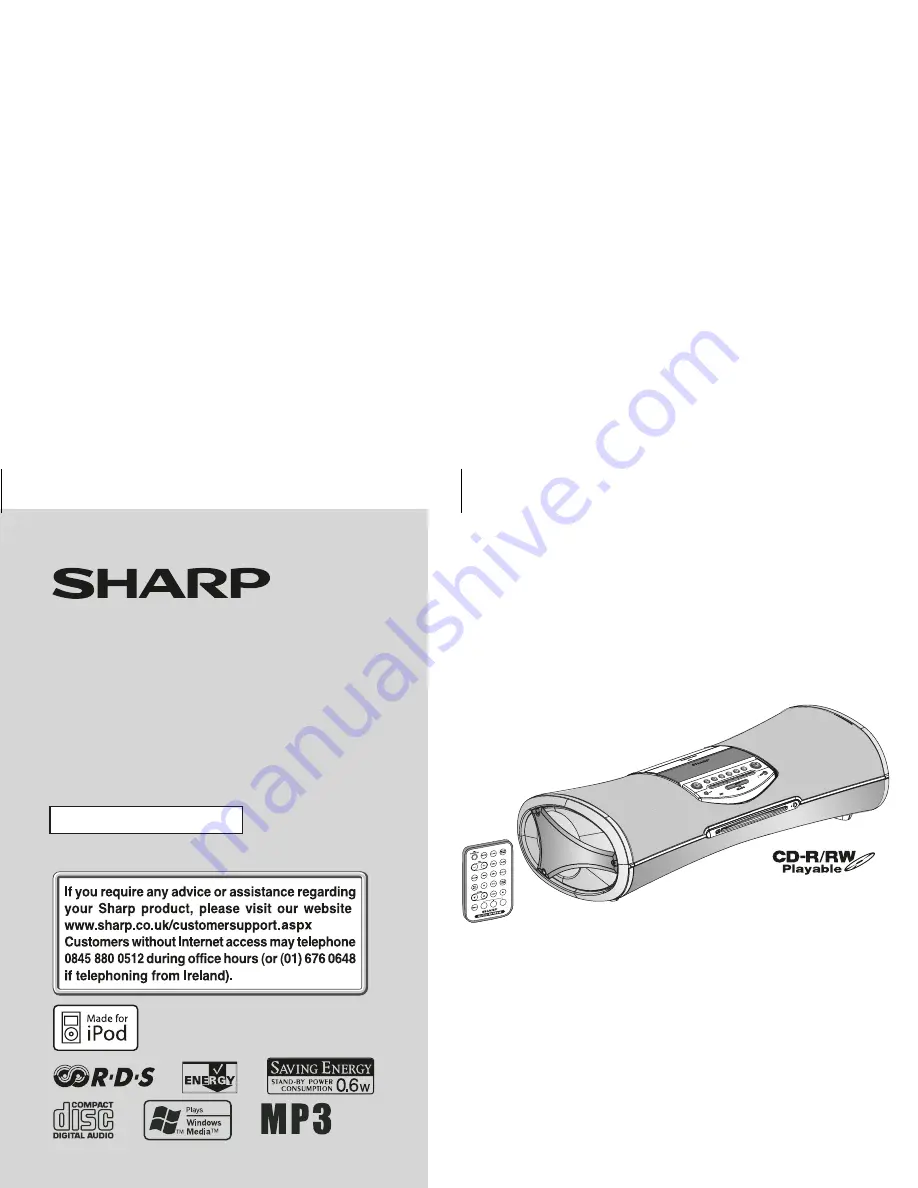
MUSIC SYSTEM FOR iPod


®


MODEL


DK-A10H

iPod is a registered trademark of 
Apple Computer, Inc.


DK-A10H(BK)


Th

e


illustrations


printed


in


t

h

is


operation


manual


are


for


t

h

e


model

 DK-

A

10H

.


OPERATION MANUAL


Thank you for purchasing this SHARP product. 
To obtain the best performance from this product, please read this
manual carefully. It will guide you in operating your SHARP product.

Summary of Contents for DK-A10BK

Page 1: ...e Computer Inc DK A10H BK The illustrations printed in this operation manual are for the model DK A10H OPERATION MANUAL Thank you for purchasing this SHARP product To obtain the best performance from this product please read this manual carefully It will guide you in operating your SHARP product ...

Page 2: ...your plug proceed as follows The wire which is coloured blue must be connected to the plug terminal which is marked N or coloured black The wire which is coloured brown must be connected to the plug terminal which is marked L or coloured red Ensure that neither the brown nor the blue wire is connected to the earth terminal in your three pin plug Before replacing the plug cover make sure that If th...

Page 3: ...f you purchase a similar new one Please contact your local authority for further details If your used electrical or electronic equipment has batteries or accumulators please dispose of these separately beforehand according to local requirements By disposing of this product correctly you will help ensure that the waste undergoes the necessary treatment recovery and recycling and thus prevent potent...

Page 4: ...MPEG Layer 3 audio coding technology licensed from Fraunhofer IIS and Thomson Accessories Please confirm that the following accessories is included Note Only the above accessories are included Contents Page General Information Precautions 5 Controls and indicators 6 8 Preparation for Use System connections 9 10 Remote control 11 Basic Operation General control 12 Setting the clock 13 iPod Listenin...

Page 5: ...re to high volume levels Do not turn the volume on to full at switch on and listen to music at moderate levels Excessive sound pressure from earphones and headphones can cause hearing loss Please ensure that the equipment is positioned in a well ventilated area and ensure that there is at least 10 cm 4 of free space along the sides top and back of the equipment Use the unit on a firm level surface...

Page 6: ...tton 23 10 Alarm Button 30 11 CD Eject Button 18 12 Disc Slot 18 13 Alarm Indicator 30 14 Alarm ON OFF Button 30 15 E Sound Demo Button 10 12 16 Play Pause Button 16 18 17 Skip Down Tuner Preset Down Button 13 16 18 24 18 Skip Up Tuner Preset Up Button 13 16 18 24 19 Disc Stop Button 18 20 Volume Down Button 12 21 Volume Up Button 12 4 3 2 5 11 12 14 15 13 1 16 17 18 19 20 21 6 7 8 9 10 The iPod r...

Page 7: ...icator 23 11 RDS Indicator 25 12 Total Indicator 18 22 13 Random Indicator 19 14 Summer Time Indicator 13 15 Pause Indicator 16 18 16 Memory Indicator 20 17 Repeat Play Indicator 19 18 Play Indicator 18 Rear panel Reference page 1 FM 75 Ohms Aerial Socket 9 2 AM Aerial Earth Terminal 9 3 Summer Time Switch 13 4 AM Loop Aerial Terminal 9 5 Video Out Socket 10 6 Auxiliary Input Sockets 32 7 Headphon...

Page 8: ...wn Buttons 23 10 Memory Button 20 24 11 Clock Button 13 12 Snooze Dimmer Button 12 30 13 Sleep Button 31 14 Alarm Button 30 15 Skip Up Tuner Preset Up Button 13 16 18 24 16 Display Button 16 17 Play Pause Button 16 18 18 E Sound Demo Button 10 12 19 Clear Button 20 20 EQ Button 12 21 RDS Display Button 25 22 RDS PTY Button 25 23 RDS ASPM Button 25 Note Before using remote control please remove pla...

Page 9: ... is activated Deactivate the alarm first refer page 30 Make sure to unplug the AC power lead before any connections Supplied FM aerial Connect the FM aerial wire to the FM 75 OHMS socket and position the FM aerial wire in the direction where the strongest signal can be received Supplied AM loop aerial Connect the AM loop aerial to the AM and GND terminals Position the AM loop aerial for optimum re...

Page 10: ...it will enter the demonstration mode Note Unplug the AC power lead from the wall socket if the unit will not be in use for a prolonged period of time Demonstration mode TV To video input socket Video cable not supplied To AC input Wall socket AC 220 240 V 50Hz The first time the unit is plugged in the unit will enter the demonstra tion mode Lights on the snooze button subwoofer and around the disc...

Page 11: ...or if the operation becomes erratic Purchase CR 2025 coin lithium battery Periodically clean the transmitter on the remote control and the sensor on the unit with a soft cloth Exposing the sensor on the unit to strong light may interfere with operation Change the lighting or the direction of the unit if this occurs Keep the remote control away from moisture heat shock and vibrations Test of the re...

Page 12: ... ON is selected the unit will enter the E SOUND mode and adjust low bass and high frequency automatically according to volume input Equaliser When the EQ button is pressed the current mode setting will be displayed To change to a different mode press the EQ button repeatedly until the desired sound mode appears Function When the FUNCTION button on remote control is pressed the current function wil...

Page 13: ...ur display Summer time The Summer Time switch is located on the rear of the unit 1 Press the CLOCK button for more than 2 seconds 2 Press the or button to select 12 hour or 24 hour display and then press the CLOCK button The 12 hour display will appear 12 00 AM 11 59 PM The 12 hour display will appear 0 00 AM 11 59 PM The 24 hour display will appear 0 00 23 59 3 Press the or button to adjust the h...

Page 14: ...nit turns on iPod button main unit The unit turns on and the iPod function is activated button main unit and remote control The unit turns on and playback of the last function will start iPod CD TUNER AUX iPod adaptor connection Choose the iPod adaptor that fits your iPod Your iPod will fit snuggly into the correct adaptor If your iPod is not mentioned below an iPod adaptor may have been included ...

Page 15: ...s safe to do so even during playback Dock connector iPod bottom iPod iPod adaptor iPod connector iPod dock 1 Press the ON STAND BY button to turn the power on The iPod terminal door will automatically open when the display is on 2 Press the iPod button on the main unit once or FUNCTION button on remote control repeatedly to select iPod function 3 Insert iPod unit in iPod dock of main unit 4 Press ...

Page 16: ...nce play button on iPod unit is pressed the unit will automatically change to iPod function overriding the previous function selected Caution Unplug all accessories for the iPod before inserting it into the iPod dock Stop button is invalid during iPod function Function Main unit Remote control Operation Play Press in the pause mode Pause Press in the playback mode Track up down Press in the playba...

Page 17: ...Layer 3 MPEG 2 Layer 3 and VBR files During VBR file playback time counter in the display may differ from its actual playback time Bitrate which is supported by MP3 is 32 320 kbps WMA WMA files are Advanced System Format files that include audio files which are compressed with Windows Media Audio codec WMA is developed by Microsoft as an audio format file for Windows Media Player MP3 and WMA indic...

Page 18: ...ess the button 12 cm 5 8 cm 3 Total number of tracks on the disc Total playing time of the disc Total number of files Disc Name CD MP3 WMA Disc play indicator Function Main unit Remote control Operation Play Press in the stop mode Stop Press in the playback mode Pause Press in the playback mode Press the button to resume playback from the paused point Track up Track down Press in the playback or s...

Page 19: ...uring random play you can move to the track selected next by the random operation However the button does not allow you to move to the previous track It will go to the beginning of the current track instead In random play the CD player will select and play tracks automatically You cannot select the order of the tracks Random and repeat play can be use on the same time Caution After performing repe...

Page 20: ...grammed tracks is ejected the programme is automatically cancelled Even if you press the ON STAND BY button to enter the stand by mode or change the function from CD to another the programmed selections will not be cleared During the programme operation random play is not possible 1 Whilst in the stop mode press the MEMORY button to enter the programming save mode 2 Press the or button to select t...

Page 21: ...ck the files not according to your expected playback order Folder mode on off can be operated by the FOLDER button on the remote control Files that are played when folder mode is set to the on position may differ from those played back when folder mode is turned off Folder Mode Off case All the files starting from the selected folder or file will be played back If file 3 inside Folder C is selecte...

Page 22: ...5 To change the playback folder press the TUNING or to select another folder 3 Select desired file to be played back by pressing the or button Proceed to step 5 TOTAL indicator MP3 indicator CD indicator WMA indicator FOLDER indicator FOLDER name FILE name 4 Select desired file to be played back by pressing the or button Folder mode off 5 Press the button Playback will start and file name will be ...

Page 23: ...indicator will be displayed will appear when an FM broadcast is in stereo If the FM reception is weak press the TUNER button main unit or FUNCTION button remote control to extinguish the ST indicator The reception changes to monaural and the sound becomes clearer 1 Press the ON STAND BY button to turn the power on 2 Press the TUNER button on main unit or FUNCTION button on remote control repeatedl...

Page 24: ...he stations in memory in order starting with preset channel 1 4 Within 1 minute press the MEMORY button to store that station in memory If the preset number indicators disappear before the station is memorised repeat the operation from step 2 5 Repeat steps 1 4 to set other stations or to change a preset station When a new station is stored in memory the station previously memorised for that prese...

Page 25: ...tation RDS and the station name will be displayed You can control the RDS by using the buttons on the remote control only Information provided by RDS Each time the RDS DISPLAY button is pressed the display will switch as follows When tuning in to a station other than an RDS station or to an RDS station which sends weak signal the display will change in the follow ing order Note that pressing DISPL...

Page 26: ...he RDS signals are very weak station names may not be stored in memory To store a station name again if the wrong name was stored in memory It may be impossible to store station names in memory using the ASPM function if there is lots of noise or if the signal is too weak In this case perform as follows 1 Press the TUNER button on main unit or FUNCTION button on remote control repeatedly to select...

Page 27: ...oss the display If you tune in to an RDS station which is not broadcasting any radio text NO RT will be displayed when you switch to the radio text position To recall stations in memory To specify programmed types and select stations PTY search You can search a station by specifying the programme type news sports traffic programme etc see pages 28 29 from the stations in memory 1 Press the TUNER b...

Page 28: ... seconds Then the display will change NEWS Short accounts of facts events and publicly expressed views reportage and actuality AFFAIRS Topical programme expanding or enlarging upon the news generally in different presentation style or concept including debate or analysis INFO Programmes whose purpose is to impart advice in the widest sense SPORT Programme concerned with any aspect of sport EDUCATE...

Page 29: ...ideas and opportunities Not for use for announcements about problems delays or roadworks affecting immediate travel where TP TA should be used LEISURE Programmes concerned with recreational activities in which the listener might participate Examples include Gardening Fishing Antique collecting Cooking Food Wine etc JAZZ Polyphonic syncopated music characterised by improvisation COUNTRY Songs which...

Page 30: ...nnected unit to AUX will not turn on or off When the entire preset memory is erased page 24 source will automatically change to BUZZER 1 even if TUNER is pre selected step 2 1 Check that the clock is set to the correct time refer page 13 If it is not set you cannot use the alarm function 2 For iPod playback Insert iPod to the unit refer page 15 3 For TUNER Set preset memory refer page 24 4 For CD ...

Page 31: ... 1 Playback the desired sound source 2 Press the SLEEP button to select sleep time 3 Press the MEMORY button SLEEP will appear 4 The unit will enter the clock function automatically after the preset time has elapsed The volume will be turned down 1 minute before the sleep operation finishes 1 Whilst SLEEP is indicated press the SLEEP button on the remote control once to select SLEEP XXX XXX is sle...

Page 32: ...an cause hearing loss Before plugging in or unplugging the headphones reduce the vol ume Be sure your headphones have a 3 5 mm 1 8 diameter plug and impedance between 16 and 50 ohms The recommended impedance is 32 ohms Plugging in the headphones disconnects the speakers automatically Adjust the volume using the VOL or control During alarm activation sound will be output to the speaker even if head...

Page 33: ...et it Refer to page 34 No sound is heard Is the volume level set to 0 Are the headphones connected iPod door not fully open close Set the unit to the power stand by and turn it on again Reset it Refer page 34 Symptom Possible cause The remote control does not operate Is the AC power lead of the unit plugged in Is the battery polarity correct Are the battery dead Is the distance or angle incorrect ...

Page 34: ...ase all data stored in memory including clock alarm settings and tuner preset Before transporting the unit Remove the iPod and the disc from the unit Then set the unit to the power stand by mode Carrying the unit with iPod left docked or disc left inside might damage both the unit and the iPod Maintenance Cleaning the cabinet Periodically wipe the cabinet with a soft cloth and a diluted soap solut...

Page 35: ... Speaker RMS 4 W 2 W 2 W 10 T H D RMS 4 W 2 W 2 W 0 9 T H D Subwoofer RMS 10 W 5 W 5 W 10 T H D RMS 6 W 3 W 3 W 0 9 T H D Speaker 1 way type light up speaker system Front Speaker 6 5 cm 2 1 2 12 ohms Full Range Subwoofer 10 cm 4 8 ohms Woofer Speaker maximum input power Front Speakers 4W Channel Subwoofer 10W Channel Speaker rated input power Front Speakers 2W Channel Subwoofer 5W Channel Output t...

Page 36: ... must be notified to Sharp or its appointed Service Facility within one year from the date this product was purchased Proof of purchase must be provided 4 The guarantee does not cover carriage costs audio tapes compact discs or batteries 5 In the unlikely event of this product requiring repair please contact the supplier from whom it was purchased Where this is not possible please contact the Shar...

Reviews: