background image

Declaration of Conformity

Hereby, Sharp Telecommunications of Europe Ltd, declares that this 703SH is in 
compliance with the essential requirements and other relevant provisions of 
Directive 1999/5/EC.
A copy of the original declaration of conformity can be found at the following 
Internet address:
http://www.sharp-mobile.com

 DRAFT

Summary of Contents for 703SH

Page 1: ...urope Ltd declares that this 703SH is in compliance with the essential requirements and other relevant provisions of Directive 1999 5 EC A copy of the original declaration of conformity can be found at the following Internet address http www sharp mobile com DRAFT ...

Page 2: ...tive holders Screen layout may differ from that illustrated in this user guide The information described in this user guide is subject to change without notice All the functions described in this user guide may not be supported by all networks We assume no responsibility for downloaded contents information etc from the network Occasionally a few black or bright pixels may appear on the screen Plea...

Page 3: ...2 4 785 450 4 811 420 5 228 056 5 420 896 5 799 010 5 166 951 5 179 571 5 345 467 T9 Text Input is licensed under one or more of the following U S Pat Nos 5 818 437 5 953 541 5 187 480 5 945 928 and 6 011 554 Australian Pat No 727539 Canadian Pat No 1 331 057 United Kingdom Pat No 2238414B Hong Kong Standard Pat No HK0940329 Republic of Singapore Pat No 51383 Euro Pat No 0 842 463 96927260 8 DE DK...

Page 4: ...la com for additional details Useful Functions and Services Your phone offers you the following features Video calls You can talk while viewing each other on respective screens 3D and colour Java games and applications with a graphic accelerator You can also download various games and applications from Vodafone via the mobile Internet Thin Film Transistor TFT colour LCD main display with images th...

Page 5: ...pdating Contacts List entries on the Internet A schedule alarm for creating and sending schedule entries with alarm settings A miniSD memory card slot that expands connectivity with a PC using the memory card miniSD is a trade mark of SD Card Association ...

Page 6: ...ll 27 Answering a Video Call 27 Incall Menu Video Call 28 Entering Characters 31 Changing the Input Language 32 Changing the Input Mode 32 My Dictionary 32 Using Templates 33 Using the Menu 35 Top Menu 35 Shortcut Keys 35 Contacts List 37 Changing the Name Order 37 Changing the List Displayed 37 Selecting the Storage Memory 37 Sorting the Contacts List Entries 38 Add New Contact 38 Viewing My Cont...

Page 7: ...New Message 50 Messaging Settings 55 Vodafone live 59 Navigating a WAP Page 60 Music 63 Music Player 63 My Items 65 Pictures 65 Sounds Ringtones 66 Videos 67 Other Documents 68 Common Option Menus 68 Games Applications 70 Text Templates 71 Memory Status 71 Entertainment 73 Games Applications 73 Settings 75 TV Video 77 Video Player 78 Organiser Tools 81 Calendar 81 Alarms 83 Calculator 85 Voice Rec...

Page 8: ...3SH to Your PC 117 System Requirements 117 3G GSM GPRS Modem 117 Handset Manager 118 Software Installation 118 Note 118 Troubleshooting 119 Safety Precautions and Conditions of Use 121 CONDITIONS OF USE 121 ENVIRONMENT 124 PRECAUTIONS CONCERNING VEHICLE USE 124 SAR 124 Information on Proper Disposal 125 PRECAUTIONS FOR USE IN USA 126 Specifications and Optional Accessories 129 Specifications 129 O...

Page 9: ...8 Contents ...

Page 10: ... Phone Please check the following carefully Your phone should come complete with 3G UMTS GSM 900 1800 1900 GPRS phone Lithium Ion Battery Battery Cover AC Charger Stereo Earphone Microphone User Guide Quick Start Guide ...

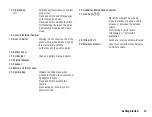
Page 11: ...10 Your Phone ...

Page 12: ...Getting Started 11 Getting Started 1 2 3 4 5 6 8 9 11 10 12 13 14 15 17 16 7 18 20 19 28 27 26 29 24 25 22 23 21 ...

Page 13: ... Key S Press to open the shortcut menu to access the desired applications 7 Voice Mail Key G Press and hold to connect to the Voice Mail centre Depending on the SIM card 8 Shift Key P Switches character case between four modes Abc ABC 123 and abc on the text entry screen Press to enter P or in standby Press and hold in standby to lock the keypad 9 Microphone 10 Sub Camera Internal Camera 11 Main D...

Page 14: ...er 21 Small Light Used as a battery charge indicator 22 External Display 23 Speaker 24 Memory Card Slot Cover 25 Camera Key Displays the Main menu when pressed in standby then executes a highlighted function Press and hold to activate the camera Press during an incoming call to answer the call 26 Handsfree Microphone Connector 27 Side Keys V W Moves the highlight up or down Press in standby or dur...

Page 15: ...and slide the SIM card holder back to lock 3 Hold the battery so that the metal contacts of the battery are facing down slide the guides on the top of the battery into the battery slots and then insert it 4 Replace the battery cover Note Make sure that only 3V SIM cards are used Make sure that the standard accessory battery XN 1BT90 is used 1 2 4 5 3 SIM card 7 7 6 ...

Page 16: ... Slide the SIM card holder to unlock Lift and remove the SIM card Then push and slide the SIM card holder back to lock Battery Disposal The device is battery powered In order to protect the environment please read the following points concerning battery disposal Take the used battery to your local waste depot dealer or customer service centre for recycling Do not expose the used battery to a naked...

Page 17: ...tate of the battery and other conditions See Battery on page 121 To Disconnect the Charger When charging is complete the small light turns off 1 Unplug the charger from the AC outlet then unplug the charger connector from the phone 2 Close the cover Note Do not use any non approved chargers as they may damage your phone and invalidate any warranties see Battery on page 121 for details To Charge Us...

Page 18: ...cover Note Make sure that the phone is turned off before inserting the memory card Be sure to insert the card in the correct direction and orientation Do not open the memory card cover while the memory card is being formatted or written to The card may be damaged beyond use Keep all memory cards out of the reach of small children Tip You see the following indicators when the memory card is in use ...

Page 19: ...rectly three times in a row the SIM card is locked See Enabling Disabling the PIN Code on page 104 If the clock settings have not been made the date and time entry screen is displayed p 98 To Copy All Contacts List Entries from the SIM Card When you insert the SIM card into your phone for the first time and start the Contacts List application you are asked whether you wish to copy Contacts List en...

Page 20: ...g in progress 7 Video call communication mode enabled 8 Diverts set to Voice Calls of Always 9 Secure WAP page displayed 10 Alerts text message multimedia message Email 11 Connection status USB cable IrDA ON IrDA exchanging information Bluetooth wireless setting enabled in standby or except in standby exchanging information talking with the Bluetooth headset 12 Java application executed colour sus...

Page 21: ... messages text message multimedia Email 20 WAP OTA provisioning alerts WAP alert OTA provisioning alert WAP and OTA provisioning alerts 21 Voicemail message alert 22 Connection status 1st IrDA communication enabled exchanging information 23 Function Lock enabled 24 Keypad Lock enabled 25 blank IrDA setting enabled disabled Display Indicators External Display Status Indicators 1 Battery level 2 Str...

Page 22: ... in square brackets which are displayed at the bottom left and right of the screen Press the corresponding soft key A or C To return to the previous screen press the right soft key if it displays Back To close the Main menu press the right soft key if it displays Exit Each section in this user guide starts with a list of items you will need to select in order indicated in italics before performing...

Page 23: ...22 Navigating Functions ...

Page 24: ...a international dialling prefix sign is displayed 2 Enter the country code followed by the area code without the leading zero and the phone number and press D to dial Adding an Entered Phone Number to the Contacts List 1 After entering a phone number press Options and select Save Number For details on creating a new entry see Add New Contact on page 38 Showing or Hiding My Phone Number on the Disp...

Page 25: ...aller s number is displayed on the screen If the caller s name and number are saved in the Contacts List the caller s name and phone number are displayed on the screen If the number is a restricted number the display shows Withheld When you receive a call from the person whose picture is registered in the Contacts List the picture name and phone number are displayed Rejecting an Incoming Call 1 Pr...

Page 26: ...l press Options and select Send Message The following options are available Create New to make an SMS and MMS or Inbox Sent Messages or Drafts to access these folders For details on SMS see SMS and MMS on page 49 Call Waiting This service notifies you of another incoming call while you have a call in progress 1 During a call press Options and select Hold Answer to answer the second call The first ...

Page 27: ... the number you wish to include in the conference call and press D to dial 3 Press Options and select Multi Party 4 Select Conference All to join the conference call If you wish to add other participants repeat steps 1 to 4 To End the Call with a Conference Call Participant 1 During a conference call highlight the person that you wish to disconnect from the conference call 2 Press Options and sele...

Page 28: ...alled party is displayed upper on the screen and yours lower left Tip If the called party s phone is not video call enabled you can press F and enter the phone number again to make a voice call When the call ends the last call cost is displayed Answering a Video Call When an incoming call is detected the phone rings 1 Press D to answer the call by video or A Answer to answer the voice only Tip Whe...

Page 29: ...On and Off You can talk via the loudspeaker on the clamshell cover of the phone when it is on 1 During a video call press Options and select Loudspeaker On Note In a high noise environment you may not be able to continue a call or make a clear call We recommend that you use the Stereo Earphone Microphone Unit With this option you may not be able to continue a call without interruption if you incre...

Page 30: ...gs 2 Select Backlight 3 Select from On As Normal Setting or Off When On is selected the backlight will always be on during a video call When As Normal Setting is selected the backlight will time out depending on the Backlight setting p 97 To Adjust the Video Exposure 1 During a video call press Options and select Video Call Settings 2 Select Exposure 3 Press a Light or b Dark ...

Page 31: ...30 Voice Call Video Call Functions ...

Page 32: ...depending on the language selected English Mode Key Upper Case Characters Lower Case Characters Numeric G full stop comma hyphen apostrophe 1 1 H ABC2 abc2 2 I DEF3 def3 3 J GHI4 ghi4 4 K JKL5 jkl5 5 L MNO6 mno6 6 M PQRS7 pqrs7 7 N TUV8 tuv8 8 O WXYZ9 wxyz9 9 Q space 0 0 P Switches character case between four modes Abc ABC 123 and abc R _ Å Ä Æ å ä æ à Ç É è é ì Ñ ñ Ö Ø ö ø ò ß Ü ü ù Φ Γ Λ Ω Π Ψ Σ...

Page 33: ...il you highlight the correct one 6 Press to select the word Note If the correct word is not shown in step 5 enter the correct word again after switching to the multi tap input method Tip If you press Q instead of step 6 a space is inserted next to the selected word Symbols and Punctuation 1 On the text entry screen press Options and select Add Symbol 2 Select the desired symbol My Dictionary You c...

Page 34: ...t the template 2 Press Options and select Advanced 3 Select Insert Template 4 Select the desired text template Copying Cutting and Pasting Text 1 On the text entry screen press Options and select Advanced 2 Select Copy or Cut 3 Move the cursor to the first letter to be copied or to be cut then press 4 Move the cursor to the last letter to highlight the area then press 5 Move the cursor to the poin...

Page 35: ...34 Entering Characters ...

Page 36: ...s for the corresponding number on the Main menu For numbers 10 to 12 press and P 10 Q 11 or R 12 See the following table for reference Shortcuts are listed in the headings of this user guide For example M 6 2 Examples To Access Videos Sub Menu M 6 4 Using Shortcut Keys Press L J To Access Totals Sub Menu M 7 10 2 Using Shortcut Keys Press M P H To Access Vibration Sub Menu M 12 3 4 Using Shortcut ...

Page 37: ...36 Using the Menu ...

Page 38: ...Save New Contact 1 Select from To Handset To SIM or Choose before Saving First Name up to 16 characters Last Name up to 16 characters Telephone Number up to 3 phone numbers up to 32 digits each Email Address up to 3 Email addresses up to 128 characters each Category up to 16 categories Street Number up to 64 characters City up to 64 characters State Province up to 64 characters Postcode up to 20 c...

Page 39: ... SIM 1 Select the field you wish to fill in and enter the relevant information 2 Press Save when finished Tip To create an entry at least one field must be filled First Name Last Name Telephone Number or Email Address for the handset memory Name Telephone Number or Email Address for the SIM memory Viewing My Contact Details You can register and edit your own contact as other Contacts List entries ...

Page 40: ...ormation To add a thumbnail to entries select Picture and then Assign Picture Select the desired picture To assign a ringtone or a ring video clip to each contacts list entry select Assign Tone Video and then For Voice Call For Video Call or For New Message Select Assign Tone or Assign Video and then Preset Sounds or My Sounds when you select Assign Tone Select the desired tone or video clip 4 Pre...

Page 41: ...ategory names in the SIM card You cannot edit the ringtone or ring video settings Editing the Category Name You can edit category names to be assigned to the Contacts List entries First change the Contacts List displayed p 37 Contacts Manage Category 1 Highlight the desired category name 2 Press Options and select Edit Name 3 Modify the name Contact Groups You can create a mailing list to send the...

Page 42: ...ced Memory Status Speed Dial List You can set a maximum of 8 phone numbers in the Speed Dial list p 23 Setting Contacts List Entries in the Speed Dial List Contacts Speed Dial List 1 Select the desired entry 2 Highlight the desired phone number 3 Press Options and select Add to Speed Dial 4 Select the desired location Tip The nine digit keys correspond to list numbers To Edit the Speed Dial List C...

Page 43: ...ervice and allows you to save your Contacts List entries in the handset memory on the Internet server The data in the SIM card will not be saved Subscribe to a synchronisation service by contacting your network service centre Synchronising the Contacts List Contacts Synchronise 1 Select the desired synchronisation profile 2 Select Normal for synchronisation Note To make or restore a backup file se...

Page 44: ... As Postcard from the send option The Postcard service is not available with some service providers Contact your service provider for more information Note When the video camera is launched press Options and select Go to Photo Camera or press c When you try to send the picture that has too large a file size the picture size is resized for the message The original sized picture is saved in My Items...

Page 45: ...Save and Send Then select the desired way you wish to send For further procedures see Creating a New Message on page 50 Note You can only send video clips when For Message is selected for the recording time For details see Selecting the Recording Size on page 48 Common Options Menu Indicators On screen indicators are provided for various camera mode settings 1 Press the camera key The Options menu...

Page 46: ...nd Video Camera Modes You can switch between the camera and video camera modes by pressing c or d Select the appropriate option Camera Options Go to Video Camera Camera Options Go to Photo Camera Selecting the Picture or Video Quality Select the appropriate option Camera Options Picture Quality Camera Options Video Quality 1 Select the desired picture or video quality Super Fine Fine Normal Note T...

Page 47: ...e desired size Picture Sizes 960 1280 dots 768 1024 dots 480 640 dots 240 320 dots 120 160 dots Selecting the Scene You can select the appropriate mode by scene when you take the picture Camera Options Modes Scene 1 Select the desired scene The following four modes are available Automatic Automatically adjusted to surroundings Night Suited for night photography Sports Suited for moving objects Cha...

Page 48: ...ect Manual to take continuous pictures press manually in the desired speed When the Timer and Continuous Shoot functions are simultaneously set for 4 Pictures for example is displayed instead Selecting a Frame You can select the frame from preset patterns or My Pictures Camera Options Modes Add Frame 1 Select Preset Frames or My Pictures 2 Select the desired frame The selected frame is confirmed o...

Page 49: ...CIF or QVGA MPEG4 format for Extended Video Note If you select For Message for the recording size the file size is limited depending on the service provider Therefore the quality is also limited for the setting Save and Send is not displayed after recording in the Extended Video mode Setting the Picture Size You can change the picture size during playback recording Camera Options Advanced Picture ...

Page 50: ... you to send and receive multimedia messages of up to 300 KB with images sound or video clips attached Email Email allows you to send messages of up to 300 KB Note Some MMS functions may not always be available depending on your network Contact your network operator for more information Maximum message size varies depending on the settings by the network operator 1 Recipient field 2 Message field ...

Page 51: ...ess Options and select Add Subject 4 Highlight Send then press to send After the message is sent the message is moved to the Sent box Tip To send the same message to a group of recipients select Select Group in step 3 then select the desired group name For details on creating a mailing list see Creating a New Mailing List on page 40 To Add a Slide Show 1 In step 2 in Creating a New Message press O...

Page 52: ...ns and select Attach Appointment 2 Select the desired day including a schedule entry you wish to add 3 Select the desired schedule entry Using the Sending Options You can use the message sending options for each type of message 1 Press Options and select Advanced Message type SMS MMS Sets the transportation type Read Report Yes No SMS MMS Enables or disables Read Report when the recipient is requi...

Page 53: ...ages For details on using this option see Using Templates on page 33 Sending a Message in the Drafts Box A Drafts 1 Select the desired tab SMS MMS or Email 2 Press Options and select Edit Send 3 Modify the message if necessary 4 Select Send 5 Highlight Send then press to send Sending a Voice Clip Message or Video Clip Message You can record a new voice or video clip when creating a new message Sel...

Page 54: ...Press Options and select Call Sender Downloading a Single MMS A Inbox 1 Highlight the message alert you wish to download 2 Press Options and select Download Tip You can download multiple messages at the same time See the next section Downloading Multiple MMS A Inbox 1 Press Options and select Advanced 2 Select Multiple Select 3 Select the desired message alert using the Select or Select All option...

Page 55: ...Press Options and select Advanced 3 Select Lock or Unlock Sending a Picture File with Postcard Your phone allows you to send multimedia messages to a Vodafone specific Postcard service centre that prints the picture and mails it to the recipient s home address specified in the MMS message Your phone is initially provided with the address of a Vodafone specific Postcard service centre and its addre...

Page 56: ...em Country may not be displayed so you cannot send Postcards overseas from your phone Files in Animation GIF format cannot be used for the Postcard service The picture quality of Postcards varies depending on the picture size Messaging Settings General Settings A Messaging Settings General Settings 1 Select the item you wish to set up Home Download Controls message download timing inside your netw...

Page 57: ...to Delete Deletes the oldest message automatically when the Inbox Sent Messages or both Inbox and Sent Messages is full SMS Settings A Messaging Settings SMS Settings 1 Select the item you wish to set up Message Centre Enter the message centre number If you wish to enter a country code for a message to an international number press and hold Q until a sign is displayed Message Format Select the mes...

Page 58: ...ts the download interval Max Message Size Defines the maximum size of messages that are downloaded Cell Broadcasts You can receive cell broadcast messages or general messages such as weather forecasts and traffic reports This information is broadcast to subscribers in certain network areas This function may not be available on all mobile phone networks Contact your network operator for more inform...

Page 59: ... Tip If the desired page is not in the list that appears in step 2 select Create Subject in step 1 then enter the subject code to add a page For details on the subject code contact your service provider Area Info The Area Info is the message information that operators send to subscribers in certain areas When you receive Area Info the message area code is displayed in standby To Enable Disable Are...

Page 60: ...If you have problems getting connected please phone Vodafone Customer Support Your phone contains a WAP browser used for surfing on the Mobile Internet where you can get a lot of useful information Normally pages are designed for a mobile phone Your phone is already setup to Vodafone site for WAP MMS Settings Top Menu Vodafone live Vodafone live The Vodafone live service page is displayed Vodafone...

Page 61: ...e browser press and hold Turns off the phone Editing Bookmarks Vodafone live Bookmarks 1 Select the desired URL and press Options You can edit the list of Bookmarks by the following options Select Selects a bookmark Details Displays detailed information of the WAP page Send page Sends the URL address to recipients New Creates new folders or bookmarks Rename Renames bookmarks Edit URL Edits URL add...

Page 62: ...eed confirmation for push message Download to Sets the download location The Browser Options You can use various options of the WAP browser C Options Select Selects a WAP page Home Goes to the homepage Bookmarks see page 60 Mark Page Marks the selected WAP page Save items Saves items from WAP pages Go to URL Goes to the WAP page that you enter the URL address Access History Shows the history where...

Page 63: ...page data Details Shows detailed information of the WAP page Browser Data Edits the browser data You can clear the cache cookies history Search This Page Searches specific words in the WAP page Alert Inbox Displays WAP Push alerts Copy Text Copies the text on the web page Settings Displays the Settings menus Restart browser Restarts the browser About Displays the browser information ...

Page 64: ...d when the file is being played back Tip You can return to the Main menu screen while playing back the file in the background You can create your playlist listing only the desired files p 64 You can select the playback pattern in step 1 Press Options and select Playback Pattern Normal Plays back all files in the selected folder once and stops playback Repeat Continues to play back the selected fil...

Page 65: ... memory and the memory card 2 Highlight the file you wish to add to the playlist 3 Press Options and select Add to Playlist The playlists are displayed For details on adding a playlist see Adding a New Playlist on page 64 4 Select the desired folder 5 Press The file highlighted in step 2 is saved To delete the playlist highlight the playlist and press Options Then select Delete Playlist Adding a N...

Page 66: ...ou wish to view The selected picture is displayed To display the list from the memory card press d To go back to the handset memory press c Using Images as Wallpaper My Items Pictures 1 Select Handset Memory or Memory Card The tab switches the file displayed between the handset memory and the memory card 2 Highlight the file you wish to use as wallpaper 3 Press Options and select Set as Wallpaper ...

Page 67: ...tion Note Resize may not be available depending on the original picture and copyright issued Tip For other option menus see page 68 Downloading Picture Files My Items Pictures Get new 1 Select Handset Memory or Memory Card The tab switches the file displayed between the handset memory and the memory card The picture file download site is displayed Sounds Ringtones The downloaded sound files and th...

Page 68: ...d Playing Back Video Clip Files My Items Videos 1 Select Handset Memory or Memory Card The tab switches the file displayed between the handset memory and the memory card 2 Select the file you wish to play back 3 Press To resume press again To stop playback press Back To display the list from the memory card press d To go back to the handset memory press c Using a Video Clip as a Ring Video You can...

Page 69: ...ngtones My Items Videos 1 Highlight the file you wish to activate 2 Press Options and select Activate Note Some pictures with DRM may not open even when an attempt is made to activate it Pictures with DRM cannot be sent attached to a message with the exception of Separate Delivery files Sending My Items Data Select the appropriate option My Items Pictures My Items Sounds Ringtones My Items Videos ...

Page 70: ... Videos My Items Other Documents 1 Highlight the desired file 2 Press Options and select Advanced 3 Select the desired option Move Moves the files to another folder Select the desired folder to move Copy Copies the file Select the desired folder to copy Create Folder Creates a new folder Sort Sorts the file Select the desired files to sort To Rename the File Select the appropriate option My Items ...

Page 71: ...opyright cannot be uploaded with the exception of Separate Delivery files Selecting Multiple Files You can select more than one item from My Items for moving copying and deleting Note The following procedure applies when the entries other than Get new are highlighted Select the appropriate option My Items Pictures Options My Items Sounds Ringtones Options My Items Videos Options My Items Other Doc...

Page 72: ...ct Edit To view the text template press Options and select View To delete the text template press Options and select Delete 3 Modify the text and press Sending Text Templates My Items Text Templates 1 Highlight the text template you wish to send 2 Press Options and select Send Template Memory Status This function helps you to check the memory status of the handset memory or memory card Memory stat...

Page 73: ...72 My Items ...

Page 74: ...y Games Applications More Games 1 Select the desired application Before downloading the application you are asked to confirm what you are about to receive After checking the information on the confirmation screen the application can be downloaded 2 Press to start downloading 3 Press when finished Note User authentication may be required before downloading the application on some information screen...

Page 75: ...ser Data Sets permission to write entries in your phone such as Contacts List entries mailbox Inbox and My Items data Use Multimedia Sets permission to use the multimedia recording Location Access Sets permission to update the positioning function Reset Clears all the above settings 4 Select one of the following options Per Session The confirmation message is not displayed until you exit the appli...

Page 76: ...cations My Games Applications 1 Highlight the desired Java application 2 Press Options and select Delete Settings Application Volume You can set the volume of the application such as the sound effect to one of the five levels or silent When Ringer Volume p 93 is set to Silent this setup has priority Entertainment Games Applications Settings Application Volume 1 Press a or d to increase the volume ...

Page 77: ...ound of SMAF file in the application Calls Alarms You can set the priority of incoming calls and alarms while an application is operating Entertainment Games Applications Settings Calls Alarms 1 Select Voice Call Video Call Incoming Message or Alarm 2 Select the desired method Call Priority Message Priority or Alarm Priority The application is suspended automatically and you can receive a call or ...

Page 78: ... to 6 hours Java Information Entertainment Games Applications Java Information The information about the licences belonging to Java is displayed TV Video Playing Back the TV Live Video Clip or Video Clip Files To Play Back the Last File Entertainment TV Video Last Played Video To Play Back the Files in the Handset Memory or Memory Card Entertainment TV Video My Videos 1 Select Handset Memory or Me...

Page 79: ...memory and the memory card 2 Select the desired file To pause playback press To stop playback press Back Searching a File to Be Played Back Entertainment TV Video My Videos 1 Select Handset Memory or Memory Card 2 Select All Music or the desired playlist 3 Press Options and select Search 4 Enter the first few letters of the title Search results are displayed in alphabetical order and the matching ...

Page 80: ...d Subtitle Create a subtitle to add to the file Settings You can select a play mode for Playback Pattern Backlight and Display Size when playing back video clip files Entertainment TV Video My Videos 1 Select Handset Memory or Memory Card 2 Select the file for which you wish to adjust the play mode 3 Press Options and select Settings 4 Select from Playback Pattern Backlight or Display Size 5 Selec...

Page 81: ... played back even if a key is pressed Normal Settings Works with the main backlight setting p 97 Display Size Original Size Displays the file in its original size Enlarge Displays the file in an enlarged size Full Screen Displays the file on the full screen SD VIDEO Entertainment TV Video SD VIDEO M 1 2 4 ...

Page 82: ...ation 8 Select the reminder time or date 9 Press Save Note If the date and time settings have not been made the date and time entry screen is displayed p 98 The reminder will not sound when Ringer Volume p 93 is set to Silent To Change the Type of the Reminder Tone or Video 1 On the New Entry screen select Reminder 2 Select Assign Tone Video 3 Select Assign Tone and then select Preset Sounds or My...

Page 83: ...ays the weekly view c d Moves the cursor to left the previous day or to right the next day a b Moves the cursor upward last week or downward next week Weekly view P Displays the previous week R Displays the next week Q Displays the monthly view c d Moves the cursor to left the previous day or to right the next day a b Moves the weekly view up or down the previous hour or next hour Editing a Schedu...

Page 84: ... with a Bluetooth wireless technology enabled device for the first time Receiving a Schedule Entry When the phone receives a schedule entry a confirmation message is displayed in standby 1 Press Yes The received entry is saved in the Calendar Press No to reject Tip For details on making Infrared or Bluetooth wireless settings see Connectivity on page 109 Viewing the Memory Status 1 In any view pre...

Page 85: ...e 93 To Change the Snooze of the Alarm Tone 1 On the Set Alarm screen select Snooze 2 Select the desired snooze option To Change the Alarm Volume 1 On the Set Alarm screen select Alarm Volume 2 Press a or d to increase the volume or press b or c to decrease the volume To Change the Vibration of Alarm Tone 1 On the Set Alarm screen select Vibration 2 Select On On Link to Sound or Off For details on...

Page 86: ...ser Tools Calculator Options Currency Converter Exchange Rate 1 Select Domestic or Foreign 2 Enter the currency conversion rate To Convert a Value Organiser Tools Calculator 1 Enter the value to be converted 2 Press Options and select Currency Converter 3 Select Convert to Domestic or Convert to Foreign Voice Recorder This allows you to record a voice clip which can be used to remind you of schedu...

Page 87: ...hen selecting Choose before Saving you can select the location when saving a voice clip E Book This function allows you to view book files XMDF or Text files stored in an SD card Organiser Tools E Book 1 A folder list is displayed followed by a file list 2 Select the desired file and press To search for dictionary contents enter the title on the Search screen 3 Enter a password if required 4 Press...

Page 88: ...g Options and selecting Save to Templates Resetting Time 1 After stopping the stopwatch press Options and select Reset Tasks You can register your schedule as task entries which are associated with the date and time Creating a New Entry Organiser Tools Tasks 1 Select Add New Entry 2 Enter the subject 3 Enter the due date and then due time 4 Select the reminder time When selecting Other enter the d...

Page 89: ...data secret or select Off to leave as is Sending a Task Entry Organiser Tools Tasks 1 Highlight the task entry you wish to send 2 Press Options and select Send 3 Select As Message Via Infrared or Via Bluetooth For Via Bluetooth For details see Bluetooth on page 109 For Via Infrared For details see Infrared on page 111 Note When pairing you need to enter your passcode when establishing contact with...

Page 90: ...3 Enter the desired city name and time Setting the Daylight Saving Organiser Tools World Clock 1 Press Edit and select Daylight Saving 2 Select On or Off Countdown Timer Organiser Tools Countdown Timer 1 Enter the time to count You can set the time from 1 second to 60 minutes 2 Press to start counting 3 Press to pause Press again to continue counting 4 If the countdown has finished press Cancel an...

Page 91: ...To Change Amount 1 In the total view select the desired item 2 Press Options and select Change Amount 3 Enter the desired amount using the digit keys To Delete a Recorded Item or All Items 1 In the total view select the desired item 2 Press Options and select Delete Item or Delete All Editing the Category Name Organiser Tools Expenses Memo Edit Category 1 Select the desired category name 2 Modify ...

Page 92: ...SIM Application 91 SIM Application You can refer to the information on the SIM USIM Contact your service provider for further details M 11 ...

Page 93: ...92 SIM Application ...

Page 94: ...et code is 9999 For details on changing the handset code see To Change the Handset Code on page 105 Ringer Volume You can adjust the ringer volume to one of six levels or to an increasing volume Settings Profiles 1 Highlight the profile you wish to customise 2 Press Options and select Personalise 3 Select Ringer Volume 4 Press a or d to increase the ringer volume or press b or c to decrease the ri...

Page 95: ... select Personalise 3 Select Ringtone Ringvideos 4 Select For Voice Call or For Video Call 5 Select Assign Video 6 Highlight the ring video clip file you wish to use To preview the file press Options and select Play 7 Press Options and select Select Message Notification When receiving messages your phone will notify you of their arrival with the ringtone or ring video you specify Settings Profiles...

Page 96: ...nd option When you select On or On Link to Sound in step 4 is displayed in standby Any Key Answer You can answer a call by pressing any key except F U and Busy For details see page 24 Settings Profiles 1 Highlight the profile you wish to customise 2 Press Options and select Personalise 3 Select Any Key Answer 4 Select On or Off Setting the Display You can change the settings of the display Setting...

Page 97: ...ure press 5 Specify the area you wish to display using the navigation keys Note Some pictures cannot be used because of their picture and data types If the picture in My Pictures is already set it is displayed in step 2 Press Change and select the desired picture Setting the Font Weight Settings Display Settings Font Settings 1 Select Thin Normal Bold or Bolder The preview image is displayed in th...

Page 98: ... phone Backlight is set to 15 seconds To Select the Backlight Time Out Settings Display Settings Backlight Timeout 1 Select the desired time Select Off to shut it off To Adjust the Brightness of the Backlight Settings Display Settings Backlight Brightness 1 Press a Light and b Dark to switch between 4 levels of clarity 2 Press Setting the Display Saving The screen of this phone will automatically ...

Page 99: ...ime Zone 1 Press c or d to select the home city to set 2 Press Customising the Time Zone Settings Date Time Set Time Zone Options Set Custom Zone 1 Enter the city name 2 Enter the time zone differences using the digit keys Press a or b to switch between and 3 Press Display Date Time You can display the calendar or the current date and or time in standby To Set the Clock Display Settings Date Time ...

Page 100: ...Date Time Wake up Alarm 1 Select On or Off Language Setting You can change the language that the phone uses to display messages Settings Language 1 Select the desired language Tip You can also change the input language on the text entry screen p 32 Note If you select Automatic in step 1 the language preset on the SIM USIM card is selected If the language preset on the SIM USIM card is not supporte...

Page 101: ...p 38 3 Press Note When diverts is set to Voice Calls of Always is displayed in standby To Check the Divert Status Settings Call Settings Voicemail Diverts 1 Select the divert option you wish to check 2 Select Status To Cancel the Diverts and Voicemail Service Once you made some settings you can cancel all the settings at a time with this option Settings Call Settings Voicemail Diverts Cancel All T...

Page 102: ... This function lets you place restrictions on incoming and outgoing calls To activate this option you will need the specified password which is available from your service provider Settings Call Settings Restrict Calls 1 Select Outgoing Calls or Incoming Calls Outgoing Calls Restricts outgoing calls Incoming Calls Restricts incoming calls 2 Select one of the following options For Outgoing Calls Ba...

Page 103: ...hone numbers you do not wish to answer To Reject the Registered Number Settings Call Settings Restrict Calls Rejected Numbers Switch On Off 1 Select On or Off To Register the Rejected Number Settings Call Settings Restrict Calls Rejected Numbers Set Rejecting Number 1 Select a blank field 2 Enter the desired number Changing the Network Password Settings Call Settings Restrict Calls Change N W Pass...

Page 104: ...ll Timer Settings Call Settings Display Call Timer 1 Select On or Off Displaying Call Costs Settings Call Settings Display Call Cost 1 Select On or Off Auto Redial Settings Call Settings Auto Redial 1 Select On or Off Video Call Settings Set various types of functions and services for video calls Selecting an image for the Alternative Image You can select your image to be sent through the sub came...

Page 105: ...ctures 2 Select the desired picture Security Enabling Disabling the PIN Code If the PIN code is enabled you are asked to enter the PIN code each time the phone is switched on Your PIN code is registered on the SIM USIM card and you should have been made aware of the code when you purchased the SIM USIM card Contact your service provider for further details Settings Security PIN Entry Switch On Off...

Page 106: ...set code 2 Enter a new handset code 3 Enter the new handset code again Function Lock By setting this option on your phone will lock the function until the correct handset code is entered Settings Security Function Lock 1 Enter your handset code The default handset code is 9999 For details on changing the handset code see To Change the Handset Code on page 105 To Turn Off the Function Lock Enter yo...

Page 107: ...set code The default handset code is 9999 For details on changing the handset code see To Change the Handset Code on page 105 Resetting All Settings from M1 to M12 and All Created Data Settings Master Reset Reset All 1 Enter your handset code For details on the handset code see page 105 M 12 9 M 12 9 1 M 12 9 2 ...

Page 108: ...ote The Postcard service is not available with some service providers Please contact your service provider for more information Deleting a Call Log 1 In the call log list press Options and select Delete Call Timers This function lets you check the duration of your calls Checking the Duration of the Last Call and All Calls Call Log Call Timers 1 Select Received Calls or Dialled Calls Resetting Call...

Page 109: ...the maximum limit for call cost Call Log Call Costs Cost Units Set Units 1 Enter your PIN2 code 2 Enter a currency unit up to 3 characters 3 Enter a cost per unit To enter a decimal point press R Setting the Charge Limit This function is useful if you wish to make sure you do not exceed a certain charge limit Call Log Call Costs Max Cost Set Limit 1 Enter your PIN2 code 2 Enter a value Checking th...

Page 110: ...ed visibility settings Show My Phone Allows other devices to recognise your phone Hide My Phone Hides your phone from other devices To Search for Devices to be Paired Connectivity Bluetooth Search for Devices 1 Select the desired device for pairing 2 Enter the device passcode Note If the Bluetooth wireless function is off before searching the phone turns the Bluetooth wireless function on automati...

Page 111: ...g starts automatically 2 Enter your handset code The default handset code is 9999 For details on changing the handset code see To Change the Handset Code on page 105 3 Enter the device passcode for unpaired devices 4 Select the desired data to send Note If the handsfree device is connected the confirmation screen to deactivate the handsfree function is displayed Press Yes to deactivate Bluetooth W...

Page 112: ...ect Off you may authenticate the passcode when the sender requests it To See Your Phone Details Connectivity Bluetooth Bluetooth Settings My Phone Details Infrared In order to use the infrared function you need to search for other infrared enabled devices to establish contact with your phone Keep your phone within a distance of 20 centimetres before searching The infrared setting will return to of...

Page 113: ...e country code up to 3 digits 3 Enter the network code up to 3 digits 4 Enter a new network name up to 25 characters 5 Select Select network type 6 Select the desired network To Edit the Preferred List Connectivity Network Settings Select Network Set Preferred 1 Select the name of the network you wish to edit 2 Select Insert to insert over the selected position Add to end to insert at the end or D...

Page 114: ...Email account name Unique name POP3 Server name user ID password and port number for POP3 server SMTP Server Server name user ID password port number for SMTP server and SMTP Authentication Access Point Access point for Email Email Address Email address Streaming Settings Connectivity Internet Settings Streaming Settings Profile Name Profile name for streaming Unique name Proxy Address Proxy addre...

Page 115: ...ss SM originating address To Activate the WAP MMS Email Streaming Profile Connectivity Internet Settings 1 Select WAP Settings MMS Settings Email Settings or Streaming Settings 2 Select the desired profile you wish to activate To Edit Copy Delete the WAP MMS Email Streaming Profile Connectivity Internet Settings 1 Select WAP Settings MMS Settings Email Settings or Streaming Settings 2 Highlight th...

Page 116: ...ter your handset code 2 Select the desired item to restore or Select All to restore all files 3 Select the desired file to restore A confirmation message indicating deletion from the memory card is displayed on the screen 4 Press Yes Note To delete a backup file highlight the desired item press Options and select Delete after performing steps 1 to 3 Formatting Memory Card Connectivity Memory Card ...

Page 117: ...116 Connectivity ...

Page 118: ... as a 3G GSM GPRS modem to access the Internet from your PC Connect your phone to your PC via Bluetooth wireless technology or USB interface Software installation on your PC is required For details see Software Installation on page 118 Modem via the USB Cable To use the modem function using a USB cable use the cable mentioned above and see the instructions accompanying the cable Modem via Bluetoot...

Page 119: ...auncher exe in your CD ROM 2 Press the desired button The installation starts 3 Follow the on screen instructions to complete installation Note The phone may not recognise the USB data cable if it is connected while an application Camera My Items etc is running Connect the USB data cable in standby Infrared Communication Infrared ports need to be aligned with each other Infrared ports need to be p...

Page 120: ...e is turned on Check the radio signal strength indicator as you may be outside the service area Check to see if any error message is displayed when you turn your phone on If so contact your dealer Make sure the SIM USIM card is correctly inserted Calls cannot be made or received If the message SIM card error is displayed when the phone is switched on you cannot use your SIM USIM card or the SIM US...

Page 121: ...nt number Contact your service provider to confirm the correct settings Limited memory available Delete any unnecessary data Call is terminated unexpectedly Magnetised objects such as health necklaces placed near the phone may terminate the call Keep your phone away from such objects No entries are displayed in the Contacts List Confirm that the Contacts Location setting Handset or SIM USIM is mad...

Page 122: ...n your phone near gas or flammable substances Observe the rules concerning the use of mobile phones at gasoline stations chemical plants and at all sites where a risk of explosion exists Caring for your phone Do not allow children to use your phone without supervision Do not open or attempt to repair your phone yourself The product can only be repaired by authorised service personnel Do not drop y...

Page 123: ... charged and discharged hundreds of times but it will eventually wear out When the operating time talk time and standby time is noticeably shorter than normal it is time to buy a new battery CAUTION RISK OF EXPLOSION IF BATTERY IS REPLACED BY AN INCORRECT TYPE DISPOSE OF USED BATTERIES ACCORDING TO THE INSTRUCTIONS See Battery Disposal on page 15 Memory Card Do not remove or insert a memory card w...

Page 124: ...erfering with blasting operations please turn off the mobile phone in a blasting area or in a place where a turn off two way radio sign is posted Camera Operation Learn picture quality file formats etc beforehand The taken pictures can be saved in JPEG format Be careful not to move your hand while taking pictures If the phone moves while taking a picture the picture can become blurred When taking ...

Page 125: ...ge which may result as a consequence of improper use or use contrary to the instructions contained herein SAR Your Sharp mobile phone has been designed manufactured and tested so as not to exceed the limits for exposure to electromagnetic fields recommended by the Council of the European Union These limits are part of comprehensive guidelines developed by independent scientific organisations The g...

Page 126: ...treatment recovery and recycling and thus prevent potential negative effects on the environment and human health which could otherwise arise due to inappropriate waste handling 2 In other Countries outside the EU If you wish to discard this product please contact your local authorities and ask for the correct method of disposal For Switzerland Used electrical or electronic equipment can be returne...

Page 127: ...se contact your local authorities and ask for the correct method of disposal CAUTION Changes or modifications not expressly approved by the manufacturer responsible for compliance could void the user s authority to operate the equipment 126 Safety Precautions and Conditions of Use ...

Page 128: ......

Page 129: ...128 Safety Precautions and Conditions of Use ...

Page 130: ...V xxx mAh Optional Accessories Lithium Ion Battery XN 1BT90 Cigarette Lighter Charger XN 1CL30 USB Data Cable XN 1DC30 AC Charger XN 1QC30 XN 1QC31 External Antenna Cable XN 1AT90 Audio Remote Controller XN 1AR90 Car Holder XN 1CH90 Desktop Holder XN 1DH90 Stereo Headset XN 1HS90 Handsfree Microphone Unit XN 1HU90 Video Cable XN 1VC90 The above accessories may not be available in all regions For d...

Page 131: ...130 Specifications and Optional Accessories ...

Page 132: ...ing 107 Camera digital video 43 Adjusting the Exposure 45 Auto Save 46 Changing the Picture Size 48 Common Functions in the Photo and Video Camera Modes 45 Common Options Menu Indicators 44 Common Shortcut Keys 46 Continuous Shoot 47 Focus Setting 46 Recording Video Clips 44 Recording with Sound 48 Saving 45 Selecting a Frame 47 Selecting the Picture Quality 45 Selecting the Picture Size 46 Select...

Page 133: ...mage of Yourself 28 Muting the Microphone 28 Swapping Images 28 Turning the Speaker On and Off 28 Video Call Settings 28 Incall Menu Voice Call 24 Accessing SMS MMS Menu during a Call 25 Conference Call 25 Muting the Microphone 26 Putting a Call on Hold 25 Turning the Speaker On and Off 25 International Calls 23 Internet Settings 113 K Keypad Lock 18 L Language Setting 99 M Main Menu 35 Master Res...

Page 134: ...ge Notification 94 Resetting 93 Ringer Volume 93 Vibration 95 R Redialling 24 S Safety Precautions 121 Screensavers 77 Secret Data 105 SIM Application 91 SIM Card 14 Sound Settings 98 Sounds Ringtones Downloading 67 Playing Back 66 Sending 68 Using the Sound Files as a Ringtone 67 Speed Dialling 23 Stopwatch 87 T Tasks 87 Text Templates 71 Troubleshooting 119 V Video Call Letting the Caller Know Y...

Page 135: ...134 Index ...

Page 136: ... Create Message 2 Inbox 3 Drafts 4 Sent Messages 5 Outbox 6 Vodafone Messenger 7 Call Voicemail 8 Templates 9 Media Album 10 Messaging Settings 11 Memory Status 5 Camera 6 My Items 1 Pictures 2 Videos 3 Sounds Ringtones 4 Games Applications 5 Text Templates 6 Other Documents 7 Memory Status 7 Organiser Tools 1 Calendar 2 Alarms 3 Calculator 4 Voice Recorder 5 E Book 6 Stopwatch 7 Tasks 8 World Clo...

Page 137: ...sts 10 Connectivity 1 Bluetooth 2 Infrared 3 Network Settings 4 Flight Mode 5 Internet Settings 6 Memory Card 11 SIM Application 12 Settings 1 Profiles 2 Display Settings 3 Sound Settings 4 Date Time 5 Language 6 Call Settings 7 Video Call Settings 8 Security 9 Master Reset Current indications in the user guide Indications in United Kingdom Indications in Ireland Postcard live Postcard Not availab...

Reviews: