background image


CNC HIGH SPEED PRECISION LATHE 

INSTRUCTION MANUAL AND PARTS LIST 


1840TC-FC/ 1840TC-F 

2060TC-F 

2460TC-F


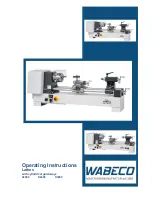
Summary of Contents for 1840TC-F

Page 1: ...CNC HIGH SPEED PRECISION LATHE INSTRUCTION MANUAL AND PARTS LIST 1840TC FC 1840TC F 2060TC F 2460TC F ...

Page 2: ...General Layout Of Lathe 18 2 2 Dimensional Drawing 19 2 3 Machine Specification 19 20 2 4 Hardware Operation 21 2 5 Control Panel Function Keys 21 2 6 Standard Accessories 22 2 7 Optional Accessories 22 2 8 Check List 23 3 Maintenance 24 3 1 General Preparation Selecting Location 25 3 2 Connection Of Power Line 26 3 3 Unpacking 27 3 4 Lifting Machine 28 3 5 Placing The Machine 28 3 6 Clean Lubrica...

Page 3: ... 54 4 5 Machine Data 55 57 5 Parts List 58 5 1 Parts List Content 59 Headstock 60 79 Tool Post 80 81 X Axis 82 84 Z Axis 85 86 Manual Pulse Generator Assembly 87 88 Tailstock 89 95 X Z Axis Cover 96 98 Electrical Control Box 99 100 Bed Chip Tray 101 102 Operation Box Door Assembly 103 105 Splash Guard Cover Assembly 106 108 ...

Page 4: ...NSTRUCTIONS FOR TURNING CENTERS WARNING Please read this manual before operation or maintaining the machine everyone working on the machine must know how to operate it safety and correctly to avoid possible injury ...

Page 5: ... 2 1 SAFETY INSTRUCTIONS ...

Page 6: ...be keep in the vicinity of the machine so they are accessible to the operator and maintenance personel The following safety instructions are general recommendations for most common operations on a turning machine Additional safety measures may be required for your particular application MlCROWEILY therefore makes no warranty or representation as to the absolute correctness or sufficiency of the in...

Page 7: ...he correct way to wear protective devices If operator has long hair hair should always be tucked under a cap or tied back and up beware of loose hair near the rotating parts of lathe 8 Turning machines are designed to be ran by one person persons other than the designed operator should stay out of the machine area during operation 9 Take care not to bump or accidentally touch any machine control 1...

Page 8: ...ich present electrical hazard under machine has power on 22 Never extend an unsupported bar out of the rear of the spindle or hydraulic cylinder a distance from a concentric support more than 10 times its diameter Doing so can cause the bar to bend or break When any bar is extended a large sign should be placed to warn people to stay away from the area 23 If you work turning machine with bar feede...

Page 9: ...C With reference to manufacturer s manual for chuck and cylinder to any other maintenance requirements As the spindle r p m increase the gripping force of the jaw decreases various types of top jaws are used on chucks for different applications the best workholding conditions that need use serrated contact surfaces on work gripping surfaces and use the maximum area of contact between the jaws and ...

Page 10: ... this machine 3 Know all points were voltages are present on this machine and in electrical boxes 4 Residual voltages can exist in the electrical cabinets for a period of time after power has been turned off Check any component inside cabinet by meter before touching 1 4 INSTALLATION SAFETY INSTRUCTIONS 1 Verify machine weight and make sure lifting equipment cables etc are sufficient capacity refe...

Page 11: ...uld be grounded to a separate grounding rod if an independent ground can not be provided for the machine prepare the ground connection as follows 1 Connect a single conductor to its own grounding terminal this will avoid possible serious accidents resulting from ground currents which might otherwise flow in the NC machine if a peripheral device should malfunction 2 Be careful when using concrete r...

Page 12: ...ctual measurement This should measure less than 100 ohms if the single device is connect to its own grounding rod DESIRABLE INDEPENDENT GROUNDING Earth resistance Less than 100 ohms COMMON GROUNDS Resistance to ground 100 the number of devices connected to the ground Ω NEVER GROUND EQUIPMENT AS SHOWN IN THE FOLLOWING FIGURE ...

Page 13: ...ETY PRECAUTIONS The operator should not rely solely the safety devices operator must understand special precautions as following before operate machine 1 6 1 Basic Operating Practices DANGER Some control panels transformers motors junction boxes and other 1 parts have high voltage terminals these should not be touched or a severe electric shock will be sustained Do not touch switch by wet hands 2 ...

Page 14: ... be missing order another caution plate from the supplier shown on machine and suitable place 1 6 2 Before Switching On DANGER When cables cords or electric wire whose insulation is damaged that will cause current leaking and electric shocks check above before switch on WARNING Be sure the instruction manual and the programming manual are fully 1 understood every function and operating procedure s...

Page 15: ...witch on the operating panel to the ON position in the order 8 Check the coolant level and add coolant if necessary 1 6 3 After Control Power Switch Has Been Turned On CAUTION When the power switch on the operating panel is ON position as described is 7 above the READY lamp should be also be check 1 6 4 Routine Inspections WARNING When checking belt tensions keep your fingers away between belt and...

Page 16: ...fications dimensions 1 and types Seriously worn tools can cause injuries replace all such tools with 2 new ones beforehand The work area should be adequately lighted to facilitate safety checks 3 Tools and other items around machine or equipment should be stored to ensure 4 good footing and clear aisles Tools or any items must not be place on the headstock turret cover and similar 5 places If the ...

Page 17: ...tive mask CAUTION During automatic operation never open the machine door 1 When performing heavy duty machining carefully prevent chips from being 2 accumulate since hot chips can catch fire 1 6 8 To Interrupt Machining WARNING When leaving the machine temporarily after completing a job turn off the power switch on the operation panel and the main circuit breaker 1 6 9 Completing A Job CAUTION Alw...

Page 18: ...ing maintenance operating in progress or similar wording should be indicated on such switches and at any other appropriates locations such indication should be secured by a semi premanent means in the reading direction 2 With the machine turned on any maintenance operation can be dangerous in principle the main circuit breaker should be turned off throughout the operation WARNING 1 The electrical ...

Page 19: ... 7 WARNING SIGNS PLATE ON THE MACHINE Safety related informatino with must be strictly ovserved by all machine operators is given on warning signs plate these warning signs plate are attached to the machine ...

Page 20: ... 17 2 SPECIFICATION ...

Page 21: ...k 12 Lubrication unit 3 Chuck 13 Chip tray 4 Left moving door 14 Installation block 5 Operation panel 15 Stand 6 Right moving door 16 Bed 7 Tailstock 17 2 Electrical Handwheels for 8 Carriage X Z axis manual operation 9 Fourway tool post 18 Coolant pump 10 Cross slide 19 X A xis servo motor ...

Page 22: ...leeve MT 6 Spindle bore 60 mm 2 3 8 Longitudinal travel Z axis 1000 mm 40 1500 60 Cross slide travel X axis 270 mm 10 5 8 Cross slide dimension 700 mm 27 1 2 x210 mm 8 1 4 Tailstock Quill diameter 75 mm 2 15 16 Tailstock Quill travel taper 160 mm 6 5 16 MT 5 Ball screw diameter X axis Z axis 25 mm 62 64 32mm 1 1 4 Machine weigh dim LxWxH 2300kgs 2800kgs L2575mm 101 3 8 3025mm 119 1 8 W1400mm 55 H1...

Page 23: ...inal travel Z axis 1000 mm 40 1500 60 Cross slide travel X axis 270 mm 10 5 8 Cross slide dimension 700 mm 27 1 2 x210 mm 8 1 4 Tailstock Quill diameter 75 mm 2 15 16 Tailstock Quill travel taper 160 mm 6 5 16 MT 5 Ball screw diameter X axis Z axis 25 mm 62 64 32mm 1 1 4 Machine weigh dim LxWxH 2300kgs 2800kgs L2575mm 101 3 8 3025mm 119 1 8 W1400mm 55 H1840mm 72 1 2 The maximum8 3 jaw universal ch...

Page 24: ...pindle control Forward backward stop speed enter 3 Operation at constant surface speed CSS 4 Operation with live tools 5 Operation with axes jog keys 6 Operation with handwheels 7 Operation with conversational icons Facing turning taper rounding grooving 8 threading drilling tapping positioning profiling cycle Parts memory storage P Prog 9 10 Single block mode 11 Numeric key A Z 0 9 12 Cycle start...

Page 25: ...nters 7 Sleeve 8 Set of Wrenches 9 10 Set of hexagon T Type wrenches 11 Spare paint 12 Wrench for spindle 13 Leveling bolts and nuts 2 7 OPTIONAL ACCESSORIES 1 Steady rest 2 Follow rest 3 5C Lever operated quick change closing collet attachment 4 3 jaw scroll chuck 5 4 jaw scroll chuck 6 Face plate 7 Quick change tool post with 4 tool holders 8 American type tool post 9 Live center MT 5 10 Suck fo...

Page 26: ...2 7 Main switch and button ON 8 Press emergency stop button to stop machine 9 10 Learn safety rules Chapter 1 11 Simple trouble shooting Chapter 6 4 12 Maintenance Chapter6 2 9 CHECK LIST Check list for maintenance Item Job Interval Clean machine Do not use air compressor Weekly 1 Checking electrical circuit connection Every time 2 before operation Replacing coolant and clean coolant tank 3 months...

Page 27: ... 24 3 MAINTENANCE ...

Page 28: ...well as easy opening of the door of electric cabinet 3 1 2 Foundation With special torque resistant capability at the machine base this machine requires no particular foundation provide 6 150mm thick of concrete on floor and leave space of component for leveling Do not use wood foundation which with nature of un stability may cause the machine to move gradually Install the machine on the first or ...

Page 29: ...ges be sure to rewire the spindle motor coolant system dust suction device and transformer to correct voltage the relevant currents fuses and overload relays are shown in the electrical manual Note Do not turn on the machine motor when its voltage is different from power voltage and contact electric technician from reparation 3 For connecting the power supply the electrical technical valued are pr...

Page 30: ...king crate and remove skids as carefully as possible to avoid damaging the machine if the machine is damaged during transportation contact with your local dealer and transportation company who delivered your machine immediately 3 3 1 Checking for shortage Be sure to check your machine against the packing list which his shipped with every machine in case of shortages note items not received and con...

Page 31: ... Make sure there is no obstacle or personnel on the move path and left 3 on the machine Keep machine s balance and move slowly 4 We do not recommend lift and transportation machine by crane Figure 2 3 5 PLACING THE MACHINE Before placing the machine fix the adjusting screw on the base makes machine as close as possible to the floor and position of leveling pads in their most suitable place increas...

Page 32: ...e lubricant such as Sunoco Way lube 11180 or Mobil Vactra Oil 2 3 7 LEVELLING MACHINE It is necessary to level the machine before starting to operate the machine Please prepare the following tools to adjust machine leveling Accurate spirit leveling gauge spec 0 02mm 1000mm or 0 001in 4 ft 1 Two adjustable wrench 2 Clean the table surface thoroughly set one of the spirit leveling gauge on the longi...

Page 33: ...re the voltage of incoming power supply is right type that the machine requires or as marked on the unit 2 Power wires ground and over voltage protector should comply with the local electricity regulations 3 For wiring to other voltages be sure to rewire the spindle motor coolant system and transformer to correct voltage the relevant currents fuse and overload relays are shown in the electrical ma...

Page 34: ...udes discharge oil of proportional distribution and an alarm for low fluid level warnint Still please check the fluid level before operation the following recommend lubricant to the reservoir Shell Spirax HD90 1 Mobil Vactra Oil 2 2 Esso Gear Oil GX90 3 Chinese Petroleum Corp R32 4 Other equivalent grade lubricant 5 Figure 4 ...

Page 35: ...ion System On Headstock The gear construction in headstock is lubricated by mechanical type of direct drive pump The pump will supply lubrication during power on A For TY 1840 1860CNC Spindle Speed 2500 R P M Figure 5 1 ...

Page 36: ... 33 B For TY 1840 1860CNC Spindle Speed 3500 R P M Figure 5 2 ...

Page 37: ... 34 C For TY 2040 2060CNC Spindle Speed 1600 2000 R P M Figure 5 3 ...

Page 38: ...W direct increase pressure 4 Use flat head screw driver to adjust screw B C W direct decrease pressure 5 Tighten nut B 6 Tighten nut A Figure 6 3 9 4 Others There are three oil balls on the tailstock Please add 10 drops of recommended lubricant to them respectively every day before operating to ensure the smoothenss of way Figure 7 ...

Page 39: ... change oil from headstock by follow steps 1 Open end cover of headstock 2 Prepare one empty tank for old oil from reservoir use one tube D put this tube into drain adapter C 3 Pull out the drain plug A 4 Turn the hand of adapter C to Open position the old oil will drain out to tank through tube 5 Turn the hand of adapter C to Close position while the oil is completely empty 6 Fill in the new lubr...

Page 40: ...ning Headstock If taper appears on turning workpiece and convex on rounding adjust the parallel of headstock by the following steps 1 Insert test bar in the spindle bore attach the base of test indicator to tool post apply the stylus of the indicator to the outer diameter of the bar move the saddle along Z axis and measure the maximal difference 2 If indicator needle of swings drastically release ...

Page 41: ... R1 Fig 10 should be scribed on each chuck or face plate to coincide with the reference line R on the spindle nose This assists subsequent re mounting NOTE For correct locking conditions each cam must tighten with its index line between the two vee marks on the nose Fig 11 DO NOT INTERCHANGE CHUCKS OR OTHER SPINDLE MOUNTING ITENS BETWEEN LATHES WITHOUT CHECKING EACH CAM ROR CORRECT LOCKING To adju...

Page 42: ... every six months according to the following steps 1 Release the screw A 2 Remove slide cover B as shown in Figure 12 then the gibs can be seen 3 Use flat head screw driver to release the adjust screw C about 1 2 circle CCW 4 Tighten screw E about 1 2 circle CW 5 Move the slide back and forth to a satisfied smoothness 6 Re assemble the cover B Figure 12 ...

Page 43: ...saddle travel Check and adjust them every six months according to the following steps Use flat head screw driver to loose the adjust screw A and B about 1 2 1 circle CCW Appropriately tighten adjust screw C and D about 1 2 circle CW 2 Move saddle left and right to a satisfied smoothness 3 Figure 13 ...

Page 44: ...tock to the spindle steps as following Insert a gauge bar between the spindle and tailstock attach the base of 1 a test indicator to the saddle apply the needle of indicator to the surface of the bar then move the saddle through the full longitudinal travel Take the measurement of its maximal difference for later adjustment 2 Release the 4 pcs of fixing screw A 3 Release the screw B 4 Adjust screw...

Page 45: ... 42 3 10 7 Adjusting Belt Tension 1 Remove motor access cover rear cover for L H base under headstock 2 Loosen adjusting nut A till desire tension is achieved 3 Tighten jumb nut B Figure 15 ...

Page 46: ...y and tighten if necessary 3 11 4 Simple trouble shooting Description Possible Cause Repair Method Lubricant level down to bottom while spindle is runnmg Oil insufficient Add oil into headstock Pump path clogged Remove the object that clogs the pump outlet Rails on bed tum black Automatic lubrication system out of lubricant Add lubricant Inappropriate oil proper ties Immediately replace the oil Oi...

Page 47: ...n the emergency button before turning on the power switch on you can release the button if everything come out OK this is a must procedure for the every first installation 4 When the power is turned on press the RESET key to check if the rotating directions of spindle and coolant motor are correct 5 Check if the lub is functioning and infuse to prevent table from damage 6 Do not pile stuff within ...

Page 48: ...ect 2 Inspect if the lub working properly 3 Check if the machine lamp working 4 Check if the servo motor on 2 axes working properly 9 Voltages required 220VAC 35A 380VAC 25A 415VAC 20A 440VAC 20A 480VAC 20A 10 Power rate 1 Spindle 10HP 2 Coolant 1 4HP 3 Lub 100W 4 Machine lamp 50W 5 X Z axes 2000W 6 Controller 300W ...

Page 49: ... 46 4 OPERATION ...

Page 50: ... 47 4 1 Mowing Direction X Moving direction of cross slide Z Moving direction of saddle ...

Page 51: ...le safety door is opened under manual mode The safety door can not open unless change workpiece or manual operation condition HOW TO USE DOOR INTERLOCK FUNCTION To protect operator while machine is operated the door can not open to avoid workpiece injury operator The operator clamp workpiece into chuck first then close door next press CYCLE START button from control panel How to close safety door ...

Page 52: ...en move manual feed handwheel makes tool pust leave overtravel area then release this switch LIGHT Turn this switch on NO position then light will be open AUTOMATIC MANUAL SELECT SWITCH Turn this switch on AUTOMATIC position mcahine operation by control panel Turn this switch on MANUAL position mcahine operation by control p ...

Page 53: ... range the 100 on the scale d represents continuous rating 150 represents 30 minutes do not overload running which will cause spindle motor be damaged EMERGENCY STOP This button is used in case of emergency if this machine gets any trouble or works in wrong way push this button immediately X AXIS SELECT SWITCH Select X axis push X or X and the lamp on SELECT GRADUATION SWITCH X 1 0 001mm pulse X 1...

Page 54: ... chart on the headstock there are 3 steps in the range of spindle speeds CAUTION DO NOT MOVE SPEED SELECT HANDLE DURING THE SPINDLE RUNNING 1 Stop spindle running 2 In order to obtain the desired spindle speeds place the lever at the proper position be sure not shift the lever when the spindle is running ...

Page 55: ... 52 TY 1840 1860CNC SPINDLE POWER CURVED MAX 2500 R P M SPINDLE SPEED POWER CURVED SPINDLE SPEED TORQUE CURVED ...

Page 56: ... 53 TY 1840 1860CNC SPINDLE POWER CURVED MAX 3500 R P M SPINDLE SPEED POWER CURVED SPINDLE SPEED TORQUE CURVED ...

Page 57: ... 54 TY 2040 2060CNC SPINDLE POWER CURVED MAX 2000 R P M ...

Page 58: ...5 1 Threading Stock Removal Frequency Comparison Table Note 1 Please do your own calculation if your requiremen 2 Stock removal and frequency can be changed according to the 3 The numbers in Stock Removal are shown according to ...

Page 59: ... 56 4 5 2 Conditions For Using Ultra hard Cutter ...

Page 60: ... 57 4 5 3 Standard Condition For Drilling 4 5 3 1 Drilling Speed Conditions 4 6 3 2 Bit Insert Feed Standard ...

Page 61: ... 58 5 PARTS LIST ...

Page 62: ...Post 80 81 X Axis 82 84 Z Axis 85 86 Manual Pulse Generator Assembly 87 88 Tailstock 89 95 X Z Axis Cover 96 98 Electrical Control Box 99 100 Bed Chip Tray 101 102 Operation Box Door Assembly 103 105 Splash Guard Cover Assembly 106 108 ...

Page 63: ... 60 ...

Page 64: ...Spacer 1 10 Double Round Head Key 10x8x105L 1 11 50 0106 A0 Low Speed Gear 1 12 82 0109 00 Spacer 1 13 50 0107 00 High Speed Gear 1 14 50 0108 00 Locking Nut 1 15 Taper Roller Bearing 32016xC P5 1 16 50 0110 00 Locking Nut 1 17 Retaining Ring STW75 1 18 Taper Roller Bearing 6015 1 19 Double Round Head Key 8x7x18L 2 22 50 0113 00 Packing 1 23 50 0114 00 Bearing Cover Rear 1 24 Socket Head Cap Screw...

Page 65: ...Spacer 1 10 Double Round Head Key 10x8x105L 1 11 50 0106 A0 Low Speed Gear 1 12 82 0109 00 Spacer 1 13 50 0107 00 High Speed Gear 1 14 50 0108 00 Locking Nut 1 15 Taper Roller Bearing 32016xC P5 1 16 50 0110 00 Locking Nut 1 17 Retaining Ring STW75 1 18 Taper Roller Bearing 6015 1 19 Double Round Head Key 8x7x18L 2 22 50 0113 00 Packing 1 23 50 0114 00 Bearing Cover Rear 1 24 Socket Head Cap Screw...

Page 66: ...Washer 1 45 82 0141 00 Rod 1 46 50 0123 00 Packing 1 47 50 0124 00 Bearing Plug 1 48 Socket Head Cap Screw M6x12L 3 49 82 0125 00 Bearing Cover 1 50 O Ring P52 1 51 Socket Head Cap Screw M6x12L 3 52 50 0135 01 Packing 1 53 Deep Groove Ball Bearing 6206 1 54 77B 0131 00 Input Shaft 1 55 82 0126 00 Gear 1 56 Double Round Head Key 8x8x50L 1 57 Deep Groove Ball Bearing 6207 1 58 Retaining Ring 1 59 17...

Page 67: ... 6 84 Socket Head Cap Screw 3 8 16UNCx16L 6 85 50 01120A 00 Driving Plate 1 86 17 0176 00 Driving Collar 1 87 Socket Head Cap Screw M12x25L 1 88 50 01129 00 Driving Pin 2 89 62 0148 00 Shifting Arm 1 90 17 0629 01 Plug 2 92 82 0149 02 Shifting Fork 1 93 77A 0150 00 Change Speed Shaft 1 94 77A 0151 00 Sleeve 1 95 Steel Ball ij1 4 1 96 Compression Spring ij6xij0 8x30L 1 97 Socket Head Set Screw M8x8L 1...

Page 68: ...ing Block 1 116 50 01113 00 Positioning Pin 1 117 77B 01107 00 Headstock Name Plate 1 118 Revit ij2x5L 8 119 50 01146 00 Oil Sight Glass 1 121 77A 0130 00 Collar 1 122 Double Round Head Key 5x5x20L 1 123 Deep Groove Ball Bearing 6006ZZ 2 124 77 0128 00 Internal Ring 1 125 Synchronous Belt 270L050 1 126 77 0126 00 Synchronous Pully 1 127 Double Round Head Key 5x5x20L 1 128 77 0131 00 Washer ij8 5xij30...

Page 69: ... 136 Speed Coder 1 137 Socket Head Cap Screw M5x25L 4 138 Spring Washer M5 4 150 77A 0152 02 Position Check Rod 1 151 Socket Head Set Screw M8 x8L 1 152 Compression Spring 1 153 Steel Ball ij1 4 1 154 Oil Seal TC20x35x7 1 155 Set Screw M6x8L 1 156 77A 0153 00 Touch Block 1 ...

Page 70: ... 67 ...

Page 71: ... 68 ...

Page 72: ...Spacer 1 12 77A 0106 00 Spacer 1 13 77A 0107 00 Anti Leaking Ring 1 14 50 0106 A0 Low Speed Gear 1 15 82 0109 00 Spacer 1 16 50 0107 00 High Speed Gear 1 17 50 0108 00 Locking Nut 2 18 77A 0152 02 Position Check Rod 1 20 77A 0108 00 Spacer 1 21 77A 0109 01 Anti Leaking Ring 1 22 Taper Roller Bearing NN3016K 1 23 Oil Seal TC20x35x7 1 24 Socket Head Cap Screw M8x20L 2 25 Set Screw M6x8L 1 26 77A 015...

Page 73: ...40 00 Spacer 2 43 Retaining Ring 1 44 77A 0114 00 Rod 1 45 50 0142 00 Washer 1 46 50 0123 00 Packing 1 47 50 0124 00 Bearing Cover 1 49 Socket Head Cap Screw M6x16L 2 50 Double Round Head Key 8x7x18L 1 51 77 0120 01 Pulley 1 52 Deep Groove Ball Bearing 6206 2 53 77A 0116 00 Spacer 1 54 O Ring G30 1 56 Locking Nut 1 57 Locking Washer 1 58 Double Round Head Key 10x8x45L 1 59 Oil Seal TC40x55x8 1 60 ...

Page 74: ...l Bearing 1 83 82 0122 00 Shaft 1 84 O Ring P52 1 85 77A 0113 00 Bearing Cover 1 86 82 0121 00 Gear 1 87 Double Round Head Key 10x8x105L 1 88 50 01133 00 Driving Button 1 89 62 0148 00 Shifting Arm 1 90 Plug 2 92 82 0149 02 Shifting Block 1 93 77A 0150 00 Change Speed Shaft 1 94 77A 0151 00 Sleeve 1 95 Steel Ball ij1 4 1 96 Compression Spring ij6xij0 8x30L 1 97 Socket Head Set Screw M8x8L 1 98 Double...

Page 75: ...4 00 Adjusting Block 1 116 50 01113 00 Positioning Pin 1 117 77B 01107 00 Headstock Name Plate 1 118 Revit ij2x5L 8 119 50 01146 00 Oil Sight Glass HFTx22 1 121 77A 0130 00 Collar 1 122 Double Round Head Key 5x5x20L 1 123 Deep Groove Ball Bearing 6006ZZ 2 124 77 0128 00 Internal Ring 1 125 Belt 270L050 1 126 77 0126 00 Pulley 1 127 Double Round Head Key 5x5x20L 1 128 77 0131 00 Washer ij8 5xij30x3t 1...

Page 76: ... 73 HEADSTOCK MAX 3500 R P M REF NO PARTS NO PARTS NAME DIMENSION Q TY 136 Position Coder 1 137 Socket Head Cap Screw M5x25L 4 138 Spring Washer M5 4 ...

Page 77: ... 74 ...

Page 78: ... 75 ...

Page 79: ... 6x6x20L 1 17 Retaining Ring S 30 1 18 88 0127 00 Shaft 1 19 Ball Bearing 6006 2 20 88 0128 00 Collar 1 21 88 0129 00 Support Bracket 1 22 Spring Washer M5 4 23 Socket Head Cap Screw M5x16L 4 24 Encoder 1 25 Key 5x5x20L 1 26 Socket Head Cap Screw M6x20L 4 27 Socket Head Cap Screw M6x16L 5 28 77D 0140 00 Bearing Cover 1 29 77D 0154 00 Balance Correction Block 3 30 77D 0153 00 Balance Correction Rin...

Page 80: ...62x9 1 55 77D 0134 00 Bearing Cover 1 56 77D 0136 00 Collar 1 57 Ball Bearing 6307 2 59 77D 0114 01 Collar 1 60 Socket Head Set Screw M8x16L 1 61 Taper Roller Bearing 32022 1 62 Retaining Ring S 65 2 63 Ball Bearing 6307 1 64 65 0118A 00 Gear DP9x40T 1 65 Key 6x6x20L 3 66 Ball Bearing 6208 1 67 77D 0128 00 Collar 1 68 Key 10x8x80L 1 69 77D 0127 00 Gear DP9x38T 1 70 77D 0126 00 Collar 1 71 Ball Bea...

Page 81: ...x16L 1 94 Steel Ball ij1 4 1 95 65 0175 00 Gear 1 96 Spring Pin ij5x30L 1 97 77D 0147 00 Shifting Rod 1 98 Spring Pin ij5x30L 1 99 63 0176 01 Shifting Arm 1 100 77D 0149 00 Shifting Block 1 101 Retaining Ring S 10 1 102 Socket Head Set Screw M8x16L 1 103 Straight Joint PT1 4 M16 1 104 Thimble ij10 1 105 Thimble Nut ij10 1 106 Oil Pipe ij10 1 107 O Ring P14 1 108 77A 0163 00 Joint 1 109 Quarter Joint PT1...

Page 82: ...ead Cap Screw M8x1 25x35L 8 132 77D 0160 00 Upper Cover 1 133 77D 0101 00 Headstock Casting 1 134 50 01146 00 Oil Sight Glass HFTx22 1 135 Cross Recessed Head Screw M4x0 7x8L 8 136 77D 0155 01 Name Plate 1 137 50 01113 00 Pin 1 138 77D 0148 00 Plug 1 139 63 01119 00 Cam Lock Stud 6 140 Socket Head Cap Screw 5 16 18UNCx16L 6 141 63 01122A 00 Back Plate For Chuck 1 142 88 0148A 00 Center Sleeve 1 14...

Page 83: ... 80 ...

Page 84: ...3115S 00 Adjusting Pin 3 7 50 03113S 00 Sleeve 1 8 50 0354S 00 Sleeve 1 9 50 0353S 00 Positioning Pin 1 10 50 03116S 00 Compression Spring 1 11 77A 0240 01 Post Pad 1 12 50 0351BS 00 Tool Post Bolt 1 13 77A 0241 00 Key 2 14 50 0357S 00 Headle 1 15 50 0352S 00 Fourway Tool Post 1 16 50 03114S 00 Adjusting Screw 3 17 Socket Cap Screw M10x20L 3 18 77A 0242 00 T Nut 3 19 Socket Head Cap Screw M6x8L 1 ...

Page 85: ... 82 ...

Page 86: ... 11 77A 0215 01 Cross Slide 1 12 77A 0213 01 Nut Base 1 13 77A 0214 00 Pad 1 14 Oil Seal TC20x32x8 1 15 77A 0206 00 Bearing Cover 1 16 Taper Roller Bearing 20TAC447BDF 1 17 Bearing Nut FK20 1 18 72 0210 00 Pulley 1 19 Double Round Head Key 5x5x30 1 20 72 0211 00 Washer 1 21 Socket Head Cap Screw M6x16L 1 22 Spring Washer M6 1 23 77A 0245 00 Bedway Wiper Rear 1 24 72 0209 00 Cover 1 25 Belt 480 8M ...

Page 87: ...L 6 40 Socket Head Cap Screw M8x30L 4 41 Taper Pin ȴ8x45L 2 42 50 06167 00 Tube 1 43 17 0722B 00 Coupling 1 44 50 06169 00 Coolant Tube 1 45 17 0746 00 Bracket 2 46 Socket Head Cap Screw M6x30L 1 47 17 0747 00 Adapter 1 48 50 06166 00 Valve 1 49 50 06168 00 Nozzle 1 50 77A 0217 00 Taper Gib 1 51 50 0325 00 Adjusting Screw 2 52 Socket Head Cap Screw M5x10L 2 53 Socket Head Cap Screw M10x90L 4 54 Ta...

Page 88: ... 85 ...

Page 89: ...aring Cover 1 15 Taper Roller Bearing 30TAC62BDF 1 16 Set Screw M16x20L 2 17 Taper Pin ij10x50L 2 18 Round Screw M6x16L 6 19 77A 0317 00 Bedway Wiper Left 1 20 77A 0311 01 Apron 1 21 Socket Head Cap Screw M10x25L 6 22 77A 0316 00 Bedway Wiper Right 1 23 77A 0310A 00 77A 0310 01 Z Axis Ball Screw 1840 Z Axis Ball Screw 1860 1 24 Taper Roller Bearing 30TAC62BDF 1 25 Bearing Nut SK30 1 26 Oil Seal TC2...

Page 90: ... 87 ...

Page 91: ...4x35x8 2 4 Double Round Head Key 3x3x16L 2 5 Flat Screw M6x16L 6 6 77A 0667 00 Washer 2 7 77A 0665 00 Shaft 2 8 Retaining Ring R35 2 9 Set Screw M4x6L 2 10 Round Screw M5x10L 6 11 Manual Pulse Generator OVM 01 2 12 Round Screw M3x8L 6 13 77A 0664 00 Setting Plate 2 14 Bearing Seat 2 15 Spacer 2 16 Roller Bearing 6003ZZ 2 ...

Page 92: ... 89 ...

Page 93: ... 90 ...

Page 94: ... 91 ...

Page 95: ...L 1 12 77A 0502 00 Tailstock Base 1 13 63 0503 00 Sleeve 1 14 63 0504 00 Feed Screw Nut Metric 1 14 63 0505 00 Feed Screw Nut Imporial 1 15 Socket Head Cap Screw M6x12L 1 16 Double Round Head Key 6x6x20L 4 17 Socket Head Set Screw M6x20L 1 18 50 0509 00 Dial Metric 1 18 50 0510 00 Dial Imporial 1 19 50 0511 00 Handwheel 1 20 50 0513 00 Washer 1 21 17 0504 02 Screw 1 22 63 01118 00 Center 1 23 50 0...

Page 96: ...Cross Recessed Head Screw M6x16L 8 42 50 0532 00 Bedway Wiper 2 44 50 0533 00 Bedway Wiper Plate 2 45 50 0431 00 Knob 1 46 63 0506B 00 Feed Screw Metric 1 46 63 0507B 00 Feed Screw Imporial 1 47 Thrust Bearing 51104 2 48 50 0504 00 Spacer 5x80L 1 49 Taper Pin 1 50 80 0508B 00 Bracket 1 51 Ball Cup 1 4 1 52 Socket Head Cap Screw M6x16L 4 53 63 0539 00 Change Speed Box 1 54 Ball Cup 1 4 1 55 Socket ...

Page 97: ...Revit 2x5L 1 72 80 0552 00 Setting Plate 1 73 Cross Recessed Head Screw M5x8L 2 74 28 0229 00 Shifting Arm 1 75 17 0504 02 Screw 1 76 50 0167 00 Washer 1 77 50 0246 01 X Feed Selector Konb 1 78 Socket Head Set Screw M8x20L 1 79 Compression Spring 6x 0 8x 30L 1 80 Steel Ball 1 4 1 82 65 0549 00 Spacer 1 83 80 0540 00 Socket Head Set Screw 4 84 Hexagon Screw M20x125L 1 85 80 0522 00 Adjusting Block ...

Page 98: ... 95 TAILSTOCK REF NO PARTS NO PARTS NAME DIMENSION Q TY 92 50 0534 00 Stud 1 ...

Page 99: ... 96 ...

Page 100: ...tor Seat 1 12 Round Screw M5x8L 5 13 Micor Switch BNS543D02D12 2 14 Socket Head Cap Screw M6x20L 2 15 77B 0697 00 Z Axis Touch Block 1 16 Flat Washer M6 6 17 Socket Head Cap Screw M6x12L 6 18 77B 0698 00 Z Axis Touch Block 2 19 Socket Head Cap Screw M6x16L 2 20 Socket Head Cap Screw M6x12L 2 21 Flat Washer M6 2 22 77A 0676 01 Micor Switch Set 1 23 Socket Head Cap Screw M6x12L 2 24 Wire Protector 1...

Page 101: ... Socket Head Cap Screw M6x12L 2 35 Flat Washer M6 2 36 77B 06114 00 Micor Switch Seat 1 37 77A 0659 02 Cross Slide Rear Cover 1 38 Round Screw M6x8L 3 39 77A 0655 00 Slide Cover 1 40 Round Screw M6x8L 5 41 Socket Head Cap Screw M6x12L 6 42 Flat Washer M6 6 43 77A 0656 00 X Axis Block 1 44 77A 0658 00 X Axis Block 1 45 77A 0657 00 X Axis Block 1 ...

Page 102: ... 99 ...

Page 103: ...Round Screw M4x6L 1 8 77A 0677 00 Cover Plate 4 9 Flat Washer M6 4 10 Socket Head Cap Screw M8x40L 4 11 Round Screw M4x6L 10 12 77A 0652 00 Setting Plate 2 13 Flat Washer M8 8 14 Socket Head Cap Screw M8x10L 8 15 77B 0608 00 Base Plate 1 16 77B 0624 00 Base Plate 1 17 77A 0679 00 Relay Contactor Set Seat 1 18 Socket Head Cap Screw M6x10L 4 19 77B 0698 00 Electical Contorl Box Door 1 20 Socket Head...

Page 104: ... 101 ...

Page 105: ...4 8 Spring Washer M16 6 9 Socket Head Cap Screw M16x60L 6 10 77A 0635 01 Chip Tray 1840 1 10 77D 0735 00 Chip Tray 1840 1 11 50 06121 00 Adjusting Screw 6 12 50 06121 00 Locking Nut 6 13 77A 06122 00 Installation Block 6 14 77A 0674 00 Stand 1 15 Hexagon Nut M8 2 16 Spring Washer M8 2 17 Socket Head Cap Screw M8x30L 2 18 77B 0697 00 Pump Bracket 1 19 Coolant Pump 1 8HP 1 20 Spring Washer M6 4 21 S...

Page 106: ... 103 ...

Page 107: ...628 00 Spacer 8 12 Deep Groove Ball Bearing 6000ZZ 8 13 77 0626 00 Roller 4 14 77 0627 00 Spacer 4 15 77 0629 00 Roller Shaft 4 16 Socket Head Cap Screw M8 x12L 4 17 Anti Round Screw M4 x12L 12 18 77A 0622 00 Safety Glass 2 19 Flat Washer M4 12 20 Hexagon Nut M4 12 21 Socket Head Cap Screw M6 x10L 4 22 Socket Head Cap Screw M6 x10L 12 23 Flat Washer M6 12 24 Socket Head Cap Screw M6 x10L 6 25 77A ...

Page 108: ...NAME DIMENSION Q TY 31 Round Screw M4x6L 6 32 Socket Head Cap Screw M6x16L 2 33 Socket Head Cap Screw M6x16L 2 34 Wire Protector 80x45SB2000 1 35 Round Screw M5x6L 6 36 77A 0651 01 Safety Switch Seat 1 37 77B 0650 01 Linking Box 1 38 Socket Head Cap Screw M6x10L 4 ...

Page 109: ... 106 ...

Page 110: ...10 Slide Way 1 11 Round Screw M4x6L 10 12 77B 0607 04 Protect Cover Front 1 13 Socket Head Cap Screw M6x10L 5 14 77B 0625 01 Slide Way 1 15 Round Screw M5x6L 20 16 Round Screw M6 x10L 5 17 77B 0609 01 Z Axis Motor Plate 1 18 77B 0640 00 End Cover 1 19 77B 0640 01 Protector Plate 1 20 O Ring G250 1 21 77A 0616 01 Anti Leaking Plate 1 22 O Ring G210 1 23 Socket Head Cap Screw M5 x10L 6 24 77A 0623 0...

Page 111: ... 108 SPLASH GUIDE COVER ASSEMBLY B TYPE REF NO PARTS NO PARTS NAME DIMENSION Q TY 31 Hexagon Nut M5 4 32 Round Screw M6x16L 4 33 77A 0611 01 Rear Protector Cover 1 34 Round Screw M5x6L 16 ...

Page 112: ......

Reviews: