background image

PAGE

IMPORTANT INFORMATION ................................................ 2
Supplied Accessories ............................................................. 3
Before Operating Your TV/ VCR Combination ....................... 3
Antenna Connections ............................................................. 4
Description Of Controls .......................................................... 5
Location Of Control’s Buttons (Remote Control) .................... 6
Watching A TV Program ........................................................ 7~11

1

POWER

2

VOLUME

3

CHANNEL SELECTION

4

DISPLAY CALL

5

MENU FUNCTIONS

6

TRILINGUAL ON SCREEN DISPLAY

7

EZ SETUP during First Use ......................................... 8

8

WAKE-UP TIMER ........................................................ 8

9

SLEEP TIMER ............................................................. 9

!

VIDEO ADJUST ........................................................... 9
CLOSED CAPTION ..................................................... 9~10

#

PRESETTING THE CHANNELS ................................. 10~11
EZ SETUP ................................................................... 10
CH SETTING ............................................................... 11

Tamper Proof Function .......................................................... 12
Setting The Clock ................................................................... 12~13

1

AUTOMATIC CLOCK SETTING .................................. 12

2

MANUAL CLOCK SETTING ........................................ 13

PAGE

Playing A Cassette ................................................................. 14~16

ENERGY SAVE
BLUE SCREEN
AUTO REPEAT
S. PICTURE (SUPER PICTURE)
INSERTING A VIDEO CASSETTE
EJECTING THE CASSETTE TAPE
PLAYBACK
AUTOMATIC TRACKING CONTROL SYSTEM
FULLY AUTOMATIC PLAYBACK FUNCTION
STILL PICTURE
VIDEO SEARCH
FAST FORWARD AND REWIND
DPSS (DIGITAL PROGRAM SEARCH SYSTEM)
EZ PLAY

Recording A TV Program ....................................................... 17

RECORDING SPEEDS
CASSETTE ERASE PROTECTION
RECORDING A TV PROGRAM
TAPE COUNTER

Recording With The Timer ..................................................... 18~19
Tape Dubbing ........................................................................ 20
Pre-Service Call Checklist ..................................................... 21
Specifications ......................................................................... 22
Limited Warranty .................................................................... 24

7456 PE

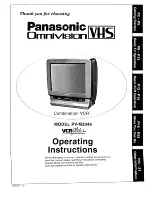
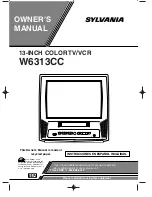
TV • VCR COMBINATION

L

OPERATION MANUAL

L


 HIGH QUALITY

CONTENTS

MODEL

13VT-CR10

A

s an 

E

NERGY 

S

TAR

®


P

artner, SHARP has determined that this product meets the 

E

NERGY 

S

TAR

®


guidelines

for energy efficiency. 

E

NERGY 

S

TAR

®


is a 

U.S.

 registered trademark.

01 13VT-CR10[E].pm65e

15/5/01, 7:23 pm

1

Summary of Contents for 13VT-CR10

Page 1: ...e 14 16 ENERGY SAVE BLUE SCREEN AUTO REPEAT S PICTURE SUPER PICTURE INSERTING A VIDEO CASSETTE EJECTING THE CASSETTE TAPE PLAYBACK AUTOMATIC TRACKING CONTROL SYSTEM FULLY AUTOMATIC PLAYBACK FUNCTION STILL PICTURE VIDEO SEARCH FAST FORWARD AND REWIND DPSS DIGITAL PROGRAM SEARCH SYSTEM EZ PLAY Recording A TV Program 17 RECORDING SPEEDS CASSETTE ERASE PROTECTION RECORDING A TV PROGRAM TAPE COUNTER Re...

Page 2: ...ART STAND TRIPOD BRACKET OR TABLE THE PRODUCT MAY FALL CAUSING SERIOUS PERSONAL INJURY AND SERIOUS DAMAGE TO THE PRODUCT USE ONLY WITH A CART STAND TRIPOD BRACKET OR TABLE RECOMMENDED BY THE MANUFACTURER OR SOLD WITH THE PRODUCT FOLLOW THE MANUFACTURER S INSTRUCTIONS WHEN INSTALLING THE PRODUCT AND USE MOUNTING ACCESSORIES RECOMMENDED BY THE MANUFACTURER A PRODUCT AND CART COMBINATION SHOULD BE MO...

Page 3: ...the set will not be used for a long period such as during a vacation unplug the set from the wall outlet to economize power If the TV set is plugged in a slight current still flows even with the POWER BUTTON in the OFF position Lines and other noise may appear in TV broadcast images when an FM tuner or radio is located near the TV and both radio and TV broadcasts are being received Should such noi...

Page 4: ...low Please note RF switch equipped with position A B not provided is required A position on the RF switch not supplied You can view all unscrambled channels using the TV s channel keys B position on the RF switch not supplied You can view the scrambled channels via the converter descrambler using the converter s channel keys Note Consult your SHARP Dealer or Service Center for the type of splitter...

Page 5: ...r PROGRAM TIMER indicator TAMPER PROOF indicator CHANNEL UP DOWN buttons PLAY button SENSOR AREA FOR REMOTE CONTROL ANT CABLE TERMINAL 75 POWER WAKE UP TIMER REC PROGRAM TIMER TAMPER PROOF EZ PLAY button REC button STOP EJECT button FF Forward Video Search button REW Reverse Video Search button VOLUME UP DOWN buttons 05 07 13VT CR10 E pm65e 16 5 01 1 36 pm 5 ...

Page 6: ...e d e TR d RETURN CH Infrared Transmitter Window DISPLAY Used to change the On Screen Display MUTE Press Mutes sound Press again Restores sound to previous level Press the MUTE button to enter the CLOSED CAPTION mode automatically if the signal contains CC information VOLUME UP DOWN CHANNEL UP DOWN TRACKING e d Used to select the CHANNEL Used to adjust the TRACKING while playing the tape TAMPER PR...

Page 7: ...mory please refer to page 11 4 DISPLAY CALL Pressing the DISPLAY button on the Remote Control will change the display on the screen in the following sequence Note When CLOSED CAPTION is turned ON the ON SCREEN DISPLAY turns off automatically after about 3 seconds For CLOSED CAPTION information please refer to pages 9 10 Press Once Time and Date Channel Number Tape Operation Display Tape Speed Mode...

Page 8: ... NO MENU YES SET EZ SETUP mode PLEASE WAIT AIR 2 AUTO PROGRAMMING STOP SET SELECT SET SET PREVIOUS RETURN QUIT MENU CLOCK SET AUTO CLOCK EDS CH MONTH DAY YEAR TIME ON AUTO 8 WAKE UP TIMER L Setting the Wake up Timer automatically turns on the TV or VCR at a preset time 1 Press the MENU button on the Remote Control to call up the MENU screen 2 Press the or button on the Remote Control to select TIM...

Page 9: ...n Pressing the or button moves the mark 3 Press the or button to adjust the brightness to a favorite picture 4 Press the SET button The screen will return to the 2 above To continue any additional adjustment repeat the steps from 2 to 4 above 5 Press the MENU button anytime to exit VIDEO ADJUST Description of Adjustment Items Selected button button Item PICTURE To increase contrast To decrease con...

Page 10: ...IOUS RETURN QUIT MENU MENU TIMER VIDEO ADJUST CLOSED CAPTION FUNCTION CLOCK LANGUAGE CH SETTING SELECT SET SET PREVIOUS RETURN QUIT MENU CLOSED CAPTION MODE DATA CAPTION CH2 SELECT SET SET PREVIOUS RETURN QUIT MENU CLOSED CAPTION MODE DATA CAPTION CH2 PRESETTING THE CHANNELS L EZ SETUP By operating the channel preset functions you can preset your TV to the desired channels for viewing 1 Press the ...

Page 11: ...E AIR CABLE STD CABLE HRC CABLE IRC SELECT SET SET PREVIOUS RETURN QUIT MENU CH SETTING EZ SETUP AIR CABLE CH SEARCH CH MEMORY SELECT SET SET PREVIOUS RETURN QUIT MENU CH SEARCH AIR 2 START START SET PREVIOUS RETURN QUIT MENU 3 Adding weak or additional channels from TV memory 1 Select CH MEMORY from the CH SETTING screen by pressing or button then press the SET button 2 Use either the CH UP DOWN ...

Page 12: ...24 125 AUTO CATV HRC CATV IRC AUTO 1 2 3 124 125 AUTO If AUTO is selected for clock setting it may take a few hours to complete the clock setting as your TV has to search for the EDS channel If you want to use the clock functions immedi ately proceed to step 2 for MANUAL CLOCK SET TING Please refer to page 13 3 2 Press the power on Once the Auto Clock setting is completed the time is displayed on ...

Page 13: ...the or button to select the YEAR then press the SET button The mark will move to the next item TIME The year will change as follows using the or button 6 Press the or button to select the hour then press the SET button The yellow position will move to the minute portion The hour will change as follows using the or button 7 Press the or button to select the minute then press the SET button The minu...

Page 14: ... above ENERGY SAVE 2 Press the or button to select REPEAT PLAY then press the SET button 3 Press the or button to select the REPEAT PLAY mode you want to use then press the SET button To clear the Auto Repeat select the OFF position in above OFF TAPE BLANK TAPE END Disengage the REPEAT PLAY In playback when the recorded portion of the tape ends and the blank portion begins the tape will automatica...

Page 15: ...c tracking adjustment The Automatic Tracking Control System will readjust the tracking during Playback mode if the recording speed changes or at the boundary between sections recorded on different VCRs If noise should remain on the TV screen after the track adjustment has been completed by the Automatic Tracking Control System use the Manual Tracking mode To adjust Manual Tracking press the TR e o...

Page 16: ...me and some picture noise appears This is not a malfunction L FAST FORWARD AND REWIND To move through the cassette faster press the STOP button and press the FF or REW button to fast forward or rewind the cassette Note The picture quality in Still Picture and Video Search is best with tapes recorded in the EP mode For tapes recorded in the SP mode the picture may be distorted Sound is muted during...

Page 17: ...set the recording speed SP or EP 3 Press the REC button If the erasure protection tab is removed the cassette will be ejected To pause recording press the PAUSE STILL button on the Remote Control To resume recording press the PAUSE STILL button again Pause disengages automatically after about 5 minutes to avoid damage to the tape and the VCR and Stop mode is engaged Note PAUSE will appear on the T...

Page 18: ... the SET button 10 Press the or button on the Remote Control to select COMPLETE then press the SET button The REC TIMER is now on and the Program Timer indicator will light up To continue any additional program setting press the or button on the Remote Control to select the NEXT and press the SET button Then repeat the steps 3 through 10 above To make a correction to the current program press the ...

Page 19: ...rted the PROGRAM TIMER indicator flashes and the cassette is ejected To stop timer recording press the STOP button If no buttons are pressed within 3 minutes while setting a program the set automatically returns to the normal viewing mode A program cannot be set unless all the recording input data is set During program timer setting with the Program Timer indicator ON the video set remains inopera...

Page 20: ...the Tape Press the REC button Note When connecting video or audio equipment to the television be sure that the power is turned off in order to prevent damage to either the television or the equipment being connected It is the intent of SHARP that this product be used in full compliance with the copyright law of the United States and that prior permission be obtained from copyright owners whenever ...

Page 21: ...vicinity may degrade the received broadcast signal The picture may be improved by altering the direction or height of your antenna Spots on the picture when receiving broadcast signals Cars neon signs etc may affect the picture received Place the antenna as far away as possible from roads and neon signs No tape movement Make sure the Pause Still mode is not activated Make sure the tape has not alr...

Page 22: ...stem Rotary Two Head Helical Scanning Number of Video Heads 2 Video Signal Standard NTSC Color System Playback Recording Tape Width 12 7 mm 1 2 inches Tape Speed SP 33 35 mm sec LP 16 68 mm sec Playback only EP 11 12 mm sec Recording Playing Time SP 120 minutes max with T 120 tape LP 240 minutes max with T 120 tape Playback only EP 360 minutes max with T 120 tape Operating Temperature 5 C to 40 C ...

Page 23: ...23 Notes 23 24 13VT CR10 E pm65e 15 5 01 7 25 pm 23 ...

Page 24: ...es ShouldthisSharpproductfailtooperateduringthewarrantyperiod warrantyservicemaybeobtainedupondeliveryoftheSharp product together with proof of purchase and a copy of this LIMITED WARRANTY statement to an Authorized Sharp Service Centre or an Authorized Sharp Servicing Dealer In home warranty service may be provided at Sharp s decretion on any Sharp television with the screen size of 27 or larger ...

Page 25: ...U RÉPÉTITION AUTOMATIQUE S IMAGE SUPER IMAGE MISE EN PLACE D UNE CASSETTE VIDÉO ÉJECTION DE LA CASSETTE VIDÉO LECTURE SYSTÈME DE CONTRÔLE AUTOMATIQUE DE L ALIGNEMENT FONCTION DE REPRODUCTION ENTIÈREMENT AUTOMATIQUE ARRÊT SUR IMAGE RECHERCHE VIDÉO AVANCE RAPIDE ET REMBOBINAGE DPSS Système digital de recherche d un programme EZ PLAY Enregistrement d une émission télévisée 17 VITESSES D ENREGISTREMEN...

Page 26: ...MMAGES IMPORTANTS UTILISER SEULEMENT SUR UNE TABLE UN CHARIOT UN TRÉPIED OU UN SUPPORT RECOMMANDÉS PAR LE FABRICANT OU VENDU AVEC L APPAREIL SUIVRE LES INSTRUCTIONS DU FABRICANT POUR INSTALLER L APPAREIL ET UTILISER LES DISPOSITIFS DE MONTAGE RECOMMANDÉS PAR LE FABRICANT L ENSEMBLE APPAREIL SUPPORT DOIT ÊTRE DÉPLACÉ AVEC SOIN DES ARRÊTS BRUSQUES UNE FORCE EXCESSIVE ET DES SURFACES INÉGALES PEUVENT...

Page 27: ...ette fiche polarisée Remarque Si on prévoit ne pas utiliser l appareil pendant une période prolongée telle que des vacances le débrancher afin d économiser de l énergie Lorsque le téléviseur est branché un faible courant continue de circuler même quand l interrupteur d alimentation POWER se trouve en position d arrêt OFF L image peut se trouver parasitée si un syntoniseur FM ou un récepteur radio ...

Page 28: ...ribution Pour des informations plus détaillées sur la manière d installer le câble TV consulter la compagnie de télédistribution Ci dessous on trouvera l explication d une des méthodes possibles d utilisation du convertisseur décodeur fourni par la compagnie de télédistribution On notera que cette méthode requiert l utilisation d un commutateur radiofréquence RF avec positions A et B non fourni Po...

Page 29: ... d arrêt éjection STOP EJECT Touche d avance rapide Recherche vidéo avant Touche de rembobinage Recherche vidéo arrière Touches d augmentation de réduction du volume VOL FENÊTRE DU CAPTEUR DE SIGNAUX DE LA TÉLÉCOMMANDE Touche d alimentation POWER Prises d entrée audio vidéo VIDEO AUDIO IN Indicateur d alimentation POWER Indicateur d enregistrement REC Indicateur de programmateur PROGRAM TIMER Indi...

Page 30: ...la bande Pause Arrêt sur image PAUSE STILL Utilisée pour arrêter temporairement la bande en mode d enregistrement Utilisée pour afficher une image fixe en mode de lecture DPSS e d Appuyer sur la touche e d pour rechercher un signal d index et commencer automatiquement la lecture Programme PROGRAM Appuyer sur cette touche pour passer dans le mode d enregistrement par programmateur Menu MENU Utilisé...

Page 31: ...e reporter à la page 11 4 4 4 4 4 RAPPEL D AFFICHAGE Des pressions successives sur la touche DISPLAY de la télécommande permettent de faire apparaître les informations ci dessous dans l ordre suivant Remarque Lorsque le mode sous titrage CLOSED CAPTION est engagé l affichage sur l écran disparaît automatiquement après environ 3 secondes Pour toute information sur le sous titrage se reporter à la p...

Page 32: ...E AUTO HORLOGE EDS CANAL MOIS JOUR ANNEE HEURE MARCHE AUTO SELEC REGLE SET REVENIR RETURN QUITT MENU 8 MINUTEUR DE RÉVEIL L Le réglage du minuteur de réveil commande la mise sous tension automatique du téléviseur ou du magnétoscope à une heure déterminée 1 Appuyer sur la touche MENU de la télécom mande pour afficher l écran MENU 2 Appuyer sur la touche ou de la télécommande pour sélectionner MINUT...

Page 33: ...ppuyer sur la touche ou pour régler LUMINOSITE comme désiré 4 Appuyer sur la touche SET L affichage de l écran retournera à celui de 2 Pourcontinuerdesréglages supplémentaires répéterles étapes 2 à 4 5 Appuyer sur la touche MENU à n importe quel moment pour sortir du RÉGLAGE IMAGE Description des rubriques de réglage Rubrique Touche Touche sélectionnée CONTRASTE Pour augmenter le Pour diminuer le ...

Page 34: ... FONCTION HORLOGE LANGUE REGLAGE CANAL SELEC REGLE SET REVENIR RETURN QUITT MENU SOUS TITRAGE MODE DONNEE S TITRES CA 2 SELEC REGLE SET REVENIR RETURN QUITT MENU SOUS TITRAGE MODE DONNEE S TITRES CA 2 SELEC REGLE SET REVENIR RETURN QUITT MENU PRÉRÉGLAGE DES CANAUX L PREREGL AUTO CANAL Cette opération vous permet de prérégler le téléviseur sur les canaux que vous souhaitez regarder 1 Appuyer sur la...

Page 35: ... ANTENNE CABLE RECHERCHE CANAL MEMOIRE CANAL SELEC REGLE SET REVENIR RETURN QUITT MENU RECHERCHE CANAL ANTENNE 2 DEBUT SET REVENIR RETURN QUITT MENU 3 Ajout de canaux faibles ou de canaux supplémentaires à partir de la mémoire du téléviseur 1 Sélectionner MEMOIRE CA NAL dans l écran REGLAGE CANAL en appuyant sur la touche ou puis appuyer sur la touche SET 2 Utiliser les touches de sélec tion des c...

Page 36: ...25 AUTO CATV HRC CATV IRC AUTO 1 2 3 124 125 AUTO Si AUTO est sélectionné quelques heures peuvent être nécessaires au réglage de l horloge étant donné que le téléviseur doit rechercher le canal EDS Pour utiliser immédiatement les fonctions de l horloge exécuter la procédure jusqu à l étape 2 du RÉGLAGE MANUEL DE L HORLOGE Se reporter à la page 13 3 2 Appuyer sur la touche d alimentation POWER pour...

Page 37: ...ppuyersurlatoucheSET Le repère se déplace jusqu à l élément suivant à sa voir HEURE La touche ou permet de permuter les années dans l ordre suivant 6 Appuyer sur la touche ou pour sélectionner l HEURE puis appuyer sur la touche SET La marque de couleur jaune se déplace jusqu à l élément des minutes La touche ou permet de permuter les heures dans l ordre suivant 7 Appuyer sur la touche ou pour séle...

Page 38: ...IE ci dessus 2 Appuyer sur la touche ou pour sélectionner LECTURE REP puis appuyer sur la touche SET 3 Appuyer sur la touche ou pour sélectionner le mode de répétition souhaité et appuyer sur la touche SET Pour annuler la répétition automatique sélectionner la position ARRET ci dessus ARRET ESPACE VIER FIN BANDE Pour mettre la LECTURE REP hors service Quand la partie enregistrée de la bande est fi...

Page 39: ...s programmes enregistrés sur des magnétoscopes différents Sil imagerestefloueoudéforméesurl écrandutéléviseur en dépit du réglage effectué par le système de contrôle automatique de l alignement se mettre en mode d alignement manuel Pour régler le suivi manuel appuyer sur la touche TR e ou d de la télécommande pendant le mode de lecture jusqu à ce que les parasites soient minimisés ou éliminés Pour...

Page 40: ...cher en noir et blanc et des parasites peuvent apparaître Cela est tout à fait normal L AVANCE RAPIDE ET REMBOBINAGE Pour atteindre plus rapidement un point de la bande ou pour la rembobiner appuyer sur la touche STOP puis sur la touche FF ou la touche REW respectivement Remarque La qualité de l image lors d un arrêt sur image ou d une re cherche vidéo est meilleure si l enregistrement a été effec...

Page 41: ...endre l enregistrement appuyer une nouvelle fois sur cette touche La pause est automatiquement libérée après environ 5 minutes afin d éviter d endom mager la bande et le magnétoscope et le mode d arrêt est engagé Remarque L indication PAUSE apparaît à l écran de télévision lorsque la touche PAUSE STILL est enfoncée en mode d arrêt Vous pouvez alors appuyer sur la touche STOP pour sortir du mode de...

Page 42: ...ou EP et appuyer sur la touche SET 10 Appuyer sur la touche ou de la télécommande pour sélectionner TERMINÉ et appuyer sur la touche SET LES ENREGISTREMENTS PROGRAMMES sont maintenant activés et le témoin de program mateur PROGRAM TIMER s allume Pour faire des entrées suplémentaires appuyer sur la touche ou de la télécommande pour sélectionner SUITE et appuyer sur la touche SET Répéter ensuite les...

Page 43: ...ENU SELECT PROGRAMME A EFFACER PROGRAM TIMER 1 PROGRAM TIMER 2 7 00 8 00 8 30 10 00 7 00 8 30 10 00 PROGRAM TIMER 1 Start Recording Start Recording End Recording End Recording Start Recording Start Recording End Recording End Recording PROGRAM TIMER 2 L Remarques sur l enregistrement avec le minuteur Fausses données entrées pendant la programmation 1 Appuyer sur la touche RETURN de la télécommande...

Page 44: ... de la télécommande 5 Pour l enregistrement copie Appuyer sur la touche REC Remarque Lors du raccordement d un appareil vidéo ou audio au téléviseur s assurer que le téléviseur et l appareil qui lui est raccordé sont hors tension Le contraire risquerait d endommager l un ou l autre des appareils SHARP entend que ce produit soit utilisé en stricte conformité avec les lois de copyright et qu une aut...

Page 45: ...r la réception télévision Placer l antenne le plus loin possible des rues et enseignes lumineuses Le ruban ne défile pas Vérifier si le mode Pause Still Arrêt est hors service S assurer que le ruban n est ni au début ni à la fin Apparition de neige à la lecture Il se peut que l humidité condensée ou le revêtement magnétique de la cassette vidéo ait contaminé les têtes Si c est le cas confier le ne...

Page 46: ...idéo Balayage hélicoïdal à 2 têtes rotatives Nombre de têtes vidéo 2 Norme des signaux vidéo Système de couleurs NTSC lecture enregistrement Largeur de bande 12 7 mm 1 2 pouce Vitesse de bande SP 33 35 mm s LP 16 68 mm s lecture seulement EP 11 12 mm s Durée d enregistrement lecture SP 120 minutes max avec cassette T 120 LP 240 minutes max avec cassette T 120 lecture seulement EP 360 minutes max a...

Page 47: ...23 Remarques 23 24 13VT CR10 F pm65e 18 5 01 1 57 PM 23 ...

Page 48: ...rs de la période de la garantie la réparation sous garantie est offerte à condition que le produit Sharp soit livré accompagné de la preuve d achat et une copie de cette GARANTIE LIMITÉE à un centre agréé de service Sharp ou à un détaillant autorisé au service Sharp La garantie de service à domicile peut être offerte à la discrétion de Sharp sur tous les téléviseurs Sharp dont l écran est de 27 po...

Reviews: