background image

10 Mega Pixels

Digital Camera

INSTRUCTION MANUAL

VPC-S1070

Summary of Contents for S1070 - VPC Digital Camera

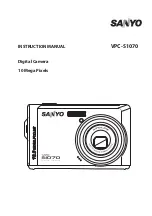
Page 1: ...10 Mega Pixels Digital Camera INSTRUCTION MANUAL VPC S1070 ...

Page 2: ......

Page 3: ... no guarantee that interference will not occur in a particular installation If this equipment does cause harmful interference to radio or television reception which can be determined by turning the equipment off and on the user is encouraged to try to correct the interference by one or more of the following measures Reorient or relocate the receiving antenna Increase the distance between the equip...

Page 4: ...urself Do not expose the camera to moisture or extreme temperatures Allow the camera to warm up when moving from cold to warm temperatures Do not touch the camera lens Do not expose the lens to direct sunlight for extended periods Do not use abrasive chemicals cleaning solvents or strong detergents to clean the product Wipe the product with a slightly damp soft cloth Battery Information Turn off t...

Page 5: ...ter This might cause fire or electric shock Take special care during rain snow on the beach or near the shore Do not place the camera on inclined or unstable surfaces This might cause the camera to fall or tilt over causing injury Keep the battery out of the reach of children Swallowing battery might cause poisoning If the battery is accidentally swallowed immediately consult a physician Do not us...

Page 6: ...eak If the internal fluid enters your eyes or comes into contact with your body or clothes rinse with fresh water If the internal fluid has entered your eyes consult a physician to receive treatment A camera is a precision instrument Do not drop it strike it or use excessive force when handling the camera This might cause damage to the camera Do not use the camera in humid steamy smoky or dusty pl...

Page 7: ...r installation If this equipment does cause harmful interference to radio or television reception which can be determined by turning the equipment off and on the user is encouraged to try to correct the interference by one or more of the following measures Reorient or relocate the receiving antenna Increase the separation between the equipment and receiver Connect the equipment into an outlet on a...

Page 8: ...ehold waste Note If a chemical symbol is printed beneath the symbol mark this chemical symbol means that the battery or accumutator contains a heavy metal at a certain concentration This will be indicated as follows Hg mercury Cd cadmium Pb lead In the European Union there are separate collection systems for used electrical and electronic equipment batteries and accumulators Please despose of them...

Page 9: ... 818 998 7322 This device complies with Part 15 of the FCC Rules Operation is subject to the following two conditions 1 this device may not cause harmful interference and 2 this device must accept any interference received including interference that may cause undesired operation Canadian ICES 003 Information This class B digital apparatus complies with Canadian ICES 003 Tested To Comply With FCC ...

Page 10: ...oduct and accessories that come with your camera may be different from those described in this manual This is due to the fact that different retailers often specify slightly different product inclusions and accessories to suit their market requirements customer demographics and geographical preferences Products very often vary between retailers especially with accessories such as batteries memory ...

Page 11: ... Symbols used in this manual vi FCC Information vii Declaration of Conformity vii Canadian ICES 003 Information vii TRADEMARK INFORMATION viii READ THIS FIRST viii Introduction 1 System Requirements 1 Package Contents 1 Main Features 1 Camera Views 2 Front View 2 Back View 2 Top View 2 Bottom View 3 Left Right View 3 LED Indicators 3 Camera Buttons 4 Navigation Buttons 4 The Scene Button 7 Functio...

Page 12: ...First Video 21 Recording Voice Memos 21 Capture Settings 23 The Capture Menu 23 Image Resolution 23 Image Quality 24 Focus Zone 24 EV Compensation 24 AEB 25 M Burst Interval 25 White Balance 25 ISO Speed 26 AE Metering 26 Color 26 Sharpness 27 Saturation 27 Contrast 27 Setup 27 Video Capture Menu 28 Video Resolution 28 White Balance 28 Color 28 Saturation 28 Contrast 28 Setup 28 Photo Video Playba...

Page 13: ...amera Settings 39 The Setup Menu 39 LCD Brightness 39 File Number 39 Digital Zoom 40 Quick View 40 Continuous AF 40 Camera Sound 40 Auto LCD Off 41 Auto Power Off 41 Video Out 41 USB Mode 41 Date Stamp 42 Date and Time 42 Language 42 Image Storage 43 Format 43 Reset 43 Voice Memo 44 About 44 PictBridge Print PTP 44 Image Storage 45 This Image 46 Index Print 47 DPOF Image 47 All Images 48 Specifica...

Page 14: ...English ...

Page 15: ... package It should contain Digital camera USB AV 3 in 1 cable Wrist strap Two AA batteries Alkaline Camera pouch Quick start guide for all regions Bundled CD ROM Application Software and User s Manual for all regions Main Features 10 0 mega pixels resolution 15x zoom Up to 3x optical zoom and 5x digital zoom 1 2 3x inch CCD image sensor 2 4 inch GPT TFT LCD monitor Approx 9 5MB internal flash memo...

Page 16: ...iews Front View Back View Top View Flash Zoom Lens Wrist strap loop Self timer LED Microphone OK button 4 way navigation buttons LCD screen Menu button Scene button Zoom button Playback button Power Flash LED Shutter button Power button Zoom Lens ...

Page 17: ...r Flash LED Off Power Off Green steady Ready to take picture Green blinking Camera busy Self timer LED Off Self timer off Red blinking 10 sec Timer count down flash after 10 seconds Red blinking 2 sec Timer count down flash after 2 seconds Tripod mount Speaker PC AV port Battery SD card compartment Wrist strap loop ...

Page 18: ...rea selection using 4 way navigation buttons except Auto Video Landscape Night Landscape Fireworks 3 In Playback mode Press to start and pause the video playback Press to stop the voice memo playback 4 In USB mode MSDC N A PTP Press to confirm the selection Up Flash Delete 1 Move up in the OSD menus 2 In Capture mode Scroll through the flash mode options Auto Off Fill and Anti Red eye Press to pan...

Page 19: ... mode MSDC N A PTP Press to select the next image in This Image submenu Down Screen Face Detection 1 Move down in the OSD menus 2 In Capture mode Once press to exit histogram twice press to enter face detection press again to turn off extra icons on the LCD screen then press to turn all icons back on the LCD screen Press to pan down in AF area selection 3 In Video mode Press to turn off extra icon...

Page 20: ...icon dis plays on the LCD screen Press to pan left in AF area selection 4 In Playback mode Press to pan left in zoom in mode Press to navigate to previous image in single down Press to move left in the thumbnail display Press to fast rewind video playback during Pause mode 5 In USB mode MSDC N A PTP Press to select the previous image in This Image submenu Icon Button Function ...

Page 21: ... Icon Function Auto Scroll to Auto mode P Mode Program Mode Scroll to Program mode Video Scroll to Video mode Sport Scroll to Sport mode Landscape Scroll to Landscape mode Night Landscape Scroll to Night Landscape mode Portrait Scroll to Portrait mode Night Portrait Scroll to Night Portrait mode Museum Scroll to Museum mode Snow Scroll to Snow mode Sunset Scroll to Sunset mode Fireworks Scroll to ...

Page 22: ... Menu options Playback Press to review photos videos clips saved in the internal memory or on the memory card T Zoom in In Capture mode Press to zoom in on subject to be taken In Playback mode Press to zoom in on saved photos W Zoom out In Capture mode Press to zoom out from the subject to be taken In Playback mode Press to zoom out of saved photos Press to view thumbnails of all current saved med...

Page 23: ...he Down Screen Face Detection button to switch among a full display with histogram and without histogram Face detection and simple display only mode icon and focus area are shown while other icons are hidden Capture Video Mode Display 9999 9999 9999 10M 1 0EV 1 0EV F5 5 F5 5 1 125 1 125 1 0EV F5 5 1 125 10M 1 2 3 4 5 6 9 10 11 12 13 14 15 16 17 18 19 21 22 23 24 25 26 8 7 20 00 00 00 00 00 00 00 0...

Page 24: ... English No Name Scene Icon 1 Scene indicator Auto P Mode Video Sport Landscape Night Landscape Portrait Night Portrait Museum Snow Sunset Fireworks Beach Party Foliage Aquarium Kids Pets Copy Backlight 2 Image Resolution 10M 8M ...

Page 25: ...sh Off Fill Flash Anti Red eye 5 Self timer Burst mode Self Timer 10 Seconds 2 Seconds Burst Mode M Burst 6 AEB AEB OFF Bracket 0 3 EV Exit 7 Macro indicator Macro Mode 8 Image Counter Capture Mode Quantity 9999 Video Mode Time 00 00 00 9 Memory Interface SD Card Internal Memory 10 Date Stamp 11 Anti Shake ...

Page 26: ... Wide F2 9 F5 5 Tele F5 2 F10 0 Automatic 15 Shutter Speed Approx 1 2000 sec approx 4 sec Automatic 16 Battery Indicator Battery Full Battery Low Battery Insufficient Blink 17 AF Frame 18 ISO Speed Auto ISO 100 ISO 200 ISO 400 ISO 800 ISO 1000 ISO 1600 19 Focus Zone Multi Zone Center Selected Area 20 Continuous AF ...

Page 27: ...D screen English 21 Sharpness High Normal Low 22 Contrast High Normal Low 23 Saturation High Normal Low 24 White Balance Auto Sunny Tungsten Fluorescent Cloudy 25 AE Metering Matrix Spot Average 26 Camera Steady Warning ...

Page 28: ...ll tight to attach the strap to the camera Inserting the Battery Follow these instructions to insert the two AA bateries into the battery compartment 1 Open the battery com partment at the bottom of the camera 2 Insert the battery into the compartment observing the correct polarity 3 Close the battery compartment Note The 2 supplied batteries Alkaline can be used They are not rechargeable Other ne...

Page 29: ...ery com partment at the bottom of the camera 2 Insert the SD MMC card into the memory card slot as shown Label side up 3 Close the battery compartment To remove the SD MMC card gently push the card until it pops out Pull out the card carefully Turning On Press and hold the Power button to turn on the camera To turn off the camera press the Power button again Note Please don t take in and out the S...

Page 30: ...he desired language by Up Down navigation buttons then press the OK button to confirm After the desired language is selected the Date and Time menu pops up Press the OK button Select each field and adjust the value using the navigation buttons Press the OK button to confirm Note If the Date and Time is reset when running out the battery and not in use for a long period the Date and Time setup scre...

Page 31: ...is required Anti Shake Function This function is available in Auto capture mode Press the OK button to enable the Anti Shake function and press again to disable it An Anti Shake icon displays on the LCD screen when the function is activated Using Macro Mode Macro mode is designed for close up photography and can capture all detail even when your subject is very close to the camera Press the Left M...

Page 32: ...ho tography feature allows you to take multiple 16 consecutive VGA photos by pressing the Shutter button once To set the self timer burst mode 1 Press the Right Self timer Burst mode navigation button to cycle through the self timer or and burst photography options or on the LCD screen 2 Once you have selected an option frame and take your shot In self timer mode the icon will flash until the time...

Page 33: ...ilable in Auto and P Mode modes To set the AEB mode 1 Press the MENU button to display menu options 2 Press the Left Right navigation buttons to select AEB setting and press the OK button 3 Press the Up Down navigation buttons to select from the available options AEB Select to enable ON or disable OFF the AEB function BRACKET Select to set the bracket interval value ranging from 0 3 to 2 0 EV in 0...

Page 34: ...d automatically by the camera To select scene modes Press the SCENE button to access Scene menu which displays the Scene menu options 1 Use the 4 way navigation buttons to scroll through the modes Auto P Mode Video Sport Landscape Night Landscape Portrait Night Portrait Museum Snow Sunset Fireworks Beach Party Foliage Aquarium Kids Pets Copy Backlight 2 Press OK to confirm your selection Auto ...

Page 35: ... video clips with the camera To record a video clip 1 Turn the camera on and press the SCENE button Use the 4 way navigation buttons to locate Video mode Press the OK button to select 2 Frame your subject using the LCD screen and press the Shutter button to start recording The self timer LED is steady on to indicate recording is in progress 3 Press the Shutter button again to stop recording 4 In p...

Page 36: ... again In Playback mode 1 Press the shutter button to start recording and press again to stop recording 2 While recording the selected image and the elapsed time are shown on the LCD screen 3 The playback of the voice memo automatically starts 4 Press the OK button once for playback again ...

Page 37: ...tion 3 Press the Up Down navigation buttons to highlight an option and press the OK button to confirm Refer to the following sections for more detailed information about each setting Image Resolution The Image Resolution setting refers to the size of the image in pixels Use the Up Down navigation buttons to select from the options 7 settings for image resolution are available 10M 3648x2736 8M 3264...

Page 38: ...o Use the Up Down navigation buttons to select from the options and press the OK button to enter 3 settings for focus zone are available Multi Zone default Center Selected Area EV Compensation The EV Compensation menu allows you to adjust the exposure or amount of light that enters the lens while capturing photos or videos Use this feature to lighten or darken the image when the brightness between...

Page 39: ...ings to the camera and return to the setup menu M Burst Interval The M Burst Interval setting allows you to adjust the burst interval when the multi burst function is enabled Use the Up Down navigation buttons to select from the options 1 30 Sec default 1 15 Sec 1 7 5 Sec White Balance The White Balance setting allows you to adjust the camera setting according to the ambient white light when shoot...

Page 40: ... Metering AE Metering allows you to select the area of the subject or frame by which the camera measures light Use the Up Down navigation buttons to select from the options 3 AE metering settings are available Matrix default Camera metering is set for eval uating 16 zones of objects with intelligent weight ing in the frame Spot Camera metering is set for the brightness of a single object in the ce...

Page 41: ...n of the colors in your photos Use a high saturation setting for rich colors and a lower saturation setting for more natural tones Use the Up Down navigation buttons to select from the options 3 saturation settings are available High Normal default Low Contrast The Contrast setting allows you to adjust the contrast of your photos Use the Up Down navigation buttons to select from the options 3 cont...

Page 42: ...u to adjust the resolution at which your videos are recorded 2 video size settings are available 640X480 320X240 White Balance See White Balance on page 25 for more details on the setup menu options Color See Color on page 26 for more details on the setup menu options Saturation See Saturation on page 27 for more details on the setup menu options Contrast See Contrast on page 27 for more details o...

Page 43: ... 140 SANY0001 JPG SANY0001 JPG 2008 01 01 2008 01 01 2008 01 01 00 00 00 00 00 00 00 00 00 1 0EV F3 5 1 125 1 0EV F3 5 1 125 10M 10M 1 2 4 8 9 10 13 12 15 16 20 23 24 25 7 19 18 21 22 3 6 5 11 14 17 SANY0001 AVI SANY0001 AVI 2008 01 01 2008 01 01 2008 01 01 00 00 00 00 00 00 00 00 00 1 0EV 1 0EV 2 30 2 30 2 30 00 00 37 00 00 37 00 00 37 640 640 1 2 4 8 10 13 12 16 7 19 18 21 22 3 6 5 11 14 ...

Page 44: ... Video mode 00 00 00 Time of the video clip 7 Quantity 1 140 2 30 8 SD card Internal memory 9 Histogram 10 File Name Photo mode SANY0001 JPG Video mode SANY0001 AVI 11 Date and Time 2008 08 01 00 00 00 12 Next Move to next item 13 Battery status 14 Previous Move to previous item 15 Voice memo 16 Mode icons Please see Capture Video Mode Dis play on page 9 for detailed informa tion 17 ISO Speed 18 C...

Page 45: ...the OK button at any time during playback to pause the video 7 After the video clip finishes playing the LCD screen displays the first frame of the clip Viewing M Burst Photos To view your multi burst photos on the LCD screen 1 Press the Playback button The most recent photo or video clip is displayed 2 Use the Left Right navigation buttons to scroll through photos 3 When reviewing a multi burst i...

Page 46: ...your TV you must connect via the PC AV port on the bottom of the camera To connect your camera to a TV 1 Turn on the camera and make sure that the camera s video out format is set to the same as that of the TV See Video Out on page 41 for more information 2 Connect the USB AV 3 in 1 cable to the PC AV port on the camera 3 Connect the other end of the cable to the TV s AV input sockets 4 The LCD sc...

Page 47: ...ode press the Up Flash Delete navigation button to display the Delete menu 2 Press the Up Down navigation buttons and the OK button to select from the 4 available options Cancel Select to cancel the action and exit to the main menu Voice Memo This Video Select to delete the voice the video of the current image This Image Select to delete the current image All Images Select to delete all images Usi...

Page 48: ... be printed are tagged remove the memory card and take it to a photographic shop for printing or use it with a DPOF compatible printer To set DPOF 1 Press the MENU button to select DPOF from the menu at the playback mode then press the OK button to enter the DPOF function 2 Press the Up Down navigation buttons and the OK button to select from the available options This Image Select to print the cu...

Page 49: ...he main menu Resize The Resize function allows you to change the image resolution To resize a photo 1 Press the MENU button to select Resize from the menu then press the OK button to enter the Resize function 2 Press the Up Down navigation buttons and the OK button to select the resize ratio you require 8M 6M 5M 3M 1M and VGA 3 Select Exit to return to the main menu Note It is only possible to sca...

Page 50: ...image OK Select to rotate the image Select to exit to the main menu Protect You can lock a photo or video to protect it from being accidentally erased To lock a photo or video 1 Press the MENU button to select Protect from the menu and press the OK button to enter 2 Use the Up Down navigation buttons to select Lock or EXIT then press the OK button to confirm the one you needed 3 A key icon display...

Page 51: ... Down navigation buttons and the OK button to select from the 3 available options This Image Select to move the current image to a memory card All Images Select to move all images to a memory card Exit Select to exit to the main menu Back to AUTO memory mode 1 Press the MENU button Select SETUP from the menu and press the OK button to confirm 2 Select the IMAGE STORAGE from the menu Press the OK b...

Page 52: ...e camera s PC AV port to a free USB port on your PC using the USB cable The camera s internal memory and or SD MMC card appear as removable drives in the file manager Copy the files from the drives to the directory on your PC Use ArcSoft PhotoImpression and ArcSoft VideoImpression provided on the software CD to view or edit the photos and videos respectively ...

Page 53: ...ons and press the OK button to enter further submenus and to confirm your selection Refer to the following sections for more detailed information about each setting LCD Brightness The LCD Brightness setting allows you to brighten or darken the LCD backlight Press the OK button to enter Use the Left Right navigation buttons to increase or decrease the brightness File Number The File No setting allo...

Page 54: ...tinuous AF The Continuous AF setting allows you to turn the continuous auto focus function ON or OFF Press the OK button to enter Select ON to enable the function or OFF default to disable it Camera Sound The Camera Sound setting allows you to adjust the camera sound level You can also set the start up and shutter sound when you turn on the camera and press the shutter button Available options are...

Page 55: ... adjust the video output depending on the type of your TV Use the Up Down navigation buttons to select from the menu options 2 options are available NTSC default PAL USB Mode The USB Mode setting allows you to select the transfer method between your camera and your PC 2 options are available PTP PictBridge Print When the camera is connected to a printer by a USB cable which supports Pictbridge it ...

Page 56: ... and Time The Date and Time setting allows you to set or adjust the date and time on your camera To set or adjust the date and time Press the OK button to confirm Press the Left Right navigation buttons to select the Year field Press the Up Down navigation buttons to adjust the Year value In the same way select the Month Date Hour and Minute fields and adjust them accordingly Language The Language...

Page 57: ... Format The Format setting allows you to erase all data in the internal memory or on the SD MMC card Press the OK button to confirm Use the Up Down navigation buttons to select from the menu options 3 options are available Memory Card default All data on the SD MMC will be formatted Internal Memory All data in the internal memory will be formatted Exit Cancel format action Reset The Reset setting ...

Page 58: ...ages captured by the camera directly without connecting the camera to a PC If the camera is not connected to a PTP compliant printer an error message displays on the LCD screen To enable PTP function see USB Mode on page 41 for detailed information If the USB mode is not set at PTP an error message displays on the LCD screen When a PTP compliant printer is connected to the camera the Printer Conne...

Page 59: ...e Print PTP English Use the Up Down navigation buttons to select an option and press the OK button to confirm Image Storage See Image Storage on page 43 for detailed information IMAGE STORAGE AUTO INTERNAL MEMORY 1 140 1 140 1 140 ...

Page 60: ...navigation buttons to set the number of copies and press the OK button to enter 3 Press the Up Down navigation buttons again to select the paper size and press the OK button to enter DEFAULT SIZE 4 x 6 LETTER A4 4 Press the Up Down navigation buttons to Continue or Cancel the action and press the OK button to enter 1 140 1 140 1 140 THIS IMAGE ALL IMAGES EXIT DPOF IMAGE THIS IMAGE 1 140 1 140 1 14...

Page 61: ...LETTER A4 2 Press the Up Down navigation buttons to set the number of copies After the number of copies is set press the Up Down navigation buttons again to continue or cancel the action and press the OK button to enter DPOF Image See DPOF on page 34 for detailed information INDEX PRINT 1 140 1 140 1 140 DEFAULT SIZE LETTER A4 INDEX PRINT 1 140 1 140 1 140 DEFAULT SIZE LETTER A4 CONTINUE CANCEL Co...

Page 62: ...number of copies and press the OK button to enter 3 Press the Up Down navigation buttons to select the Paper size and press the OK button to enter DEFAULT SIZE 4 x 6 LETTER A4 4 Press the Up Down navigation buttons to select Continue or Cancel this action and press the OK button to enter THIS IMAGE ALL IMAGES EXIT DPOF 1 140 1 140 1 140 10M 10M 88 Number of copies DEFAULT SIZE 4 X 6 LETTER A4 PAPE...

Page 63: ...mm Tele T 96mm Photo Graphic Range Normal 0 6 m infinity Macro 0 1m to 0 7m Shutter Speed 4 1 2000 Sec Viewfinder None Field of View 96 by LCD Camera Features Auto Power Off Time Out Yes ISO Equivalent Auto ISO100 200 400 800 1000 1600 External Memory Support SD MMC card from 32MB to 16GB Flash Modes Auto Off Fill Red eye Shooting Mode Auto P Mode Video Sport Landscape Night Landscape Portrait Nig...

Page 64: ...osure Compensation Selectable 2 0EV with 0 3 0 4 EV steps Sharpness High Normal Low Color Vivid Color Black White Sepia AE Metering Matrix Spot Average Focus Multi Zone Center Selected area Flash Range 2 5m wide Lens Thread None Anti Shake Yes High ISO Aperture Priority Yes Shutter Priority Yes Drive Mode Single Mode Burst Mode Multi Burst VGA 16 shots Quick Delete Yes Quick View Yes Quick Review ...

Page 65: ...bytes Microphone Yes Mono Power Battery AA batteries x2 Alkaline NiMH Rechargeable Battery Life CIPA 150 images Capability Camera Interface USB 2 0 high speed Host Platform Windows XP Vista Standards Operating Temperature 0 C 40 C Language English German French Italian Spanish Portuguese Simplified Chinese Traditional Chinese Russian Turkish Thai Korean Dutch ...

Page 66: ...hausted Charge or replace the battery LCD screen displays Card Requires Formatting Memory card format not recognized Re format the memory card LCD screen displays Card is Full Memory card is full Replace the memory card with a new one or delete unnecessary images from the existing card LCD screen displays Card is locked The card is protected by a protect switch mechanism Move the switch to the unl...

Page 67: ...SANYO Electric Co Ltd Printed in China ...

Reviews: