background image

Network Board

POA-MD13NET2

OWNER’S MANUAL

INSTALLATION and OPERATION of the Network Board

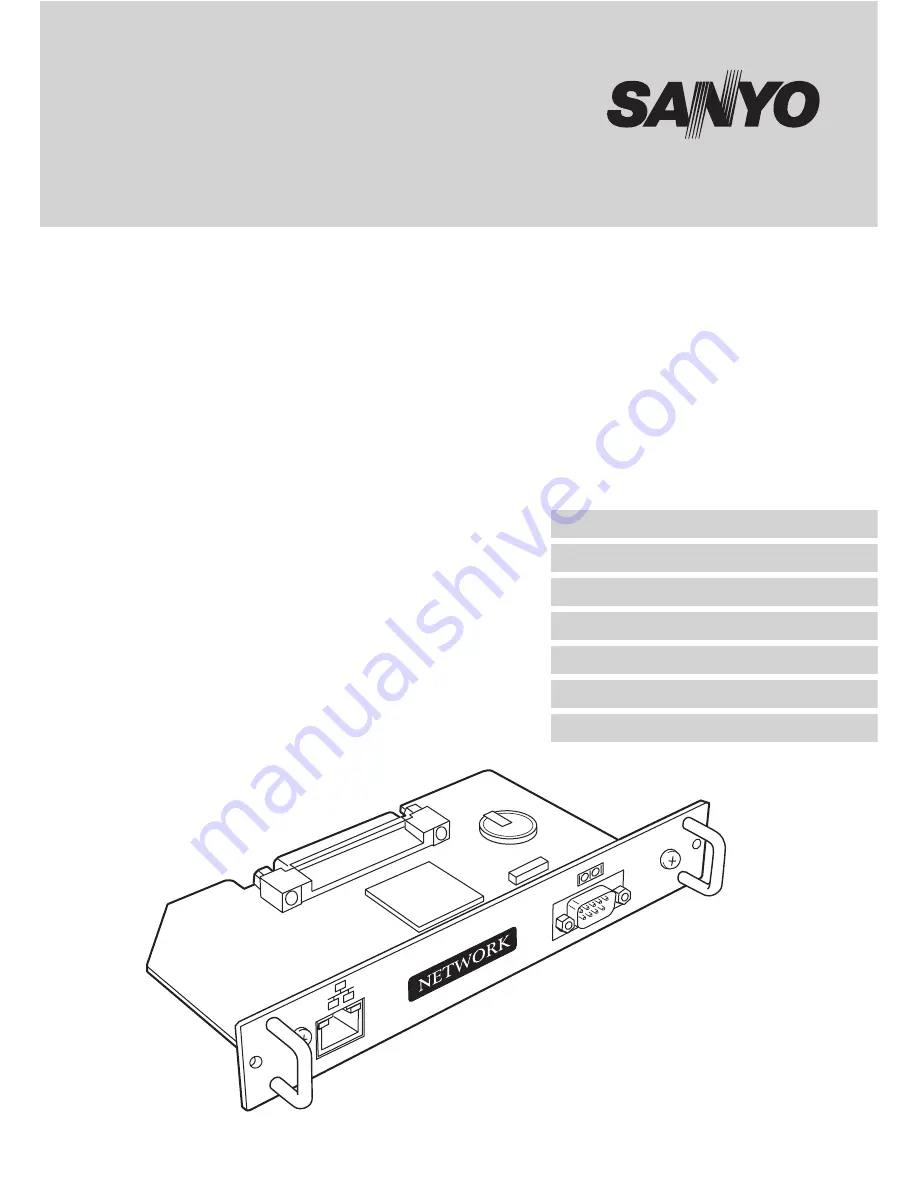
This board is the Network Board to control and set up a projector via a network. Connect
a network cable to this board, and by accessing the connected projector using the web
browser on your computer, the projector can be controlled and set up remotely.
This board is only used for our projectors that have a terminal for the Network Board.
This manual explains the installation of the Network Board and its operation.

Chapter 1 Preparation

Chapter 2 Installation

Chapter 3 Basic Setting & Operation

Chapter 4 Controlling the Projector

Chapter 5

Controlling the Multi-Projectors

Chapter 6 Use of Serial Port

Chapter 7 Appendix

Summary of Contents for PDG-DHT100L - DLP Projector - HD 1080p

Page 1: ...g the web browser on your computer the projector can be controlled and set up remotely This board is only used for our projectors that have a terminal for the Network Board This manual explains the installation of the Network Board and its operation Chapter 1 Preparation Chapter 2 Installation Chapter 3 Basic Setting Operation Chapter 4 Controlling the Projector Chapter 5 Controlling the Multi Pro...

Page 2: ...h changes or modifications should be made you could be required to stop operation of the equipment Warning This is a Class A product In a domestic environment this product may cause radio interference in which cause the user may be required to take adequate measures CAUTION ON USE IN NETWORK When you receive an alert e mail from the projector you must check the projector immediately Fire or accide...

Page 3: ...g page of the projector 26 1 Enter the IP address 26 2 Select a display mode and login 26 3 Display of main setting page 27 Initial Settings 29 1 Language Setting 29 2 Password Setting 30 3 Date Time Setting 30 Network Configuration 31 1 Configure the network 31 2 Name the projector 31 E mail Setting 32 1 Registering SMTP Server Administrator Address 32 2 Registering and deleting E mail addresses ...

Page 4: ...ame 57 Check IP address and projector name 57 Exclude Add Delete a projector 58 Status 58 Control 59 Load and apply the setting value 59 Control multi projectors at the same time 60 Chapter 6 Use of Serial Port 61 Serial Port setting 62 Control Examples 64 Use of Telnet 66 Control the projector with Telnet 68 Chapter 7 Appendix A 69 Examples of Connection 70 Peer To Peer connection 70 The gateway ...

Page 5: ...5 Network Board OWNER S MANUAL ENGLISH Chapter 1 Preparation 1 ...

Page 6: ...owser installed on your computer E Mail Alert function p 32 Projector Network Board sends messages to the registered e mail addresses when a lamp abnormality or power failure occurs with the projector In this message it describes how to solve the cause of the problems You can take efficient action for quick recovery Internet Intranet PC2 PC4 PC3 PC5 PC1 You ve got Mail PJ2 PJ1 Internet Intranet PC...

Page 7: ...al equipment via network p 62 This product provides a serial port RS 232C for controlling external equipment By connecting the equipment which has a serial port it can be controlled by a computer via the network This product does not provide the interface driver software to control exter nal equipment Internet Intranet PC2 PC4 PC3 PC5 PJ2 PJ1 PC1 Turn on the DVD player and start playing DVD Player...

Page 8: ...computer must provide a 10Base T or 100Base TX network card Web browser application Microsoft Internet Explorer version 5 0 or later Netscape Navigator version 4 7 or later Use to control and set up the projector The layout of pages in the browser may slightly differ from each type of application or operating system you use Internet mail application Microsoft Outlook Microsoft OutlookExpress Netsc...

Page 9: ...ht Cable with category 3 or 5 2 100m Network Board Computer UTP Cross Cable with category 3 or 5 2 100m 1 There may be other limitations depending on your network environment or LAN specifica tion Please consult your network administrator for further details 2 Category of LAN cable indicates the cable quality Normally cable with category 3 or 5 is used for 10Base T network and cable with category ...

Page 10: ...r and network For instructions about each piece of equipment or application software please refer to the respective booklet Trademark Ethernet is a registered trademark of Xerox Corporation Microsoft Windows Windows NT are registered trademarks of Microsoft Corporation Macintosh Mac OS are registered trademarks of Apple Computer Inc Internet Explorer is a registered trademark of Microsoft Corporat...

Page 11: ...11 Network Board OWNER S MANUAL ENGLISH Chapter 2 Installation 2 ...

Page 12: ...on to control the projector connected to the network is completed At the next step set up and control the projector via the network by using the web browser installed on your computer Please see chapter 3 Basic setting and operation p 25 1 Mount this product onto the projector 2 Connect the LAN cable and join it to the network 3 Configure the network of the Network Board 1 4 Set the password 1 1 T...

Page 13: ...t This is used when controlling the external equipment via the net work p 61 LAN port Connecting the LAN cable p 15 LINK indicator Orange This lights up orange when the net work board is connected to the net work correctly ACT indicator Green This turns on and off when sending or receiving data Serial port switch socket This is to switch the polarity of the serial port p 65 ...

Page 14: ... Board into the board slot along the guide Mount the board connector into the socket in the slot firmly 4 Secure the board with two screws supplied Mains switch must be turned off when mounting or removing this product otherwise it may damage the product Do not install multiple network boards into a projector otherwise it may damage the product Do not connect the AC cord until after connecting the...

Page 15: ...er and projector directly not using the hub When you connect the projector into the 10Base T network use cable with category 3 or 5 When you connect the projector into the 100Base TX network use cable with category 5 The length of cable between hub and projector should be less than 100m 1 Turn the Mains switch off 2 Wind the UTP straight cable once around the ferrite core supplied as the illustrat...

Page 16: ...k item Mounting p 14 Configure the network When you connect the projector to the network the network number of projector must be the same as the network you intend to connect You should configure pro jector s network first This example explains how to set the following configuration The default network configuration is set as follows IP Address 192 168 1 201 Subnet Mask 255 255 255 0 Default Gatew...

Page 17: ...screen until the re booting is complete Do not turn off the mains switch during this period Completing of installation Now the installation is completed The IP address of this projector is set to 192 168 1 201 1 In the network environments not using a Gateway or Router the Default Gateway address should be set to 0 0 0 0 2 If you do not use the functions E mail or DNS server it should also be set ...

Page 18: ...et can be used for entering the Network PIN code See item How to enter the numbers with the screen 10 key pallet 19 18 Chapter 2 Installation Network icon Network PIN Code It is recommended to set up the Network PIN code when you connect the projector to the network This setting is carried out through the projector s menu and also it can be set through the network using the web browser For further...

Page 19: ...t C and press SELECT button to clear the num ber in the column and then enter the number again 4 After entering the number in the column select a move key 7 8 e d located on the lower part of the pallet by using the point buttons and press SELECT button repeatedly to move the red frame 5 Repeat steps 3 to 4 for entering all the network address 6 After finishing select Exit and press SELECT button ...

Page 20: ...guration The default network configuration is set as follows IP Address 192 168 1 201 Subnet Mask 255 255 255 0 Default Gateway 192 168 1 1 DNS 0 0 0 0 IP Address 192 168 0 2 Subnet Mask 255 255 255 0 Default Gateway 0 0 0 0 DNS 0 0 0 0 1 Selection of network menu Network Turn on the projector and display the menu on the screen Select the Network icon from the Setting sub menu using the point butt...

Page 21: ...t buttons 7 8 are used to select the column The point buttons d e are used to change the numbers up and down 3 Restart the Network board Select the SET with the point buttons 7 8 and press the SELECT button again The network configuration display disappears and the network board begins restarting 1 It takes about 40 seconds Do not turn off the mains switch during this period Completing of installa...

Page 22: ...t access to the setting pages of the projector using the web browser The default password is set 0000 as no password 1 Use the projector s menu and select the Setting icon on the menu 2 Select the Display sub icon from the submenu and then press the SELECT button once Check that the mode is On 3 Then press the SELECT button once again The setting window appears The numbers on the display indicates...

Page 23: ... address use the network setting menu on the projector Please see chapter Network Configuration for further information p 16 22 2 Make sure that there is no network equipment set with the same IP address in the network and then connect to the network 3 When installing other projectors follow the above steps to change the IP address and connect to the network In case of installing the projector wit...

Page 24: ...24 Chapter 2 Installation ...

Page 25: ...25 Network Board OWNER S MANUAL ENGLISH Chapter 3 Basic Setting and Operation 3 ...

Page 26: ...he setting page has set the password the authenti cation window will appear In this case type user onto the User Name text area and the login password onto the Password text area and then press the OK button The entering User Name must be user and it cannot be changed Note When accessing projector for the first time or setting the no password 0000 the auto login will be performed and the next main...

Page 27: ...u For selection of control and set ting items of the projector p 35 Control sub menu For selection of sub menu to con trol and set the projector Setting page num ber browses pages by clicking the linked number z Main setting page in the Graphic Mode display This graphic mode display is mainly used through this manual for the setting and control description Functions of a representative projector m...

Page 28: ...Text Mode display Main menu For selection of control and setting items of the projector Displays sub menu and status of selected items when clicking the linked text Setting page number Browses pages by click ing the linked number Setting page Displays the control and setting items according to the selected menu ...

Page 29: ...menu button and then press the Set button The selec table language is English or Japanese You may find the unrecognized character text in the menu if the computer does not provide Japanese fonts Note This language selection is realized by using the JavaScript function of the web browser If the preference of the browser is set not to use the JavaScript the Set linked text appears on the page as the...

Page 30: ...ojector you can check it with the menu on the projec tor For further information please see item Network PIN code p 18 or Password Setting p 22 3 Date Time Setting Click on the page number 2 to display the Time Setting page Type present date onto the date text area with Year Month Date format and type present time onto the time text area with Hour Minute format in 24 hours indication Press the Set...

Page 31: ... Quit the web browser and access to the login page again in 40 seconds You must use the number specified by your administrator The address must be entered as a group with four numbers split by dots like 192 168 1 101 2 Name the projector You can name 3 the projector By setting this name properly for the DNS server the projector can be accessed by using this name instead of the IP address For furth...

Page 32: ...ich can send an alert message to users or an administrator if it detects an abnormality on the projector or run out of the life span of the lamp Click on the E Mail Setting linked text on the main menu and follow the below steps 1 Registering SMTP Server 1 Administrator Address Type the E mail address of SMTP server and administrator and press the Set but ton The administrator address is set to Re...

Page 33: ...rt messages described on the next page The mail option item may differ from the actual depending on the projector s function 2 Registering and deleting E mail addresses Type the E mail address onto the Mail Address text area and press the Set button To check the registered addresses click on the Mail Address Check Delete linked text The addresses are listed as the figure on the right To delete the...

Page 34: ... the projector support dual lamp system only TITLE Message from projector 01 12 2007 00 59 Projector Model Name Model Name TCP IP 192 168 0 2 Projector Name myProjector It sends you following massage The Projector lamp is turned off because internal projector temperature is too high Wait Temperature Warning Indicator turned off turn the Projector on again If the Indicator continues to flash check ...

Page 35: ...4 35 Network Board OWNER S MANUAL ENGLISH Chapter 4 Controlling the Projector ...

Page 36: ... page will be displayed By Pressing the On or Standby button on the page the power of the projector can be controlled When you press the Standby button another confirmation popup win dow 1 will appear and then press the OK button if it is set to standby Note 1 This popup window is realized by using the JavaScript function of web browser If the preference of the browser is set not to use JavaScript...

Page 37: ...dition Displays the status of the projector s power When occurring the internal power failure The word Power Failure and error information is displayed Input Status Displays the selected input Selection Displays the selected input mode Signal Status Displays the signal status of the selected input mode Inside temperature Displays the internal temperature of the projector The icons A B C on the pag...

Page 38: ...exts to change pages and select desired setting items Please see the owner s manual of the projector to have the further information of each control item If the adjustment items are not required by the projector itself or input signal the mark of may be indicated The control page displays valid control items depending on the selected input mode signal or functions of the projector you use therefor...

Page 39: ... PC Adj Performs automatic adjust ment Fine Sync Performs Fine Sync adjust ment Total Dots Adjust the number of total dots in the horizontal period Horizontal Adjusts horizontal picture posi tion Vertical Adjusts vertical picture posi tion Item Description Clamp Adjusts clamp position of the picture Display Area H Adjusts the image area horizontally Display Area V Adjusts the image area vertically...

Page 40: ...cted number 3 Register by pressing the Set button To restore the adjustments press the Reset button Select a mode by clicking the button Type a memo for the selected mode Select a load mode by clocking the but ton It is displayed with Stored or Free for the memo of Mode1 to Mode5 The memo of ExMode6 to ExMode50 can be stored into the selected mode 1 Available mode may differ from the actual depend...

Page 41: ...tched accord ing to the input mode These selections will not appear when the source mode is set to the computer mode Available selection when the VIDEO S VIDEO input Available selection when the Y Cb Pb Cr Pr input Item Description Color System Selects a color system of the input video signal AUTO It automatically switches to the color system of the input sig nal Item Description System Selects a ...

Page 42: ...ndard Real Cinema Dynamic Image1 to Image4 with pull down button menu Image1 to 4 are user preset mode Original Mode Displays which predefined image adjustment mode is based upon Adjustment items Contrast Brightness Color Tint BrilliantColor Improve the color performance with BrilliantColorTM technology Available image mode may differ from the actual depending on the projector s model type Type1 I...

Page 43: ... button The Image1 to Image10 are for the user preset modes to store the image adjust ment The Original Mode is represented the mode that user preset mode Image1 to Image10 is created from the predefined image modes Standard Real or Cinema Load a image mode Display the page 1 and select a set to load with the pull down menu button of the Image Adjustment Mode and press the Set button Control the P...

Page 44: ...in SP Switches the sound output from the built in speaker Mute Suppresses the sound There may not be available depending on the projector s model type Item Description Screen 1 Changes the screen mode Aspect 1 Changes the screen mode Computer Input Normal True Full Custom Video Input Normal Full Zoom Natural wide Custom True 2 Switches the projected image mode Digital Zoom 3 Adjusts the image zoom...

Page 45: ... Either of item Blue Back or Background may appear depending on the projector s model type Item Description Shutter 1 Sets the image black out mode No Show 1 Sets the image black out mode Freeze Sets the image frozen mode Power Management Sets the power management if the input signal is interrupted and no control key is pressed during the specified period of time Sets the time periods 2 until the ...

Page 46: ...Displays the current time set to the projector Timer Setting Function to switch on or off the projector at the programmed date and time Please see chapter How to set the Timer for further instructions Please see the pages 48 49 for details About Lamp Counter reset The confirmation window as the left will appear when the Reset button of the Lamp Counter Reset is pressed Select which lamp counter is...

Page 47: ...tor s model type Item Description Picture in Picture Sets the P in P or P by P mode which has been preset in the setting menu OFF User1 User5 Edge blending Sets the seamless overlapping for multi screen Color matching Corrects the difference of color for multi screen DynamicBlack Improve the black level of the image OFF Low High HDMI setup Switches Normal or Enhanced according to the HDMI source T...

Page 48: ...Monday to Saturday To set the timer event on specified date select date entry with radio button and then type the date with Year Month Date format Ex Type 2007 08 20 if you specify August 20 2007 2 Set a time Type the time with Hour Minute and 24 hours format Ex Type 18 25 if you specify PM 6 o clock and 25 minutes 3 Select an event ON or OFF Select an event ON or OFF with the pull down menu butto...

Page 49: ...le below event 3 turns on the projector so next event 4 also turning on projector will not be effective because the projector is already turned on Similarly when the projector is turned off by event 5 event 6 OFF will not be effective in turning it off again But these secondary events event 4 and event 6 will become effective if a person turns off the projector after event 3 and before event 4 or ...

Page 50: ...IDEO Y Cb Pb Cr Pr 480P NTSC Y Cb Pb Cr Pr 575I PAL VIDEO S VIDEO Y Cb Pb Cr Pr 575P PAL Y Cb Pb Cr Pr 720P60 Y Pb Pr 720P50 Y Pb Pr 1035I Y Pb Pr 1080I60 Y Pb Pr 1080I50 Y Pb Pr 1080P60 Y Pb Pr 1080P50 Y Pb Pr Item Description Fan Control Speed Sets fan control speed Prohibition Sets the prohibition of the pro jector control by the remote control or the keys on the pro jector Item Description Vid...

Page 51: ...rding to the selected source see pages 38 44 for further adjustment 2 Select the Save page Click on the Save icon from the control menu The setting page is displayed as the right Change pages by clicking on the page numbers 1 to 7 linked text and check the current settings For further information please see the next page 3 Name the current setting Select a set number Set1 to set10 you intend to st...

Page 52: ...lected set number are applied to the current settings Example of setting If the contents of the saved set are not match for the slot equipped on the projector the invalid alert message may be displayed For example the message Invalid setting for SLOT1 will be displayed in the following case Example In case of after setting the DVI computer input for SLOT1 and then it was changed to video input boa...

Page 53: ...ch the on screen display menu on or off by pressing the ON or OFF button The same operation with the MENU button on the projector and remote control hand set Cursor Used to select an item or adjust value in on screen menu by pressing the Up Down Left and Right button The same operation with the pointers on the projector and remote control handset Used to execute the item selected by pressing the S...

Page 54: ...emo linked text on the main menu The following setting page is displayed It is convenient to use as a memo for the simple description where the projector is placed in This note will be displayed on the login page Input a memo and then press the Save button The saved memo is displayed on the login page ...

Page 55: ...55 Network Board OWNER S MANUAL ENGLISH Chapter 5 Controlling the Multi Projectors 5 ...

Page 56: ...ultiple projectors equipped with the Network Board con nected to the network Click on the Multi Control linked text on the main menu to dis play the control page Note To control the multiple projectors each projector must has the same password Internet Intranet PC4 PC3 PC5 PJ2 PJ1 PJ4 PJ3 Select INPUT2 for PJ1 to PJ4 Example of multi control ...

Page 57: ...ets for the multi control Register IP address and projector name Click on the Registration of Projector linked text to display the registration page Type the IP address and projector name 1 if required and then press the Register button Check IP address and projector name To check the registered information click on the Check Change linked text The registered information of the projector is listed...

Page 58: ... control Delete Delete from the multi control Status Description blank The projector is connected to the network correctly No connected The projector may not be connected to the network Please check the connection and network configuration of this projector Password error The login password is incorrect The password for the multi controlled projectors must be the same Change password of this proje...

Page 59: ...ot be applied to all of the projectors under the multi control Control Display the control page by clicking on the Control linked text on the multi con trol page The setting pages are con structed from 1 to 6 page and each items are indicated on the next page If loading a set to the multiple projectors the contents of the set must be effective to current accessed projector If not the multi control...

Page 60: ...en the control button or setting button is pressed the registered projectors for the multi control are controlled at the same time These control items differ from each selected input mode and functions of the projector you use Change of function is disable if the multi controlled projector does not support its function The above pages are example They may differ from the actual depending on the pr...

Page 61: ...61 Network Board OWNER S MANUAL ENGLISH Chapter 6 Use of Serial Port 6 ...

Page 62: ...sing After fixing the setting press the Set button 1 Item Description Baud Rate Communication speed for serial port select with the pull down menu Parity Parity check the ways for error detecting of the transferred data Stop Stop bit indicates the end of communication Flow Control Ways for communication flow Data Indicates the length of data Serial Control Selects equipment to control External Use...

Page 63: ...ed This product does not provide any driver software Please consult your local dealer Setting to control the equipment connected to the serial port from the computer Serial Control Selects External Port Sets according to the com puter specified port no Do not use port no 10000 2 Other Settings Sets according to the com munication condition of the equipment Setting to control the projector from the...

Page 64: ...1 RS 232C serial cable Internet Intranet PC2 PC4 PC3 PC5 PJ2 PJ1 PC1 Turn on the DVD player and start playing DVD Player RS 232C serial cable Example 2 Controlling a projector which is not on the network function through network Control Examples Example 1 Controlling AV equipment through network ...

Page 65: ...s set to the reverse cross type When connecting the peripheral equip ment please use an optimum serial cable according to the polarity of the port on the equipment And this product provides a socket to switch the polarity of the serial port By switching the socket on the board as shown below it is possible to switch the polarity of the port either the normal straight type or the reverse cross type...

Page 66: ...n the main menu with the web browser p 62 4 Change the serial port setting to be the same communication condition as the con nected external equipment and then click Set button The following example setting is for our projector communication condition When controlling our pro jector set as follows Control For example in case of using the Telnet application of the Windows XP Professional 1 Select R...

Page 67: ...will be turned on C00 is a command to turn the projector on Enter with ASCII 64 byte capital characters and one byte characters To disconnect the communication type Ctrl key and key at the same time For example entering pass word 1234 1 Further instructions about the telnet application please see the on line guide on your com puter 2 The commands are defined by each product independently so please...

Page 68: ... address no open 192 168 1 201 10000 return Use the IP address assigned to the pro jector After the communication is established type the password and the command for controlling the projector and then enter Enter key The right table shows the typical command lists for controlling the our projector and please consult your local dealer for further information of another commands Command Function C0...

Page 69: ...69 Network Board OWNER S MANUAL ENGLISH Chapter 7 Appendix A 7 Connection examples Web browser setting Technical data ...

Page 70: ...55 255 0 Default Gateway DNS Computer Name PC05 IP Address 192 168 0 5 Subnet Mask 255 255 255 0 Default Gateway DNS Hub Projector Name PJ01 IP Address 192 168 0 2 Subnet Mask 255 255 255 0 Default Gateway 0 0 0 0 DNS 0 0 0 0 Computer Name PC05 IP Address 192 168 0 5 Subnet Mask 255 255 255 0 Default Gateway DNS UTP cross cable Connect the projector PJ01 to the control computer PC05 via the hub Wh...

Page 71: ...5 255 0 Default Gateway 192 168 200 1 DNS 192 168 201 1 IP Address 192 168 200 1 IP Address 192 168 10 1 IP Address 192 168 100 1 Computer Name PC05 IP Address 192 168 10 5 Subnet Mask 255 255 255 0 Default Gateway 192 168 10 1 DNS 192 168 201 1 Computer Name PC10 IP Address 192 168 10 10 Subnet Mask 255 255 255 0 Default Gateway 192 168 10 1 DNS 192 168 201 1 Computer Name PC51 IP Address 192 168...

Page 72: ...JavaScript please see further instructions on the next page Proxy setting In some cases your web browser is set up to use the proxy server for the internet or intranet connection In this case when you install this product into the local network you should set up the proxy setting of web browser preference correctly Especially when connecting the projector and computer with a UTP cross cable direct...

Page 73: ...nternet Explorer v 6 0 ActiveScript setting Select the Internet Options menu from the Tool menu on the web browser and then select Security tab and click Customize Level button On the security setting win dow scroll down and find the Scripting item make sure that Enable is selected in item Active Scripting ...

Page 74: ...ternet connection from the local area network check the item Use a proxy server and enter the proxy server address and port correctly in the proxy settings window For further instruction please consult your network administrator Not using proxy server Uncheck the item Use a proxy server If you connect the projector to the computer directly with UTP cross cable this must be unchecked To designate p...

Page 75: ... Setting Netscape Navigator v 7 0 JavaScript Setting Select the Preference menu from the Edit menu on the web browser and then select the item Advanced Scripts Plugins in the Category column Make sure that the Enable JavaScript for Navigator is checked ...

Page 76: ...m the local area network select the item Manual proxy configuration Enter the proxy server address and port number correctly on the HTTP Proxy item For further instruction please consult your network administrator Not using proxy server Select the item Direct connection to the Internet in the proxy setting window If you connect the projector to the computer directly with UTP cross cable this must ...

Page 77: ... 0 ActiveScript setting Select the Preference menu from the Edit menu on the web browser and then select Web Content under the Web Browser heading the preference settings window Make sure that the Enable scripting is checked in the Active Content column Web Browser Setting ...

Page 78: ...nection from the local area network check the item Web Proxy and enter the proxy server address correctly To make advanced set tings press the Settings button to display the Web proxy settings window For fur ther instruction please consult your network administrator Not using proxy server Uncheck the item Web Proxy If you connect the projector to the computer directly with UTP cross cable this mus...

Page 79: ...GLISH Netscape Navigator v 4 7 JavaScript Setting Select the Preference menu from the Edit menu on the web browser and then select the item Advanced in the Category column Make sure that Enable JavaScript is checked Web Browser Setting ...

Page 80: ...ual proxy configuration and press the Configure button The proxy setting window will appear Enter the proxy server address and port number correctly on the HTTP proxy item in the proxy settings window For further instruction please consult your network administrator Not using proxy server Select item Direct connection to the Internet in the proxy setting window If you connect the projector to the ...

Page 81: ...P IP Serial interface RS 232C Baud rate 0 3 1 2 2 4 4 8 9 6 19 2 28 8 57 6 115 2 Kbps Flow control Hardware flow control RTS CTS Xon Xoff Parity check Odd Even Terminal D sub 9 pin Male Power source Supplied from the projector Power consumption 3 0 watts Dimensions W x H x D 5 39 x 1 18 x 4 33 137 x 30 x 110mm Weight 0 34 lbs 155 g Built in battery Lithium battery Type CR2032 3 0V Operating temper...

Page 82: ...XD 3 TXD RXD 4 DTR 5 Ground Ground 6 DSR 7 RTS 8 CTS 9 1 2 3 4 9 8 7 6 5 D sub 9 pin connector RS 232C It is possible to switch the polarity of the serial port as shown in table below by switching the socket on the network board For further information see item Serial Port Switching p 65 At the factory shipped setting the socket is set to side A Function CD Carrier detection RXD Receive data TXD T...

Page 83: ...83 Network Board OWNER S MANUAL ENGLISH Appendix B Q A ...

Page 84: ...he computer Check the network configuration of the computer 5 The Network Board is used with the default setting p 16 20 6 The proxy setting of the web browser is not set correctly p 72 7 The computer does not provide TCP IP protocol No setting page in my web browser Is the problem in the network or in the projector I would like to find out the problem whether it is in the network or in the projec...

Page 85: ...he gateway router to restrict the accessing from the computer For further information please con sult your network administrator Can I access the projector installed on the company s local area net work from a remote location There are some ways to access to the projector in the LAN but you must con sult your network administrator Use of modem Connect to the company s network from your home or som...

Page 86: ...esigned to control up to 100 sets but it depends on the network environment What should I do when I forget the password Select the Network PIN code menu or the Password menu on the projector s on screen menu The current password will appear on the screen p 18 22 Can I register the setting page as a web browser Favorites or Bookmarks Please add the Login page to your Favorites or Bookmarks Do not a...

Page 87: ...traffic is heavy Please consult your network admin istrator By changing the preference of your web browser to not show pic tures you may have page display more quickly at the heavy network traffic Please see the browser s on line help for further information Also you can select the Text mode for displaying pages quickly p 26 I use many of the projectors in the network How can I use names of the pr...

Page 88: ...ntication depending on the SMTP server This product does not support this kind of SMTP server Can I develop a driver to control external serial equipment This product does not provide any driver software To control the external equipment connected to the extra serial port it should be required to clarify the commands and communication condition defined by each equipment If they are clarified it ca...

Page 89: ... Board It is possible to update the firmware through the network It is required to have a special tool for the updat ing For further information please consult your local dealer The ver sion number of the firmware is indi cated on the lower part of the Initial Setting page A Q Q A ...

Page 90: ... set 192 168 x x the Subnet Mask should be set 255 255 255 0 for example Rule2 The start address xxx xxx xxx 0 and the last address xxx xxx xxx 255 of the IP address must not be assigned to any other equipment These address numbers are reserved Rule3 The IP address must correlate to a network number If network numbers are different between the equipment they cannot establish communica tions each o...

Page 91: ...91 Network Board OWNER S MANUAL ENGLISH Q A ...

Page 92: ...Network Board Owner s Manual IDRMD built in KT5AL a SANYO Electric Co Ltd ...

Reviews: