background image

If you need assistance with product operation, authorized service center 
referral, service assistance, problem resolution, or parts and accessories 
availability; you may contact us by:
A. Visiting www.sanyoservice.com on a 24hr/7 days a week basis or
B. calling the customer support center at 1-800-421-6382

Weekdays 7:30 AM - 5:00 PM Pacific Time
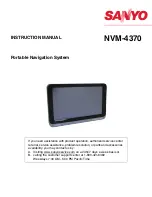
NVM-4370

Portable Navigation System

INSTRUCTION MANUAL

Summary of Contents for NVM-4370

Page 1: ...ance problem resolution or parts and accessories availability you may contact us by A Visiting www sanyoservice com on a 24hr 7 days a week basis or B calling the customer support center at 1 800 421 6382 Weekdays 7 30 AM 5 00 PM Pacific Time NVM 4370 Portable Navigation System INSTRUCTION MANUAL ...

Page 2: ...in accordance with the instruc tions may cause harmful interference to radio communications However there is no guarantee that interference will not occur in a particular installation If this equipment does cause harmful interference to radio or television reception which can be determined by turning the equipment off and on the user is encouraged to try to correct the interference by one or more ...

Page 3: ...nd severe temperature changes This could cause moisture condensation inside the unit which could damage your device In the event of moisture condensation allow the device to dry out completely before use Do not leave your device in plain sight when you leave your vehicle Take your device with you or remove it from view to avoid theft The screen surface can be easily scratched Sharp objects may scr...

Page 4: ...it may be activated and charging may not be possible Do not connect any accessory Car adaptor etc other than those supplied or optional FOR AMERICAN USERS The following advisory is included in accordance with the laws of the State of California USA You are responsible for complying with applicable federal state or local laws regulation or ordinances regarding the disposal of your Sanyo Navigation ...

Page 5: ...th the intent to clone any proprietary product to Licensor Separation or division of the Software prohibited This license hereby is granted for a single use only In no circumstances shall Licensee separate divide or compartmentalize any constituent portion s of the Software into multiple parts sections or compartments for use in multiple computers Rental lease or loan prohibited Licensee shall not...

Page 6: ...ARE DOES NOT INCLUDE ANY VIRUS OR DEFECTS THE SOFTWARE ROUTINE OR OTHER SOFTWARE DESIGNED TO RESTRICT UNAUTHO RIZED ACCESS OR TO DISABLE ERASE OR OTHERWISE HARM THE SOFTWARE HARDWARE OR DATA OR TO PERFORM ANY OTHER SUCH ACTIONS AND LICENSOR HEREBY EXPRESSLY DISCLAIMS ANY AND ALL LIA BILITIES TO RESTORE ANY SUCH DEFECTS 6 Indemnification Licensor will not have any liability to Licensee for and Lice...

Page 7: ...8 4 3 Contacts 28 4 3 1 Create new entry 29 4 3 2 Call out 30 4 3 3 View 30 4 3 4 Delete 30 4 4 Data transfer 31 4 4 1 File transfer 31 4 4 2 Import phonebook 31 4 4 3 Export contacts to SD 32 4 4 4 Import contacts from SD 32 4 5 SMS Short Message Service 32 4 5 1 Inbox 33 4 5 2 Outbox 34 4 5 3 Write SMS 34 4 5 4 Draft 35 5 Multimedia Players 36 5 1 Photo viewer 36 5 1 1 Features 36 5 1 2 Using th...

Page 8: ...screen does not respond well 41 6 7 Connection problems with PC 41 6 8 No GPS connection 41 6 9 No sound coming from the device 41 6 10 Getting a GPS fix takes longer time than normal 42 6 11 Factory reset does not mean a GPS reset 42 6 12 Bluetooth functions do not work 42 6 13 Unavailable functions 42 6 14 The rear view camera image is not displayed 42 ...

Page 9: ... ºF to 122 ºF 0 ºC to 50 ºC Storage Temperature short period 4 ºF to 140 ºF 20 ºC to 60 ºC long period 4 ºF to 95 ºF 20 ºC to 35 ºC Charging battery Temperature 32 ºF to 104 ºF 0 ºC to 40ºC Hardware Main unit Display 4 3 Touch screen 480 x 272 pixel TFT 16 7M colors Memory NAND Flash 4GB Indicators Green Red Orange for power Blue for Bluetooth Speaker 1 5 W 8 ohm Connectors MiniUSB B type SD MMC m...

Page 10: ... rating 5 0V 1A Certificates FCC CE e mark Output plug USB mini B type USB Cable Length 4 120 cm Mini jack to RCA conversion cable Length 1 30cm SD Card Support Capacity Maximum 8GB SDHC Support MMC Multi Media Card Support Capacity Maximum 2GB ...

Page 11: ...t Dashboard Mounting Disc Windshield Dashboard Car Mounting kit Car Adaptor USB cable Quick Start Guide CD Instruction Manual Warranty DVD Map Software Mini jack to RCA conversion cable 2 1 2 External features Figure 1 Front Panel View NOTE Although your unit s rechargeable Li ion battery comes approximately 40 80 charged before using it is best to connect the Car adaptor and plug to power socket ...

Page 12: ...al ON OFF power button and change menu 2 Volume Control Adjust the sound volume 3 Battery switch The main power battery cut off switch 4 Reset Restarts your device NOTE Power Menu button Press and hold the button for 2 seconds to turn power off While unit power is on press and immediately release the button to display Main Menu 2 3 4 1 2 3 4 5 1 ...

Page 13: ...USB Car adaptor PC with USB cable or TMC unit connector NOTE Your unit can charge by USB Interface Make sure that the battery switch is ON Make sure that your device is OFF state If your device is ON state press Power Menu button for long interval Connect your device to your PC with USB cable then USB charging starts Table 4 Rear controls No Function Description 1 GPS antenna GPS antenna 2 Speaker...

Page 14: ...ts of Windshield Dashboard Car Mounting kit No Function Description 1 Adjustable 2 prong ratching plate Connects the device to the ratching plate which can be adjustable horizontally and vertically 2 Tower unit Allows the device to be adjusted in 360 3 Suction cup locking lever Secures the vacuum seal of the car mount 4 Suction cup Fixes the car mount to the selected mounting area 5 Suction cup re...

Page 15: ...on cup to top of the mounting disc with the locking lever facing up for easier access c Flip the locking lever away from you to create a vacuum between the suction cup and the mounting disc Make sure that the suction is strong and stable before proceeding to the next step 4 After you are sure the mounting bracket is safe and secure attach and slide your unit into its ratching plate It snaps in eas...

Page 16: ...16 Figure 7 Mounting on the dashboard 10 Detach your unit from the Car mounting kit ratching plate Figure 8 Mounting on the dashboard Press lock button on ratching plate ...

Page 17: ...ded connection method No Component Description 1 TMC antenna jack Connects to the TMC antenna 2 USB terminal Connects to the USB slot of the device 3 USB slot Connects to the USB terminal of the car adaptor 4 TMC antenna terminal Connects to the antenna jack of the TMC unit 5 Suction cup Fixes the windshield 1 3 2 4 5 ...

Page 18: ...ct the TMC antenna to the TMC unit 4 Connect the TMC unit to the device 5 Connect the car adaptor to the USB slot of the TMC unit WARNING Make sure that the TMC antenna does not obstruct the driver s view or interfere with the operation of vehicle airbags and safety devices NOTE SANYO is not responsible for the availability or quality of traffic information provided by TMC ...

Page 19: ...ON if you don t use the rear view camera select OFF When set to ON the screen will switch automatically when camera images are input NOTE The time displayed by the navigation software is set automatically when the GPS receives a signal If you would also like the time zone to be set automatically set Automatic Time Zone to ON NOTE If you don t use the rear view camera input you should select OFF fo...

Page 20: ...gs System setting can be used to view and adjust your device current preferences Navigate from the Settings menu No Description 1 Battery Status 2 Bluetooth Status Bluetooth is ON Mobile phone is not connected Mobile phone is connected 3 The name of the connected mobile phone 1 2 3 ...

Page 21: ...menu 3 2 3 Camera Camera settings This device can be used as a monitor for rear view cameras such as those manufactured by Sanyo CCA BC200 If you use the rear view camera connect the mini Jack to RCA conversion cable provided to the video output terminal of the rear view camera and insert it into the CAMERA IN of the device The procedure to display the rear view camera image is the following 1 Tap...

Page 22: ...image stops the screen will automatically return to the original screen 5 If you keep pressing the MENU button on the top of the device for a few seconds the camera image disappears and the Main Menu is displayed To redisplay the camera image at this time tap the Camera icon in the Settings menu NOTE If the Navigation Music Player or Video Player were in operation they are temporarily suspended wh...

Page 23: ... using FM Transmitter Frequency screen and then tap the Set button 5 When pressing the FM Transmitter ON OFF button and setting it to OFF the FM Transmitter is set to OFF 3 2 5 System information 1 Tap the Sys Info icon in the Settings Menu 2 You can view the OS version GPS firmware version and other system information 3 Tap the Calibration button to open the Calibration screen of the touch panel ...

Page 24: ...e YES button to reset the settings and the NO button not to reset the settings 5 Tap the GPS Reset button to open a dialog box to select whether to reset the GPS satellite receiver Tap the YES button to reset the receiver and the NO button not to reset the receiver 6 Tap to return to the Settings menu ...

Page 25: ...t starts to search available mobile phones 3 The available phones are displayed on the phone list Select one of the mobile phones and tap the Connect button No Description 1 The name of the connected mobile phone 2 Bluetooth Status Bluetooth is ON Mobile phone is not connected Mobile phone is connected NOTE Make sure the Bluetooth settings of your mobile phone The Bluetooth switch is set to ON or ...

Page 26: ... Communications screen The mobile phones that have connected in the past are displayed on the Paired List 2 Select one of the mobile phones and tap the Connect button 3 The mobile phone will often require you to enter a password to connect the device Enter 0000 on the mobile phone in this case 4 When the connection completes the name of the connected phone is displayed on the title bar of the Comm...

Page 27: ...ut a phone number and tap Your unit starts to make a call 3 Tap the phone call quits No Name Description 1 Start to make a call 2 History Call out from the history of the incoming outgoing call 3 Contacts Call out from the contacts In detail refer to 4 3 No Name Description 4 Close a phone call 5 Mute Set the microphone muting Set the microphone mute to ON Set the microphone mute to OFF 1 2 3 5 4 ...

Page 28: ... phone number and two buttons are displayed on the screen 2 To receive a call tap To quit a call tap 3 On a phone call and are displayed at the top right of the screen 4 On the Settings you can do the setting of the automatic answer to phone call 4 3 Contacts Contacts screen is as follows ...

Page 29: ...added to the list of Contacts No Description 1 Save Save the entry 2 Category Up Down 3 Item Up Down 4 Keyboard Alphabet Numbers and Symbols Category Record Name First Last Phone Home Work Mobile Other Home Address Street City State Zip Country Work Address Street City State Zip Country Others Company E mail NOTE The maximum number of the saved entry is 400 1 3 4 2 ...

Page 30: ...4 3 3 View 1 Select one of the entries and tap the View button the View Contacts screen opens You can see the detailed information of the selected entry 2 Tap the Edit button the Input Entry screen opens and you can edit the entry 3 About see 4 3 2 4 3 4 Delete 1 Select the entry and tap the Delete button 2 Tap the YES button to delete ...

Page 31: ...le files 5 Tap the Import button and transfer starts 4 4 2 Import phonebook 1 Tap the Import Phonebook button 2 Phone book on mobile phone is imported to your unit 3 You can see imported Contacts in Contacts screen NOTE Not all mobile phones support File Transfer NOTE Music files are transferred to Music folder of Internal Memory of your unit Photo files are transferred to Photo folder of Internal...

Page 32: ...it 2 Tap the Import Contacts from SD button 3 vCard files existing in the Contacts folder of SD card appear 4 Tap vCard file you want to Import allowed to select multiple files 5 Tap the Import button and the vCard file you have selected starts to be Imported 6 You can see imported Contacts in Contacts screen 4 5 SMS Short Message Service NOTE The selected entry is output to the Contacts folder of...

Page 33: ...elect one of messages and tap the Delete button the message is deleted And select one of messages and tap the View button you can read the whole of the message on the View SMS screen Then tap the message field you can input the reply Name Description Start to make a call to the sender Save Save the reply Send Send the reply to the sender NOTE On the Settings you can do the setting of SMS Automatic...

Page 34: ...1 Input the destination number with A or B A Input the number directly Tap the destination number field B Select the number from Contacts entries Tap the Search button 2 Tap the message field you can input the message After finishing tap the Save button 3 After making a message finishes tap the Save button 4 Tap the Send button when connecting with the mobile phone the message is sent 5 Tap the Sa...

Page 35: ...ft The draft messages are saved to Draft The maximum number of the saved message in Draft is 100 Select one of messages and tap the Edit button the Write SMS screen opens You can edit and send the selected message ...

Page 36: ...our unit using USB cable Slide show mode and Rotation function 5 1 2 Using the photo viewer 1 Tap the Photos button on Main Menu 2 Tap Internal Memory SD Card to select the media in which exist image file you want to display 3 Tap then File Explorer screen appears 4 Tap the photo file icon Thumbnail you want to display then selected file is displayed Normal screen mode File Explorer screen display...

Page 37: ...ain slide show mode is restarted 5 By tapping the screen returns to normal screen mode Full screen mode without buttons Full screen mode with buttons 5 2 Music player 5 2 1 Features Support for MP3 WMA and WAV files Music files on both of your unit s internal memory and SD card can be played back You can copy music files from PC to your unit using USB cable You can use navigation system while list...

Page 38: ... Background Playback 1 Enter to Music Player again 2 Tap and exit to Main Menu 3 Music stops No Function Description 1 Skip backwards forwards Advances one song backward and forward 2 Play Pause Plays or Pauses the music 3 Random Play Sets play mode to random order 4 Repeat Sets repeat mode Song Repeat Folder Repeat 5 File Changes to File Explorer screen to select file 6 Memory SD card Selects Dat...

Page 39: ...xist movie file you want to display 3 Tap then File Explorer screen appears 4 Tap the movie file icon Thumbnail you want to playback then selected file is started to playback Normal screen mode File Explorer screen 5 3 3 Full screen display 1 Tap the screen then the screen changes to full screen mode 2 By tapping screen at full screen mode buttons appear disappear 3 By tapping the screen returns t...

Page 40: ... 2x 4x 8x 16x 32x is started 5 4 USB mass storage You can use your unit as the external mass storage disk of your PC 1 Connect your unit to PC using USB cable 2 Your unit becomes the external mass storage disk of your PC 3 You can see files on your unit You can copy multimedia files mp3 wma jpeg and mp4 from PC to your unit NOTE Operating system of your PC should be Windows XP or later ...

Page 41: ... the Sys Info This will allow you to do a factory reset restore to default settings reset the GPS and recalibrate the touchscreen interface 6 5 Screen is not displayed normally Make sure that brightness setting is appropriate There is the case that LCD does not work normally at a high temperature and low temperature Make sure that the tempera ture is in the normal operating range 6 6 The touch scr...

Page 42: ...ion see your phone s manual Make sure that your phone is located within 30 feet 10meters from your device The following Bluetooth functions are usable or unusable depending on a model of mobile phone File Transfer Import Phonebook The SMS sending and receiving functions are usable or unusable depending on a model of mobile phone For the Import Phonebook depending on a model of mobile phone one con...

Reviews: