background image

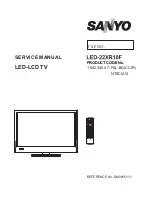
SERVICE MANUAL

PRODUCT CODE No.
1 682 

349


47

: PAL-BG(

CCIR)

FILE NO.

PRODUCT CODE No.

REFERENCE No.:

SM0915111

LED-LCD TV

NTSC

(

A

V) 

Summary of Contents for LED-22XR10F

Page 1: ...SERVICE MANUAL PRODUCT CODE No 1 682 349 47 PAL BG CCIR FILE NO PRODUCT CODE No REFERENCE No SM0915111 LED LCD TV NTSC AV ...

Page 2: ...s Working principle analysis of the unit Block diagram IC block diagram and instruction Wiring diagram Troubleshooting guide Schematic diagram APPENDIX A Main assembly list APPENDIX B Exploded View 3 5 20 23 25 26 34 35 38 Wall mounting instructions Installing the Stand or wall mount bracket ...

Page 3: ...will result 2 5 If any foreign substance such as water liquid metal slices or other matters happens to fall into the module be sure to cut the power off immediately and do not move anything on the module lest it should cause fire or electric shock due to contact with the high voltage or short circuit 2 6 Should there be smoke abnormal smell or sound from the module please shut the power off at onc...

Page 4: ... 20 80 Scope for storage 80 2 13 Display of a fixed picture for a long time may result in appearance of picture residue on the screen as commonly called ghost shadow The extent of the residual picture varies with the maker of LED screen This phenomenon doesn t represent failure This ghost shadow may remain in the picture for a period of time several minutes But when operating it please avoid displ...

Page 5: ...2 5 V Alignment instructions 2 Test equipment VG 848 VGA YPbPr signal generator VG 849 HDMI digital video signal generator CA210 color analyzer 1 Safety Instructions Be sure to switch off the power supply before replacing or welding any components or inserting plugging in connection wire Anti static measures to be taken throughout the entire production process a Do not touch here and there by hand...

Page 6: ...parameters control etc Check if the output of earphones and speakers are normal Input composite AV signal check if AV functions are normal Accessories checkup and packing Setup before shipment Input digital HDMI signal check if display and other functions are normal analog parameters control H V center etc Input HD signal mode check if YPbPr functions are normal Input VGA signal check if display a...

Page 7: ... not need to be adjusted without special customer requirements l Factory menu item EEPROM Init for factory and customer data initialization TV set will reset and initial guiding interface will display after executing the item m Factory menu item Fac Channel Preset for factory channels presetting it is necessary to connect to central signal source before operating the item now digital frequency of ...

Page 8: ...PbPr channel b Press key SOURCE then press keys 2 5 8 0 in turn to enter into initial factory menu c Move cursor to item ADC ADJUST and press key OK to enter into inferior factory menu d Input analog YPbPr signal VG848 Timing 976 1080i Pattern 918 SMPTE Color Bar move cursor to item MODE press keys and to select item YPbPr then move cursor to item AUTO ADC and press key ENTER to begin auto adjustm...

Page 9: ...T after completing adjustment the data will be saved automatically k DTV channel adjustment switch to DTV channel select 16 grey step program enter into factory menu adjust white balance followed by steps e f g l Please refer to the adjusting rules as follows B Gun coordinates of X and Y will increase when B gun is adjusted downwards coordinates of X and Y will decrease when B gun is adjusted upwa...

Page 10: ... as below a Power on CA210 connect data line normally a prompting dialog will display as Fig 4 for the first time of setup Fig 3 b Select item Setting from list or specified location advanced then press button Next please refer to Fig 4 Fig 4 c Select item Don t search I want to install driver by myself D then press button Next please refer to Fig 5 ...

Page 11: ...hown as Fig 6 will display select item Install from disk Fig 6 e Select directory of driver and file MLTCA200 INF to begin setup ignore the prompt continue or not if it displays during setup process please refer to Fig 7 ...

Page 12: ...Fig 7 f CA210 SDK driver must be installed besides above setup please refer to Fig 8 Fig 8 g File ISScript8 msi must be installed also press button Next to begin setup please refer to Fig 9 ...

Page 13: ...4 4 2 2 Install driver for communication ports of PC and TV Connective line is shown as Fig 10 Fig 10 Select file Setup exe in the software package Fig 11 will display then press button Next to complete setup ...

Page 14: ...ysical communication protocol setup Baud rate 9600bps Data bits 8 bits Parity None Stop bit 1 bit Please refer to detailed setup as follow 1 Press the FUNC key 5 key and SET key Select Function 5 0 E Config Edit 2 RS232 communication setup are shown as Fig 12 ...

Page 15: ...only communication pin 2 3 and 5 need to be used 4 4 2 4 Connect VG848 signal output terminal to TV signal input terminal There are several signal input terminals such as AV YPbPr VGA and HDMI connect them according to needs if there are several input terminals of AV YPbPr VGA or HDMI only need to connect the first terminal respectively ...

Page 16: ...nels AV1 AV2 and AV3 YPbPr has two channels YPbPr1 and YPbPr2 so AV1 and YPbPr1 must be connected 4 4 4 Adjusting interface are shown as Fig 14 and Fig 15 Fig 13 Interface of Prima auto white balance adjustment system Adjusting button Connect CA210 after opening adjustment system every time Calibrate zero after CA210 power on Connect TV after opening adjustment system every time Real chromatic coo...

Page 17: ...s setup Chromatic coordinates and precision setup Color temperature combination color temperature selection channel selection adjusting speed setup bright dark area setup Serial communication port selection Administrator password setup Save all setup ...

Page 18: ...480 31 469 59 94 27 480p NTSC PROG 6 720 576 31 25 50 27 576p PAL PROG 7 1280 720 45 59 94 74 18 720p 59p 8 1280 720 45 60 74 25 720p 60p 9 1280 720 37 5 50 74 25 720p 50p 10 1920 1080 33 75 59 94 74 25 1080i 59i 11 1920 1080 33 75 60 74 25 1080i 60i 12 1920 1080 28 125 50 74 25 1080i 50i 13 1920 1080 67 5 59 94 148 35 1080p 59p 14 1920 1080 67 5 60 148 5 1080p 60p 15 1920 1080 56 25 50 148 5 1080...

Page 19: ...laying function Insert USB memory containing files of picture audio and video check if the picture the sound and other functions are normal 5 7 MUSIC port only for SANYO model Input audio signal to side music port from audio output device check if the sound is normal 5 8 Other functions checkup a Check if timing on off sleeping time picture sound mode OSD stereo digital audio interface etc are nor...

Page 20: ... must be reset after ALL 100 burning software is opened every time Note 2 Method of burning and upgrading software online by using ISP burning device a For main board upgrade connect 4 pin cable of ISP burning device to Debug port of main board X107 for the unit upgrade connect both VGA ports of ISP burning device and main board enter into factory menu and set item Other Settings ISP Mode as ON b ...

Page 21: ...Press menu Read select burning file such as MERGE bin please refer to Fig 17 Fig 17 Burning file e Press menu Auto tick options All chip program and relative option switches please refer to Fig 18 press key Run to begin burning Fig 18 Option switches ...

Page 22: ...at U disk is formatted as FAT32 b Copy firmware to U disk with name of Merge bin c Turn on the TV set make sure current channel is ATV or DTV 1 First press key SOURCE press keys 2 5 8 0 in turn to enter into initial factory menu 2 Then enter into factory menu select item Software Update to begin upgrade d Detailed upgrading processes are below 1 Read data from USB memory while its indicating light...

Page 23: ...GL to be demodulated to analog audio signal then it is sent to earphone amplifier BH3547F to be amplified after the processes of preamplification acoustic effect processing and volume control and then it is divided into two one is sent to earphone jack the other is sent to audio power amplifier TAS5711 D class to be amplified and then drive speakers 2 DVB T signal flow Send DVB T digital RF signal...

Page 24: ...ent into main chip MSD209GL for acoustic effect processing and volume control after the processing of voltage division impendence matching and AC coupling then it is sent to earphone amplifier BH3547F to be amplified one is sent to earphone jack the other is sent to audio power amplifier TAS5711 D class to be amplified and then drive speakers 5 HDMI input signal flow HDMI video signal is sent into...

Page 25: ...Blockdiagram ...

Page 26: ...s from external sources such as USB interface For analog TV the MSD209GL includes NTSC PAL SECAM multi standard video decoder comprising a 3D motion adaptive comb filter and time based correction and a NICAM A2 audio decoder to support worldwide television standards The MSD209GL is also configured with a VBI processor to decode digital information such as Close Caption V chip teletext WSS CGMS A V...

Page 27: ...S streams extractions and provision of time stamps RealMedia Decoder z Supports maximum resolution up to 720p 30fps z Supports RV8 RV9 RV10 RA8 LBR and HE AAC decoders z Supports file formats with RM and RMVB z Supports Picture Re sampling z Supports in loop de block for B frame Hardware JPEG z Supports sequential mode single scan z Supports both color and grayscale picture z Operates in scan unit...

Page 28: ...orts z Three analog ports support up to 1080P z Supports PC RGB input up to SXGA 75Hz z Supports HDTV RGB YPbPr YCbCr z Supports Composite Sync and SOG Sync on Green separator z Automatic color calibration Auto Configuration Auto Detection z Auto input signal format and mode detection z Auto tuning function including phasing positioning offset gain and jitter detection z Sync Detection for H V Syn...

Page 29: ...rts up to 10 bit dual LVDS full HD 1920 x 1080 panel interface z Supports 2 data output formats Thine TI data mappings z Compatible with TIA EIA z With 6 8 bits optional dithered output z Spread spectrum output frequency for EMI suppression CVBS Video Output z Supports CVBS bypass output z Built in video encoder for encoding digital video into CVBS output 2D Graphics Engine z Point draw line draw ...

Page 30: ...lity z Independent ADC controls for IF and RF z Configurable parallel serial MPEG 2 transport stream interface z Impulse Noise suppression z Advanced performance for SFN networks z Supports single or dual AGC control z Direct 36MHz 44MHz IF sampling scheme from tuner z Full digital frequency offset recovery with wide acquisition range 500kHz z IQ imbalance compensation for ZIF Integrated VIF recei...

Page 31: ... in compliance with the European ATV standards for analogue as well as with the terrestrial standard ETS 300 744 and cable standard ETS 300429 for digital It consists of a 3 band RF tuner which receives RF signal and down converts it to an IF frequency of 36MHz for digital and 38 9MHz for analog IF The analogue IF output can directly drive a SAW filter A digital IF Stage which consists of one SAW ...

Page 32: ...rs Support for 3D Effects General Features Serial Control Interface Operational Without MCLK Factory Trimmed Internal Oscillator for Automatic Rate Detection Surface Mount 48 Pin 7 mm 7 mm HTQFP Package Thermal and Short Circuit Protection Support for AD or BD Mode Benefits Up to 90 Efficient AD and BD Filter Mode Support SNR 106 dB A Weighted EQ Speaker Equalization Improves Audio Performance DRC...

Page 33: ......

Page 34: ...Panel WIRING DIAGRAM Power Board Data Board IR Light sensor Key Speaker Power Speaker IR Light sencor Board Key Board Power Switch ...

Page 35: ...Troubleshooting guide 1 No Backlight ...

Page 36: ...2 No Picture but backlight is normal ...

Page 37: ...ated circuits Check if N407 15 20 22 has input signal Check if voltage of N407 19 25 is high level Check peripheral circuits of power amplifier Check mute circuits of power amplifier Check if N313 3 5 has input signal Check mute circuits of power amplified Check audio output circuits of main chip Yes Yes Yes No Yes No No No ...

Page 38: ... 33p R104 47 R105 47 R106 47 R107 47 R110 100 R112 100 R114 100 R108 100 R116 1K R117 1K R136 1K 1 R135 1K 1 R101 1K 1 R102 1K 1 R111 13K R113 13K R109 13K R115 13K R103 390 1 R144 150 H9 DQ5 L2 BA0 N8 A4 B1 DQ14 R2 A12 P2 A7 P3 A9 D9 DQ13 F1 DQ6 D1 DQ12 P8 A8 M2 A10 C2 DQ9 N7 A6 F9 DQ7 N3 A5 C8 DQ8 P7 A11 D7 DQ10 B9 DQ15 L3 BA1 D3 DQ11 N2 A3 H1 DQ4 M7 A2 M3 A1 E2 NC E2 H3 DQ3 M8 A0 L1 BA2 K8 CK R...

Page 39: ... R232 33 R222 33 R221 33 GND D Z201 K3953 1 2 3 4 5 L202 BG1608B121 5V 1 2V DE TP201 GND D GND D GND D GND D L206 22uH 3 3V DE V204 BC847AW GND D 1 2V DE GND D 5V GND D 3 3V DE SDA 001 C1 004 C2 004 F4 004 G2 GND D TSVALID 001 E3 3 3V GND D R220 33 1 2V VDDC GND D 3 3V DE DM RST 001 E4 GND D ATV SIF 001 B4 V202 BC847AW L201 BG1608B121 R230 33 C234 220u 16V G201 24MHz ATV CVBS 001 B4 SCL 001 C1 004...

Page 40: ...7 10K 10K R337 R307 10K 10K R341 R301 10 R361 10 R362 10 R302 10 R373 0 0 R338 R374 0 R308 0 R368 0 R364 4 7K R366 4 7K 4 7K R336 R304 4 7K R306 4 7K 4 7K R334 R369 1K R312 1K R310 1K R370 1K R309 1K R372 1K 47p C304 47p C301 12K R340 12K R342 47 R320 47 R327 47 R318 47 R346 47 R344 47 R323 47 R348 R325 47 47 R350 75 R317 75 R347 75 R343 75 R319 75 R349 75 R322 470 R345 100p C322 100p C318 100p C3...

Page 41: ... TJC3S 04A 1 2 3 4 5V S 5V S V403 BC847AW V404 BC847AW R412 1K R414 1K R413 10K GND D R411 10K R432 100K R436 100K KEY 001 C1 X402 TJC10S 03A 1 2 3 K401 R433 4 3K 1 C458 10n C430 100n C415 100n C434 100n C407 100n C422 100n C435 100n C431 100n C428 100n C421 100n C414 100n C401 100n N401 MP1482 C165 1 BS 2 IN 3 SW 4 GND 5 FB 6 COMP 7 EN 8 SS N403 MP1482 C165 1 BS 2 IN 3 SW 4 GND 5 FB 6 COMP 7 EN 8...

Page 42: ...Power ...

Page 43: ...Backlight ...

Page 44: ...IR Key ...

Page 45: ...1210 LF 5272564002 EN25Q64 104HIP 5275711001 TAS5711 5270164002 K4T1G164QE HCF7 5524050028 FT2112 IR board XI6KH0130910 Key board XI6KQ0020510 Power board XI6HE0432010 Remote control XI6010900501 Panel XI5203228202 RC 905 0A CLAA215FA04 000 APPENDIX A Main assembly 9222KH5110 LED 22XR10F MAIN COMPONENT AND IT S NO ...

Page 46: ...APPENDIX B Exploded view LED 22XR10F ...

Page 47: ... assembly 7 Back cover assembly 8 Adjustable clasp 9 Power cord 10 Power cord clip 11 Pedestal assembly 12 Standing pole assembly 13 Bracket of power cord clip 14 Touching key board assembly 15 Rotor assembly 16 Speaker assembly 17 IR asembly 18 Light guided pole 19 Interface baffle side Note design and specification are subject to change without notice ...

Page 48: ...XI5602510001 Power cord 1 10 XI572011201C Power cord clip 1 11 XI6151220000 Pedestal assembly 1 12 XI6156105000 Standing pole assembly 1 13 XI58B0A4231A Bracket of power cord clip 1 14 XI635KH00801 Touching key board assembly 1 15 XI6158115000 Rotor assembly 1 16 XI617081500A Speaker assembly 1 17 XI635KH00800 IR asembly 1 18 XI570031901A Light guided pole 1 19 XI5810D72410 Interface baffle side 1...

Page 49: ......

Page 50: ...e sure to ask an authorized service personnel to carry out setup 2 Thoroughly read this instruction before setup and follow the steps below precisely 3 The wall to be mounted should be made from solid materials Only use accessories supplied by the manufacturer 4 Very carefully handle the unit during setup We are not liable for any damage or injury caused by mishandling or improper installation 5 B...

Page 51: ...July 2010 ...

Reviews: