background image

Using the 

Sanyo Digi-Recorder


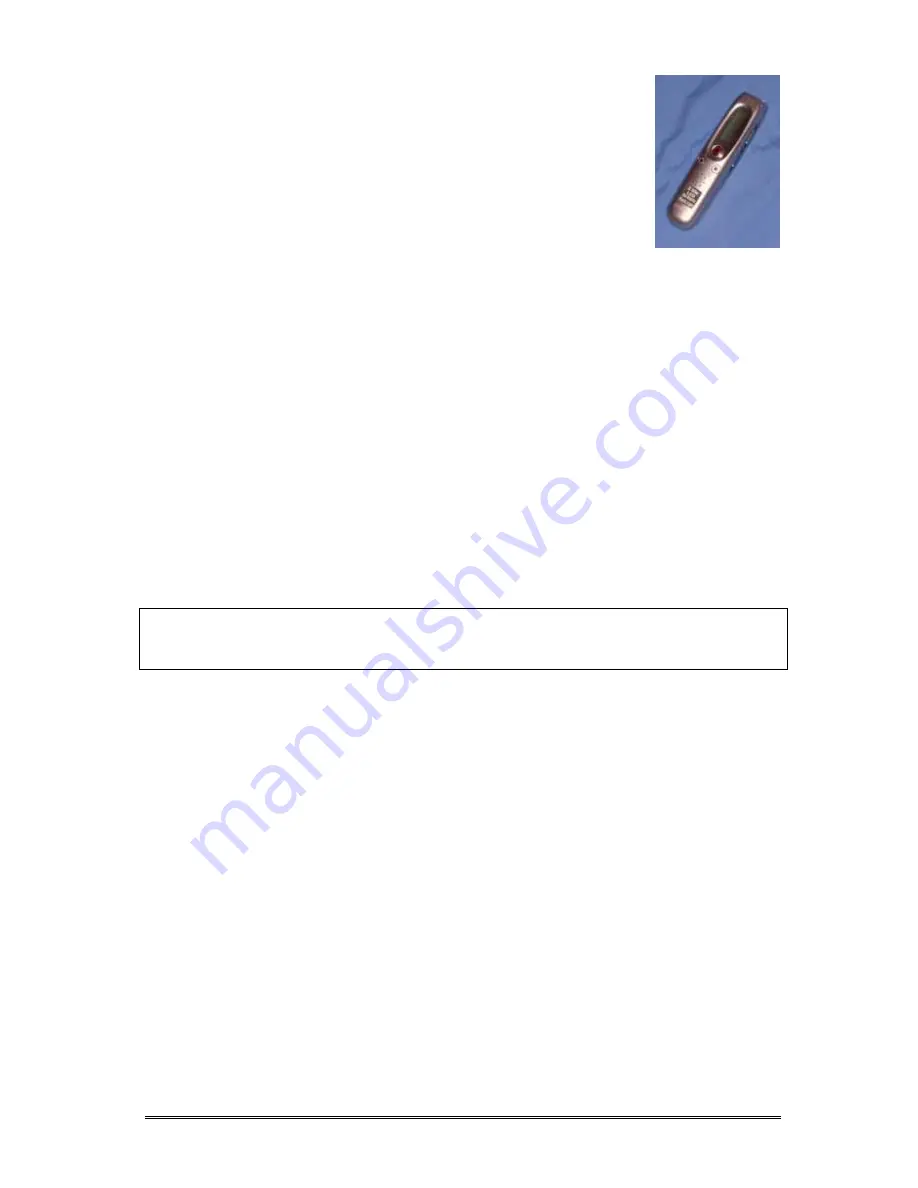
Model: Sanyo ICR-A190M (Silver) 

Ralph Cullimore, e-Learning Co-ordinator 
Devon ACL 
May 2007 


Introduction 

The Sanyo ICR-A190M is a digital voice recorder that can be used to record speech and 
then play it back again.  The speech is recorded ‘digitally’ to the built-in electronic memory 
in the form of ‘MP3’ files.  A large number of MP3 files can be stored on the recorder and 
then found again easily for playback.  The ICR-A190M has 4 ‘folders’ within its memory, 
labelled A, B, C and D to allow recorded files to be grouped together to make finding them a 
little easier.  Files can be readily transferred from the recorder to a computer from where 
they can be burned onto a CD, emailed to someone or simply kept for future reference. As 
well as A, B, C and D, there is also a fifth folder reserved just for ‘music’ files copied across 
from a computer for playback via the ICR-A190M. 
 
The recorder itself is small– about 11cm x 3cm x 2cm – and powered by two AAA batteries.  
It has 128 MB of memory and each of the 5 folders can hold up to 99 separate recording 
files.  The maximum total length of the recordings on the recorder is around 4¼ hours at 
‘High Quality’ or around 7 hours at ‘Standard’ recording quality.  There is a small built-in 
speaker which is useful for giving immediate reassurance that the recording was successful.  
There is also an ‘earphone’ socket which can be used for individual listening or used to 
connect the device to larger, powered, speakers for playback to a group. 


Part A - Setting it Up 


A1. Inserting the Batteries 

Turn the recorder over and slide the battery cover off in the direction shown under the word 
‘OPEN’.  Insert two AAA alkaline batteries as indicated by the markings in the battery 
compartment (ie flat ends of batteries against springs) then slide the battery cover back on. 
 

A2. Turning On and Off 

There is via a slider switch on the back of the recorder labelled POWER/HOLD. 
 
Sliding this switch one way turns the unit ON. 
 
What happens when you slide the switch the other way depends on what you are doing at 
the time.  If the recorder is doing nothing, then sliding the switch simply turns it OFF.  
However, if you are recording something, or playing something back, the switch puts the 
recorder into ‘Hold’ mode – see next section.  To get out of Hold mode, slide the switch 
back again. 
 
Auto-off.  If you leave the recorder on but don’t do anything for around 15 minutes it will 
automatically turn itself off, although the slider switch remains in the same position.  Slide 
the switch back then forwards and the unit should return to normal. 

R Cullimore - Using Sanyo icr-a190 digi-rec v4 - 1 May 07.doc


Page 1 of 8 

Summary of Contents for ICR-A190M

Page 1: ...y There is a small built in speaker which is useful for giving immediate reassurance that the recording was successful There is also an earphone socket which can be used for individual listening or used to connect the device to larger powered speakers for playback to a group Part A Setting it Up A1 Inserting the Batteries Turn the recorder over and slide the battery cover off in the direction show...

Page 2: ...CH if necessary 9 Press PLAY to move into the 24hr 12hr option 10 Use the SKIP SEARCH button to change from 24hr to 12hr if required 11 Press PLAY to move into the hour and use SKIP SEARCH if necessary 12 Press PLAY to move into the minutes and use SKIP SEARCH if necessary 13 Press PLAY to finish then press STOP twice to get out altogether A5 Setting the Recording Mode The ICR A190M has 4 recordin...

Page 3: ...st of the information applies to other situations as well B1 Recording 1 Select the folder you want to use by pressing the FOLDER REPEAT button until the letter for that folder is shown at the top of the display with a square round it The ICR A190M has 4 folders labelled A D for recording You might choose each folder for a different purpose eg all initial assessments go into folder A all on course...

Page 4: ...ounter then release To listen repeatedly to a 5 second segment listen to the recording as normal then at the appropriate point press FOLDER REPEAT and the last 5 seconds will be repeated again and again To carry on as normal press FOLDER REPEAT a second time To hear a recording a bit slower or a bit faster press PLAY again during playback once for slower twice for faster third time to get back to ...

Page 5: ...5 and the old 17 shuffles back to be 16 Sounds confusing but easy to get used to At step 3 only press ERASE briefly If you hold it for 2 seconds or more you end up erasing everything in that folder which can be useful but only if you intended to do it B5 How much time left To find out how much free space time there is left on the recorder simply look at the display when the recorder is doing nothi...

Page 6: ...e computer The recorder screen should then show symbols which indicate it is connected If you know how to copy files from a USB device eg a pen or flash drive you can do so in the normal way If you re not sure look at sections C2 and C3 below C2 Locating the recordings When you plug the recorder into the USB port one of two things will normally happen a small window headed Removable Disk appears o...

Page 7: ... window click File New Folder You should then see a new folder appear in the right of the window with its title probably new folder highlighted in blue 3 Type in an appropriate name for this new folder and press Enter on the keyboard This new name should replace the one highlighted in blue 4 Repeat the process to create more folders if required Copying files from the recorder to the PC 1 In the le...

Page 8: ...order This leaves the original file exactly as it was and makes a copy of it on the recorder You can also use the recorder as a portable memory device by copying files across to its DATA folder Note that once unplugged from the PC there is no way of seeing the DATA folder on the recorder itself until you plug it back in to a PC again C5 Safely removing the recorder To avoid damaging data files you...

Reviews: