background image

TM

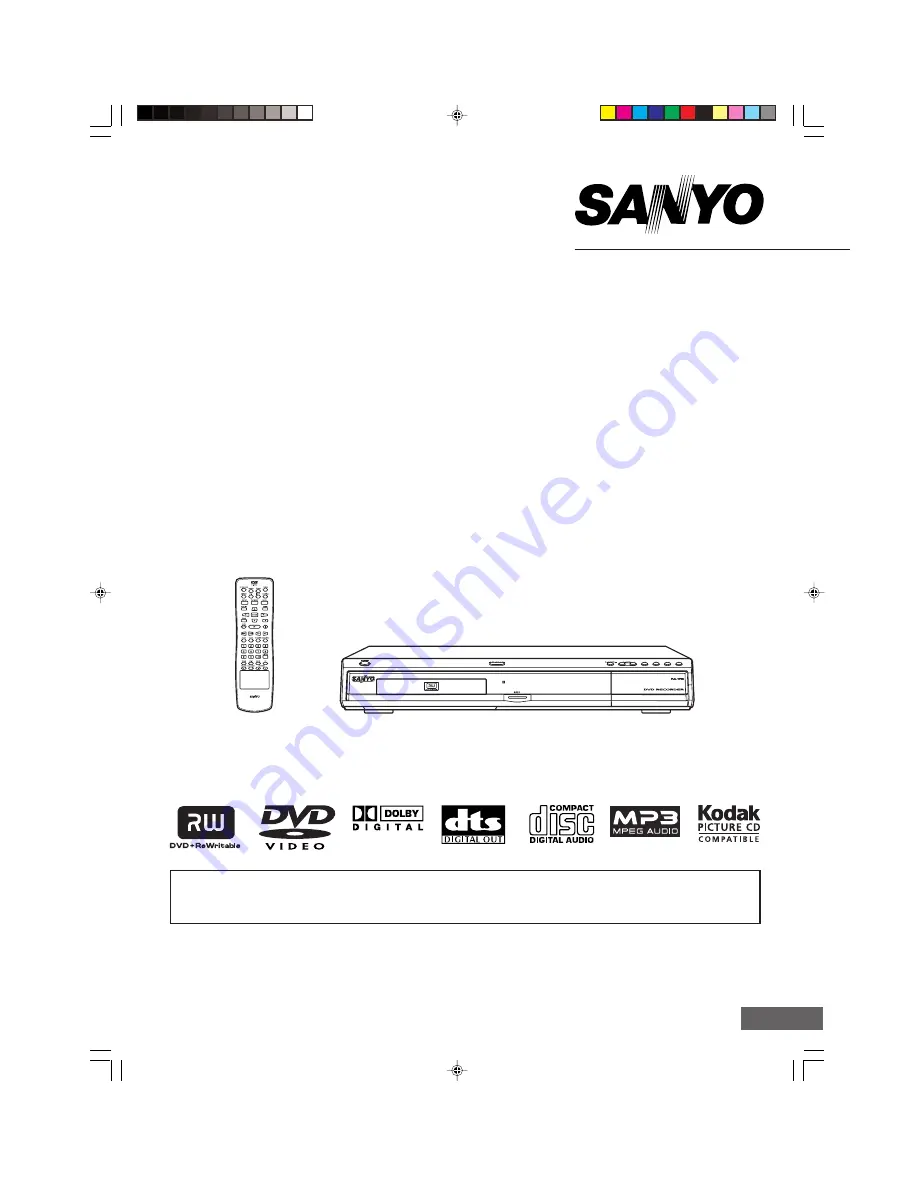
REMOTE CONTROLLER RB-DRW500

®

TM

INSTRUCTION MANUAL

DVD Video Recorder

1AD6P1P2047--  DRW-500, Issue Number 1

D

V

R-500

SANYO’S HELP-LINE

Call the toll-free number below if you have any difficulties operating this product.
1-800-813-3435 (Weekdays: 7:30 AM - 4:00 PM Central Time)

English

Please Read This Manual.

We recommend that you read this manual carefully before connecting your DVD Video Recorder and operating it for
the first time.
Keep the manual in a safe place for future reference.

Summary of Contents for DVR-500

Page 1: ...e toll free number below if you have any difficulties operating this product 1 800 813 3435 Weekdays 7 30 AM 4 00 PM Central Time English Please Read This Manual We recommend that you read this manual carefully before connecting your DVD Video Recorder and operating it for the first time Keep the manual in a safe place for future reference ...

Page 2: ...Recording TV Programs E41 Timer Recording E43 Recording from an External Equipment VCR etc E43 Disc Playback E44 Preparations E44 Basic Playback E45 Stopping Playback E45 Selecting a Top Menu E46 Selecting a DVD Menu E46 Chapter Track Skip E46 Title or Chapter Search E46 Time Search E46 Time Search CD E47 Track Search CD E47 Fast Playback E47 Slow Motion Playback E47 Still Picture Pause E47 Frame ...

Page 3: ... manufacturer s instructions have been adhered to 11 Power Sources This product should be operated only from the type of power source indicated on the marking label If you are not sure of the type of power supply to your home consult your product dealer or local power company For products intended to operate from battery power or other sources refer to the operating instructions 12 Grounding or Po...

Page 4: ...covers may expose you to dangerous voltage or other hazards Refer all servicing to qualified service personnel 20 Damage Requiring Service Unplug this product from the wall outlet and refer servicing to qualified service personnel under the following conditions a When the power supply cord or plug is damaged b If liquid has been spilled or objects have fallen into the product c If the product has ...

Page 5: ...rity to operate this equipment Note This equipment has been tested and found to comply with the limits for a Class B digital device pursuant to Part 15 of the FCC Rules These limits are designed to provide reasonable protection against harmful interference in a residential installation This equipment generates uses and can radiate radio frequency energy and if not installed and used in accordance ...

Page 6: ...cond Audio Program indicator SAP 14 Timer indicator 0 15 Message or number indicators Title chapter track playing time or other information 16 Pause indicator k 17 CD indicator CD 18 Stereo indictor ST 19 Dolby Digital indicator s DIGITAL Back Panel 1 VHF UHF antenna input jack ANTENNA IN 2 VHF UHF antenna output jack ANTENNA OUT 3 RF output channel switch RF OUTPUT CHANNEL 4 1st AV input jacks AV...

Page 7: ...cord button m RECORD 24 Clear button CLEAR 25 Edit button EDIT 26 Number buttons 1 9 0 10 27 Clock button CLOCK 28 Zoom button ZOOM 29 Skip Next Previous buttons f e 30 Slow motion playback button Ia 31 Program button PROG 32 Subtitle button SUBTITLE 33 Setup button SETUP 34 A B repeat button A B 35 Repeat button REPEAT REMOTE CONTROL Inserting batteries 1 2 Note Remove the batteries if the remote...

Page 8: ... sure to remove a disc which may be inside and turn the power off Then unplug the power cord from the AC outlet after 10 seconds Carrying the unit with a disc inside may damage the disc and or the unit Do not install this equipment in a confined space such as a book case or built in cabinet FOR SAFE AND EFFICIENT OPERATION Press q OPEN CLOSE or OPEN CLOSE on the remote control when closing the dis...

Page 9: ...nnels Note to CATV system installer This reminder is provided to call the CATV system installer s attention to Section 820 40 of the NEC which provides guidelines for proper grounding and in particular specifies that the cable ground shall be connected to the grounding system of the building as close to the point of cable entry as practical Notes If the antenna is a flat cable 300 ohm twin lead ca...

Page 10: ...ting Set your TV to either channel 3 or channel 4 Choose a channel that is not used for broadcasting in your area Then set the RF OUTPUT CHANNEL switch to channel 3 or 4 to match the channel selected on the TV This is your unit channel The TV must be set to this channel whenever the unit is used for playing a disc or watching a TV program If in doubt check with your local cable company 75 ohm coax...

Page 11: ...hm coaxial antenna cable supplied 75 ohm coaxial antenna cable not supplied TV CATV 75 ohm coaxial antenna cable not supplied DVD recorder Partial back panel Cable box not supplied 75 ohm coaxial antenna cable supplied Example Connecting a cable box with many scrambled channels Use this connection if your cable system scrambles all or most channels Connect the cable box to the unit first Notes The...

Page 12: ...acks Connect a component video cable not supplied as shown below The VIDEO OUT or S VIDEO OUT jack connection is not necessary You can enjoy high quality picture images For AUDIO connection see page E12 If you use a TV with Progressive scan Capability set the unit to the PROGRESSIVE mode See page E44 DVD recorder Partial back panel To VIDEO OUT jack Yellow Audio Video cable supplied Yellow TV DVD ...

Page 13: ...for video connection See page E11 Notes If your TV has one audio input jack connect the AUDIO OUT jacks of the unit to a Y cable adaptor not supplied then connect it to the TV s audio input jack Please consult your local audio video dealer Do not connect the AV1 IN or AV2 IN AUDIO L R jacks of the unit to your TV s audio output jacks at the same time DVD recorder Partial back panel To AUDIO OUT ja...

Page 14: ...ft speaker Surround left speaker Surround right speaker To enjoy Dolby Digital or DTS sound Set Digital Out to ON in Audio Setup screen See page E31 or or To Coaxial DIGITAL AUDIO OUT jack Coaxial digital cable not supplied To Optical DIGITAL AUDIO OUT jack Optical digital cable not supplied DVD recorder Partial back panel Before connecting remove the protective cap from the jack Replace the cover...

Page 15: ...e used for a long time disconnect the AC plug from the AC outlet Notes Before plugging the power cord into an AC outlet make sure that all the connections have been made The unit is not disconnected from the AC power unless the power cord is unplugged from the AC outlet CAUTION TO PREVENT ELECTRIC SHOCK MATCH WIDE BLADE OF PLUG TO WIDE SLOT FULLY INSERT ATTENTION POUR ÉVITER LES CHOC ÉLECTRIQUES I...

Page 16: ...als cannot be recorded Example Connection for recording from other equipment Connect a VCR or similar recording equipment to the AV1 IN or AV2 IN jacks See AV Select on page E32 Note Do not connect the video yellow jack when using an S video cable not supplied VCR etc Red R White L Yellow To AV1 IN jacks Audio Video cable not supplied S video cable not supplied DVD recorder To AV2 IN jacks Audio V...

Page 17: ...ow jack when using an S video cable not supplied If you pass the DVD recorder signals via the VCR you may not receive a clear image on the TV screen To AUDIO OUT jacks To VIDEO OUT jack Yellow Audio Video cable not supplied S video cable not supplied VCR etc Red R White L To AV input jacks DVD recorder Partial back panel Need help Call 1 800 813 3435 Please consult your local audio video dealer CA...

Page 18: ...cable box or cable box to this unit using the AV1 IN jacks First disconnect the AC power cord from an AC outlet See also the owner s manual supplied with the connected equipment Red R White L Yellow To AV1 IN jacks Audio Video cable not supplied To AV output jacks Satellite receiver or Cable box etc DVD recorder Partial back panel Need help Call 1 800 813 3435 Please consult your local audio video...

Page 19: ...es not have Daylight Saving Time DST function You must set the clock when summer switches to winter and vice versa Preparations Turn on the TV and select the appropriate video input to suit the connections to this unit Refer to your TV s owner manual To Set the Clock 1 Press POWER to turn on the power POWER ON appears briefly on the FL display SANYO logo appears on the TV screen 2 Press SETUP in N...

Page 20: ...ure which allows channels to skip up or down to the next channel set into memory skipping over unwanted channels Before selecting channels they must be programmed into the memory In addition to normal VHF and UHF channels this unit can receive up to 125 Cable TV channels To use this unit with an antenna set the Channel Setup menu Important Note The antenna must be connected to this unit See pages ...

Page 21: ...Scan Channel List Modify Channel Tuner Select Scanning for Channels CATV Total Channels Found 001 Need help Call 1 800 813 3435 Auto CH Scan 1 Select Auto CH Scan 2 Press ENTER or a A message screen appears Channel List 1 Select Channel List 2 Press ENTER or a Channel List screen appears Example Note If you want to receive or not receive the channel press p or o to select the channel and then pres...

Page 22: ...age for bilingual transmission or for other purposes 1 Select MTS Select 2 Press ENTER or a MTS Select Setup screen appears 3 Press a to select the sub menu 4 Press p or o to select Stereo SAP or MONO Usually select Stereo 5 Press ENTER appears 6 Press b repeatedly to return to Recording Setup screen Note Press SETUP to close the screen Modify Channel 1 Select Modify Channel 2 Press ENTER or a CAT...

Page 23: ...power POWER ON appears briefly on the FL display SANYO logo appears on the TV screen 2 Press SETUP in NO DISC mode or full stop mode Menu screen appears on the TV screen 3 Press p or o to select the desired menu and go to the reference page Need help Call 1 800 813 3435 BEFORE INITIAL SETTING Important Note In this instruction manual the language in on screen display is English If you change the l...

Page 24: ... 800 813 3435 2 Press ENTER or a Recording Setup is highlighted 3 Press ENTER or a again Recording Setup screen appears Setting Record Mode 1 Select Record Mode Recording Setup 4 Press o or p to select the item Record Mode See the right column Auto Chapter See page E24 Set Clock See page E18 Channel Setup See page E19 2 Press ENTER or a to select the sub menu 3 Press p or o to select the desired r...

Page 25: ...title are made automatically on the disc by this setting 1 Select Auto Chapter 2 Press ENTER or a to select the sub menu 3 Press p or o to select the desired time 4 Press ENTER appears 5 Press b to return to Auto Chapter Notes To set Set Clock see SETTING THE CLOCK on page E18 To set Channel Setup see TUNER SETTING on page E19 Press b again to return to Menu screen Press SETUP to close the screen ...

Page 26: ...exit Current selection This is a setup for playing back DVD Video discs Preparations DVD Control Disc Menu Angle Mark Audio Subtitle Parental Control 1 Select Setup Menu in Menu screen See page E22 Setting Disc Menu 1 Select Disc Menu 2 Press ENTER or a to select the sub menu 2 Press ENTER or a Recording Setup is highlighted 3 Press p to select DVD Control 4 Press ENTER or a DVD Control Setup scre...

Page 27: ...rrent selection Disc Menu Angle Mark Audio Subtitle Parental Control 4 5 a b ENTER Setting Angle Mark To show the angle mark when playing back DVD Video discs recorded with multi angle select this setting 1 Select Angle Mark 2 Press ENTER or a to select the sub menu 3 Press p or o to select ON or OFF 4 Press ENTER appears 5 Press b to return to Angle Mark Need help Call 1 800 813 3435 Setting Audi...

Page 28: ...ory 4 Press p to select Done 5 Press ENTER The parental lock level screen appears Example 6 Press ENTER or a to select the sub menu 7 Press p or o to select the parental lock level Parental Control MPAA Motion Picture Association of America Guideline is a rating system that provides advanced cautionary information to parent about the content of movie programs The parental lock level is equivalent ...

Page 29: ... 3435 Note If you want to cancel it select Back and then press ENTER DVD Control Setup screen returns 3 Enter the password Please refer to Choosing Rating on the previous page If you use this unit for first time enter 0 0 0 and 0 4 Press p repeatedly to select Done 5 Press ENTER The parental lock level screen appears 6 Press p to select Set Password 7 Press ENTER New Password screen appears 8 Pres...

Page 30: ...lay is English If you change the language please follow the selected language in on screen display Preparations General Menu Language 1 Select Setup Menu in Menu screen See page E22 General 2 Press ENTER or a Recording Setup is highlighted 3 Press p to select General 4 Press ENTER or a General Setup screen appears Setting Menu Language 1 Press ENTER or a to select the sub menu Need help Call 1 800...

Page 31: ...ect the appropriate setting for your TV screen size 4 3 PS Panscan Select when a conventional TV set is connected When the wide screen disc is played back it displays pictures cropped to fill to your TV screen The left and right edges are cut off 4 3 LB Letterbox Select when a conventional TV set is connected When the wide screen disc is played back the black bands appear at the top and bottom of ...

Page 32: ...ng Setup is highlighted 3 Press p to select Audio 4 Press ENTER or a Audio Setup screen appears Setting Digital Out If the coaxial or optical DIGITAL AUDIO OUT jack is connected to the digital amplifier you must set as follows 1 Select Digital Out 2 Press ENTER or a to select the sub menu 3 Press p or o to select ON or OFF 4 Press ENTER appears 5 Press b to return to Digital Out Setting DRC Dynami...

Page 33: ... Menu in Menu screen See page E22 AV Select 2 Press ENTER or a Recording Setup is highlighted 3 Press p to select AV Select 4 Press ENTER or a AV Select screen appears Setting AV1 Select and AV2 Select 1 Press p or o to select AV1 Select or AV2 Select AV1 Select When AV1 IN jacks are used AV2 Select When AV2 IN jacks are used 2 Press ENTER or a to select the sub menu Need help Call 1 800 813 3435 ...

Page 34: ...rded during the next one year period These settings are retained in the program memory and will repeat as long as a recordable disc is loaded in the unit Note The clock must be set before this setting See SETTING THE CLOCK on page E18 Preparations Record Status Record Time How Often Input Source TV Record Mode Title 1 Select Record Program in Menu screen See page E22 Record Status Setting Record T...

Page 35: ... Start 22 00 2004 05 03 End Verify the settings Press ENTER to edit Done Cancel Press SETUP to exit Record Time Record Day Input Source TV Record Mode Title 4 5 a b ENTER Number buttons Setting Record Day 1 Select Record Day Example 2 Press ENTER The calendar screen appears Important Note You may need extra operations during the setting If a message appears please follow the instructions displayed...

Page 36: ...o edit Done Cancel Press SETUP to exit Record Time Record Day Input Source TV Record Mode Title Record Show 21 30 AV1 SP 20040503 Start 22 00 2004 05 03 End Verify the settings Press ENTER to edit Done Cancel Press SETUP to exit Record Time Record Day Input Source TV Record Mode Title Record Show Press SETUP to exit Press to change settings 4 5 5 4 Tuner Input Source Done Back Setting TV Select th...

Page 37: ...0040503 Start 22 00 2004 05 03 End Verify the settings Press ENTER to edit Done Cancel Press SETUP to exit Record Time Record Day Input Source TV Record Mode Title Setting Record Mode 1 Select Record Mode Example 3 Press o or p to select HQ SP LP EP or EP Please refer to Setting Record Mode on page E23 4 Press ENTER or a to select Done 5 Press ENTER Record mode is set The screen returns Example Se...

Page 38: ...ed on the TV screen Record List 1 Select Record List in Menu screen See pages E22 and E33 2 Press ENTER or a My Record List screen appears Example Do one of the followings Delete 1 Select Delete 2 Press ENTER The confirmation screen appears 3 Select Confirm 4 Press ENTER My Record List screen returns Edit 1 Select Edit 2 Press ENTER Edit My Record List screen appears 3 Edit the items again Please ...

Page 39: ...Mitsubishi 2 4x 4x Prodisc 2 4x Richo 2 4x 4x Taiyo Yuden 4x CAUTION Only the above types of discs can be recorded on this unit DVD RAM DVD RW DVD R DVD ROM CD ROM SVCD CVD VCD CD R CD RW Audio CD etc cannot be recorded Fingerprints and small scratches on a disc can affect recording and or playback performance Please take proper care of your discs In some cases you may not be able to add new recor...

Page 40: ...t expose it to direct sunlight high humidity or high temperatures for extended periods of time Do not apply paper or write anything on either side of the disc Sharp writing instruments or the inks used in some felt tip pens may damage the surfaces of the disc Region Number DVD Video disc only Region number Regional restriction code is built in to the unit and DVD Video discs Region number 1 or ALL...

Page 41: ...k that the disc has enough available space for recording Set Record Mode and Auto Chapter See pages E23 and E24 Select Stereo in MTS Multi channel TV Sound Select on page E21 Do not touch the disc tray while it is moving Never place anything except a disc on the disc tray Foreign objects can damage the unit Do not apply excessive force to the disc tray Only one disc must be placed on the disc tray...

Page 42: ... Press it again to restart recording To stop recording Press n during recording Please wait until CLOSING PLEASE WAIT STOP disappears on the TV screen Note It takes a while to complete closing the disc You may not watch TV program while closing A title menu screen appears on the TV screen The TV program is recorded on the disc The additional recording information is also stored on the disc Example...

Page 43: ...ono Mono Mono SAP Stereo Right Stereo SAP STEREO Mono Mono Mono SAP Stereo Stereo Stereo SAP Mono LEFT Mono Mono RIGHT STEREO Mono SAP Stereo Stereo SAP SAP LEFT Mono Mono Mono SAP Stereo Left Stereo SAP Mono SAP RIGHT Mono Mono Mono SAP SAP Stereo Right Stereo SAP SAP SAP STEREO Mono Mono Mono SAP Stereo Stereo Stereo SAP Mono MTS select AUDIO select TV program Recording sound Recording stereo pr...

Page 44: ... turns on automatically and recording starts When the timer OFF time arrives the power turns off automatically and it is set to the standby mode Notes If there is not enough space on the disc as much of the program as possible will be recorded on the disc Be sure to check and or change the disc after every timer recording has been completed Recording from an External Equipment VCR etc Connect a VC...

Page 45: ...e press and hold down a on the unit until PROGRESSIVE TV appears briefly on the TV screen If you want to switch the setting back again press and hold down a a a a a until INTERLACE TV appears briefly on the TV screen Note In PROGRESSIVE TV mode the closed caption may not appear on the TV screen Progressive Scanning While interlaced scanning produces one frame of video in two fields progressive sca...

Page 46: ... playback Elapsed playing time appears on the TV screen If a menu screen appears on the TV screen 1 Press o a p or b or the number buttons to select the desired menu 2 Press ENTER Playback of the selected menu starts Note For more details please refer to the jacket or case of the disc Notes Press DISPLAY repeatedly until the elapsed playing time disappears if necessary See page E50 In some discs e...

Page 47: ...tle or chapter number will be changed Example TITLE 24 28 CHAPTER 015 035 Note If you make a mistake enter the title or chapter number again 4 Press a Play Playback starts from the selected title or chapter Time Search 1 Press SEARCH MODE twice during playback The time search screen appears on the TV screen Example TITLE 01 02 TIME 2 Press the number button s to enter the time Examples 3 minutes 4...

Page 48: ...X v FR 8X v FR 16X 4 steps Press a Play to return to normal playback Note The sound is muted during fast playback in DVD Slow Motion Playback DVD Video DVD RW DVD R Press SLOW repeatedly to select the forward or reverse slow speed playback SF 2X v SF 4X v SF 8X v SR 2X v SR 4X v SR 8X Forward 3 steps Reverse 3 steps Press a Play to return to normal playback Note The sound is muted during slow moti...

Page 49: ...track being played REP ALL REP ALL Repeat all tracks REPEAT OFF Normal playback mode Designated Range Repeat Playback A B Repeat Point A Point B 1 Press A B during playback at the beginning of the section you want to repeat Point A A TO B SET A appears briefly on the TV screen REP A appears on the FL display 2 Press A B again at the end of the section you want to repeat Point B DVD Video DVD RW DV...

Page 50: ...e disc is replaced select the subtitle language again If the subtitle language is not necessary press SUBTITLE to select SUBTITLE OFF Please refer to Setting Subtitle on page E26 Selecting Audio Soundtrack Language Multi Language This operation works only with discs on which multiple audio soundtrack languages are recorded Press AUDIO repeatedly during playback until the desired language appears o...

Page 51: ...N appears briefly on the TV screen SHUFF appears on the FL display 2 Press a Play to start shuffle playback The unit will automatically select tracks at random Note To stop shuffle playback press n and then press SHUFFLE SHUFFLE OFF appears briefly on the TV screen Programmed Playback CD Up to 99 selections can be programmed Programming procedure 1 Press PROG in the stop mode PROGRAM P00 00 appear...

Page 52: ...nit can recognize up to 999 files or folders per disc The CD with 1000 files or folders and over is not available to this unit MP3 CDs may not be played in the recorded order 1 Please use the MP3 software with the function that can record data alphabetically or numerically 2 Please refrain from making many sub folders by preference However some CD R RWs cannot be played back depending on the recor...

Page 53: ...o skip back to the previous file Previous appears briefly on the TV screen Repeat Playback Press REPEAT in the stop mode Each time the button is pressed the repeat mode will be changed as follows Rep one Disc Repeat Folder Repeat Repeat off To Check the Elapsed Playing Time Press DISPLAY during playback Each time the button is pressed various playing time appears File Elapsed and elapsed playing t...

Page 54: ...ockwise o Change it to the vertically reversed image picture p Change it to the mirror reversed image picture If you press e or f during the slide show it skips to the next picture or previous picture NEXT or PREVIOUS appears briefly After the last picture has been displayed the thumbnail pictures maximum 9 picture appear on the TV screen To stop the slide show press n The thumbnail pictures appea...

Page 55: ...mage picture p Change it to the mirror reversed image picture If you press e or f during the slide show it skips to the next picture or previous picture NEXT or PREVIOUS appears briefly To stop the slide show press n Notes If the disc is loaded with the label side downward or if a badly scratched disc is loaded NO DISC or NO PLAY appears on the TV screen If this occurs load the disc correctly or r...

Page 56: ...ed 3 Press ENTER or a to select the sub menu 4 Press p or o to select the item and go to the reference page Play Edit Titles See the right column Edit Disc See page E57 Notes Once the DVD R disc is finalized you cannot edit or record on the disc You may lose the edited contents if you remove the disc or a timer recording starts while editing Important Note You may need extra operations during this...

Page 57: ...R Note Select the title first See the previous page 1 Select TITLE RENAME TITLE DELETE DVD RW Note Select the title first See the previous page 1 Select TITLE DELETE 2 Press ENTER Rename screen appears Need help Call 1 800 813 3435 2 Press ENTER A message appears 3 Press b to select Yes Note If it is not necessary select No and then press ENTER 4 Press ENTER Please wait until PLEASE WAIT disappear...

Page 58: ...DVD RW You can delete all titles and create a blank disc Make sure nothing important is left on the disc 1 Select Format Disc 2 Press ENTER A message appears 3 Press b to select Yes Note If it is not necessary select No and then press ENTER 4 Press ENTER to start to erase Please wait until erasing is finished Disc Operations screen returns Finalize Disc DVD R After you finalize the disc you can pl...

Page 59: ...press ENTER 4 Press ENTER A message appears Rename Disc DVD RW DVD R You can enter up to 10 characters for a disc name 1 Select Rename Disc 2 Press ENTER New Disc Name screen appears 3 Press the directional arrow button a b o p to select the letter or number Note If it is not necessary select Back and then press ENTER 4 Press ENTER The character appears in the box 5 Repeat steps 3 and 4 to make th...

Page 60: ... the TV Load a disc See page E45 Clean the disc or replace it Load a playable or recordable disc See page E38 Refer to your TV s owner manual Select the appropriate setting for your TV screen size See page E30 The feature or action cannot be completed at this time because The operation is prohibited by the unit or the disc The feature is not available at the moment The DVD software restricts it Th...

Page 61: ... was not finalized However the disc cannot be played back depending on the recording condition Cancel the parental lock function or change the rating level Reset it after play See page E27 POSSIBLE CAUSE An unrecordable disc is loaded The disc is upside down The disc is set to Protect Disc The disc space is not enough The clock setting is not correct The timer setting is not correct or overlapped ...

Page 62: ...nutes EP Approx 360 minutes TV system NTSC standard system Tuner channel range VHF 2 13 UHF 14 69 CATV 1 125 RF converter Built in VHF converter Converter output Channel 3 or 4 selectable Time indication 24 hour system Timer 1 year 15 event programmable Outputs COMPONENT VIDEO OUT Y 1 0 Vp p 75 Ω PB 0 7 Vp p 75 Ω PR 0 7 Vp p 75 Ω VIDEO 1 0 Vp p 75 Ω S VIDEO Y 1 0 Vp p 75 Ω C 0 286 Vp p 75 Ω DIGITA...

Page 63: ...SANYO Electric Co Ltd Printed in China ...

Reviews: