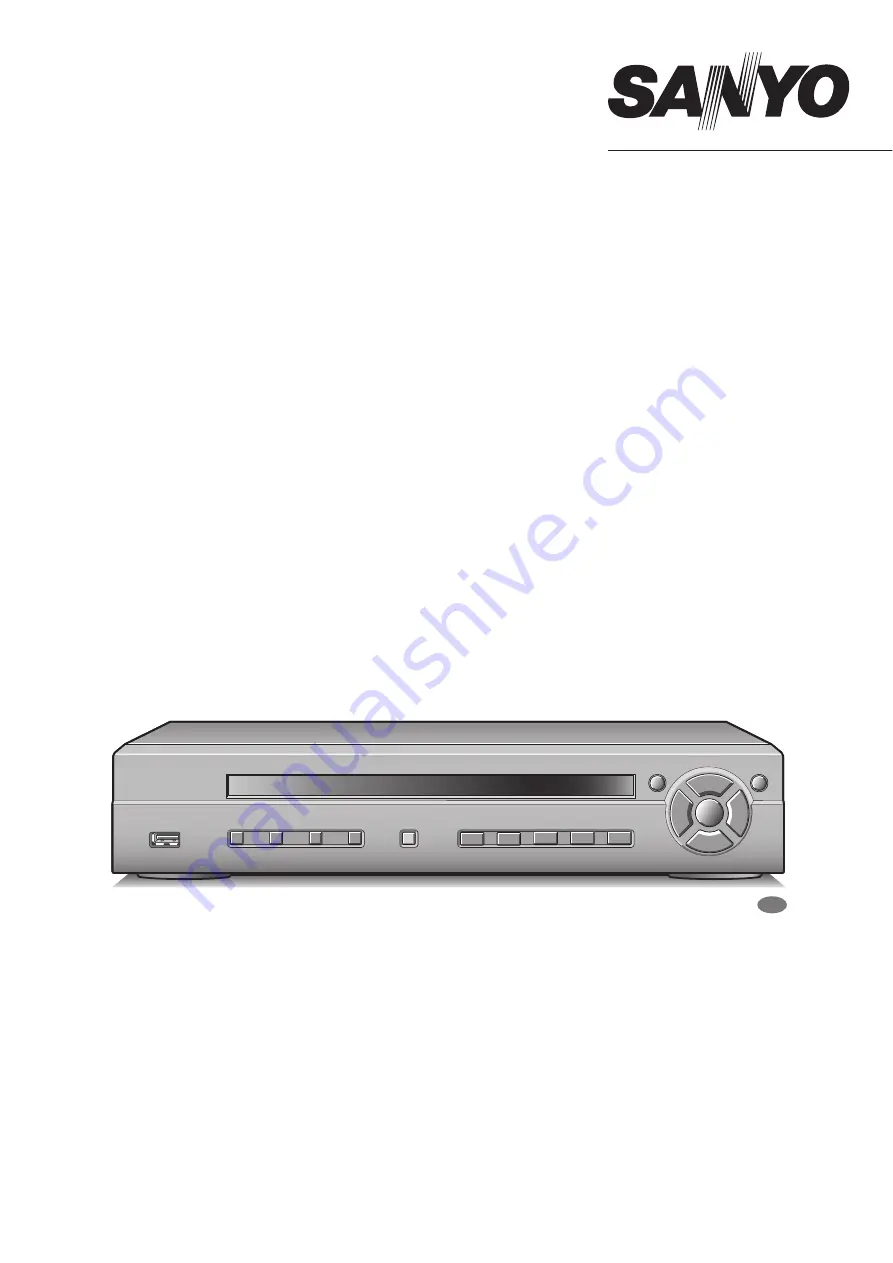
background image

DSR-2004

About this manual

Before installing and using this unit, please read this manual carefully.
Be sure to keep it handy for later reference.

INSTRUCTION MANUAL

Digital Video Recorder 

with Multiplexer Function

Refer to the included CD-ROM for the German, French, Spanish and Italian “INSTRUCTION MANUAL”.

Die “BEDIENUNGSANLEITUNG” in den Sprachen Deutsch, Französisch, Spanisch und Italienisch 
finden Sie auf der beiliegenden CD-ROM.

Utilisez le CD-ROM fourni pour consulter le “MANUEL D’INSTRUCTIONS” en allemand, français, 
espagnol et italien.

Consulte en el CD-ROM suministrado el “MANUAL DE INSTRUCCIONES” en alemán, francés, español e 
italiano.

Per il “MANUALE DI ISTRUZIONI” in Tedesco, Francese, Spagnolo e Italiano, fare riferimento al 
CD-ROM allegato.

GB

Summary of Contents for DSR-2004

Page 1: ...h and Italian INSTRUCTION MANUAL Die BEDIENUNGSANLEITUNG in den Sprachen Deutsch Französisch Spanisch und Italienisch finden Sie auf der beiliegenden CD ROM Utilisez le CD ROM fourni pour consulter le MANUEL D INSTRUCTIONS en allemand français espagnol et italien Consulte en el CD ROM suministrado el MANUAL DE INSTRUCCIONES en alemán francés español e italiano Per il MANUALE DI ISTRUZIONI in Tedes...

Page 2: ...ECORD settings 27 ASetting the RESOLUTION 27 BSetting a CHANNEL 27 CSetting the TIMER SET 28 SYSTEM settings 29 ASetting the DVR ID 29 BDESCRIPTION confirmation 29 CSetting the LOAD DEFAULT 29 DSetting an ADMIN PASSWORD 30 ESetting a NETWORK PASSWORD 31 FSetting the DATE FORMAT 31 GSetting the CLOCK SET 31 HSetting the PTZ CONTROL 31 ISetting the LANGUAGE 31 JSetting a REMOTE CONTROLLER ID 32 NETW...

Page 3: ...losure that may be of sufficient magnitude to constitute a risk of electric shock to persons The exclamation point within an equilateral triangle is intended to alert the user to the presence of important operating and maintenance servicing instructions in the literature accompanying the product This class B digital apparatus complies with Canadian ICES 003 CAUTION Danger of explosion if battery i...

Page 4: ...re the power consumption of the connected unit does not exceed the electrical rating of the extension cord Higher power consumption may result in heat generation and cause fire b Disassembly prohibited Do not place your hand inside this unit as this may cause fire and or electrocution Consult the dealership where this unit was purchased or factory shop for diagnostics adjustments and repairs b Do ...

Page 5: ...ctrocution b Do not touch the power plug with wet hands Doing so may result in electrocution b Do not sit on Doing so may cause the unit to fall be damaged and or result in injury b Make sure the cables are connected properly Connect and install the power cable and connection cable very carefully Tripping over the cable may result in the unit capsizing or falling and cause injury b Do not place he...

Page 6: ...ol air Dusty areas Areas that contain fire hazards Areas that contain magnetic items In the vicinity of volatile substances Areas where the unit will be exposed to constant vibration in trains cars etc b Cautionary points on condensation Droplets may form on the outside when very cold water is poured into a cup In the same way droplets may form around the internal components of this unit This is c...

Page 7: ...ect the AC adapter to a loose outlet Make sure the AC adapter is properly plugged to the outlet Do not use if the plug of the AC adapter is damaged Continued use when insecurely plugged may result in heat generation and cause fire and or electrocution When removing the AC adapter plug from the outlet do not pull forcefully Doing so may damage the plug and or the cable and cause fire and or electro...

Page 8: ...pon or staple it b Do not place the unit in an unstable position Doing so may result in the unit toppling or falling and cause injuries and or damages In the event that the unit has fallen or the casing has been damaged consult the dealership where this unit was purchased Continued use may result in fire electrocution and or breakdown b Precaution on unit positioning Do not use this unit where it ...

Page 9: ...nments The recorded content cannot be guaranteed It is recommended to periodically back up or mirror data in order to prevent the loss of data in the event of breakdowns recording faults or accidents bMaintaining this unit Turn the power off and remove the power plug from the outlet Wipe away any dust using a soft cloth When the stains are hard to remove Soak a cloth in water with diluted neutral ...

Page 10: ...tion b Hard disk 2 years 25 C environment The life expectancy of each part depends on the environment in which the unit is used However the head and motor are particularly prone to wear and deterioration Therefore writing errors are more likely to occur after two years of use b Cooling fan 3 years 25 C environment Cooling fan failure causes higher internal temperatures which may result in a faulty...

Page 11: ...wer off The hard disk continues to rotate for a short duration after the power has been turned off The unit is further susceptible to damage through shock and vibration during that period It is imperative that you do not move the unit during that time G Do not expose to shock or vibration Avoid placing this unit directly on the floor Make sure that the four stands attached to the base of this unit...

Page 12: ...ing of the monitored live image displayed G Automatic camera scrolling button SEQ P10 Automatically switches through and displays the images of each live H Quad screen display button QUAD P10 Displays a quad screen I Mark Copy button MARK COPY P21 Switches to image saving mode J Search button SEARCH P18 Switches to recorded images searching mode K Pan Tilt Zoom button PTZ P11 Switches the dome cam...

Page 13: ...the illustration and insert the power plug into the outlet The POWER indicator situated on the front panel blinks Basic connections Do not turn this unit on before all the connections are complete Read the instruction manual of each unit carefully Make sure each unit is connected properly as faulty connection may result in the unit emitting smoke and or being damaged Feed additional units with the...

Page 14: ...on manual of the device for information on how to connect Memo The type of network must be set on the NETWORK screen P33 Network connection ETHERNET LAN connection POWER MODE AUTO MENU Camera Sold separately Monitor Sold separately Computer Switching hub Ethernet cable Straight cable POWER MODE AUTO MENU Computer Monitor Sold separately Camera Sold separately Cross type Internet DHCP ADSL connecti...

Page 15: ...e disk is full 99 changes to FULL When the recording settings are set to overwrite and the hard disk is full 99 changes to which represents overwriting mode 5 Date and time display This unit manages the recorded videos according to their date and time Make sure the correct date and time are set in the menu setting P7 6 Camera channel display CH1 CH2 CH3 CH4 7 Recording display Factory default sett...

Page 16: ... PC monitor to the VGA terminal 1 Press the MENU button The PASSWORD input screen is displayed To return to the previous screen press the EXIT STOP button 2 Press the button 1 four times to enter 1111 and press the ENTER button The MAIN MENU screen is displayed 1111 is the factory default setting password We recommend you change the password to avoid unauthorized use P30 2 3 1 8 7 A Setting the te...

Page 17: ...15 MM DD YYYY DD MM YYYY YYYY MM DD Example 2006 12 15 MM DD YYYY DD MM YYYY The time on this CLOCK SET screen has not been calculated considering summer time SYSTEM DVR ID DVR DESCRIPTION LOAD DEFAULT ADMIN PASSWORD NETWORK PASSWORD DATE FORMAT YYYY MM DD CLOCK SET PTZ CONTROL LANGUAGE ENGLISH REMOTE CONTROLLER ID 0 D S T SUMMER TIME OFF UPDATE DATE TIME CLOCK SET 2006 12 15 10 20 30 CONFIRM CANC...

Page 18: ...splay 0 using the control button and move to the right using the control button 2 Display 3 using the control button and move to the right using the control button repeat to set other settings and press the ENTER button The summer time input selection screen is displayed again 4 Repeat the procedure to input the end date 31 August 23 00 C Setting the language LANGUAGE SYSTEM DVR ID DVR DESCRIPTION...

Page 19: ...s the SEQ button while in single screen display The cameras automatically switch in sequence starting with the channel of the camera being displayed If there is an audio input the audio also switches in channel sequence order Memo The sequence interval from one camera video to another can be set P25 2 Press the SEQ button once operations are complete The sequence mode is cancelled A C B A Single s...

Page 20: ...S using the control button and press the ENTER button 2 Adjust the zoom using the control button and adjust the focus position using the control button The following message is displayed on the screen during operations Up Down key Zoom In Out Left Right key Focus Near Far b Initializing the camera position Select INITIALIZE using the control button and press the ENTER button Once the initializatio...

Page 21: ...ily time slot set under the SCHEDULE screen of the recording settings 1 Press the REC STOP button while monitoring live videos R is displayed on the recording display and recording starts Memo Setting the OVERWRITE P37 ON Overwrites earlier data once the hard disk capacity is full OFF Stops recording operations once the hard disk capacity is full 2 Press the EXIT STOP button once operations are co...

Page 22: ...ct the level of sensitivity using the control button Selections 1 9 Low sensitivity 6 Select PRE RECORD using the control button and select the pre recording as necessary using the control button 7 Select POST EVENT RECORD using the control button and select the recording time as necessary using the control button Selections 2 30 SECONDS 8 Press the EXIT STOP button once operations are complete Pr...

Page 23: ...onnecting an external alarm to the OUT terminal of the external sensor 2 Select ALARM using the control button and select ON using the control button 3 Select ALARM DURATION using the control button and select the alarm signal output duration using the control button Selections 1 60 SECONDS 4 Press the EXIT STOP button once operations are complete Press the EXIT STOP button repeatedly to return to...

Page 24: ... same setting M 5 Press the EXIT STOP button once operations are complete Press the EXIT STOP button repeatedly to return to the live screen E BY SCHEDULE recording RESOLUTION CHANNEL FRAME RATE QUALITY The following settings are necessary when performing sensor detection MOTION ZONE MOTION SENSITIVITY SENSOR TYPE PRE RECORD POST EVENT RECORD RECORD RESOLUTION QUAD CHANNEL CH1 FRAME RATE 1 f s QUA...

Page 25: ...ress the ENTER button The TIMER SET CH2 screen is displayed The CH1 schedule is copied to CH2 Example 1 Copying the channel 1 schedule to channel 3 COPY FROM 0 3 6 9 12 15 18 21 24 ALL SUN MON TUE WED THU FRI SAT TIMER SET CH1 COPY FROM CH1 COPY TO CH1 C M S C M S C M S S C M S C M S C M S S C M S C M S C M S S M C M S C M S C M S S M C M S C M S C M S M C M S C M S C M C S M C M S C M S C C RECOR...

Page 26: ...GO LAST T D SEARCH TIMELINE SEARCH EVENT SEARCH b EVENT SEARCH P18 Search through a recorded video list by setting the date on the calendar display the camera channel and specify the type of recording b BOOKMARK P20 Search through copied still images or moving videos b The function of each button during playback e The fast forward speed changes each time it is pressed the symbol is displayed on th...

Page 27: ...t 5 Select the type of recording Mode to be searched using the control button and press the ENTER button A All types ALL M Recording activated by motion detection BY MOTION S Recording activated by sensor detection BY EXT SENSOR R Real time recording C Continuous recording CONTINUOUS Example Searching recordings activated by the motion detection M of the channel 2 of the camera The list screen is ...

Page 28: ... time sections to be played using the control button and press the ENTER button Playback starts When all the channels have been selected becomes red Each channel can be selected using the control buttons 6 Press the EXIT STOP button once operations are complete Press the EXIT STOP button repeatedly to return to the live screen 1 Press the SEARCH button The search menu screen is displayed 2 Select ...

Page 29: ...played back 1 Press the SEARCH button The menu is displayed 2 Select BOOKMARK using the control button and press the ENTER button The BOOKMARK screen is displayed If recordings are available the date is displayed in red Indicates that there are recordings in the previous month Indicates that there are recordings in the next month Move the cursor to the day of the first recording in the month displ...

Page 30: ... that there are recordings in the previous month Indicates that there are recordings in the next month Move the cursor to the day of the first recording in the month displayed by the calendar pressing the button displays the previous month of the calendar Move the cursor to the day of the last recording in the month displayed by the calendar pressing the button displays the next months of the cale...

Page 31: ...opied are displayed The video pauses and the BOOKMARK screen is displayed 4 Select VIDEO Example using the control buttons and press the ENTER button The DURATION screen is displayed If STILL was selected The videos are marked as still images and the message STILL OK is displayed 5 Specify the duration to be recorded Seconds using the control button and press the ENTER button The videos are marked...

Page 32: ...FORAMT NETWORK PORT 5445 CLIENT ACCESS ON BANDWIDTH SAVING ON NETWORK TYPE DHCP DDNS OFF SEND E MAIL CH1 C MAIN MENU PASSWORD 2006 07 14 17 25 37 2 SERVICE SYSTEM RECORD HDD SET NETWORK LIVE b LIVE settings P25 To perform adjustments related to live videos monitoring such as sequencing settings and each camera video adjustments b RECORD settings P27 To perform adjustments related to recordings suc...

Page 33: ...Press the EXIT STOP button once operations are complete Press the EXIT STOP button repeatedly to return to the live screen Memo The contents of the settings are saved when leaving the menu setting screen Even if the power is turned off the settings content are retained 2 2 1 6 5 PASSWORD CH1 2006 07 14 17 25 37 2 1 CH1 2006 07 14 08 06 09 2 PASSWORD MAIN MENU RECORD LIVE SYSTEM HDD SET NETWORK SER...

Page 34: ...rol button The display bar 20 100 changes and the contrast of the real time character display changes To set the sequence and the sequence interval of the screen 1 Select SEQUENCE using the control button and select ON using the control button ON Sequencing is performed on a single screen When live OFF Sequencing is not performed 2 Select SEQ DWELL TIME using the control button and select a sequen...

Page 35: ...100 changes and changes the contrast of the real time video HUE settings To select HUE and adjust the hue of the video The display bar 0 100 changes and changes the hue of the real time video Setting the SATURATION To select SATURATION and adjust the saturation of the video The display bar 0 100 changes and changes the saturation of the real time video Press the EXIT STOP button once operations ar...

Page 36: ...to a total of 100 frames for all channels Setting the QUALITY To select QUALITY and select the video quality Selections NORMAL FINE BASIC Setting the RECORDING To select RECORDING and select the recording mode CONTINUOUS P13 Recording is performed while this unit is turned on BY MOTION recording P13 Recording is performed as soon as the internal motion sensor of this unit reacts BY EXT SENSOR P14 ...

Page 37: ...seconds before the internal motion sensor or the external sensor detector is triggered Fixed to 1 ips OFF No pre recording Setting the POST EVENT RECORD To select POST EVENT RECORD and select in how much time after the sensor detection the recording will start Selections 2 3 4 30 SECONDS Setting the ALARM To select ALARM and select the output mode when an alarm is triggered ON Outputs a signal to ...

Page 38: ...n of the unit Select DESCRIPTION using the control button and press the ENTER button The DESCRIPTION screen is displayed To return to the factory default settings of the unit 1 Select LOAD DEFAULT using the control button and press the ENTER button The LOAD DEFAULT screen is displayed 2 Select CONFIRM using the control button and press the ENTER button The screen switches to the INITIALIZING scree...

Page 39: ... correct password again b Settings for no password It is possible to enter the menu settings screen without inputting a password 1 Select ADMIN PASSWORD using the control button and press the ENTER button The Current password input screen is displayed 2 Enter the current password using the camera selection button 1 2 3 4 and press the ENTER button The New password input screen is displayed 3 Press...

Page 40: ...SSWORD CHANGED is displayed so press the ENTER button To go to the live screen press the EXIT STOP button A password can be set to limit the access to the network for network users The initial value is 1111 1 Select NETWORK PASSWORD using the control button and press the ENTER button The Current screen is displayed 2 The following setting method is identical to the one described in Setting an ADMI...

Page 41: ...to access the numeric buttons 4 Press the ID button of the remote control and press 4 of the numeric button The remote control display reappears the ID number 4 set in the SYSTEM settings allows the operation of this unit J Setting a REMOTE CONTROLLER ID CH1 R 2006 07 14 08 06 09 2 2 SYSTEM DVR ID DVR DESCRIPTION LOAD DEFAULT ADMIN PASSWORD NETWORK PASSWORD DATE FORMAT YYYY MM DD CLOCK SET PTZ CON...

Page 42: ...te To give access permission through an external PC Select CLIENT ACCESS using the control button and set ON using the control button ON Accessing the unit via a PC using the supplied exclusive software OFF Does not allow access Set if the network bandwidth is not large enough when monitoring live videos Select BANDWIDTH SAVING using the control button and set the settings using the control button...

Page 43: ...hen press the ENTER button The screen returns to the NETWORK screen 3 Select PASSWORD using the control button and press the ENTER button The ADSL PASS input screen is displayed 4 Display A Ex using the control button move to the right using the control button and repeat the operation and then press the ENTER button The screen returns to the NETWORK screen 5 Press the EXIT STOP button The APPLY NE...

Page 44: ...tton and select the setting using the control button IP NOTIFICATION When DHCP ON An E mail is sent when the IP address of this unit is changed OFF Does not send an E mail EVENT ALARM ON Sends the information of the channel that triggered the alarm when an alarm event is triggered OFF Does not send the channel information 3 Select the following item using the control button and set the information...

Page 45: ...l fails Example 1 Press the ENTER button The screen returns to the SEND E MAIL screen 2 Press the EXIT STOP button twice The screen returns to the NETWORK screen and the APPLY NETWORK ADDRESS screen is displayed 3 To register select CONFIRM using the control button and press the ENTER button Once the settings are complete restart the unit The screen switches to live video MAIL SERVER NAME m a i l ...

Page 46: ...s the internal hard disk 1 Select FORMAT using the control button and press the ENTER button The FORMAT screen is displayed 2 Select CONFIRM using the control button and press the ENTER button The message FORMATTING is displayed and formatting starts Once formatting is complete the unit restarts and returns to live videos HDD SET OVERWRITE ON FORAMT MAIN MENU RECORD LIVE NETWORK HDD SET SERVICE SY...

Page 47: ...s displayed Allows to call up the settings of this unit saved on a device such as a USB memory onto this unit or onto a device of identical model 1 Connecting the USB memory containing the menu settings to the USB terminal 2 Select LOAD SETUP FROM A USB using the control button and press the ENTER button The confirmation screen is displayed 3 Select CONFIRM using the control button and press the E...

Page 48: ...higher Memory Minimum 256 MB 512 MB or higher recommended VGA 16 MB 64 MB recommended Resolution 1024 768 Disk capacity 10 MB Operating System Windows 2000 Professional SP4 XP Professional SP2 XP Home Direct X Direct X 8 1 or above Install using the interactive screen 1 Insert the supplied CD ROM in the CD drive and double click Sanyo Client exe The installer runs 2 Confirm the installation destin...

Page 49: ...to a different program folder input the folder name in the box directly or select a folder from the Existing Folders list 5 The software starts installing The progress of the installation is displayed on the Setup Status screen 6 Installation is complete Once the installation is complete the DVR Utility 2004 shortcut icon is displayed on the desktop Double click this icon to start the software Spe...

Page 50: ...DP Password Input the network password set on the SYSTEM screen of this unit 3 Click OK on the dialog Connect The camera connects to this unit and the live video of the camera is displayed on the main screen b Disconnecting Once connected the connect button on the operation panel changes to the disconnect button Clicking this button disconnects the connection with this unit and the displayed video...

Page 51: ...S BY EXT SENSOR recording in progress P14 3 Bottom right R Recording such as real time recording in progress P12 4 Bottom left A Alarm output in progress P43 2 Information display area The following information is displayed 1 Shows the used capacity of the hard disk of this unit 2 Communication bit rate and frame rate To display set in the set up menu in the general setting screen P50 3 Date and t...

Page 52: ... switch button G Menu button H Exit button SW Displays the Connect dialog for connection P41 Disconnects the connection To sequence camera switch display Switching to quad screen display Selecting a channel and switching to single screen display SW For Pan Tilt operations For Zoom Focus operations SW The audio is not output The audio is output Adjusts the output volume VOLUME SW Sets recording fun...

Page 53: ... screen Saving images P46 PTZ camera operations P46 Switching the audio output P43 b To sequence camera switch display Click the sequence button on the operation panel while in single screen display The video of the four cameras connected to this unit is displayed continuously in the order of the channel numbers When the button is re clicked sequence display stops and display returns to normal sin...

Page 54: ... operation panel When recording is set to automatic recording it is always locked to ON 1 Clicking the recording button on the operation panel The recording function changes to ON and the button display switches to stop Setting the recording function to ON allows recording according to the recording mode In Always mode Starts the recording In Event mode Recording is on standby recording starts whe...

Page 55: ...g One screen image is saved when CAPTURE is clicked When the PTZ camera is connected to this unit it can be remotely operated from the PC 1 Sets the menu using this unit Set the PTZ CONTROL settings on the SYSTEM screen of the menu settings of this unit P11 2 Displays the live video and specifies the camera to be operated When in quad screen display select 1 camera video and click a red frame surr...

Page 56: ...of the log window 1 Time scale Moves the slide knob on the scale as the video is played back The playback point moves as the slide knob is dragged and dropped to the left or to the right or when clicking on the scale 2 Display unit Switches the mark unit of the scale HOUR One hour X 24 marks MINUTE 5 minutes X 12 marks 3 Backup operation button START POINT Sets the start point of the video range t...

Page 57: ...ne is displayed above the scale if a recorded video is available Memo Switching the display unit of the scale from HOUR to MINUTE allows the user to further narrow down the time slot with recorded video 4 Specify the playback start point Drag and drop the slide knob of the time scale and move it to the playback start point 5 Click the playback button 1 The video starts playing During the playback ...

Page 58: ...INT 6 Click BACKUP Confirm the backup content of the backup using the AVI Backup dialog 1 Start time End time Can be modified using the spin buttons 2 File Path The path set in the general settings screen in the set up menu is displayed P50 3 Channel The channels numbers with recorded video are displayed 7 Click OK The specified recorded video range is backed up on the PC The backup progress is di...

Page 59: ... of the SEARCH button on the operation panel 2 Password Clicking the button allows the user to set a Security Option password Old Password Input the current password New Password Input the new password Confirm Password Re input the new password to confirm the password Click OK after inputting the password 3 Save Path Set the destination folder for still video Capture and backup video Backup 4 Misc...

Page 60: ...mplete The content of the settings are confirmed and saved Sets the event management method 1 Log Sets the destination folder and the allowable size of the event log 2 Event Set the saving and display conditions for each event using the checkbox Log Whether it saves it as an event log or not Icon Whether it displays an icon on the camera video or not Event list Whether it displays the event on the...

Page 61: ... on the operation panel is set to ON Event When the recording button on the operation panel is set to ON recording is on standby and recording is performed when specified events occur Automatic recording settings Auto Record If the checkbox is checked the recording button on the operation panel is always fixed to ON and video is automatically recorded in the selected recording mode when the unit i...

Page 62: ...the capacity is exceeded using the radio button Replace oldest files Continues to record and overwrites the previously recorded video starting with the oldest Stop recording Stops the recording Click OK once the above settings are complete The content of the settings are confirmed and saved The version information of the currently used software can be confirmed F Disk settings Disk 1 2 G Version i...

Page 63: ...button During settings Moves the cursor to the right During playback Fast forwards 7 REPLAY button During settings Moves the cursor downward During playback Skips the video 1 minute backward 8 ENTER c h button During settings Confirms the selected item During search Plays back the selected video During playback Displays a still video 9 MENU button Displays the setting menu screen F EXIT button b T...

Page 64: ...ent recording External alarm recording Hard disk None mounted 540 GB Max with a 3 5 inch disk Video input terminal 1 0 V p p 75 Ω BNC 4 Video output terminal Selection possible BNC Initial value 1 VGA 1 Audio input terminal RCA 4 Audio output terminal RCA 1 Alarm input output terminal Input 4 connectors NO or NC available relay output 1 connector Network terminal Interface RJ 45 10Base T 100Base T...

Reviews: