


INSTALLATION INSTRUCTIONS
1 CHANNEL PROGRAMMER
Technical Data
Power Supply:
230V AC, 50Hz
Operating Temperature:
0°C to 35°C
Total Switch Rating:
230V AC, 6(2)A
Contact Type:
1B , Micro-Disconnection (Voltage Free)
Battery Type:
Lithium Cell CR2032
Enclosure Protection
IP30
Plastics
Thermoplastic, flame retardant
Insulation Class
Double
Wiring:
For fixed wiring only
Backplate
Industry standard
Dimensions:
140mm x 87mm x 37mm
Clock
12 hour am/pm, 1 minute resolution
BST/GMT time change
Automatic
Clock Accuracy
+/- 1 sec per day
Program Cycle 24hr, 5/2day or 7day selectable.
Program On/offs per day
2on/off, 3on/off selectable
Program Resolution
10mins
Program Selection
Auto, On all day, On constant, Off
Program Override
+1,2 or 3Hr, Advance
Complies with
EN60730-1, EN60730-2.7, EMC Directive 2004/108/EC,
LVD
Directive
2006/95/EC
Pre-Installation Product Set Up
:
Before installing, set the bank of 4 DIP Switches on the back to configure the unit according
to the chart below:
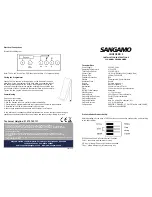
DIP Switches: Shown in Factory Default Positions.
24 Hr – runs same programme every day.
5/2 Day – allows different on/off times at weekend.
7 day – allows different on/off times every day.
Electrical Connections
Internal Wiring Diagram
Note: The Switch is volts free. COM should be linked to L for mains switching.
Fitting the Programmer
Loosen the two ‘captive’ retaining screws on the bottom of the back
plate. Now fit the programmer to the back plate, ensuring the lugs of
the back plate engage with the slots on the programmer. Swing the
bottom of the programmer into position ensuring the connection pins
on the back of the unit locate into the terminal slots in the back plate.
Tighten the two ‘captive’ screws to fix the unit securely
Commisioning
Switch on mains supply.
Referring to the user guide
1. Use the buttons to ensure correct product functionality.
2. Set timing and programme details in accordance with customer requirements.
3. Normally unit will be left with channel in ‘Auto’ mode.
4. Leave these installation instructions with customer for reference.
In the interests of continuous product improvement we reserve the right to alter designs,
specifications and materials without prior notice and cannot accept liability for errors.
143702_A
Sangamo Limited, Industrial Estate, Port Glasgow, Renfrewshire PA14 5XG
Tel: 01475 745131 Fax: 01475 744567
Email: [email protected] Web: www.sangamo.co.uk
CHOICE PR 1
SERVICE AND WARRANTY
Your product is not user serviceable. PLEASE DO NOT TRY TO DISMANTLE THE UNIT.
This product is guaranteed by your supplier for 3 years from the Date of Manufacture. If it should become
defective, please contact your installer or supplier for a replacement unit or visit www.sangamo.co.uk/returns.
An extended warranty may be purchased online (www.sangamo.co.uk/warranty)
CUSTOMER CARE POLICY
As part of Sangamo’s continuous improvement program, the Company operates a Customer Care Policy.
This means that we welcome your comments and complaints, as it can help us to improve our services to you,
our customer.
Due to our policy of continuous product improvement and development, the specifications in this guide may be subject to
change without prior notice.
Technical Helpline: 01475 745131


