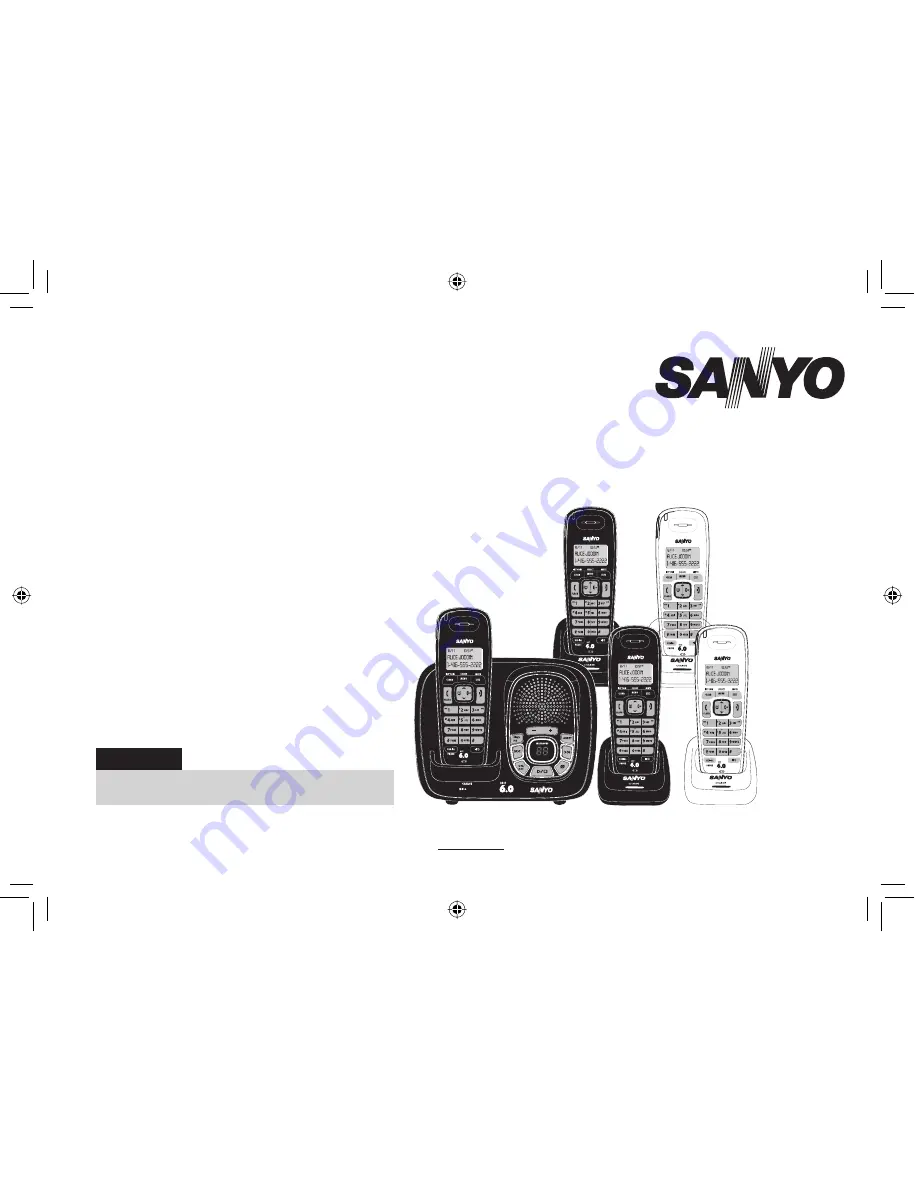
background image

INSTRUCTION MANUAL

DECT 6.0 Cordless Telephone
with Answering System & Caller ID

CAS-D6325

SANYO Canada Inc.

www.sanyo.ca

IMPORTANT

Charge the handset battery pack for a full 15-20 hours 
before using your cordless handset for the first time.

UC590EH.indd   EA

UC590EH.indd   EA

8/19/2008   11:38:54 AM

8/19/2008   11:38:54 AM

Summary of Contents for CAS-D6320

Page 1: ...ering System Caller ID CAS D6325 SANYO Canada Inc www sanyo ca IMPORTANT Charge the handset battery pack for a full 15 20 hours before using your cordless handset for the first time UC590EH indd EA UC590EH indd EA 8 19 2008 11 38 54 AM 8 19 2008 11 38 54 AM ...

Page 2: ...e 70 Phonebook Entries Alphabetical Search Personalized Ring by Party Transfer Single Listing or Entire Phonebook Speakerphone on Handset 7 Ringer Options on Handset 3Tones 4 Melodies Last 5 Number Redial Bilingual Menu Displays English and French CallTransfer Conferencing Intercom Answering System Features DigitalTapeless Recording Up to 13 Minutes of RecordingTime Call Screening Personal or Pre ...

Page 3: ...y Answer E19 SETTING UPTHE PHONEBOOK E20 Creating Phonebook Entries E20 Finding a Phonebook Entry E21 Editing an Existing Phonebook Entry E21 Storing Caller ID or Redial Numbers in the Phonebook E22 Deleting Phonebook Entries E22 Copying Phonebook Entries to Another Handset E23 USINGYOUR PHONE E24 Making a Call from the Phonebook E24 Chain Dialing from the Phonebook E25 Switching to the Handset Sp...

Page 4: ...ce only E38 Activating the Message Alert E39 Activating Call Screening E39 Setting a Security Code or Personal Identification Number PIN E39 USINGTHE ANSWERING SYSTEM E40 TurningYour Answering System On and Off E40 Reviewing Messages E40 Screening Calls E42 Turning Off the Message AlertTone E42 Operating the Answering System WhileYou Are Away from Home E42 ADDITIONAL INFORMATION E44 Installing the...

Page 5: ...ne that connects to your phone line and lets you make and receive calls Charger A cradle that charges the handset battery It connects to power but does not connect to a phone line Global Settings This term relates to feature settings that will apply to all registered handsets and the base These features are available by selecting GLOBAL SETUP in the handset menu Only one handset can change global ...

Page 6: ...6 Handset earpiece 7 LCD display 8 CLEAR INT COM key 9 key up 10 FLASH key talk flash 11 key phonebook left 12 TONE key 13 REDIAL PAUSE key 14 MENU SELECT key 15 MUTE key messages mute 16 key caller ID right 17 key end call 18 key down 19 key 20 key speaker 21 Handset microphone 22 Handset charging contacts UC590EH indd E4 UC590EH indd E4 8 19 2008 11 38 55 AM 8 19 2008 11 38 55 AM ...

Page 7: ...ase speaker 27 VOLUME keys 28 message counter LED 29 GREET key record select greeting 30 key skip 31 key delete 32 key play stop 33 FIND HS key find handset 34 key repeat 35 ON OFF key answering system on off 36 DC IN 9V jack 37 TEL LINE jack UC590EH indd E5 UC590EH indd E5 8 19 2008 11 38 56 AM 8 19 2008 11 38 56 AM ...

Page 8: ... place the handset in an upright position Metal and reinforced concrete may affect cordless telephone performance Avoid television sets and other electronic equipment Choose a central location Avoid sources of electrical noise such as motors Avoid excessive moisture extremely low temperatures dust mechanical vibration or shock Avoid other cordless telephones Avoid heat sources such as radiators ai...

Page 9: ...o the battery jack Be sure to match the red and black wires to the label near the jack The cable should snap into place Gently pull on the battery cable If the battery connector comes loose try connecting again until the battery connector clicks into place Place the battery case cover back on the handset and slide it upwards until it clicks into place 1 2 3 BLACK BLACK RED Click RED BLACK BLACK RE...

Page 10: ...t 15 to 20 hours before plugging into the phone line Notes Connect the AC adapter to a continuous power supply Place the base unit close to the AC outlet so that you can plug the AC adapter easily It is normal for the handset and base to get warm when the handset is charging in the base unit IMPORTANT Use only the supplied SANYO AC adapter Do not use any other AC adapter Do not place the power cor...

Page 11: ...Try making a call If your call does not connect or you cannot get a dial tone try the following steps Make sure the AC adapter cord is securely connected to the DC IN 9V jack and a standard power outlet Check to make sure the battery is fully charged If you don t see the battery full icon check to make sure the battery is properly connected Change the dial mode 1 2 3 1 2 1 2 3 To AC outlet To DC I...

Page 12: ...T You will hear a confirmation tone If you ever need to change the dial mode back to tone dialing follow the same procedure but selectTONE in step 2 Note If you have multiple bases select the base before changing the dial mode see Selecting the Base on page E16 Wall Mounting the Base This phone can be mounted on any standard wall plate Turn the base upside down to reach the wall mount bracket On t...

Page 13: ...the wall insert two 10 screws minimum length of 1 3 8 inches 34 9 mm not supplied into the wall 3 15 16 inches 100 mm apart leave the screw heads 1 8 inch 3 175 mm away from the wall to allow room for mounting the phone Be sure the wall is capable of supporting the weight of the phone and use the proper type of anchoring device for the wall material No need to route the telephone cord through the ...

Page 14: ...ed off The voice mail icon appears when you have messages waiting in your voice mailbox The privacy icon appears when the Privacy Mode is turned on The speaker icon appears when the speaker phone is in use The mute icon appears while the microphone is muted The battery icon indicates the handset battery status full medium low and empty UC590EH indd E12 UC590EH indd E12 8 19 2008 11 39 00 AM 8 19 2...

Page 15: ...U SELECT Press or on the four way function key to move the cursor To select an option press MENU SELECT To go back to the previous screen press left on the four way function key To exit the menu and return to standby press If you do not press a key within thirty seconds the phone will time out and exit the menu When setting the day and time the time out period is extended to two minutes Note For A...

Page 16: ... Press 6 once to enter M Use right on the four way function key to move the cursor to the right Press 6 six times to enter o Press 8 six times to enter v Press 4 six times to enter i Press 3 five times to enter e Press 7 eight times to enter s Press MENU SELECT to end your text entry If you make a mistake while entering a name use right or left on the four way function key to move the cursor to th...

Page 17: ...n to standby Registering the Handset to Another Base To register a handset to another base Make sure the handset battery is fully charged Disconnect the base AC adapter Then press and hold FIND HS while you reconnect the adapter Keep pressing FIND HS until the charge LED starts to blink On the handset press MENU SELECT Select the REGISTER BASE menu HANDSET REGISTERING will appear in the display Af...

Page 18: ...ELECT SEARCHING will appear in the display When the base is found the handset will return to standby If the base is not found SEARCHING continues to appear You can repeat the procedure listed above to return back to the original connection or to find the different base Note You cannot change bases during a call Selecting a Language Your phone supports two languages English and French Once you sele...

Page 19: ...ressed You can turn this tone on or off Press MENU SELECT Select the HANDSET SETUP menu and then the KEY TOUCH TONE submenu Move the cursor to select ON or OFF Press MENU SELECT You will hear a confirmation tone Activating the Caller ID Phonebook Match If you subscribe to Caller ID service the phone will display the name from your phonebook instead of the name received with the Caller ID data When...

Page 20: ... detailed instructions on entering text Press MENU SELECT You will hear a confirmation tone Note When you have multiple bases and even if the handset ID is changed when you switch to a different base the handset will keep the banner name Selecting a Ring Tone Handset only You may choose from four melodies or three tones for your phone s primary ring tone Each handset can use a different ring tone ...

Page 21: ... MENU SELECT Select the HANDSET SETUP menu and then the AUTO TALK submenu Move the cursor to select ON or OFF Press MENU SELECT You will hear a confirmation tone Activating Any Key Answer Any Key Answer allows you to answer the phone by pressing any key on the dial pad Press MENU SELECT Select the HANDSET SETUP menu and then the ANY KEY ANSWER submenu Move the cursor to select ON or OFF Press MENU...

Page 22: ...EnteringText from Your Handset on page E14 for instructions on entering text If you do not want to enter a name for this entry your phone will store this entry as NO NAME Press MENU SELECT when you are finished Enter the number for this entry EDIT NUMBER Once you have stored a name EDIT NUMBER appears next Use the number keypad to enter the phone number the phone number can contain up to twenty di...

Page 23: ...onebook entries are stored in alphabetical order To scroll through the phonebook from A to Z press To scroll through the phonebook from Z to A press You can also use the letters on the number keys to jump to a name that starts with that letter For example to search for an entry beginning with the letter M press 6 once The phonebook jumps to the first entry that begins with the letter you entered y...

Page 24: ... STORE INTO PB EDIT NAME appears If the phone number is already stored in memory you will hear a beep andTHIS DATA IS ALREADY SAVED appears in the display The number will not be stored Continue by following the steps for Creating Phonebook Entries on page E20 Deleting Phonebook Entries You can delete a single phonebook entry at a time or all phonebook entries at once To delete a single phonebook e...

Page 25: ...ect the handset which you want to transfer the entries to and then press MENU SELECT If you select COPY ALL AREYOU SURE appears on the display screen Move the cursor to selectYES and then press MENU SELECT The phonebook entries will be transferred to the designated handset During the copy process the receiving handset shows RECEIVING and the Handset ID of the sending handset When the transfer is c...

Page 26: ...l answer when you pick up the handset from the cradle Press FLASH If Any Key Answer is on you can also press any key on the dial pad 1 2 Pick up the handset Press 1 2 Hanging up Press or return the handset to the cradle Press or return the handset to the cradle Making a Call from the Phonebook When the phone is in standby press to open the phonebook Find the phonebook entry you want to call see Fi...

Page 27: ...l press Adjusting the Ringer Earpiece and Speaker Volume Adjusting the Ringer Volume You can choose from four ringer volume settings off low medium and high on the handset or the base Handset With the phone in standby use to make the ringer volume louder or to make it softer or turn it completely off Base While the phone is ringing or in standby use VOLUME to make the ringer volume louder or VOLUM...

Page 28: ...alTone is recommended for hearing aid users Audio tone adjustments only apply to the earpiece not the speakerphone To adjust the audio tone While on a call press MENU SELECT Move the cursor to select AUDIOTONE and then press MENU SELECT Move the cursor to select desired option HIGH TONE NATURAL TONE or LOW TONE and then press MENU SELECT Selected option appears in the display for two seconds and t...

Page 29: ...rticipate in a conference call A three way conference call consists of an outside line and two handsets You can easily join a call already in progress The handsets must be currently registered to the same base see page E16 Press FLASH or to join the call To hang up return the handset to the cradle or press The other party will still be connected to the call Transferring a Call You can transfer a c...

Page 30: ...nsferring handset will be disconnected Only the first handset to answer the transfer page will be connected to the call If the transfer page is not picked up within one minute the operation will be canceled The phone will go to Line On Hold mode To return to the party on hold press FLASH or on the handset Privacy Mode If you don t want other handsets to interrupt you while on a call turn on privac...

Page 31: ...eive an outside call or an intercom page while selecting the other handset You do not select a handset within thirty seconds Your handset is out of range OUT OF RANGE appears in the display The party does not answer the page within one minute The party is busy The party is out of range UNAVAILABLE appears in the display Answering an Intercom Page When the intercom page tone sounds the display will...

Page 32: ...l area code in your phone Programming your area code will allow you to see the caller s seven digit phone number which will allow you to easily return the local call without modifying the number before dialing If you get a call from outside your area code you will see all ten digits To program your local area code Press MENU SELECT Select the GLOBAL SETUP menu and then the AREA CODE submenu Use th...

Page 33: ...where you have multiple phones where users may pick up an extension while someone else is on the phone Only in very rare instances where your phone system is not detecting that an extension phone is picked up will you ever need to change this feature There are three settings for this feature TYPE A TYPE B or OFF but change this option only when instructed to by customer service In most all situati...

Page 34: ...l signaling tone You can use your phonebook to store the access number Resetting the Voice Message Waiting Indicator When you receive a new voice mail message the new message LED on the top of the handset flashes and appears in the handset display In the event your message alert tone gets out of sync with your phone company s voice messaging system you can reset back to its original no messages wa...

Page 35: ... ID records are stored from newest to oldest Once your Caller ID list is full the oldest record will be automatically deleted when a new call is received To open the Caller ID list press on the right side of the four way key The phone will show the number of new Caller ID records and the total number of stored records Use and to scroll through the list Making a Call from a Caller ID Record When th...

Page 36: ...the phone asks you to confirm selectYES Note When you delete a Caller ID number you delete it permanently Using Call Waiting If you have Call Waiting service and a second call comes in when you are on the phone a call waiting tone will sound Press FLASH to accept the waiting call There is a short pause and then you will hear the new caller To return to the original caller press FLASH Note You must...

Page 37: ...ty EMPTY appears in the display and you will hear a beep You can also press FLASH or before you open the redial list When you come to the phone number you want to dial press MENU SELECT Deleting a Redial Record If you want to delete a phone number from the handset s redial list follow the steps below When the phone is in standby press REDIAL PAUSE Use and to scroll through the redial list When you...

Page 38: ... If another handset makes a call remote operation is cancelled During remote operation appears on the base Note For ANSW SETUP and GLOBAL SETUP menu options make sure the line is not in use and the handsets are within range of the base Recording a Personal Greeting Your answering system comes with a pre recorded outgoing message or greeting that plays when you receive a call Hello no one is availa...

Page 39: ...greeting you hear is used as the current greeting Deleting Your Personal Greeting You can delete your personal greeting from the base You cannot delete the pre recorded greeting When the phone is in standby press GREET on the base While the personal greeting is playing press The system announces Greeting has been deleted and switches back to the pre recorded greeting Selecting the Language You can...

Page 40: ...the clock on your answering system your messages may not have the correct time and day stamp On the handset press MENU SELECT Move the cursor to DAY TIME and press MENU SELECT Use and to select the day of the week and press MENU SELECT Use the number keypad 0 through 9 to enter the hour and minutes Use and to select AM or PM and press MENU SELECT You hear a confirmation tone Setting the Record Tim...

Page 41: ...F Press MENU SELECT You will hear a confirmation tone Activating Call Screening Your phone allows you to listen to callers leaving you a message This call screen feature can be turned on or off On the handset press MENU SELECT Select the ANSW SETUP menu and then the CALL SCREEN submenu Move the cursor to select ON or OFF Press MENU SELECT You will hear a confirmation tone Setting a Security Code o...

Page 42: ... Answering System is off The message counter LED is no longer illuminated If memory is full the message counter LED always displays FL 1 2 3 Press MENU SELECT Select the ANSW SETUP menu and then the ANSWER SETUP submenu Move the cursor to select OFF Press MENU SELECT You will hear a confirmation tone 1 2 3 4 Reviewing Messages The message counter LED on the base displays the number of messages sto...

Page 43: ...g a message Press to go to the beginning of the next message Press 3 to go to the beginning of the next message Deleting a message While a message is playing press The message is permanently deleted While a message is playing press 4 The message is permanently deleted Deleting all messages While the phone is in standby press When the system asks you to confirm press again All messages are permanen...

Page 44: ...cally deactivate The tone will not deactivate until all new messages are played back To quickly turn off the tone press any key on the base Operating the Answering System While You Are Away from Home You can access your answering system while you are away from home to check play and delete messages or turn your answering system on and off For your convenience a wallet size card is enclosed to be u...

Page 45: ... to enter the first command after the first command you have two seconds to enter each command Remote Commands Command Function Command Function Command Function 0 then 1 Repeat a message 0 then 4 Delete a message 0 then 9 Answering system off 0 then 2 Play incoming messages 0 then 5 Stop operation 1 then 0 Help 0 then 3 Skip a message 0 then 6 Answering system on If you press 0 then 1 in the firs...

Page 46: ...he holes Optional Headset Your phone can be used with an optional headset not included To use this feature insert the headset plug into the headset jack Your phone is ready for hands free conversations For purchasing servicing or replacement please contact our service centre SANYO Canada Inc 1 300 Applewood Cres Concord Ont L4K 5C7 905 760 9944 1 800 263 2244 www sanyo ca UC590EH indd E44 UC590EH ...

Page 47: ...CYCLING NICKEL METAL HYDRIDE BATTERIES NICKEL METAL HYDRIDE BATTERIES MUST BE DISPOSED OF PROPERLY Nickel metal hydride cells are used in the battery pack Please take your used nickel metal hydride battery packs to a store that recycles nickel metal hydride batteries Power Failure During the period that the power is off you will not be able to make or receive calls with the telephone Caution Use o...

Page 48: ... so may discolor the surface of the telephone and damage the finish Low Battery Alert When the battery pack is very low the phone is programmed to eliminate functions in order to save power When LOW BATTERY CHARGE HANDSET appears in the display and the phone is in standby none of the keys will operate If you are on a call you will hear the Low Battery warning tone Complete your conversation as qui...

Page 49: ...than five seconds Select DEREGISTER HS Select the handset which you are operating and then press MENU SELECT The phone will ask you to confirm the deregistration SelectYES The selected handset will clear its registration information only from the base it is currently connected to and then delete the link to the base from its own memory When the base information is deleted the handset displays HAND...

Page 50: ... the handset is still registered to another base it searches for the other base and then returns to standby After de registering the handset place the handset to the base to register You must re register the handset before you can use it Traveling Out of Range During a call if you move your handset too far from your base noise may increase If you pass the range limit of the base the handset will b...

Page 51: ...t line to make another outside call Make sure your handset is registered to the base Check the telephone cord connection If CHECKTEL LINE appears on the handset display the telephone cord may not be connected correctly Make sure the AC adapter is plugged into the base and wall outlet Disconnect the AC adapter and reconnect The Caller ID does not display The call was placed through a switchboard Ca...

Page 52: ...e sure the base is plugged in Make sure that the answering system is turned on Make sure that the message record time is not set to announce only Time stamp cannot be heard Make sure you have set the time see Setting the Day Time on page E38 Messages are incomplete Incoming messages may be too long Ask callers to leave a brief message The memory may be full Delete some or all of the saved messages...

Page 53: ... electrical appliances especially microwave ovens computer equipment especially wireless LAN equipment and DSL modems radio based wireless devices such as room monitors wireless controllers or wireless headphones or speakers large florescent light fixtures particularly ones that give off a buzzing noise other services that use your phone line like alarm systems intercom systems or broadband Intern...

Page 54: ... be followed to reduce the risk of fire electric shock and injury to persons including the following Do not use this product near water for example near a bath tub wash bowl kitchen sink or laundry tub in a wet basement or near a swimming pool Avoid using a telephone other than a cordless type during an electrical storm There may be a remote risk of electric shock from lightning Do not use the tel...

Page 55: ...pment provides an indication of the maximum number of terminals allowed to be connected to a telephone interface The termination on an interface may consist of any combination of devices subject only to the requirement that the sum of the Ringer Equivalence Numbers of all the devices does not exceed five RADIO EQUIPMENT The term IC before the radio certification number only signifies that Industry...

Page 56: ...SANYO Canada Inc or to an authorized SANYO Service Depot when you make a claim under this warranty You the original retail purchaser are responsible for any costs of TRANSPORTING the product to and from SANYO Canada Inc or an authorized SANYO Service Depot You also are responsible for the cost of any MAINTENANCE necessary in respect of the product WARRANTY BECOMES VOID This warranty becomes void i...

Page 57: ... with SOS all that s necessary is a quick call from your home for product assistance HASSLE FREE EXCHANGE Should your SANYO telephone require servicing due to a manufacturing defect during the warranty period SANYO Canada will ship prepaid a replacement unit within two business days after receiving your defective unit Consumers are responsible for the shipping costs of the unit back to SANYO For o...

Page 58: ...E56 MEMO UC590EH indd E56 UC590EH indd E56 8 19 2008 11 39 15 AM 8 19 2008 11 39 15 AM ...

Page 59: ...E57 MEMO UC590EH indd E57 UC590EH indd E57 8 19 2008 11 39 15 AM 8 19 2008 11 39 15 AM ...

Page 60: ...68 5 915 227 5 929 598 5 930 720 5 960 358 5 987 330 6 044 281 6 070 082 6 076 052 6 125 277 6 253 088 6 314 278 6 321 068 6 418 209 6 618 015 6 714 630 6 782 098 6 788 920 6 788 953 6 839 550 6 889 184 6 901 271 6 907 094 6 914 940 6 940 867 6 953 118 7 023 176 7 030 819 7 146 160 7 203 307 7 206 403 7 310 398 Other patents pending UCZZ01590EZ 0 SANYO Canada Inc Printed in China UC590EH indd E58 ...

Page 61: ......

Reviews: