background image

Positioning System

User Manual

SCU-2370

SCU-9051

SCU-VAC

SCU-VAC1

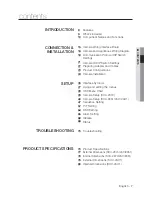
Summary of Contents for SCU-2370

Page 1: ...Positioning System User Manual SCU 2370 SCU 9051 SCU VAC SCU VAC1 ...

Page 2: ...ng Techwin makes the best to verify the integrity and correctness of the contents in this document but no formal guarantee shall be provided Use of this document and the subsequent results shall be entirely on the user s own responsibility Samsung Techwin reserves the right to change the contents of this document without prior notice Warranty If the product does not operate properly in normal cond...

Page 3: ...al injury Do not place conductive objects e g screwdrivers coins metal parts etc or containers filled with water on top of the camera Doing so may cause personal injury due to fire electric shock or falling objects Do not install the unit in humid dusty or sooty locations Doing so may cause fire or electric shock If any unusual smells or smoke come from the unit stop using the product In such case im...

Page 4: ... disposal of batteries in this product Applicable in the European Union and other European countries with separate battery return systems This marking on the battery manual or packaging indicates that the batteries in this product should not be disposed of with other household waste at the end of their working life Where marked the chemical symbols Hg Cd or Pb indicate that the battery contains me...

Page 5: ...fied by the manufacturer or sold with the apparatus When a cart is used use caution when moving the cart apparatus combination to avoid injury from tip over Unplug this apparatus during lightning storms or when unused for long periods of time When a cart is used use caution when moving the cart apparatus combination to avoid injury from tip over Refer all servicing to qualified service personnel Ser...

Page 6: ...s an extension ladder This is an assistant device to the monitoring system the company do not take responsibility for any financial or physical damage to the product that may occur due to theft fire or natural disasters CAUTIONS FOR OPERATING TEMPERATURE The camera cannot operate properly at temperatures lower than 50ºC Even if the surrounding temperature is 50ºC or higher the camera may not thaw it...

Page 7: ...es 23 Product Configurations 24 Camera Installation SETUP 26 26 Interface Symbols 27 Using and setting the menus 28 OSD Menu Chart 29 Camera Setup SCU 2370 40 Camera Setup SCU 9051 VAC VAC1 47 Sequence Setting 57 P T Setting 64 OSD Setting 65 Alarm Setting 68 Initialize 69 Status TROUBLESHOOTING 70 70 Troubleshooting PRODUCT SPECIFICATIONS 73 73 Product Specifications 77 External Dimensions SCU 2370...

Page 8: ...ea can be selectively masked on the screen Smart P T The Smart P T function automatically adjusts the control speed of the Pan and Tilt functions according to the current zoom ratio It is useful to adjust the functions manually for detailed controls when monitoring at high zoom ratios SCU 2370 VAC Day Night With its daytime nighttime switch and Sens Up functions based on the ICR Infrared Cut filter...

Page 9: ...age Main Body Sunsheild Screw M5 X 2 L type hexagon wrenches 4 0mm Positioning System User Guide SCU 2370 SCU 9051 SCU VAC SCU VAC1 Fuse 2EA User Manual CD Manual Mount The following items are sold separately from the camera SBU 220PM Pedestal Mount SBU 500WM Wall Mount SBU 550IM Light Projector Mount ...

Page 10: ...on COMPONENT NAMES AND FUNCTIONS Front Lens Wiper Use it to wipe out the front glass of the housing Sunshield SCU VAC VAC1 models support various lens and camera installations upon user s requirement M SCU 2370 VAC VAC1 SCU 9051 ...

Page 11: ...English 11 INTRODUCTION Back COM ID Setup Switch Video Out Cable Communication Cable Power Cable For the DIP switch settings please refer to the on Pages 18 21 M ...

Page 12: ...connect SHC 745 y Basic Wiring y Lens SLA 880 SLA12240 y y Camera SHC 745 SCB 3000 SCB 4000 y y y PCB How to connect SCB 4000 y How to connect SCB 3000 y Power module 485 485 Communication Control 485 GND MD Motion Detection The power adaptor AC has no polarity Light Projector Power Module ...

Page 13: ...White Near 5 Blue FOCUS_MOTOR 2 White FOCUS_MOTOR Zoom Red Tele 4 Green ZOOM_MOTOR 6 Red ZOOM_MOTOR Pot Return 8 Gray GND CCTV ZOOM LENZ SLA 12240 12 240mm 1 1 6 Made in Japan FOCUS_MOTOR ZOOM_MOTOR 5V AD_FOCUS_P AD_ZOOM_P CABLE 7Lines Adjusting the zoom and focus Auto Iris Jack ALC LEVEL FOCUS_MOTOR ZOOM_MOTOR Lens Label Board Label Focus GREEN Far FOCUS_MOTOR BLACK Near FOCUS_MOTOR Zoom YELLOW W...

Page 14: ...A 880 SCU VAC Video SCB 3000 SLA 12240 SCU VAC1 DC SCB 4000 Samsung E ON OFF Motion Detection SCU VAC VAC1 DN MD GND D N M D GND Camera Cam I F Board SHC 745 SCB 3000 Alarm GND GND D N M D GND Camera Cam I F Board SCB 4000 RS 485 SCU 9051 D D R R 485 485 Camera Cam I F Board Check ID 1 Baudrate 9600 N 1 SCU 9051 9600 E 1 When shipped all switches are set to OFF by default y M ...

Page 15: ... TXD TXD Controller or DVR Camera RXD RXD TXD TXD TXD TXD RXD RXD Controller or DVR RXD RXD y Alarm Output y Alarm Input AlarmConnections AlarmConnections Name Descriptions IN1 Alarm Signal Input 1 IN2 Alarm Signal Input 2 IN3 Alarm Signal Input 3 GND Ground Type Name Descriptions Alarm Output COM1 Alarm Out 1 Common 1N O Alarm Out 1 for Normal Open 1N C Alarm Out 1 for Normal Close COM2 Alarm Out...

Page 16: ...and Alone DVR The maximum power capacity of the built in relay is 30VDC 2A 125VAC 0 5A and 250VAC 0 25A A separate relay driver device is required if used with an adaptor which exceeds specified nominal specifications Connecting the power connector and GND incorrectly to the NC NO and COM ports may cause a short circuit and fire damaging the camera M PowerModuleConnectionDiagram PowerModuleConnection...

Page 17: ...ra Camera RXD RXD TXD TXD RXD RXD Controller ToconnecttoSamsungPCDVR RS 485 y Camera RXD RXD PC DVR TX RX TX RX G TXD TXD RXD RXD TXD TXD MENU SEAR CH MULT I REC MENU PRES ET GROU P TRAC K CAM 1 2 3 4 5 6 7 8 9 0 MON CLOS E OPEN NEAR FAR WIDE TELE PTZ DVR MTX SETUP ESC FUNC ENTER SRP 1610 1650 TX RX TX RX G ...

Page 18: ...fer Method RS 485 422 Settings 6 Response Mode Settings 7 Terminal Resistance TX 8 Terminal Resistance RX 9 TEST 10 Factory Default Protocol Settings Select a communication protocol for the camera No Protocol 4 3 2 1 1 SAMSUNG T OFF OFF OFF OFF 2 SAMSUNG E OFF OFF OFF ON 3 Pelco D OFF OFF ON OFF 4 Pelco P OFF OFF ON ON 5 Panasonic OFF ON OFF OFF 6 Vicon OFF ON OFF ON 7 Honeywell OFF ON ON OFF 8 AD...

Page 19: ...ication signals between the camera and controller the items at the end of line must be set up with the termination settings Camera Input Position 7 8 Terminal Resistance TX ON OFF Terminal Resistance RX OFF ON When terminating for RS 485 8 l ON When terminating for RS 422 7 8 l ON Initialize Initialize the system using the Initialize switch on the rear of the product Once initialized all current s...

Page 20: ...ntrols Using Different Protocols AD Protocol VICON Protocol GE Protocol EnteringCameraOSD 3 Auxilary ON IRIS OPEN IRIS OPEN ExitingCameraOSD 3 Auxilary OFF IRIS CLOSE IRIS CLOSE ENTER IRIS OPEN IRIS OPEN IRIS OPEN ESC IRIS CLOSE IRIS CLOSE IRIS CLOSE For more information about the protocols refer to our official website The product s DIP switch is set to OFF when shipped and the default values are ...

Page 21: ...defaulted to OFF Each switch has a unique value and the board ID is the sum of the values of the switches Refer to the example below for the board ID Example 1 Example 2 Example 3 ON OFF 1 2 4 8 16 32 64 128 ON OFF 1 2 4 8 16 32 64 128 ON OFF 1 2 4 8 16 32 64 128 1 2 3 Board ID 3 4 32 36 Board ID 36 1 2 4 8 16 32 64 128 255 Board ID 255 Use a unique ID for each Camera 1 2 M ON OFF 1 2 4 8 16 32 64...

Page 22: ...nication please use a video amp intended for coaxial communications Regular video amps do not transfer coaxial signals Communications Cable For the camera to communicate with the controller a RS 485 422 communications line is required To ensure the quality of long distance communication and the accuracy of the overall communication it is recommended using a twisted pair cable such as UTP Depending...

Page 23: ...IDE TELE PTZ DVR MTX SETUP ESC FUNC ENTER MENU SEAR CH MULT I REC MENU PRES ET GROU P TRAC K CAM 1 2 3 4 5 6 7 8 9 0 MON CLOS E OPEN NEAR FAR WIDE TELE PTZ DVR MTX SETUP ESC FUNC ENTER RS 485 SRD Series RS 485 SRD Series Coaxial Communication SRD Series Coaxial Communication SRD Series CONTROLLER SUB CONTROLLER MAIN CONTROL LINE VIDEO LINE CONTROL VIDEO LINE ...

Page 24: ...utlet until the installation is complete Supplying power in the middle of the installation may cause fire or damage the product Bend back the wiper before opening the housing Ensure that the housing is closed completely before you turn on the product Do not reset the system with the housing open Otherwise it may cause damage to the product M ...

Page 25: ... 4 hex screws through the holes prepared on the boundary of the bracket from the bottom side Fix the center hex screw from the upper side of the bracket mount towards the light projector Mounting and securing the light projector may vary depending on the light projector type Connect the cables Insert the projector cables through the rear hole of the camera Light projector cable is to be connected ...

Page 26: ...put Alarm Ports Priority Only one of in the upper right of the screen blinks Ú The alarm port indicator blinks only when the sequence is set Preset Number Display Settings If a preset number is already available H If a preset location is the camera s home position y y y y ID 001 123 Area1 Area Name G SEQ1 PRESET 001 Preset Name P 300 T 040 010X Motion Detect Area Display Preset Info Sequence Statu...

Page 27: ...controller or a DVR refer to the user s manual of the product OSD Commands Function Chart and Menu Controls This camera can be operated using two methods Using hot keys on its dedicated controller or accessing the OSD On Screen Display on the video output The OSD menu commands are as follows Command Function Move the joystick up down left right Moves the OSD menus up down left right respectively E...

Page 28: ...ing Load Wiper SCU 2370 VAC VAC1 Prop P T SCU 2370 VAC1 Image Hold SCU 2370 Alarm Setting P T Setting Camera Setting Focus Zoom White Balance Exposure Back Light AGC SSNR SSDR Day Night Others Sequence Setting OSD Setting Status Preset Swing SEQ Group SEQ PTZ Trace Auto Run Power On Resume MD Dwell Time SCU 2370 VAC VAC1 Camera ID Camera Name Preset Number Preset Name Sequence Status PTZ Position ...

Page 29: ...decreases as its zoom ratio increases The auto focus function may not operate normally under the following conditions When background illumination is low While Slow Shutter is in operation If the zoom level is set too high When background illumination is too high If a long distance object and a close distance object appear together within a monitoring area If there is no contrast e g the sky or a ...

Page 30: ...s when zooming Full manual mode Speed SLOW MEDIUM FAST Adjusts the zooming speed z z Focus Zoom Focus Mode ONE SHOT 偓Zoom Tracking Digital Zoom OFF Camera Setting 偓Focus Zoom White Balance ATW Exposure Back Light OFF AGC MEDIUM SSNR MEDIUM SSDR Day Night Others Æ Zoom Tracking 偓Mode AUTO Speed FAST Æ Main Menu 偓Camera Setting Sequence Setting P T Setting OSD Setting Alarm Setting Initialize Status...

Page 31: ... MANUAL Enables customization the Red and Blue gains White Balance may not work properly under the following conditions When the color temperature of the environment surrounding the subject is out of the control range e g Clear sky or sunset When the ambient illumination of the subject is dim If the camera is directed towards a fluorescent light or is installed in a place where illumination changes...

Page 32: ...g frequencies clash with camera frame rates MANUAL Enables manual adjustment of the shutter speed Sens Up AUTO Automatically detects light levels and maintains a clear picture at night or under low light conditions Sens Up Limit Adjusts to the maximum powered zoom per frame For optimal performance of the A FLK mode avoid using the mode in conjunction with Backlight While the Internal Sync mode is ...

Page 33: ...trance to an apartment parking lot or gas station and is useful to detect a small objects like car license plates HLC is disabled during the daytime While monitoring nigh time car traffic if car headlights reflects too much bright light on the screen the camera automatically eliminates the headlamp lights and adjusts the color of the license plate accordingly z Main Menu 偓Camera Setting Sequence S...

Page 34: ...al Zoom or Freeze function is in use BLC Setting You can selectively choose a screen area to see objects within the area more clearly than others Four direction Joystick Controls Moving the joystick in all four directions upward downward left and right adjusts the location and size of a selected area Zoom Control Zoom Tele Enlarges the size of a selected area Zoom Wide Reduces the size of a select...

Page 35: ...OFF AGC does not function LOW MEDIUM HIGH As the level increases to HIGH brighter the captured screen in a dark lighting MANUAL AGC can be fine tuned by adjusting the level 5dB 41dB z z z Main Menu 偓Camera Setting Sequence Setting P T Setting OSD Setting Alarm Setting Initialize Status Æ Camera Setting Focus Zoom White Balance ATW Exposure Back Light OFF 偓AGC MEDIUM SSNR MEDIUM SSDR Day Night Other...

Page 36: ...M The most commonly used mode Reduces a suitable amount of noise while generating a subtle afterimage HIGH Reduces noise significantly but generates obvious afterimages SSNR is not available if AGC is set to OFF or MANUAL M Main Menu 偓Camera Setting Sequence Setting P T Setting OSD Setting Alarm Setting Initialize Status Æ Camera Setting Focus Zoom White Balance ATW Exposure Back Light OFF AGC MEDI...

Page 37: ...between bright and dark spots Mode Enables or disables SSDR Range Defines a range of SSDR Level Changes the contrast between bright and dark spots by the level 44 3 0 44 3 0 Camera Setting Focus Zoom White Balance ATW Exposure Back Light OFF AGC MEDIUM SSNR MEDIUM 偓SSDR Day Night Others Main Menu 偓Camera Setting Sequence Setting P T Setting OSD Setting Alarm Setting Initialize Status Æ SSDR 偓Mode O...

Page 38: ...table as in the chart below The camera s ambient light diversion performance may vary depending on its environment ColorpB W B WpColor FAST 2 5Lux 4Lux SLOW 0 8Lux 6Lux Dwell Time The duration of both the lighting conditions can be customized to let the camera divert between the daytime and nighttime settings Auto mode is not available if AGC is set to OFF or MANUAL Only available if it is set to ...

Page 39: ...camera caused by due to the wind and other reasonable causes The Stabilizer uses the digital zoom and may cause low picture quality The Stabilizer is disabled if the ambient light is too low The Stabilizer is disabled if the field of view has very low or no contrast e g The sky or a white wall Image Adj Sharpness Sharpens outlines of an image Color Adjusts the color density of an image Freeze Stops...

Page 40: ...ordingly However if an abnormal zoom factor is displayed you must set the value to Decrease so that the zoom factor will be displayed accordingly Reversed Focus Depending on the wiring direction Far Near can be controlled reversely This is what you can use to make the product work properly without changing the wiring Focus Near Pos Feedback SLA 12240 Lens Specification If the feedback value from th...

Page 41: ...e with the camera specification Otherwise the product may not work properly Per communication settings of the camera module SCU VAC VAC1 ID 1 baud rate 9600 communication mode 8 N 1 SCU 9051 ID 1 baud rate 9600 communication mode 8 E 1 z M z M Ú This instruction applies to SCU 9051 For VAC VAC1 camera settings refer to each product s user manual Main Setup Press the SET button to display the MAIN S...

Page 42: ...els 1 2 3 4 5 6 7 8 9 10 1 Select 2 RETURN to confirm the current setting and go back to the MAIN SETUP menu screen Default value 6 Ú In order for the CONTRAST AUTO setting to be enabled the BRIGHTNESS AUTO setting must already be turned on Accordingly if AUTO cannot be set to ON enable the BRIGHTNESS AUTO setting and then turn on the CONTRAST AUTO setting RANGE Use this option to switch between an...

Page 43: ...NUC MODE sub menu Press the LEFT button or RIGHT button while the cursor is aligned with 5 NUC MODE to switch from INTERVAL AMB MANUAL INTERVAL Press the SET button again to adjust the sub menu Select 2 RETURN to confirm the current setting and go back to the MAIN SETUP menu screen Default value INTERVAL INTERVAL An NUC will be performed at the specified INTERVAL AMB An NUC will only be performed wh...

Page 44: ...will be displayed in the opposite way as BW Press the LEFT button or RIGHT button while the cursor is aligned with 4 POLARITY to switch the black white inversion setting from BW WB BW Select 7 RETURN to confirm the current setting and go back to the MAIN SETUP menu screen Default value BW COLOR Use this option to set the color of images When COLOR1 is selected high temperature areas will be shown i...

Page 45: ...he camera ID to 1 BAUD RATE Communications Speed Settings Mode Set the baud rate to 9600 UART MODE Parity Settings Mode Set the communication mode to 8 N 1 RET PKT Return Packet Setting Use this option to adjust the return packet returned using the same status as the data entered setting Press the LEFT button or RIGHT button while the cursor is aligned with 4 RET PKT to switch the RET PKT setting ...

Page 46: ...h the basic settings which will be used the next time you start up the device Press the SET button while the cursor is aligned with 8 SAVE to record your current settings to the internal memory If you exit without saving the MAIN SETUP menu will close without any values being updated Do not disengage the power while settings are being saved After switching BRIGHTNESS and or CONTRAST to MANUAL and ...

Page 47: ...ressing the Enter key redirects the menu to the screen shown below Using the joystick adjust the location of the Pan and Tilt functions and then set the Zoom and Focus command In Preset Settings the Zoom and Focus command is controllable only by the Zoom command z z Æ Main Menu Camera Setting 偓Sequence Setting P T Setting OSD Setting Alarm Setting Initialize Status Preset 偓PTZF Setting Edit 001 Ho...

Page 48: ... Back Light Refer to the section entitled Setting Up Your Camera Day Night Refer to the section entitled Setting Up Your Camera SSNR Refer to the section entitled Setting Up Your Camera After Action Enables setting up an automatic action after the camera arrives at a selected preset location MD Commands the camera to perform the Motion Detection function If Focus mode is set to Auto the MD functio...

Page 49: ...system stabilization and 5 seconds of intelligence stabilization If using Group SEQ set the dwell time to at least 8 seconds MD restrictions according to the box camera module For SCU VAC VAC1 the MD function is the only after action SHC 745 Only motion detection is available SCB 3000 If you come to use MD at the preset point while in intelligence mode the current Intelligence mode will be deactiv...

Page 50: ...Enter key to perform the Set command and save the name Preset Name Edit 001 0123456789 Â ABCDEFGHIJKLMNOPQRSTUVWXYZ abcdefghijklmnopqrstuvwxyz BACKSPACECLEARSET Preset Name Edit Preset 001 1 255 Preset Name On Off OFF Edit Æ OSD Setting Camera ID ON Camera Name Preset Number ON 偓Preset Name Main Menu Camera Setting Sequence Setting P T Setting 偓OSD Setting Æ Æ Æ ...

Page 51: ...et PTZF Setting Edit 001H Home Position 001H Execute Clear 偓Status Preset PTZF Setting Edit 001H Home Position 001H Execute 偓Clear Status Preset PTZF Setting Edit 001H Home Position 001H 偓Execute Clear Status Preset PTZF Setting Edit 001H 偓Home Position 001H Execute Clear Status PresetStatus 001 þþþþþ þþþþþ þþþþþ þþþþþ 021 þþþþþ þþþþþ þþþþþ þþþþþ 041 þþþþþ þþþþþ þþþþþ þþþþþ 061 þþþþþ þþþþþ þþþþþ þ...

Page 52: ...ll Time 003s 3 128 Æ Select 2 preset locations by using the joystick Speed indicates the camera s movement speed DWELL TIME indicates the camera s duration of stay at a preset location Execute Executes the Swing operation Clear Deletes data in the Swing memory While in Sequence mode operation the actual movement can be slower than the specified when moving the camera in the direction of Pan and Til...

Page 53: ...1Setting NO PSET DWT s SPD 001 003 54 002 003 54 003 003 54 004 003 54 005 003 54 006 003 54 007 003 54 Execute Executes the group operation Clear Deletes the selected group While in Sequence mode operation the actual movement can be slower than the specified when moving the camera in the direction of Pan and Tilt at the same time z z z M Main Menu Camera Setting 偓Sequence Setting P T Setting OSD S...

Page 54: ...an stop replay by using the MENU used for OSD menu button Ú Using other protocols Protocol Representative Model Stop saving the trace PELCO D P KDB300A Ack Iris Open SAMSUNG E SSC 5000 OSD ON Iris Open PANASONIC WV CU161C OSD ON VICON V1300X DVC Iris Open HONEYWELL HTX 3000 Iris Open AD OSD ON Iris Open GE KTD 405 Iris Open Bosch Iris Open z z Æ Main Menu Camera Setting 偓Sequence Setting P T Setti...

Page 55: ... selected trace mode A PAN Auto run a 360 degree pan To activate the panning command you need to set up the camera s tilt angle and auto pan speed manually SCHEDULE Execute Auto Run on the selected day of the week Time Enables setting up an Auto Run duration The duration can be 10 60 seconds or 1 60 minutes z z Æ Auto Run 偓Mode OFF Time 30 SEC Main Menu Camera Setting 偓Sequence Setting P T Setting...

Page 56: ...l Time performs the Group function While the camera is performing a sequence action if motion is detected from a selected preset location the camera pauses the sequence action operation and starts monitoring the location instead for a duration that is set under the MD Dwell Time menu If the motion is no longer detectable or the duration expires the camera aborts the monitoring operation and then r...

Page 57: ...SC EXIT START PAN ENTER SET ESC EXIT The following picture shows the Tilt Limit setting Move the joystick left and right to select a movement range from the starting point to the end START TILT ENTER SET ESC EXIT END TILT ENTER SET ESC EXIT ON OFF Sets the configured Pan Tilt Limit function to use or not z z Æ P T Setting 偓Pan Limit Tilt Limit Area Setting Area Masking Housing Load 03 KG Wiper Pro...

Page 58: ...the picture below move the joystick to select the upper left corner and lower right corner of an area END POSITION ENTER SET ESC EXIT START POSITION ENTER SET ESC EXIT The effective positioning range is between 45 and 40 in the tilting angle at the zoom factor of 1x ON OFF Cancels or activates the display function of selected areas Area naming for SCU 9051 VAC VAC1 END POSITION ENTER SET ESC EXIT ...

Page 59: ... 45 and 40 in the tilting angle at the zoom factor of 1x ON OFF Cancels or activates the Area Masking function Area masking setting for SCU VAC VAC1 END POSITION ENTER SET ESC EXIT START POSITION ENTER SET ESC EXIT If the custom area includes the masking settings the entire screen will be masked z z M Æ Area Masking 偓Mask 1 Mask 2 Mask 3 Mask 4 P T Setting Pan Limit Tilt Limit Area Setting 偓Area M...

Page 60: ...peed depends on the camera module s weight For optimal speed control set the weight of the camera module between 3 kg 10 kg M Æ P T Setting Pan Limit Tilt Limit Area Setting Area Masking 偓Housing Load 03 KG Wiper Prop P T ON Image Hold OFF Main Menu Camera Setting Sequence Setting 偓P T Setting OSD Setting Alarm Setting Initialize Status ...

Page 61: ... Preset run with Wiper function Set the preset to face the pump s water outlet Pump Delay Operating time of the pump 1 30 seconds Duration Operating time of the pump and wiper 6 30 seconds If the pump is turned off means operating time of the wiper Delay Off Operating time of the wiper 6 30 seconds z z z z z z Æ Wiper 偓Pump Enable OFF Wiper OFF Duration 06 SEC P T Setting Pan Limit Tilt Limit Area...

Page 62: ...erclockwise Wide accelerates the Pan and Tilt speed allowing detailed adjustments Turning this Off executes the function the optical 1x zoom speed regardless of how far the lens is zoomed in Æ P T Setting Pan Limit Tilt Limit Area Setting Area Masking Housing Load 03 KG Wiper 偓Prop P T ON Image Hold OFF Main Menu Camera Setting Sequence Setting 偓P T Setting OSD Setting Alarm Setting Initialize Sta...

Page 63: ... next preset position This is useful to help the screen observer keep sharp eyes and to monitor multiple locations within a network Æ P T Setting Pan Limit Tilt Limit Area Setting Area Masking Housing Load 03 KG Wiper Prop P T ON 偓Image Hold OFF Main Menu Camera Setting Sequence Setting 偓P T Setting OSD Setting Alarm Setting Initialize Status ...

Page 64: ...anguage This camera supports English Chinese French German Spanish Italian and Portuguese Clock Specify the time and date settings to your preference z z z z z z z z Æ OSD Setting 偓Camera ID ON Camera Name Preset Number ON Preset Name Sequence Status ON PTZ Position ON Language ENGLISH Clock Main Menu Camera Setting Sequence Setting P T Setting 偓OSD Setting Alarm Setting Initialize Status XXX Name...

Page 65: ...ON As shown in the picture above the Alarm Input must be entered with the Open or Closed switch signals Supplying power without entering the signals may damage the product z z M Æ Alarm Input ALM MOD P SEQ NO IN1 OFF 1 OFF IN2 OFF 2 OFF IN3 OFF 3 OFF Alarm Setting Alarm Enable OFF 偓Alarm Input Alarm Output Aux Output IR Illuminator Main Menu Camera Setting Sequence Setting P T Setting OSD Setting ...

Page 66: ...he alarm output for each of 3 alarm inputs and MD You can also assign more than one alarm input and MD to one alarm output port Timer 1 2 On Retains an alarm output for a set duration from a minimum of 1 second to a maximum of 60 hours upon the alarm occurrence MOMENT Retains an alarm output only until the alarm is canceled The Alarm Output is equipped with a relay circuit The operation of the ala...

Page 67: ...x command is transmitted from the controller A duration can be selected from a minimum of 1 second to a maximum of 60 minutes Ä NO COM AUXOff NO COM AUXOn Connecting the power connector and GND incorrectly to the Aux terminal s NO and COM ports may cause a short circuit and fire damaging the camera The maximum power capacity of the built in relay is 30VDC 2A 125VAC 0 5A and 250VAC 0 25A Operating t...

Page 68: ...y Default Set Enables resetting the camera to its factory default settings When the mode is selected all custom data such as preset locations is deleted from the camera Use this function if it is necessary to reset the settings of the camera z z M z z Æ Alarm Setting Alarm Enable OFF Alarm Input Alarm Output Aux Output 偓IR Illuminator Main Menu Camera Setting Sequence Setting P T Setting OSD Setti...

Page 69: ... factor of the connected camera CAMERA VER Display the software version of the connected camera MOTION VER Main board F W version PROTOCOL Protocol settings CONTROLLER Communication mode settings INNER VER Inner board F W version DRIVER VER Display the DSP F W version of the main board z z z z z z z z Æ Status CAMERA INFO SCM2370 NTSC CAMERA VER V2 00_100527 MOTION VER V1 00_100726 PROTOCOL SAMSUN...

Page 70: ...Check the camera s Brightness menu Adjust the camera s Brightness menu 32 The monitor displays a white image Check if the iris of the lens is open Adjust the menu for the iris of the lens 32 Picture is out of focus Check if the cover or the camera lens is dirty or smudged If it is clean the dirt off Verify the distance between the camera and the subject as well as the subject s surroundings Camera...

Page 71: ...fined in a preset This phenomenon may happen since the motors have a margin error of 0 1 Sequence configuration of the camera does not work Check if Preset or another operation mode has been set 47 51 Camera suddenly turns on or moves to a preset position by itself Check the Auto Run settings Auto Run puts a camera through a predefined action sequence if the user does not use the Controller to ope...

Page 72: ...distance is exceeded Check the Power cord s by periods The Power cord s coating has been damaged The power cord is hot to touch when the product is in operation The power cord gets hot after being folded or pulled on y y y Continuing to use the product when its power cord is damaged constitutes an electrical and fire hazard The power plug must be removed from the outlet immediately and a qualified...

Page 73: ... 1 1 6 Wide 3 9 Tele Angular Field of View H 55 5 Wide 1 59 Tele V 42 5 Wide 1 19 Tele Min Object Distance 150cm Focus Control AUTO MANUAL ONE SHOT Zoom Movement Speed 2 8 sec Pan Tilt Pan Range 360 Endless Pan Speed Preset 0 1 120 sec Manual 0 1 sec 36 sec Turbo 120 sec Tilt Range 85 40 Tilt Speed Preset 0 1 36 sec Manual 0 1 sec 36 sec Preset 255 Preset Accuracy 0 1º Operational On Screen Displa...

Page 74: ...l SPC 300 Compatible Protocol Coax Pelco C Coaxitron RS 485 Samsung T Samsung E Pelco D Pelco P Panasonic Vicon Honeywell AD GE Bosch Environmental Operating Temperature Humidity 50 C 50 C 58 F 122 F Less than 90 RH Ingress Protection IP66 Electrical Input Voltage Current 24VAC 10 Power Consumption Max 40W Max 144W Heater Fan Mechanical Color Material Ivory Aluminum Dimension WxHxD 217 3 W 587 5 H...

Page 75: ...co C Coaxitron RS 485 Samsung T Samsung E Pelco D Pelco P Panasonic Vicon Honeywell AD GE Bosch Alarm 3 In 2 Out Aux 1 Out Environmental Operating Temperature Humidity 50 C 50 C 58 F 122 F Less than 90 RH Ingress Protection IP66 Electrical Input Voltage 24VAC 10 Power Consumption Max 40W Max 144W Heater Fan Mechanical Color Material Ivory Aluminum Dimensions WxHxD 217 3 W 587 5 H 500 D mm 220 3 W ...

Page 76: ...sec Preset 255 Preset Accuracy 0 1º Operational On Screen Display English Chinese French German Spanish Italian Portuguese Image Mode Color1 Color2 ISO B W Sharpness Off On Manual Contrast Enhancement Auto Manual Digital Noise Reduction 3D 4 Step Low Medium High Off Alarm Out 3 In 2 Out 1 Aux Communication Coaxial Control SPC 300 Compatible RS 485 Protocol Coax Pelco C Coaxitron RS 485 Samsung T S...

Page 77: ...English 77 PRODUCT SPECIFICATIONS EXTERNAL DIMENSIONS SCU 2370 VAC 9051 ...

Page 78: ...78_ product specifications product specifications INTERNAL DIMENSIONS SCU 2370 VAC 9051 ...

Page 79: ...English 79 PRODUCT SPECIFICATIONS EXTERNAL DIMENSIONS SCU VAC1 ...

Page 80: ...80_ product specifications product specifications INTERNAL DIMENSIONS SCU VAC1 ...

Page 81: ...English 81 PRODUCT SPECIFICATIONS 154 7 170 9 2 135 102 102 4 10 4 10 1 8 120 72 1 72 1 6 496 8 150 80 177 120 10 34 2 420 72 1 72 1 153 7 6 5 Wall Mount y Pedestal Mount y ...

Page 82: ... Equipment Type Environment Positioning System Model Name SCU 2370 VAC VAC1 9051 Conformance to EN 55022 2006 EN 50130 4 2003 We the undersigned hereby declare that the equipment specified above conforms to the above Directive s Manufacturer SAMSUNG TECHWIN CO LTD Legal Representative in Europe Signature Signature Full Name BONJENG GU Full Name Position QUALITY CONTROL MANAGER Position Place CHANG...

Page 83: ...MEMO ...

Page 84: ...MEMO ...

Page 85: ...MEMO ...

Page 86: ...82 70 7147 8740 60 FAX 82 31 8018 3745 SAMSUNG TECHWIN EUROPE LTD Samsung House 1000 Hillswood Drive Hillswood Business Park Chertsey Surrey UNITED KINGDOM KT16 OPS TEL 44 1932 45 5300 FAX 44 1932 45 5325 SAMSUNG TECHWIN AMERICA Inc 100 Challenger Rd Suite 700 Ridgefield Park NJ 07660 Toll Free 1 877 213 1222 Direct 1 201 325 6920 Fax 1 201 373 0124 www samsungcctvusa com SALES NETWORK ...

Reviews: