background image

GABD-000264 

Ed.  02 


OfficeServ 7000 Series Call Server 

Programming Manual 


Summary of Contents for OfficeServ 7000 Series

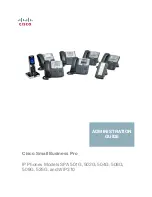
Page 1: ...GABD 000264 Ed 02 OfficeServ 7000 Series Call Server Programming Manual ...

Page 2: ... please separate this from other types of wastes and recycle it responsibly to promote the sustainable reuse of material resources Household users should contact either the retailer where they purchased this product or their local government office for details of where and how they can take this item for environmentally safe recycling Business users should contact their supplier and check the term...

Page 3: ...ow to program a digital phone Audience This manual is intended for users who program the MMC of the OfficeServ 7000 Series system Document Content and Organization This manual is composed of two Chapters and Abbreviation Each chapter is introduced as follows CHAPTER 1 Overview of MMC Programming This chapter describes things to know before starting MMC programming and about the buttons of digital ...

Page 4: ...t the reader should follow in order to avoid personal injury or fatality CAUTION Provides information or instructions that the reader should follow in order to avoid a service failure or damage to the system CHECKPOINT Provides the operator with checkpoints for stable system operation NOTE Indicates additional information as a reference Console Screen Output The lined box with Courier New font wil...

Page 5: ...tions for the OfficeServ 7000 Series system OfficeServ 7000 Series General Description Describes the business features available with the OfficeServ 7000 Series system WIP 5000M User Guide This is a user s guide for the WIP 5000M mobile telephone that is designed to use the wireless LAN provided by the OfficeServ 7000 Series system Revision History EDITION DATE OF ISSUE REMARKS 00 12 2008 First Ed...

Page 6: ...Revision History IV SAMSUNG Electronics Co Ltd This page is intentionally left blank ...

Page 7: ... and correct operation the following information must be given to the operator user and shall be read before the installation and operation Symbols Caution Indication of a general caution Restriction Indication for prohibiting an action for a product Instruction Indication for commanding a specifically required action ...

Page 8: ...e call cost This MPD facility requires the Meter Pulse Detection version of the trunk card When changing the MMC 506 807 812 and 816 MMC 506 510 807 812 and 816 should not be changed from the default levels without the assistance of the local SAMSUNG distributor Compliance with the National Version Standards For the national version OfficeServ 7000 Series is designed to comply with the standards o...

Page 9: ...MC Programming 1 1 1 1 Introduction to Programming 1 1 1 2 Digital Phones 1 2 1 2 1 DCS Euro Phones 1 2 1 2 2 DS ITP 5000 Series Phones 1 3 1 3 Cautions in Programming 1 6 1 4 Program List by User s Level 1 7 1 4 1 Station Level Programming 1 7 1 4 2 Operator Level Programming 1 8 1 4 3 Technician Level Programming 1 15 1 5 Program List by Function 1 17 1 5 1 Phone Function 1 17 1 5 2 Networking F...

Page 10: ...DATE DISPLAY 2 19 110 STATION ON OFF 2 21 111 PHONE RING TONE 2 24 112 ALARM REMINDER CLOCK 2 25 113 VIEW MEMO NUMBER 2 27 114 PHONE VOLUME 2 28 115 SET PROGRAMMED MESSAGE 2 30 116 ALARM AND MESSAGE 2 31 117 EDIT TEXT MESSAGE 2 33 118 CONFERENCE GROUP 2 34 119 CALLER ID DISPLAY 2 36 120 LARGE LCD OPTIONS 2 39 121 PHONE LANGUAGE 2 41 122 NEWS DISPLAY SPEED 2 42 125 EXECUTIVE STATE 2 43 126 MOBEX NU...

Page 11: ...2 82 303 ASSIGN BOSS SECRETARY 2 84 304 ASSIGN EXTENSION TRUNK USE 2 86 305 ASSIGN FORCED CODE 2 88 306 HOT LINE OFF HOOK SELECTION 2 89 308 ASSIGN BACKGROUND MUSIC SOURCE 2 90 309 ASSIGN STATION MOH SOURCE 2 91 310 LCR CLASS OF SERVICE 2 92 312 ALLOW CALLER ID 2 93 314 CONFIRM OUTGOING CALL 2 94 315 CUSTOMER SET RELOCATION 2 95 316 COPY STATION USABLE 2 96 317 ASSIGN STATION STATION USE 2 97 318 ...

Page 12: ... M DID RINGDOWN 2 135 417 E1 PRI CRC4 OPTION 2 137 418 BRI AND PRI CARD RESTART 2 138 419 BRI OPTIONS 2 139 420 PRI OPTIONS 2 144 421 MSN DIGIT 2 148 422 TRUNK COS 2 150 423 S T MODE 2 152 424 BRI S0 MAPPING 2 153 425 CID TRUNKS 2 154 426 TRUNK GAIN CONTROL 2 155 428 ASSIGN TRUNK TRUNK USE 2 157 432 SET H TRK 2 158 433 COST RATE 2 159 434 CONNECTION STATUS 2 160 436 TRUNK TMC GAIN 2 163 437 16 TRU...

Page 13: ...09 CALL LOG BLOCK 2 211 611 ALLOW TEXT MESSAGING 2 212 612 ALLOW GROUP CONFERENCE 2 213 614 STATION TRUNK USE GROUP 2 214 615 MGI GROUP 2 215 616 MGI USER 2 217 700 COPY COS CONTENTS 2 218 701 ASSIGN COS CONTENTS 2 219 702 TOLL DENY TABLE 2 223 703 TOLLALLOWANCE TABLE 2 225 704 ASSIGN WILD CHARACTER 2 227 705 ASSIGN SYSTEM SPEED DIAL 2 228 706 SYSTEM SPEED DIAL BY NAME 2 230 707 AUTHORIZATION CODE...

Page 14: ...MESSAGE MATCH 2 288 739 ASSIGN AA MOH 2 290 740 STATION PAIR 2 291 746 COSTING DIAL PLAN 2 292 747 RATE CALCULATION TABLE 2 294 750 SVM SYSTEM 2 296 751 USER OPTIONS 2 298 752 AUTO RECORD 2 299 753 WARNING DESTINATION 2 301 754 VM HALT 2 302 755 VM ALARM 2 303 756 ASSIGN VMMOH 2 304 757 VM IN OUT 2 305 758 VM DAY NIGHT 2 306 759 CLI RINGING 2 307 760 ITEM COST TABLE 2 309 761 TAX RATE SETUP 2 311 ...

Page 15: ...346 824 NETWORK DIAL TRANSLATION 2 348 825 ASSIGN NETWORKING OPTIONS 2 350 826 ASSIGN SYSTEM REFERENCE CLOCK 2 352 827 CRM DSP MODE SELECT 2 353 828 RCM2 DSP MODE SELECT 2 355 829 LAN PRINTER PARAMETERS 2 356 830 LAN PARAMETERS 2 358 831 MGI PARAMETERS 2 361 832 VoIP ACCESS CODE 2 363 833 VoIP IP TABLE 2 366 834 H 323 OPTIONS 2 368 835 MGI DSP OPTIONS 2 370 836 H 323 GK OPTIONS 2 376 837 SIP OPTIO...

Page 16: ...SYSTEM OPTIONS 2 424 856 TECH PROGRAMMING LOGS 2 425 857 VIRTUAL CABINET SET 2 426 858 OAS CARD SERVICE 2 427 859 HARDWARE VERSION DISPLAY 2 428 860 LICENSE 2 430 861 SYSTEM OPTIONS 2 432 863 SYSTEM NODE INFORMATION 2 435 865 FAN POWER CONTROL 2 437 867 IRM DSP MODE SELECT 2 438 868 REMOTE STATION 2 440 889 DISPLAY SERVER STATUS 2 441 890 INITIALIZE PORT 2 442 ABBREVIATION I A C I D I II K O III P...

Page 17: ...d MMC list 1 10 Table 1 5 Timer and Tone Related MMC list 1 11 Table 1 6 Group Related MMC list 1 12 Table 1 7 Tables Codes AA DECT and VM MMC list 1 13 Table 1 8 Technician Level Programming list 1 15 Table 1 9 Phone Function Programming list 1 17 Table 1 10 Networking Function Programming list 1 18 Table 1 11 VoIP Function Programming list 1 18 Table 1 12 WLAN Function Programming list 1 19 Tabl...

Page 18: ...TABLE OF CONTENTS XVI SAMSUNG Electronics Co Ltd This page is intentionally left blank ...

Page 19: ...ta that is used for the system operation program The MMC can be divided into programmable one and non programmable one The programmable MMC is classified into 3 levels such as technician operator and station level The technician level programming and the operator level programming require a passcode for each level and the station level programming does not require a passcode Program List by User s...

Page 20: ... numbered 1 12 from top to bottom Buttons 7 to 12 are special buttons A F used for programming 6B LCD phone has 6 programmable buttons left column is numbered 1 3 from the top right column is numbered 4 6 from the top Buttons 1 to 3 are special buttons A C and buttons 4 to 6 are special buttons D F used for programming Volume Control Buttons Volume control for handset ring speaker etc Scroll Butto...

Page 21: ...ogramming mode ANS RLS Button Select ALL option for making changes to all rather than individual stations trunks etc Hold Button Clear an entry in the display Volume Buttons Scroll through display options TRSF Transfer Button Enter MMC programming mode or store data and exit programming mode Speaker Button Store data and advance to next MMC 1 2 2 DS ITP 5000 Series Phones These include the DS 5038...

Page 22: ...tons Scroll Button Telephone Status Indicator Conference Button Redial Button Volume Button Speaker Button Speaker Dial Buttons Hold Button A Button LCD Display Navigation Button A Button DS 5014S Programmable Buttons 14 DS 5007S Programmable Buttons 7 Soft Buttons Transfer Button LCD screen Programmable Buttons Scroll Button Status Indicator Conference Button Redial Button Volume Button Dial Butt...

Page 23: ...ous other kinds of information Using three colors red green and yellow the station status indicator displays the current status of station When programming other functions programmed on buttons are as follows Volume Buttons Scroll through items in the display Redial Button Select ALL option for making changes to all rather than individual stations trunks etc Soft Buttons Save data or move the curs...

Page 24: ...ming is allowed on a phone that does not have an LCD display If the LCD displays an INVALID DATA message while programming reenter the correct data If no button is pressed for a certain period of time during programming default is 60 seconds the phone returns to the idle state from programming mode Programming mode halts if the handset is picked up or the Transfer button is pressed or the phone is...

Page 25: ...el Programming list MMC No MMC Name MMC 100 STATION LOCK MMC 101 CHANGE USER PASSCODE MMC 102 CALL FORWARD MMC 103 SET ANSWER MODE MMC 104 STATION NAME MMC 105 STATION SPEED DIAL MMC 106 STATION SPEED DIAL NAME MMC 107 KEY EXTENDER MMC 108 STATION STATUS MMC 109 DATE DISPLAY MMC 110 STATION ON OFF MMC 111 PHONE RING TONE MMC 112 ALARM REMINDER CLOCK MMC 113 VIEW MEMO NUMBER MMC 114 PHONE VOLUME MM...

Page 26: ...ollows Table 1 2 System Related MMC list MMC No MMC Name MMC 200 OPEN CUSTOMER PROGRAMMING MMC 201 CHANGE CUSTOMER PASSCODE MMC 202 CHANGE FEATURE PASSCODE MMC 203 ASSIGN UA DEVICE MMC 204 COMMON BELL CONTROL MMC 205 ASSIGN LOUD BELL MMC 206 BARGE IN TYPE MMC 207 ASSIGN VM AA PORT MMC 208 ASSIGN RING TYPE MMC 209 ASSIGN ADD ON MODULE MMC 210 CUSTOMER ON OFF PER TENANT MMC 211 DOOR RING ASSIGNMENT ...

Page 27: ...ON TRUNK USE MMC 305 ASSIGN FORCED CODE MMC 306 HOT LINE OFF HOOK SELECTION MMC 308 ASSIGN BACKGROUND MUSIC SOURCE MMC 309 ASSIGN STATION MOH SOURCE MMC 310 LCR CLASS OF SERVICE MMC 312 ALLOW CALLER ID MMC 314 CONFIRM OUTGOING CALL MMC 315 CUSTOMER SET RELOCATION MMC 316 COPY STATION USABLE MMC 317 ASSIGN STATION STATION USE MMC 318 DISTINCTIVE RINGING MMC 319 BRANCH GROUP MMC 320 PRESET FORWARD N...

Page 28: ...K RELEASE MMC 408 ASSIGN TRUNK MOH SOURCE MMC 409 TRUNK STATUS READ MMC 410 ASSIGN DISA TRUNK MMC 411 ASSIGN E1 SIGNAL TYPE MMC 412 ASSIGN TRUNK SIGNAL MMC 413 VMS CALL TYPE MMC 414 MPD PRS SIGNAL MMC 415 REPORT TRUNK ABANDON DATA MMC 416 ASSIGN E M DID RINGDOWN MMC 417 E1 PRI CRC4 OPTION MMC 418 BRI AND PRI CARD RESTART MMC 419 BRI OPTIONS MMC 420 PRI OPTIONS MMC 421 MSN DIGIT MMC 422 TRUNK COS M...

Page 29: ...ne Related MMC list MMC No MMC Name MMC 500 SYSTEM WIDE COUNTERS MMC 501 SYSTEM TIMERS MMC 502 STATION WIDE TIMERS MMC 503 TRUNK WIDE TIMERS MMC 504 PULSE MAKE BREAK RATIO MMC 505 ASSIGN DATE AND TIME MMC 506 TONE CADENCE MMC 507 ASSIGN RING PLAN TIME MMC 508 CALL COST MMC 510 SLI RING CADENCE MMC 511 MSG WAITING LAMP CADENCE MMC 512 HOLIDAY ASSIGNMENT MMC 513 HOTEL TIMER MMC 514 TONE SOURCE MMC 5...

Page 30: ...me MMC 600 ASSIGN OPERATOR GROUP MMC 601 ASSIGN STATION GROUP MMC 602 STATION GROUP NAME MMC 603 ASSIGN TRUNK GROUP MMC 604 ASSIGN STATION TO PAGE ZONE MMC 605 ASSIGN EXTERNAL PAGE ZONE MMC 606 ASSIGN SPEED BLOCK MMC 607 UCD OPTIONS MMC 608 ASSIGN REVIEW BLOCK MMC 609 CALL LOG BLOCK MMC 611 ALLOW TEXT MESSAGING MMC 612 ALLOW GROUP CONFERENCE MMC 614 STATION TRUNK USE GROUP MMC 615 MGI GROUP MMC 61...

Page 31: ... MMC 707 AUTHORIZATION CODE MMC 708 ACCOUNT CODE MMC 709 TOLL PASS CODE SPECIAL CODE TABLE MMC 710 LCR DIGIT TABLE MMC 711 LCR TIME TABLE MMC 712 LCR ROUTE TABLE MMC 713 LCR MODIFY DIGIT TABLE MMC 714 DID NUMBER AND NAME TRANSLATION MMC 715 PROGRAMMED STATION MESSAGE MMC 716 UK LCR OPTION MMC 717 UCD AGENT ID MMC 718 MY AREA CODE MMC 719 IDLE DISPLAY MMC 720 COPY KEY PROGRAMMING MMC 721 SAVE STATI...

Page 32: ...0 STATION PAIR MMC 746 COSTING DIAL PLAN MMC 747 RATE CALCULATION TABLE MMC 748 COSTING DIAL PLAN MMC 749 RATE CALCULATION TABLE MMC 750 SVM SYSTEM MMC 751 USER OPTIONS MMC 752 AUTO RECORD MMC 753 WARNING DESTINATION MMC 754 VM HALT MMC 755 VM ALARM MMC 756 ASSIGN VMMOH MMC 757 VM IN OUT MMC 758 VM DAY NIGHT MMC 759 CLI RINGING MMC 760 ITEM COST TABLE MMC 761 TAX RATE SETUP MMC 762 ROOM COST RATE ...

Page 33: ... LEVEL AND GAIN MMC 806 CARD PRE INSTALL MMC 807 PHONE VOLUME CONTROL MMC 810 HALT PROCESSING MMC 811 RESET SYSTEM MMC 812 SET COUNTRY CODE MMC 813 HOTEL OPERATION MMC 815 CUSTOMER DATABASE COPY MMC 816 CONFERENCE GAIN MMC 817 STOP MEMORY MMC 818 PROGRAM DOWNLOAD MMC 819 MEDIA CARD FILE CONTROL MMC 820 ASSIGN SYSTEM LINK ID MMC 821 ASSIGN NETWORK TRUNK MMC 822 VIRTUAL EXTENSION TYPE MMC 823 ASSIGN...

Page 34: ...TION MMC 845 WLAN PARAMETERS MMC 846 WIP INFORMATION MMC 848 WLAN IP MAC LIST MMC 849 WLAN CONFIGURATION MMC 850 SYSTEM RESOURCE DISPLAY MMC 851 ALARM REPORTING MMC 852 SYSTEM ALARM ASSIGNMENTS MMC 853 MAINTENANCE BUSY MMC 854 DIAGNOSTIC TIME MMC 855 DISPLAY SYSTEM OPTIONS MMC 856 TECH PROGRAMMING LOGS MMC 857 VIRTUAL CABINET SET MMC 858 OAS CARD SERVICE MMC 859 HARDWARE VERSION DISPLAY MMC 860 LI...

Page 35: ... 7000 Series are as follows Table 1 9 Phone Function Programming list MMC Program No Program Description MMC 100 STATION LOCK MMC 101 CHANGE USER PASSCODE MMC 102 CALL FORWARD MMC 103 SET ANSWER MODE MMC 104 STATION NAME MMC 105 STATION SPEED DIAL MMC 106 STATION SPEED DIAL NAME MMC 107 KEY EXTENDER MMC 108 STATION STATUS MMC 109 DATE DISPLAY MMC 110 STATION ON OFF MMC 111 PHONE RING TONE MMC 112 ...

Page 36: ...NETWORK DIAL TRANSLATION MMC 825 ASSIGN NETWORKING OPTIONS MMC 830 LAN PARAMETERS MMC 861 SYSTEM OPTIONS 1 5 3 VoIP Function The MMC programs related to the function of VoIP Voice over Internet Protocol are as follows Table 1 11 VoIP Function Programming list MMC Program No Program Description MMC 831 MGI PARAMETERS MMC 832 VoIP ACCESS CODE MMC 833 VoIP IP TABLE MMC 834 H 323 OPTIONS MMC 835 MGI D...

Page 37: ... Routing are as follows Table 1 13 LCR Function Programming list MMC Program No Program Description MMC 710 LCR DIGIT TABLE MMC 711 LCR TIME TABLE MMC 712 LCR ROUTE TABLE MMC 713 LCR MODIFY DIGIT TABLE MMC 763 SECOND LCR 1 5 6 Auto Attendant Voice Mail Function The MMC programs related to the function of AA Auto Attendant or VM Voice Mail are as follows Table 1 14 Auto Attendant Voice Mail Functio...

Page 38: ...ogramming list MMC Program No Program Description MMC 434 CONNECTION STATUS MMC 851 ALARM REPORTING MMC 852 SYSTEM ALARM ASSIGNMENTS MMC 853 MAINTENANCE BUSY MMC 854 DIAGNOSTIC TIME MMC 855 DISPLAY SYSTEM OPTIONS This MMC is not shown in OfficeServ 7100 7030 7070 MMC 890 INITIALIZE PORT 1 5 8 Hotel Function The MMC programs related to the function of a hotel are as follows Table 1 16 Hotel Functio...

Page 39: ...rogram number either 200 or 800 Enter either the operator passcode or the technician passcode Press 1 dial button to enable the programming mode In case of Program 800 Technician Program Mode Setting enter the tenant number to be programmed 2 Make the program number selectable state If the Speaker button is pressed the program selection mode appears Or if the Transfer button is pressed the program...

Page 40: ... The phone cannot make calls outside the system It can however make and receive intercom calls and receive incoming Trunk Line calls When in this mode the Hold button will flash slow RED 2 LOCKED ALL The phone cannot make or receive any calls When in this mode the Hold button will light steady RED CONDITIONS Check if the station lock function is disabled at MMC 301 ASSIGN STATION COS If so the sta...

Page 41: ...ton to select station and press Right Soft button to move cursor OR Select all stations ALL STN LOCK 3 Enter 0 to unlock or 1 to lock e g 1 OR 205 STN LOCK LOCKED OUT Press Volume button to make selection and press Right Soft button to return to step 2 4 Press Transfer button to save and exit OR Press Speaker button to save and advance to next MMC RELATED ITEMS MMC 101 CHANGE USER PASSCODE MMC 301...

Page 42: ...hile the program mode is ENABLE An Operator or Technician Level can only delete the passcode of a station and reset the passcode to the default value 1234 not permitting to know the passcode Default passcode Default passcode cannot be used for toll restriction override or for DISA access DEFAULT DATA ALL STATION PASSCODES 1234 ACTION DISPLAY 1 Press Transfer button and enter 101 Display shows 201 ...

Page 43: ...time provided that destinations have been entered for both No Type 0 FORWARD CANCEL 1 FWD ALL 2 BUSY 3 NO ANS 4 BUSY NO ANSWER 5 FWD DND CONDITIONS When BUSY NO ANSWER is selected calls are forwarded to stations set in BUSY and NO ANS Thus a destination number must be set for both BUSY and NO ANS before you can select the BUSY NO ANSWER option If forwarding is set to OFF in MMC 701 ASSIGN COS CONT...

Page 44: ... press Right Soft button to move cursor 4 Dial destination number e g 201 OR 205 FORWARD 1 FWD ALL 201 Press Volume button to select destination and press Right Soft button to move cursor 5 Dial 1 for YES 0 for NO OR 205 FORWARD CURRENTLY SET YES Press Volume button to select YES or NO and press Right Soft button to return to step 2 6 Press Transfer button to save and exit OR Press Speaker button ...

Page 45: ...iving a short attention tone the phone will automatically answer calls on the speakerphone When a Trunk line is transferred to a phone in Auto Answer the screened portion of the call will be Auto Answered but the phone will ring when the transfer is complete if you have not pressed the ANS RLS or SEND button or lifted the handset 2 VOICE ANNOUNCE The phone will not ring After a short attention ton...

Page 46: ...ss Volume button to select phone and press Right Soft button to move cursor OR Select all phones ALL ANS MODE 3 Dial 0 1 or 2 to change ring mode OR 205 ANS MODE VOICE ANNOUNCE Press Volume button to select ring mode and press Right Soft button to return to step 2 above 4 Press Transfer button to save and exit OR Press Speaker button to save and advance to next MMC RELATED ITEMS MMC 111 PHONE RING...

Page 47: ...umber 2 once to get the letter A Continue selecting characters from the table below to complete your message Pressing A button toggles between upper case and lower case Volume Up Down keys When the character you want appears on the same dial pad key as the previous character press the Volume Up button to move the cursor to the right or the Volume Down button to move the cursor to the left A space ...

Page 48: ...ber e g 205 OR 205 STN NAME _ Press Volume button to select station and press Right Soft button to move cursor 3 Enter the station name using the procedure described above and press Right Soft button 205 STN NAME SAM SMITH to return to step 2 4 Press Transfer button to save and exit OR Press Speaker button to save and advance to next MMC RELATED ITEMS NONE ...

Page 49: ...access number it will automatically insert the separator DEFAULT DATA NONE PROGRAM BUTTONS B Used to insert a flash code F C Used to insert a pause code P D Used to insert a pulse tone conversion code C E Used to mask unmask following digits shows as or F Used to enter name for speed dial bin see MMC 106 ACTION DISPLAY 1 Press Transfer button and enter 105 Display shows 201 SPEED DIAL 00 2 Dial st...

Page 50: ...o step 2 OR Press Left Soft button to return to step 3 Press Hold button to clear an entry If an error is made use VOLUME DOWN arrow to step back 5 Press F button to access MMC 106 Station Speed Dial Name to enter a name for speed dial OR Press Transfer button to save and exit OR Press Speaker button to save and advance to next MMC RELATED ITEMS MMC 106 STATION SPEED DIAL NAME MMC 606 ASSIGN SPEED...

Page 51: ...5 OR 205 SPEED NAME 00 Press Volume button to select station and press Right Soft button to move cursor If selected station has no speed dial bins the display will be as shown and a new station may be selected 305 SPEED NAME SPDBLK NOT EXIST 3 Dial speed dial location e g 01 OR 205 SPEED NAME 01 _ Press Volume button to scroll through location numbers and press Right Soft button to move cursor 4 E...

Page 52: ...kup Extension or station group number DS Direct Station Select Station number EP Established Call Pick Up ESTABLISHED CALLPICK UP FWRD Call Forward 0 7 GPIK Group Pickup 01 99 IG In Out of Group Station group number MGC MCS Predefined Conference 001 999 MCS Group Number MACR Assign MACRO function 0 49 MMPG Meet Me Page 0 9 MS Manual Signaling Extension or station group number MW Message Waiting Ex...

Page 53: ...tation numbers and press Right Soft button to move the cursor 3 Enter key number e g 18 OR 205 EXT MAST 18 DS Use Volume button to scroll through keys and use Right Soft button to move the cursor OR Press the key to be programmed 205 EXT MAST 18 DS DS_ 4 Dial extender according to above table System will return to step 3 205 EXT MAST 18 DS DS207 5 Press Left Soft button to return to step 2 OR Pres...

Page 54: ... Programming 2 16 SAMSUNG Electronics Co Ltd RELATED ITEMS MMC 720 COPY KEY PROGRAMMING MMC 721 SAVE STATION KEY PROGRAMMING MMC 722 STATION KEY PROGRAMMING MMC 723 SYSTEM KEY PROGRAMMING MMC 724 DIAL NUMBERING PLAN ...

Page 55: ... 6 Service level of ring mode 5 and 6 9 TENANT GROUP Tenant Group Number 1 or 2 DEFAULT DATA PORT FOLLOWS HARDWARE POSITION TYPE DEPENDENT ON CONNECTED PHONE PICKUP GRP NONE SGR NONE BOSS SECR NONE PAGE ZONE NONE COS NUMBER 01 IN ALL RING PLANS TENANT GRP 1 ACTION DISPLAY 1 Press Transfer button and enter 108 Display shows first station 201 STN STATUS PORT C1 S3 P01 2 Dial station number e g 205 O...

Page 56: ...td 4 Press Transfer button to save and exit OR Press Speaker button to save and advance to next MMC RELATED ITEMS MMC 301 ASSIGN STATION COS MMC 302 PICKUP GROUPS MMC 303 ASSIGN BOSS SECRETARY MMC 601 ASSIGN STATION GROUP MMC 604 ASSIGN STATION TO PAGE ZONE ...

Page 57: ...d has two options 0 UPPER CASE Displays Friday as FRI and March as MAR 1 LOWER CASE Displays Friday as Fri and March as Mar CONDITIONS NONE DEFAULT DATA COUNTRY WESTERN CLOCK 12 HOUR DISPLAY LOWER CASE ACTION DISPLAY 1 Press Transfer button and enter 109 Display shows 201 DAY FORMAT COUNTRY WESTERN 2 Dial station number e g 205 OR 205 DAY FORMAT COUNTRY WESTERN Press Volume button to select statio...

Page 58: ...CHAPTER 2 MMC Programming 2 20 SAMSUNG Electronics Co Ltd 5 Press Transfer button to save and exit OR Press Speaker button to save and advance to next MMC RELATED ITEMS MMC 505 ASSIGN DATE AND TIME ...

Page 59: ... When OFF requires you to press the fast flashing button to answer a ringing call after lifting the handset 08 AUTO CAMPON OFF When ON phone users can allow intercom calls to camp on to other phones without having to press a CAMP ON key 09 AME BGM OFF This feature selects whether a station using Answer Machine Emulation will hear their personal greeting or BGM while callers are listening to the pe...

Page 60: ...This function can operate in case PING RING SERVICE is enabled in MMC861 20 MISSED CALL OFF When ON the information of the missed calls will be displayed on extensions The missed call means that the ringing call is not answered The information of the missed calls includes the below The call which was not answered In case the call which was occurred by group call was not answered In case the call b...

Page 61: ...ove the cursor OR Select all stations 3 Dial option number from above list e g 03 OR 205 STN ON OFF HOT KEYPAD ON Press Volume button to select option and press the Right Soft button to move the cursor 4 Dial 1 for ON or 0 for OFF OR 201 STN ON OFF HOT KEYPAD OFF Press Volume button to select ON or OFF Press Left or Right Soft button to return to step 2 OR 5 Press Transfer button to save and exit ...

Page 62: ...on and enter 111 Display shows 201 RING TONE SELECTION 5 2 Dial phone number e g 205 OR 205 RING TONE SELECTION 5 Press Volume button to select station and press Right Soft button to move cursor OR Select all stations ALL RING TONE SELECTION 3 Dial 1 8 to select ring tone OR 205 RING TONE SELECTION 5 Press Volume button to select ring tone and press Right Soft button to move cursor 4 Press Transfe...

Page 63: ...No Type Description 0 NOTSET No alarm 1 TODAY Alarm once only 2 DAILY Alarm daily at set time DEFAULT DATA ALARMS ARE NOTSET ACTION DISPLAY 1 Press Transfer button and enter 112 Display shows 201 ALM CLK 1 HHMM NOTSET 2 Dial station number e g 205 OR 205 ALM CLK 1 HHMM NOTSET Press Volume button to select station and press Right Soft button 3 Dial 1 3 to select alarm e g 1 OR 205 ALM CLK 1 HHMM NO...

Page 64: ...CHAPTER 2 MMC Programming 2 26 SAMSUNG Electronics Co Ltd RELATED ITEMS MMC 116 ALARM AND MESSAGE ...

Page 65: ...CHARACTERS in MMC 104 STATION NAME DEFAULT DATA NONE ACTION DISPLAY 1 Press Transfer button and enter 113 Display shows 201 VIEW MEMO 1 2 Dial the keyset number e g 205 OR 205 VIEW MEMO 1 Press VOLUME keys to select station and press RIGHT soft key to move cursor 3 Dial memo number 1 3 OR 205 VIEW MEMO 1 _ Press VOLUME keys to select and press RIGHT soft key to move cursor 4 Enter memo via dial ke...

Page 66: ... highest 3 SPEAKER VOL This is the receive volume setting for conversations on the speaker phone of a phone There are 16 volume levels level 1 is the lowest and level 16 the highest In case of WIP phone There are 5 volume levels level 1 is the lowest and level 5 the highest 4 BGM VOLUME This is the volume you will hear background music over the phone speaker at when your phone is idle and BGM is t...

Page 67: ... VOLUME RING VOLUME 4 3 Dial volume type e g 3 OR 205 STN VOLUME SPEAKER VOL 13 Press Volume button to select volume type and press RIGHT soft key to move cursor 4 Press Volume button to select volume You will hear a brief tone for the volume you select 205 STN VOLUME SPEAKER VOL 08 5 Press Transfer button to save and exit OR Press Speaker button to save and advance to next MMC RELATED ITEMS MMC 1...

Page 68: ...and enter 115 Display shows 201 PGMMSG 00 CANCEL PGM MSG 2 Dial station number e g 205 OR 205 PGMMSG 00 CANCEL PGM MSG Press Volume button to select station and press Right Soft button to move cursor OR Select all stations ALL PGMMSG 3 Dial message number e g 05 OR 205 PGMMSG 05 PAGE ME Press Volume button to select message and press Right Soft button to return to step 2 OR Dial 00 to cancel an ex...

Page 69: ...Description 0 NOTSET No alarm 1 TODAY Alarm once only 2 DAILY Alarm daily at set time ENTERING CHARACTERS Refer to ENTERING CHARACTERS in MMC 104 STATION NAME DEFAULT DATA ALARMS ARE NOTSET ACTION DISPLAY 1 Press Transfer button and enter 116 Display shows 201 ALM REM 1 HHMM NOTSET 2 Dial station number e g 205 OR 205 ALM REM 1 HHMM NOTSET Press Volume button to select station and press Right Soft...

Page 70: ... HHMM 1300 DAILY OR Press Volume button to select alarm type and press Right Soft button to move cursor 6 Enter message and press Right Soft button to return to step 2 205 ALM REM Meeting 7 Press Transfer button to save and exit OR Press Speaker button to save and advance to next MMC RELATED ITEMS MMC 112 ALARM REMINDER CLOCK ...

Page 71: ...N NAME DEFAULT DATA BLANK MESSAGE ACTION DISPLAY 1 Press Transfer button and enter 117 Display shows 201 TXTMSG 01 Blank Message 2 Dial station number e g 205 OR 205 TXTMSG 01 Blank Message Press Volume button to select station and press Right Soft button to move cursor 3 Dial 01 10 to select message OR 205 TXTMSG 02 Blank Message Press Volume button to select message and press Right Soft button t...

Page 72: ...lected here Large LCD phones are automatically set to use conference groups ENTERING CONFERENCE GROUP NAME Refer to ENTERING CHARACTERS in MMC 104 STATION NAME DEFAULT DATA NONE ACTION DISPLAY 1 Press Transfer button and enter 118 Display shows 201 GRP 1 NAME 2 Dial station number e g 205 OR 205 GRP 1 NAME Press Volume button to select station and press Right Soft button to move cursor 3 Dial 1 5 ...

Page 73: ...onics Co Ltd 2 35 5 Enter conference member dial number and press Right Soft button to return to step 4 205 GRP 1 MBR1 9 2794296 6 Press Transfer button to save and exit OR Press Speaker button to save and advance to next MMC RELATED ITEMS MMC 612 ALLOW GROUP CONFERENCE ...

Page 74: ... CLI name or CLI number or trunk number If the former is not valid the latter has a priority DDI NUMBER FIRST According to priority it displays DDI number or DDI name If the former is not valid the latter has a priority If both are invalid it operates as a CLI NAME FIRST DDI NAME FIRST According to priority it displays DDI name or DDI number If the former is not valid the latter has a priority If ...

Page 75: ... supports up to 16 characters If both are invalid it displays trunk number CLI NAME DDI It displays CLI NAME DDI NUMBER It supports up to 16 characters If both are invalid it displays trunk number DDI NUMBER NAME It displays DDI NUMBER DDI NAME It only supports up to 16 characters If both are invalid it operates as a CLI NAME FIRST DDI NAME NUMBER It displays DDI NAME DDI NUMBER It only supports u...

Page 76: ...s Transfer button and enter 119 Display shows first station 201 RING LINE1CLI NAME FIRST 2 Enter station number e g 205 OR 205 RING LINE1 CLI NAME FIRST Press Volume button to select station and press Right Soft button OR Select all stations ALL RING LINE1 CLI NAME FIRST 3 Dial display option 0 1 or 2 e g 2 OR 205 RING LINE1 CLI NUMBER FIRST Press Volume button to select option and press Right or ...

Page 77: ... to keys are displayed when SCREEN key is pressed while on a call 4 CALENDAR Sets whether to display PREVIOUS screen or CALENDAR screen on LCD when idle 5 AOM CURSOR Sets cursor position on AOM menu screen 01 99 PREV POSITION 6 VIDEO MODE Sets the image start mode of a VIDEO IP phone In AUTO START the image screen is displayed automatically when a call is connected to a Video IP phone In MANUAL St...

Page 78: ...on OR Select all stations and press the Right Soft button ALL IDLE DISP CALENDER 3 Dial the option number from above list e g 1 OR 203 DS KEY DSP TEL NUMBER Press Volume button to select the option and press Right Soft button to move the cursor 4 Press Volume button to select display type and press Right Soft button 203 DS KEY DSP EXT NAME 5 Press Transfer button to save and exit OR Press Speaker ...

Page 79: ... 05 DUTCH 06 ITALY DEFAULT DATA ENGLISH ACTION DISPLAY 1 Press Transfer button and enter 121 Display shows 201 LANGUAGE ENGLISH 2 Dial station number e g 205 OR 205 LANGUAGE ENGLISH Press Volume button to select station and use Right Soft button to move cursor OR Select all stations ALL LANGUAGE 3 Dial 00 10 for language required OR 205 LANGUAGE GERMAN Press Volume button to make selection and pre...

Page 80: ...03 0300 ms ACTION DISPLAY 1 Press Transfer button and enter 122 Display shows first station 201 CALL SPEED 03 2 Enter station number e g 205 OR 205 CALL SPEED 03 Press Volume button to scroll through stations and press Right Soft button to select a station OR Select all stations 3 Dial speed option 03 10 205 CALL SPEED 03 04 4 Press Transfer button to save and exit OR Press Speaker button to save ...

Page 81: ...nce Refer to MMC 103 for a description of answer modes ENTER CHARACTERS Refer to ENTERING CHARACTERS in MMC 104 STATION NAME DEFAULT DATA NONE ACTION DISPLAY 1 Press Transfer button and enter 125 Display shows 201 EXEC STATE IN THE ROOM 2 Dial executive station number e g 205 OR 205 EXEC STATE IN THE ROOM Press Volume button to select station and press Right Soft button to move cursor 3 Dial 0 3 t...

Page 82: ...CHAPTER 2 MMC Programming 2 44 SAMSUNG Electronics Co Ltd RELATED ITEMS NONE ...

Page 83: ...ion should pair with MOBEX station through MMC 329 Ring Group ACTION DISPLAY 1 Press Transfer button and enter 126 Display shows 2001 MBR 1 3333 TEL 2 Input extension number OR 2001 MBR 1 3333 TEL Press Volume button to select station and press Right Soft button to move cursor 3 Input member number of ring group programmed in MMC 329 OR 2001 MBR 1 3333 TEL Press Volume button to make selection and...

Page 84: ... This option may not be available in certain OfficeServ models 3 SOFT LICENSE STS Maximum number and resisted number of SOFT Phone If License Key is not inputted or invalid Display show INVAILD LICENSE 4 SIP LICENSE STS Maximum number and resisted number of Samsung standard SIP Station Samsung standard SIP Station means standard SIP Station produced by Samsung If License Key is not inputted or inv...

Page 85: ...47 ACTION DISPLAY 1 Press Transfer button and enter 199 Display shows MGI LICENSE STS MAX 008 2 Press Volume button Display show admission status VMS LICENSE STS MAX 004 3 Press Transfer button to save and exit OR Press Speaker button to save and advance to next MMC RELATED ITEMS NONE ...

Page 86: ...customer level programming 1 ENABLE Close disable customer level programming DEFAULT DATA DISABLE ACTION DISPLAY 1 Press Transfer button and enter 200 Display shows ENABLE CUS PROG PASSCODE 2 Enter passcode ENABLE CUS PROG PASSCODE Correct code shows ENABLE CUS PROG DISABLE Incorrect code shows ENABLE CUS PROG PASSCODE ERROR 3 Press Volume button arrow key to select ENABLE or DISABLE and press Rig...

Page 87: ...OfficeServ 7000 Series Call Server Programming Manual SAMSUNG Electronics Co Ltd 2 49 RELATED ITEMS MMC 201 CHANGE CUSTOMER PASSCODE MMC 501 SYSTEM WIDE TIMERS MMC 802 CUSTOMER ACCESS MMC NUMBER ...

Page 88: ...AULT DATA PASSCODE 1234 ACTION DISPLAY 1 Press Transfer button and enter 201 CUST PASSCODE NEW CODE _ 2 Enter new passcode via dial keypad maximum four digits CUST PASSCODE NEW CODE 3 Verify new passcode via dial keypad CUST PASSCODE VERIFY Passcode verified go to step 4 OR CUST PASSCODE VERIFY SUCCESS Passcode failure return to step 2 CUST PASSCODE VERIFY FAILURE 4 Press Transfer button to save a...

Page 89: ... This passcode is used to allow items to be deleted from a room bill Hotel Application only 6 WLAN REGST The passcode required to register a WIP phone CONDITIONS The passcode is four digits long Each digit can be 0 9 The current passcode is required for this MMC DEFAULT DATA RING PLAN 0000 DISAALARM 5678 ALARM CLR 8765 DECT REGST 4321 DELETE 9999 WLAN REGST 0000 ACTION DISPLAY 1 Press Transfer but...

Page 90: ...MC Programming 2 52 SAMSUNG Electronics Co Ltd 4 Press Transfer button to save and exit OR Press Speaker button to save and advance to next MMC RELATED ITEMS MMC 410 ASSIGN DISA TRUNK MMC 507 ASSIGN RING PLAN TIME ...

Page 91: ... speaker phone number COMMON BELL Common bell phone number When setting the MMC 203 Only one of the above options can be selected If the ability to ring more than one item e g all four external page zones is required a station group containing all four zone codes must be created DEFAULT DATA NONE ACTION DISPLAY 1 Press Transfer button and enter 203 Display shows current assignment ASSIGN UA PORT N...

Page 92: ... in the group ring DEFAULT DATA CONTINUOUS ACTION DISPLAY 1 Press Transfer button and enter 204 Display shows current setting 3801 COM BELL CONTINUOUS 2 Dial common bell number OR 3801 COM BELL CONTINUOUS Press Volume button to make selection of common bell numbers and press Right Soft button to advance cursor 3 Dial 0 for continuous or 1 for interrupted operation OR 3802 COM BELL INTERRUPTED Use ...

Page 93: ...n group DEFAULT DATA UNASSIGNED ACTION DISPLAY 1 Press Transfer button and enter 205 Display shows current setting 3901 LOUD BELL RING PAIR NONE 2 Dial loud bell number e g 3902 OR 3902 LOUD BELL RING PAIR NONE Use Volume button to scroll through loud bell numbers and press Right Soft button to move the cursor 3 Enter station number e g 201 OR 3902 LOUD BELL RING PAIR 201 Press Volume button to ma...

Page 94: ... in is allowed There is no barge in tone or display at the station barged in on and the barging in station will be muted DEFAULT DATA NO BARGE IN ACTION DISPLAY 1 Press Transfer button and enter 206 Display shows BARGE IN TYPE NO BARGE IN 2 Dial 0 2 to select barge in type e g 2 OR BARGE IN TYPE WITHOUT TONE Press Volume button to select barge in type and press Right Soft button 3 Press Transfer b...

Page 95: ... protected against tones When using the MMC 207 This MMC is not used to assign voice mail card ports Voice mail card ports are assigned as voice mail ports automatically when the system detects an SVM 400 or SVMi 20 card or embedded VM DEFAULT DATA NORMAL PORT ACTION DISPLAY 1 Press Transfer button and enter 207 209 VMAA PORT NORMAL PORT Display shows 2 Dial station number e g 205 OR 205 VMAA PORT...

Page 96: ...ng cadence 1 CO RING Follows Trunk line ring cadence 2 DATA RING Follows Trunk line ring cadence and does not support off hook ring DEFAULT DATA ICM RING ACTION DISPLAY 1 Press Transfer button and enter 208 Display shows 209 RING TYPE ICM RING 2 Dial station number e g 205 OR 205 RING TYPE ICM RING Press Volume button to select station and press Right Soft button to move cursor 3 Dial 1 2 or 0 to ...

Page 97: ...stem the AOM NOT EXIST message is displayed DEFAULT DATA MASTER NONE ACTION DISPLAY 1 Press Transfer button and enter 209 Display shows first AOM 301 AOM MASTER MASTER NONE 2 Dial AOM number OR 301 AOM MASTER MASTER NONE Use Volume button to scroll through AOM numbers and use Soft buttons to move cursor 3 Enter station number e g 301 OR 301 AOM MASTER MASTER 201 Use Volume button for selection of ...

Page 98: ...ID CODE INS OFF When ON the system will insert the country code when receiving CID information This feature can use the CID display callback feature 05 DISA MOH OFF When ON outside parties will hear trunk MOH instead of dial tone from the time the system answers a DISA trunk until the caller dials a digit 06 TRANSFER MOH OFF When ON outside parties will hear trunk MOH instead of ringback tone from...

Page 99: ...ond call but pressing the hook flash will not toggle between the two calls it will disconnect the second call and reconnect the single line phone to the first call 26 RECALL DISC OFF When ON the system disconnects a transferred call when it recalls 29 ARD TONE CHK ON When system detects CO BUSY TONE from Central Office it returns to auto redial state 30 VPN ENABLE OFF When ON VPN is enabled Austra...

Page 100: ...de will be omitted in Hotel operation 46 PERI UCD SIO OFF When ON the PERI UCD data will be sent to the SMDR IO port 47 AUTO CLEANED OFF Normally when a room is checked out the room status is changed to NEED CLEAN When the option is set to ON the room status will be changed to AVAILABLE instead Hotel Application 48 REDIAL REVW OFF When ON the CALL LOG review will appear when the Redial or LNR butt...

Page 101: ...r in MMC501 expires before the call is answered it is disconnected To use this feature MMC 400 AUTO ANSWER option must set to ON 67 TRSF VT KEY ON When ON works like the VT key when the user transfers the call to Voice Mail using the TRSF key 68 PAIR NO RING OFF When ON if a paired phone is busy the call camps on and a message waiting indication is set at the busy phone and does not ring the free ...

Page 102: ... is assigned can be set FAC mode DEFAULT DATA SEE DESCRIPTION SOME OPTIONS DEPEND ON COUNTRY ACTION DISPLAY 1 Press Transfer button and enter 210 Display shows TEN ON AND OFF DISA PSWD OFF 2 Dial option number e g 00 Press Right Soft button to move cursor TEN ON AND OFF DISA PSWD OFF 3 Dial 1 for ON or 0 for OFF OR TEN ON AND OFF DISA PSWD ON Press Volume button to make selection and press Right S...

Page 103: ...r phone 229 DOOR RING 1 500 2 500 2 Dial door phone number e g 230 OR 230 DOOR RING 1 500 2 500 Press Volume button to scroll through door phone numbers and use the Right Soft button to move cursor OR Select All door ring ALL DOOR RING 1 500 2 500 3 Enter new ring plan number selection via dial keypad 250 DOOR RING 1 301 2 500 OR Press Volume button to make selection and press Right Soft button 4 ...

Page 104: ...AULT DATA ALL RING PLANS 500 ACTION DISPLAY 1 Press Transfer button and enter 214 Display shows DISA ALARM RING 1 500 2 500 2 Enter valid destination number for ring plan e g 217 DISA ALARM RING 1 217 2 500 OR Press Volume button to make selection and press Right Soft button to advance cursor 3 Enter valid destination number for another ring plan e g 249 DISA ALARM RING 1 217 2 249 OR Press Volume...

Page 105: ...NT OFF Automatic print feature is disabled 1 DAILY A report is printed at a programmable time every day and all the totals are reset to 0 2 EVERY HOUR A report will be printed every hour 3 THREE TIME SHIFT Up to three separate Start and End times may be programmed to report traffic within different shifts A report is printed at the end of each End time and all totals are reset to 0 When a report i...

Page 106: ...T OPTN Press Volume button to select and press Right Soft button 3 If AUTO selected dial 0 1 2 or 3 for automatic print option TRAFFIC REPORT DAILY HHMM 2359 OR Press Volume button to select option and press Right Soft button 4 Enter daily report time HHMM TRAFFIC REPORT DAILY HHMM 2200 5 Press Transfer button to save and exit OR Press Speaker button to save and advance to next MMC RELATED ITEMS M...

Page 107: ...lue PAGE DEFAULT DATA EXTERNAL PAGE ACTION DISPLAY 1 Press Transfer button and enter 219 Display shows 362 RELAY TYPE EXTERNAL PAGE 2 Enter MISC port number or press volume button to select MISC and press right Soft button to move 362 RELAY TYPE EXTERNAL PAGE cursor 3 Enter relay service type 0 3 or press volume button to select service type and 362 RELAY TYPE EXTERNAL PAGE press Right Soft button...

Page 108: ...kHz Audio service 3 1 kHz Audio None 3 MODEM MODEM service 3 1 kHz Audio Telephony DEFAULT DATA VOICE ACTION DISPLAY 1 Press Transfer button and enter 220 Display shows 209 ISDN SVC VOICE 2 Enter the station number e g 210 OR 210 ISDN SVC VOICE Press Volume button to select station and press Right Soft button 3 Select service type 0 3 OR 210 ISDN SVC AUDIO 3 1 Press Volume button to select option ...

Page 109: ...a station is designated as this type it will appear in room status and check in features as a non smoking room 3 MEETING ROOM Stations designated as Meeting Rooms will have the same attributes as guest rooms with regard to cleaning and occupied status but will not show up while scrolling through room status lists 4 ADMINISTRATOR Only stations designated as administrator stations can use Hotel feat...

Page 110: ... 3 Dial 0 5 to select station type OR 214 PHONE USE GUEST NO SMOKING Press Volume button to select option and press Right Soft button 4 Press Transfer button to save and exit OR Press Speaker button to advance to next MMC RELATED ITEMS MMC 813 HOTEL OPERATION ...

Page 111: ...813 HOTEL OPERATION This MMC can be used only when there is station that set GUEST SMOKING GUEST NO SMOKING in MMC 222 and if not display ROOM NOT EXIST ACTION DISPLAY 1 Press Transfer button and enter 222 Display shows 201 FAX PAIR NONE 2 Dial guest extension number e g 205 OR 205 FAX PAIR NONE Press Volume button to select and press Right Soft button 3 Dial fax station number e g 301 OR 205 FAX ...

Page 112: ...et as TONE hold tone is provided 3 RBT SOURCE Specifies AA VMS group number to be connected in coloring service 4 VCS STN GRP Specifies the number of VCS Station group in MMS service This option may not be available in certain OfficeServ models DEFAULT DATA None CONDITIONS None ACTION DISPLAY 1 Press the Transfer button and 224 AUDIO PROMPT STN GROUP NONE 2 Enter the AA VMS group number specificat...

Page 113: ...essing the Right Soft button 6 Enter the GROUP BUSY specification 2 Or select the GROUP BUSY by using the WAKE UP ANNOUNCE GROUP BUSY 372 Volume button and move the cursor by pressing the Right Soft button 7 Enter the number of a background sound source Or select the number of a desired background sound WAKE UP ANNOUNCE RBT SOURCE NONE source specification by pressing the Volume button and move th...

Page 114: ...on ACTION DISPLAY 1 Press the Transfer button and 225 3365 IP UMS IVR UMS SERVICE 2 Press an extension number e g 3366 or press the Volume button to select an extension number and press the Right button to move the cursor 3366 IP UMS IVR UMS SERVICE 3 Enter a desired service type Or press the Volume button to select a desired service type and press the Right button 3366 IP UMS IVR IVR SERVICE 4 Pr...

Page 115: ...the steps verifying the ring plan passcode will be added in Ring Plan change 08 INTRCOM SMDR OFF When the station is set to OFF the station will not print intercom calls on SMDR 09 FWD DELAY USE OFF When ON calls will overflow to the Forward No Answer destination when the Forward No Answer timer expires even when the Forward No Answer feature is not activated at the called party extension 11 FORWA...

Page 116: ...on and enter 300 Display shows 201 CUS ON OFF ACCESS DIAL ON 2 Dial station number e g 205 OR 205 CUS ON OFF ACCESS DIAL ON Press Volume button to select station OR Select all stations and press Right Soft button to move cursor ALL CUS ON OFF ACCESS DIAL ON 3 Press Volume button to select feature and press Right Soft button to move cursor ALL CUS ON OFF ACCESS DIAL ON 4 Dial 1 for ON or 0 for OFF ...

Page 117: ...OfficeServ 7000 Series Call Server Programming Manual SAMSUNG Electronics Co Ltd 2 79 RELATED ITEMS LCR PROGRAMMING MMC 710 LCR DIGIT TABLE MMC 711 LCR TIME TABLE MMC 712 LCR ROUTE TABLE ...

Page 118: ... g 205 OR 205 STN COS 1 01 2 01 3 01 Use Volume button to scroll through stations Press Right Soft button to advance step 3 OR Use Volume button to scroll through stations and press Left Soft button to advance to step 4 OR Select all stations ALL STN COS 1 01 2 01 3 01 3 Enter new ring plan selection via dial keypad OR 205 STN COS 1 01 2 01 3 01 Press Volume button to make selection and press Righ...

Page 119: ...se Volume button to scroll through classes of service and press Right Soft button to move cursor to the next ring plan OR Use Volume button to scroll through classes of service and press Left Soft button to return to previous step 6 Press Transfer button to save and exit OR Press Speaker button to save and advance to next MMC RELATED ITEMS MMC 701 ASSIGN COS CONTENTS ...

Page 120: ...belong to each group Stations can only be in one pickup group at any given time ACTION PINGRING SERVICE DISABLED DISPLAY 1 Press Transfer button and enter 302 Display shows 201 PICKUP GRP PICKUP GRP NONE 2 Dial station number e g 205 OR 205 PICKUP GRP PICKUP GRP NONE Use Volume button to select station number and press Right Soft button OR Select all stations ALL PICKUP GRP PICKUP GRP 3 Dial picku...

Page 121: ... Right Soft button 3 Dial member number e g 05 OR PICKUP GROUP 02 MEMBER 05 205 Press Volume button to select member number and press Right Soft button 4 Dial station number e g 206 OR PICKUP GROUP 02 MEMBER 05 206 Press Volume button to select station number and press Right Soft button 5 Press Left Soft button to return to step 3 OR Press Transfer button to save and exit OR Press Speaker button t...

Page 122: ...Used to toggle BOSS SECRETARY field ACTION DISPLAY 1 Press Transfer button and enter 303 Display shows BOSS STN NONE SECR 1 NONE 2 Dial BOSS station number e g 205 OR BOSS STN 205 SECR 1 NONE Press Volume button to select station and press Right Soft button 3 Dial SECRETARY number 1 2 3 or 4 OR BOSS STN 205 SECR 1 NONE Press Volume button to select number and press Right Soft button 4 Dial SECRETA...

Page 123: ...OfficeServ 7000 Series Call Server Programming Manual SAMSUNG Electronics Co Ltd 2 85 RELATED ITEMS MMC 722 STATION KEY PROGRAMMING ...

Page 124: ...unk group If a station group is set to NO Answer stations cannot answer incoming calls on that trunk group MMC 406 Trunk Ring Assignment overrides this MMC for the answer option DEFAULT DATA DIAL YES ANS YES ACTION DISPLAY 1 Press Transfer button and enter 304 Display shows 001 USE 301 DIAL YES ANS YES 2 Dial the station use group number e g 005 OR 005 USE 301 DIAL YES ANS YES Press Volume button ...

Page 125: ...or 0 for NO and press Right Soft button to move cursor to ANS option Press Volume button to select YES NO Option OR 005 USE 304 DIAL NO ANS YES Dial 1 for YES or 0 for NO and press Right Soft button to return to step 2 5 Press Transfer button to save and exit OR Press Speaker button to advance to next MMC RELATED ITEMS MMC 316 COPY STATION USABLE MMC 614 STATION TRUNK USE GROUP ...

Page 126: ... the AUTHORIZATION CODE Table MMC 707 2 ACCT VERIFIED Forces user to enter a valid Account code listed in the ACCOUNT CODE Table MMC 708 3 ACCT NO VERIFIED Forces user to enter an Account code which is not verified User can enter any code up to 12 digits including and DEFAULT DATA NONE ACTION DISPLAY 1 Press Transfer button and enter 305 Display shows 201 FORCD CODE NONE 2 Dial station number e g ...

Page 127: ...TA NONE PROGRAM BUTTONS B Used to insert a flash code F C Used to insert a pause code P D Used to insert a pulse tone conversion code C E Used to mask unmask following digits shows as or ACTION DISPLAY 1 Press Transfer button and enter 306 Display shows 201 HOT LINE NONE 2 Dial station number OR 205 HOT LINE NONE Use Volume button to scroll through stations Press Right Soft button to move the curs...

Page 128: ...a sound source is not connected to the external sound source port designated as the background music source music will not be played even if the background music function is enabled DEFAULT DATA NONE ACTION DISPLAY 1 Press Transfer button and enter 308 Display shows current setting 201 BGM SOURCE BGM SOURCE NONE 2 Dial phone number e g 205 OR 205 BGM SOURCE BGM SOURCE NONE Use Volume button to scr...

Page 129: ...he MIS card DEFAULT DATA TONE ACTION DISPLAY 1 Press Transfer button and enter 309 Display shows current setting 201 STN MOH MOH SOURCE NONE 2 Dial phone number e g 205 OR 205 STN MOH MOH SOURCE NONE Use Volume button to scroll through phone numbers and press Right Soft button to move the cursor OR Press ANS RLS button to select all stations ALL STN MOH MOH SOURCE 3 Enter source number e g 371 OR ...

Page 130: ...nd enter 310 Display shows 201 LCR CLASS LCR CLASS 1 2 Dial station trunk number e g 205 OR 205 LCR CLASS LCR CLASS 1 Press Volume button to select station and press Right Soft button to move cursor OR Select all stations ALL LCR CLASS LCR CLASS 3 Dial 1 8 to select class type e g 3 OR 205 LCR CLASS LCR CLASS 3 Press Volume button to select class type and press Right Soft button to return to step ...

Page 131: ...station number e g 205 OR 205 ALLOW CLIP RCV YES SND YES Press Volume button to select station and press Right Soft button to move cursor OR Select all stations ALL ALLOW CLIP RCV YES SND YES 3 Dial 0 or 1 to select Receive option OR 205 ALLOW CLIP RCV YES SND YES Press Volume button to select receive option and press Right Soft button to move cursor 4 Dial 0 or 1 to select Send option OR 205 ALLO...

Page 132: ...onnected DEFAULT DATA NONE ACTION DISPLAY 1 Press Transfer button and enter 314 Display shows 201 CO CONFIRM NONE 2 Dial station number e g 205 OR 205 CO CONFIRM NONE Press Volume button to select station and use Right Soft button to move cursor OR Select all stations ALL CO CONFIRM NONE 3 Dial a feature option 0 2 OR 205 CO CONFIRM CONFIRM TONE Press Volume button to make selection and press Righ...

Page 133: ...n and work as normal CONDITIONS Refer to the Relocate Allowed Table next page listing which phones AOMs can be exchanged DEFAULT DATA NONE ACTION DISPLAY 1 Press Transfer button and enter 315 Display shows SET RELOCATION EXT_ EXT 2 Enter number of original station e g 202 Press Right Soft button to move cursor SET RELOCATION EXT202 EXT_ 3 Enter second station number e g 210 Press Right Soft button...

Page 134: ...and enter 316 Display shows 001 COPY USABLE FROM NONE 2 Enter station use group number e g 005 OR 005 COPY USABLE FROM NONE Press Volume buttons to make selection and press Right Soft button to move cursor 3 Enter station use group number to copy from Cursor returns to step 2 005 COPY USABLE FROM 003 OR Press Volume button to make selection 4 Press Right Soft button to return to step 2 OR Press Tr...

Page 135: ...ion use group number e g 005 OR 005 USE 001 DIAL YES Press Volume button to select station and press Right Soft button OR Select all station use groups ALL USE 001 DIAL YES 3 Dial the second station use group number e g 004 OR 005 USE 004 DIAL YES Press Volume button to select station and press Right Soft button 4 Dial 1 for YES or 0 for NO NO means first group cannot dial second group 005 USE 004...

Page 136: ...ity to be connected if a busy line becomes free when all members lines of the called extension group are busy and several calls are waiting 1 9 PRIORITY 1 has the highest priority 3 VM RBACK Specifies the use of the coloring service by using a VMS message according to extensions YES NO CONDITIONS Digital phone identifies rings by using ring tone If the T of a calling party s extension trunk line i...

Page 137: ...o enter NO 202 DIST RING DGP TONE NONE Or select the ring tone by pressing the Volume button and press the Right Soft button 4 Enter a ring cadence 0 5 Press 0 to enter NO 202 DIST RING SLT RING NONE Or press the Volume button to select the ring cadence and press the Right Soft button 5 Enter a priority 0 9 Press 0 to enter NO 202 DIST RING PRIORITY NO Or press the Volume button to select the ring...

Page 138: ...fer button and enter 319 Display shows 201 BRANCH GRP BRANCH GRP NONE 2 Dial station number e g 205 OR 205 BRANCH GRP BRANCH GRP NONE Press Volume button to select station and use Right Soft button to move cursor OR Select all stations ALL BRANCH GRP BRANCH GRP 3 Dial a branch group number 01 04 OR 205 BRANCH GRP BRANCH GRP 04 Press Volume button to make selection and press Right Soft button to re...

Page 139: ...tively for each type of call No Type Description 0 INT Preset FNA applies only to intercom calls 1 EXT Preset FNA applies only to incoming calls 2 BOTH Preset FNA applies to both intercom and incoming calls When using PRE FWD BUSY option in MMC 210 If PRE FWD BUSY option in MMC 210 is set ON the forward busy follows this feature DEFAULT DATA NONE ACTION DISPLAY 1 Press Transfer button and enter 32...

Page 140: ...ll type 0 1 or 2 e g 1 OR 205 PRESET FNA 202 OPT EXT Press Volume button to make selection and press Right Soft button to return to step 2 5 Press Transfer button to save and exit OR Press Speaker button to save and advance to next MMC RELATED ITEMS MMC 102 CALL FORWARD ...

Page 141: ...g Party Number of station or trunk 4 SIP ALIAS In case of SIP trunk outgoing call express display name or real name of calling party DEFAULT DATA EMPTY ACTION DISPLAY 1 Press Transfer button and enter 323 Display shows 201 CLI NUMB 1 2 Dial extension or trunk number e g 201 OR 201 CLI NUMB 1 Press Volume button to select extension and press Right Soft button to move the cursor 3 Dial table number ...

Page 142: ...CHAPTER 2 MMC Programming 2 104 SAMSUNG Electronics Co Ltd RELATED ITEMS MMC 312 ALLOW CID MMC 419 PRI OPTION MMC 420 BRI OPTION MMC 834 H 323 OPTIONS MMC 837 SIP OPTIONS ...

Page 143: ...f the SLI2 card and press the Right Soft button and move the cursor 201 SLI2 GAIN DOWNLOAD NO 3 Enter the port number whose sensitivity is changed Or press the Volume button to select a desired port number and press the Right soft button to move the cursor 201 SLI2 GAIN 01 LEVEL 3 3 4 Enter a receive sensitivity 0 9 LEVEL 0 9 Or press the Volume button to select a desired receive sensitivity and p...

Page 144: ...button to select a desired phone number and press the Right soft button to move the cursor 3201 RBT MSG NONE 3 Enter the number of the coloring service 0001 9999 Or select the number of a desired service by using the Volume button and move the cursor by using the Right Soft button 3201 RBT MSG 0001 4 Press the Transfer button to complete the procedure or press the Speaker button to store the data ...

Page 145: ...usy tone by interworking with the Server 3 MMS MOH Specifies the function to receive the multimedia information from the multimedia server and display the information and not the function to provide MOH when the other party you called holds your call by interworking with the server ACTION DISPLAY 1 Press the Transfer button and 327 3201 MMS SVC MMS RBACK NO 2 Enter a terminal number that can inter...

Page 146: ...CHAPTER 2 MMC Programming 2 108 SAMSUNG Electronics Co Ltd RELATED ITEMS Program 224 Specify a Voice Alarm Message Program 830 LAN PARAMETERS ...

Page 147: ... A virtual station to which a MOBEX number is assigned Master Station A station that assigns a group of MOBEX stations to which a simultaneous call is to be made No Type Description 0 TEL NUMBER The phone number of an external device such as a mobile phone to be ringing The length of value should be above 2 digit and be formatted with speed dial The available trunk is ISDN SIP trunk trunk group LC...

Page 148: ...mber and press the Right soft button to move the cursor 3 Enter the desired number OR 3001 TEL NUMBER 7001 2099 Press Volume button to make selection and press Right Soft button to move cursor 4 Press the Transfer button to complete the procedure or press the Speaker button to store the data RELATED ITEMS Program 857 Set virtual cabinet of MOBEX station Program 724 Set number plan of MOBEX station...

Page 149: ...ber station it shall not be ringing However if the forward busy or no answer function is enabled this setting shall be ignored When a master or one of its member stations answers a call other rings shall be cleared MMC 329 MOBEX extension number cannot be assigned to Master of ring group ACTION DISPLAY 1 Press the Transfer button and 329 2080 RING GROUP MEMBER 1 NONE 2 Enter a desired station numb...

Page 150: ...er this call is routed to the designated destination ACTION DISPLAY 1 Press the Transfer button and 330 3201 EMGY CODE 2 Enter a desired station number OR 3201 EMGY CODE Press the Volume button to select a desired phone number and press the Right soft button to move the cursor 3 Enter the number of a desired option OR 3201 EMGY DIAL Select the number of a option by using the Volume button and move...

Page 151: ...H feature for 8TRK 8TRK2 16TRK 4TRM card is enabled 6 EFWD EXT CLI ON This option determines what kinds of CLI number will be sent to the external forwarded outgoing call Station or Received CLI from Trunk 7 REPEAT CLI ON This option determines what kinds of CLI number will be sent to the trunk to trunk call Trunk or Received CLI from Trunk 8 TONECHK DISC OFF When this option is set to ON loop tru...

Page 152: ...press Right Soft button to move cursor to options ALL TRK ON OFF 1A2 EMULATE 3 Dial option number from above list OR 704 TRK ON OFF TRK FORWARD ON Press Volume button to select option and press Right Soft button to move cursor 4 Dial 1 for ON or 0 for OFF OR 704 TRK ON OFF TRK FORWARD OFF Press Volume button to select ON OFF and press Right Soft button to return to step 2 5 Press Transfer button t...

Page 153: ...runk basis DEFAULT DATA ALL TRUNKS CO LINE ACTION DISPLAY 1 Press Transfer button and enter 401 Display shows 701 PBX LINE CO LINE 2 Dial trunk number e g 704 OR 704 PBX LINE CO LINE Use Volume button to scroll through trunk numbers and press Right Soft button to move OR Select all trunks ALL PBX LINE 3 Dial 1 for PBX or 0 for CO e g 1 OR 704 PBX LINE PBX LINE Use Volume button to scroll through o...

Page 154: ...S DTMF ACTION DISPLAY 1 Press Transfer button and enter 402 Display shows 701 DIAL TYPE DTMF TYPE 2 Dial trunk number e g 704 OR 704 DIAL TYPE DTMF TYPE Use Volume button to scroll through trunk numbers and press Right Soft button to move the cursor OR Select all ALL DIAL TYPE 3 Dial 0 for DTMF or 1 for PULSE OR 704 DIAL TYPE DIAL PULSE TYPE Use Volume button to scroll through options Press Right ...

Page 155: ... toll class D 5 CLS E Follow toll class E 6 CLS F Follow toll class F 7 CLS G Follow toll class G 8 CLS H Follow toll class H All restricted DEFAULT DATA ALL TRUNKS F STN ACTION DISPLAY 1 Press Transfer button and enter 403 Display shows 701 TOLL CLASS 1 F STN 2 F STN 2 Dial trunk number e g 704 OR 704 TOLL CLASS 1 F STN 2 F STN Use Volume button to scroll through trunk numbers and press Right Sof...

Page 156: ...ing 2 118 SAMSUNG Electronics Co Ltd 5 Press Transfer button to save and exit OR Press Speaker button to advance to next MMC RELATED ITEMS MMC 301 ASSIGN STATION COS MMC 507 ASSIGN RING PLAN TIME MMC 701 ASSIGN COS CONTENTS ...

Page 157: ... DEFAULT DATA NONE ACTION DISPLAY 1 Press Transfer button and enter 404 Display shows 701 TRUNK NAME 2 Dial trunk e g 704 OR 704 TRUNK NAME Press Volume button to select trunk and press Right Soft button to move the cursor 3 Enter trunk name Press Right Soft button to return to step 2 704 TRUNK NAME TELECOMS 4 Press Transfer button to save and exit OR Press Speaker button to advance to next MMC RE...

Page 158: ...button can be used for special characters space _ DEFAULT DATA NONE ACTION DISPLAY 1 Press Transfer button and enter 405 Display shows 701 CO TEL NO 2 Dial trunk e g 704 OR 704 CO TEL NO Press Volume button to select trunk and press Right Soft button to move the cursor 3 Enter trunk number using the dial keypad 704 CO TEL NO 3054264100 4 Press Right Soft button to return to step 2 OR Press Transfe...

Page 159: ...RK RING 1 500 2 500 Use Volume button to scroll through trunk numbers and press Right Soft button to move the cursor OR Select all All TRK RING 1 500 2 500 3 Dial ring plan number or press Right Soft button to move to the next step 704 TRK RING 1 500 2 500 4 Dial station number or station group number e g 205 704 TRK RING 1 205 2 500 OR Press Volume button to make selection and press Right Soft bu...

Page 160: ...tton and enter 407 Display shows 701 TRK RELS RELEASE _Y 1 N 0 2 Dial in trunk number e g 704 OR 704 TRK RELS RELEASE _Y 1 N 0 Press Volume button selected trunk and press Right Soft button OR Select all trunks ALL TRK RELS RELEASE _Y 1 N 0 3 Dial 1 for YES or 0 for NO Pressing 1 or 0 will return to step 2 704 TRK RELS RELEASE _Y 1 N 0 4 Press Transfer button to save and exit OR Press Speaker butt...

Page 161: ...nect the corresponding port of the source to the external sound source of the MIS card or the MISC port of OfficeServ 7100 7200 MP20S DEFAULT DATA TONE ACTION DISPLAY 1 Press Transfer button and enter 408 Display shows current setting 701 TRK MOH MOH TONE AA TONE 2 Dial trunk number e g 704 OR 704 TRK MOH MOH TONE AA TONE Use Volume button to scroll through trunk numbers and press Right Soft butto...

Page 162: ...TFM Dial Pulse 06 11 TOLL TYPE 1 6 Ring Plan Toll Restriction 1 6 12 17 RING PLAN 1 6 Ring Plan Ring Destination 1 6 18 MOH SOURCE MOH Source 19 DISA LINE DISA Status DEFAULT DATA FOLLOWS TRUNK ACTION DISPLAY 1 Press Transfer button and enter 409 Display shows 701 TRK STATUS PORT C1 S5 P01 2 Enter trunk number via dial keypad e g 704 OR 704 TRK STATUS PORT C1 S5 P04 Press Volume button to make sel...

Page 163: ...lectronics Co Ltd 2 125 RELATED ITEMS MMC 400 CUSTOMER ON OFF PER TRUNK MMC 401 TRUNK LINE PBX LINE MMC 402 TRUNK DIAL TYPE MMC 403 TRUNK TOLL CLASS MMC 404 TRUNK NAME MMC 406 TRUNK RING ASSIGNMENT MMC 408 ASSIGN TRUNK MUSIC ON HOLD SOURCE MMC 410 ASSIGN DISA TRUNK ...

Page 164: ...all The button may be used to terminate the DISA call and disconnect the central office line DISA lines must be assigned to the ring plan s DEFAULT DATA ALL TRUNKS NORMAL ACTION DISPLAY 1 Press Transfer button and enter 410 Display shows 701 123456 DISA LINE 000000 2 Dial trunk number e g 704 OR 704 123456 DISA LINE 000000 Press Volume button to select trunk and press Right Soft button OR Select a...

Page 165: ..._ROM AR_WINK AR_WINK_MPD CHINA_NO1 POL_WINK_MPD COMMON E D I O IMMEDIATE START COMMON E D I O DELAY COMMON E D I O WINK START COMMON E D I O WINK START WITH MPD BRAZIL E D I O CONTINUE BRAZIL E D I O PULSED BRAZIL E D I O R2 DIGITAL RUSSIA E D I O PABX RUSSIA E D I O HARRIS PABX UK_EM RUSSIA E D I O USER ROM ARGENTINA E D I O WINK ARGENTINA E D I O WINK MPD CHINA E D I O NO 1 OF CHINA POLAND E D I...

Page 166: ...utton to select trunk type and press Right Soft button to move cursor 705 E1 SIGNAL E M IMMEDIATE 4 Press Volume button to Signaling select and press Right Soft button to move cursor 705 E1 SIGNAL E M ITU_WINK 5 Press Transfer button to save and exit OR Press Speaker button to advance to next MMC RELATED ITEMS TRUNK PROGRAMMING MMC 400 CUSTOMER ON OFF PER TRUNK MMC 401 TRUNK LINE PBX LINE MMC 402 ...

Page 167: ...D PRS SIGNAL MMC 415 REPORT TRUNK ABANDON DATA MMC 416 ASSIGN E M DID RINGDOWN MMC 417 E1 PRI CRC4 OPTION MMC 418 BRI AND PRI CARD RESTART MMC 419 BRI OPTIONS MMC 420 PRI OPTIONS MMC 421 MSN DIGIT MMC 422 TRUNK COS MMC 423 S T MODE MMC 424 BRI S0 MAPPING MMC 426 TRUNK GAIN CONTROL MMC 433 COST RATE MMC 434 CONNECTION STATUS MMC 436 TRUNK TMC GAIN ...

Page 168: ...layed DEFAULT DATA IMMEDIATE START ACTION DISPLAY 1 Press Transfer button and enter 412 Display shows 701 TRK SIGNAL IMMEDIATE START 2 Enter desired trunk number e g 705 OR 705 TRK SIGNAL IMMEDIATE START Press Volume button to make selection and press Right Soft button to move cursor OR Select all trunks ALL TRK SIGNAL IMMEDIATE START 3 Enter desired trunk type selection from above list OR 705 TRK...

Page 169: ...3 This option may not be available in certain OfficeServ models DEFAULT DATA SEE TABLE ACTION DISPLAY 1 Press Transfer button and enter 413 Display shows 701 CTYPE AP N AT N AA Y VM N 2 Enter desired trunk number e g 702 OR 702 CTYPE AP N AT N AA Y VM N Press Volume button to make selection and press Right Soft button to move cursor OR Select all trunks 3 Enter 1 for YES or 0 for NO OR 702 CTYPE A...

Page 170: ...uration timer is started When second PRS is detected call duration timer is stopped The call is not released PRS 2 When first PRS is detected call duration timer is started When second PRS is detected call duration timer is stopped and the call is released PRS 3 The call duration timer starts based on the timer When first PRS is detected call duration timer is stopped and call is released MPD Mete...

Page 171: ...TRK PRS NONE Press Volume button to select trunk and use Right Soft button to move cursor 3 Dial 0 for PRS 1 1 for PRS 2 2 for PRS 3 3 for MPD or 4 for NORMAL 705 TRK PRS PRS 2 OR Press Volume button to scroll through options and use Left or Right Soft button to return to step 2 4 Press Transfer button to save and exit OR Press Speaker button to save and advance to next MMC RELATED ITEMS MMC503 TR...

Page 172: ...t 1 REPORT YES Abandoned call records for incoming calls with CLIP information will be printed on SMDR and stored in the system call abandon list These records will also be stored in the station review list DEFAULT DATA ALL TRUNKS REPORT YES ACTION DISPLAY 1 Press Transfer button and enter 415 Display shows 701 TRK ABNDN REPORT YES 2 Dial trunk number e g 705 OR 705 TRK ABNDN REPORT YES Use Volume...

Page 173: ...n defined in MMC 714 that matches the digits received from the TRUNK LINE 2 FOLLOW TRK RING If this option is selected press the Right Soft button and NO RCV DIGIT will appear on the display Here is where the number of incoming digits from Trunk Line must be entered 0 4 When a trunk is set to this option calls will ring at the destination defined in MMC 406 for that trunk If the destination define...

Page 174: ...t button to move cursor OR Select all trunks ALL EM DD RING FOLLOW INCOM DGT 3 Dial option number 0 2 OR 705 EM DD RING NO RCV DIGIT 00 Press Volume button to make selection and press Right Soft button to return step 2 If FOLLOW TRK RING is selected the LCD display shows step 4 4 Enter the number of incoming digits 705 EM DD RING NO RCV DIGIT 00 5 Press Transfer button to save and exit OR Press Sp...

Page 175: ...the card to make the change effective DEFAULT DATA CRC4 ON ACTION DISPLAY 1 Press Transfer button and enter 417 Display shows 701 E1 PRI CRC ON 2 Enter first trunk number in PRI card e g 701 OR 701 E1 PRI CRC ON Press Volume button to select trunk and use Right Soft button to move cursor 3 Enter 1 for ON 0 for OFF OR 701 E1 PRI CRC OFF Press Volume button to select and press Right Soft button 4 Pr...

Page 176: ... TEPRI or TEPRI2 card must be set ON to PRI mode DEFAULT DATA NONE ACTION DISPLAY 1 Press Transfer button and enter 418 Display shows first BRI or PRI circuit 725 RESTART CARD RESTART NO 2 Dial first trunk on a BRI or PRI card e g 733 OR 733 RESTART CARD RESTART NO Press Volume button to select the first trunk and press Right Soft button to move the cursor 3 Dial 1 for YES or 0 for NO Pressing 1 w...

Page 177: ...ted to a single channel and translated within the system MMC714 to a single device P M NOR Point to Multi point Normal This type of circuit operates in a similar manner to P P NORmal but allows multiple devices to be attached to the circuit Ringing is defined in MMC 406 P M MSN Point to Multi point MSN This setting is used when the line uses the MSN supplementary service Ringing is defined in MMC ...

Page 178: ...to ON the rerouting message can be sent as FACILITY type 12 NO CH BUSY If BRI line is not available this line can be set to be busy 13 CD PLAN Specifies the called party s numbering plan as follows 0 UNKNOWN 1 ISDN 2 NATION 14 CD TYPE Specifies the calling party s number type as follows 0 UNKNOWN 1 INT NAT 2 NATIONAL 3 NETWORK 4 SUBSCRIB 5 ABBREV 6 EXTEN 15 TIME SYNC The time information of system...

Page 179: ...ES or NO 2 ECT SERVICE Specifies the ISDN explicit call transfer option as follows 0 NONE 1 REQ 2 RCV 3 BOTH This option may not be available in certain OfficeServ system CONDITIONS A BRI card must be installed in the system Or the NO BRI CARD message is displayed If any changes are made in this MMC the BRI card that is affected by these changes must be restarted using MMC 418 in order for the cha...

Page 180: ...SEND OVERLAP 727 BRI TRK CLIP TABLE NONE 727 BRI TRK NB TYPE UNKNOWN 4 Select option OR 727 BRI TRK CLIP TABLE 1 Press Volume button to select BRI station and press Right Soft button 5 Dial BRI station number e g 729 OR 729 BRI STN CHANNEL ANY YES Press Volume button to select BRI station and press Right Soft button 6 Select option item OR 729 BRI STN CHANNEL ANY YES Press Volume button to select ...

Page 181: ...er Programming Manual SAMSUNG Electronics Co Ltd 2 143 RELATED ITEMS MMC 323 CALLING PARTY NUMBER MMC 405 TRUNK CO TEL NUMBER MMC 418 BRI AND PRI CARD RESTART MMC 421 MSN DIGIT MMC 423 S T MODE MMC 714 DID NAME AND NUMBER TRANSLATION ...

Page 182: ...END PRI dial sending mode select ENBLOCK Digits will be collected and sent in a single block similar to a cellphone OVERLAP Digits will be sent as they are dialed by the user 3 CLIP TABLE Used to select the Calling Party Number to send to the network If NONE MMC405 CO TRUNK NUMBER is sent to the network otherwise the Calling Party Number entry in MMC 323 corresponding with the selected number is s...

Page 183: ...d party s numbering plan as follows 0 UNKNOWN 1 ISDN 2 NATION 14 CD TYPE Specifies the calling party s number type as follows 0 UNKNOWN 1 INT NAT 2 NATIONAL 3 NETWORK 4 SUBSCRIB 5 ABBREV 6 EXTEN 15 TIME SYNC Determines the automatic update of the system time by the use of ISDN Calls When this option is set to ON the system time is updated if a correct time value is transmitted from the trunk line ...

Page 184: ... SAME CONNID OFF CD PLAN UNKNOWN CD TYPE UNKNOWN TIME SYNC OFF DIVERT OFF CENTREX OFF ACTION DISPLAY 1 Press Transfer button and enter 420 Display shows 701 PRI OPTION CHANNEL ANY YES 2 Dial first PRI trunk number in PRI card e g 730 OR 730 PRI OPTION CHANNEL ANY YES Press Volume button to make selection and press Right Soft button 3 Enter option number OR 730 PRI OPTION PRI MODE DDI Press Volume ...

Page 185: ...0 Series Call Server Programming Manual SAMSUNG Electronics Co Ltd 2 147 RELATED ITEMS MMC 323 CALLING PARTY NUMBER MMC 405 TRUNK CO TEL NUMBER MMC 418 BRI AND PRI CARD RESTART MMC 714 DID NAME AND NUMBER TRANSLATION ...

Page 186: ...or camped on to the station which is alerted to the call CONDITIONS A BRI card must be installed in the system Or the NO BRI CARD message is displayed For each BRI access two adjacent ports are assigned You need only change the value for one of the two ports the value for the other port will be changed automatically DEFAULT DATA 1 6 NONE CW YES OPT ACCEPT ACTION DISPLAY 1 Press Transfer button and...

Page 187: ...o make selection and press Right Soft button 6 Enter 1 for YES or 0 for NO OR 704 MSN DGT 4 CW NO OPT ACEPT Press Volume button to make selection and press Right Soft button 7 Enter 1 for ACCEPT or 0 for REJECT OR 704 MSN DGT 4 CW NO OPT ACEPT Press Volume button to make selection and press Right Soft button 8 Press Transfer button to save and exit OR Press Speaker button to advance to next MMC RE...

Page 188: ... Right Soft button to advance to step 3 OR Use Volume button to scroll through trunks and press Left Soft button to advance to step 4 OR Select all trunks ALL TRK COS 1 01 2 01 3 01 3 Enter ring plan class of service e g 05 OR 705 TRK COS 1 05 2 01 3 01 Use Volume button to scroll through classes of service and press Right Soft button to advance to step 4 OR Use Volume button to scroll through cla...

Page 189: ...000 Series Call Server Programming Manual SAMSUNG Electronics Co Ltd 2 151 5 Press Transfer button to save and exit OR Press Speaker button to save and advance to next MMC RELATED ITEMS MMC 701 ASSIGN COS CONTENTS ...

Page 190: ...CTION DISPLAY 1 Press Transfer button and enter 423 Display shows first BRI 725 S T MODE TRUNK 2 Dial trunk number e g 727 OR 727 S T MODE TRUNK Use Volume button to scroll through BRI numbers and press Right Soft button to move cursor OR Select all ALL S T MODE TRUNK 3 Enter circuit type e g station OR 727 S T MODE STATION Press Volume button to select option and press Right Soft button to return...

Page 191: ...nsfer button and enter 424 Display shows first terminal number 8701 S0 MAPPING NONE 2 Dial terminal number OR 8704 S0 MAPPING NONE Press Volume button to make selection of terminal numbers and press Right Soft button to advance cursor 3 Dial BRI port number OR 8704 S0 MAPPING 712 Use Volume button to scroll through ports and press Right Soft button to return to step 2 4 Press Transfer button to sa...

Page 192: ...og loop trunk line e g 702 702 CID TRUNKS NORMAL TRUNK OR Select a trunk line by pressing the Volume button and move the cursor by pressing the Right Soft button OR Select all trunk lines by pressing the Message button DS 24SE or the ANS RLS button DS 4028E 3 Enter 1 or 0 to specify if the trunk line provides CID or not OR Select if the CID is provided by using the Volume button and move the curso...

Page 193: ...ption 0 0 0 No adjustment 1 1 9 Up 1 9 dB 2 6 0 Down 6 0 dB 3 2 5 Down 2 5 dB Others No Trunk Gain Description 0 0 0 No adjustment 1 1 0 Up 1 0 dB 2 1 9 Up 1 9 dB 3 2 8 Up 2 8 dB 4 6 0 Down 6 0 dB 5 4 1 Down 4 1 dB 6 2 5 Down 2 5 dB 7 1 2 Down 1 2 dB DEFAULT DATA TX 0 0 RX 0 0 ACTION DISPLAY 1 Press Transfer button and enter 426 Display shows 701 TRUNK TSW RX 0 0 TX 0 0 2 Enter desired trunk numbe...

Page 194: ...press Right Soft button to move cursor 705 TRUNK TSW RX 0 0 TX 0 0 4 Press Volume button to make selection and press Right Soft button to move cursor and return to step 1 701 TRUNK TSW RX 0 0 TX 2 5 5 Press Transfer button to save and exit OR Press Speaker button to advance to next MMC RELATED ITEMS NONE ...

Page 195: ...301 USE 301 DIAL YES 2 Dial the trunk use group number e g 305 OR 305 USE 301 DIAL YES Press Volume button to selection and press Right Soft button OR Select all trunk use groups ALL USE 301 DIAL YES 3 Dial the trunk use group number e g 304 OR 305 USE 304 DIAL YES Press Volume button to selection and press Right Soft button 4 Dial 1 for YES or 0 for NO OR 305 USE 304 DIAL NO Press Volume button t...

Page 196: ...A E M ACTION DISPLAY 1 Press Transfer button and enter 432 Display shows 701 SET H TRK E M 2 Enter desired trunk number e g 705 OR 705 SET H TRK E M Press Volume button to make selection Press Right Soft button to move cursor OR Select all trunks ALL SET H TRK E M 3 Press Volume button to select trunk type and press Right Soft button to move cursor 705 SET H TRK DID 4 Press Transfer button to save...

Page 197: ...ype 8 only if you want incoming call costing for a trunk DEFAULT DATA ALL TRUNKS ALL DIAL PLANS ALL COST RATES ASSIGNED ACTION DISPLAY 1 Press Transfer button and enter 433 Display shows trunk number and Cost Rate table numbers 701 12345678 CR 11111111 2 Dial trunk number e g 705 OR Press Volume button to select trunk and press Right Soft button to move cursor OR Select all 705 12345678 CR 1111111...

Page 198: ...ction the display will show INVALID DATA If the station or trunk is made busy by the CPU the display will show MADE BUSY If the station is in busy state with no other connection the display will show BUSY only DEFAULT DATA NONE ACTION DISPLAY Display trunk connection status 1 Press Transfer button and enter 434 DISPLAY STATUS 201 IDLE 2 Enter station or trunk number Display show connection status ...

Page 199: ...k OR DISPLAY STATUS 216 702 227 Press Transfer button to exit Display status no connection 1 Press Transfer button and enter 434 DISPLAY STATUS 201 IDLE 2 Enter station or trunk number Display show connection status DISPLAY STATUS 702 NONE 3 Enter another station or trunk OR DISPLAY STATUS 702 NONE Press Transfer button to exit Display status no connection 1 Press Transfer button and enter 434 DIS...

Page 200: ...A 3 Enter another station or trunk OR DISPLAY STATUS 201 IDLE Press Transfer button to exit Display connection status with trunk or station number in maintenance busy 1 Press Transfer button and enter 434 DISPLAY STATUS 201 IDLE 2 Enter station or trunk number Display show connection status DISPLAY STATUS 725 MADE BUSY 3 Enter another station or trunk OR DISPLAY STATUS 725 MADE BUSY Press Transfer...

Page 201: ...s Transfer button and enter 436 Display shows 701 TMC GAIN RX 0 dB TX 0 dB 2 Enter desired trunk number e g 705 via the dial keypad 705 TMC GAIN RX 0 dB TX 0 dB OR Press Volume button to make selection and press Right Soft button to move cursor OR Select all ALL TMC GAIN RX 0 dB TX 0 dB 3 Press Volume button to make selection and press Right Soft button to move cursor 705 TMC GAIN RX 0 dB TX 0 dB ...

Page 202: ...n OR Specify all trunk lines by pressing the Message button DS 24SE or the ANS RLS button DS 4028E 702 TRK TYPE 1 RX 3 TX 3 3 Enter a TRK TYPE number 1 4 and store the number by pressing the Right Soft button 702 TRK TYPE 2 RX 3 TX 3 4 Enter a RX GAIN number 1 4 and store the number by pressing the Right Soft 702 TRK TYPE 2 RX 2 TX 3 button 5 Enter a TX GAIN number 1 5 and store the number by pres...

Page 203: ...tem will allow to incorrectly access a DISA line before locking out the DISA line RANGE 99 4 NEW CALL COUNTER 99 Number of times the system will allow a user to signal New Call on a Trunk line during one call RANGE 1 99 5 UCDS VISUAL ALARM 0 Used to set the Visual alarm threshold It is triggered when the number of calls waiting to be answered in the UCD group reaches this value RANGE 0 25 6 UCDS A...

Page 204: ...ter number from above list e g 6 OR UCDS AUDIO ALARM 00 Press Volume button to make selection and press Right Soft button to move cursor 3 Enter in new value via dial keypad If entry is valid system will return to step 2 UCDS AUDIO ALARM 00 02 4 Press Transfer button to save and exit OR Press Speaker button to advance to next MMC RELATED ITEMS NONE ...

Page 205: ... the duration of the attention tone preceding a call to a phone in the Voice Announce or Auto Answer mode This tone will also precede a forced Auto Answer call ALM REM INTERVAL 25 1 250 SEC This timer controls the time between ring attempts at a station when alarm reminder is set ALM REM RING OFF 10 1 25 SEC This timer controls the length of the ring cycle duration when an alarm reminder is set at...

Page 206: ...ill hear the confirm tone CO CO DISCONNECT 20 1 250 MIN This timer monitors the duration of an unsupervised conference when it expires both trunks are disconnected CONFIRM TONE TM 1000 100 2500 MSEC The tone heard when a feature is activated or deactivated CRD TONE INT TM 30 0 250 SEC This is the call record tone interval time An entry other than zero will cause a tone to be heard by all the parti...

Page 207: ... and returning the you to error tone HOK FLASH MAX TM 120 20 2500 MSEC This timer monitors the duration of a hook switch flash to ensure that the flash is valid and not a line noise or an accidental hookswitch bounce LONGEST duration HOK FLASH MIN TM 70 20 2500 MSEC This timer monitors the duration of a hook switch flash to ensure that the flash is valid and not a line noise or an accidental hook ...

Page 208: ...ly MS LED ON TIME 5 1 10 SEC This timer controls the duration a Manual Signaling key will remain on after use OFF HOOK RING INT 15 1 250 SEC This timer controls the time between ring bursts to a user who has a camped on call OHVA ANSWER TIME 10 1 250 SEC This timer controls the time allowed to answer an OHVA call before automatic rejection PAGE TIME OUT 20 1 250 SEC This timer controls the duratio...

Page 209: ...e place TRANSFER RECALL 20 0 250 SEC This timer determines how long transferred calls ring before recalling This is a system wide timer TRK AUTOMOH DISC 60 1 250 SEC When set to ON incoming trunk calls are connected to MOH automatically after the DISA ANSWR timer MMC 503 expires In this case the caller hears MOH If the TRK AUTOMOH DISC timer expires before the call is answered the call is disconne...

Page 210: ...treated as failed When timers value is 0 Some timers are disabled when their value is set to 0 DEFAULT DATA SEE DESCRIPTION SOME TIMERS DEPEND ON COUNTRY ACTION DISPLAY 1 Press Transfer button and enter 501 Display shows first timer value AA INT DGT TIME 05 SEC 2 Press Volume button to select timer and press Right Soft button to move cursor KMMC LOCK OUT TM 060 SEC 3 Enter new value using keypad i...

Page 211: ...delay before generating DTMF digits for In Band integration 100 9900 ms 3 OFFHK SEL This timer controls the grace period before placing an internal external call as programmed in MMC 306 0 250 sec 4 EFWD DELAY This timer controls the External Call Forward feature which will allow a station to ring before the call is placed on external call forwarding 1 250 sec 5 CC RNG DLY If a station does not an...

Page 212: ...FWD 015 SEC _ 3 Enter new value must be three digits via dial keypad e g 020 205 NO ANS FWD 015 SEC 020 System will return to step 2 4 Dial timer number from above list e g 1 OR 205 DTMF DUR 0100 MS _ Press Volume button to select and press Right Soft button to move cursor 5 Enter new timer value must be four digits e g 0200 205 DTMP DUR 0100 MS 0200 System returns to step 2 6 Press Transfer butto...

Page 213: ...entary open sent on a circuit when FLASH key is pressed 20 2500 MSEC 06 NO RING TM This is the length of time the system will wait after detecting a ring burst on a line before deciding the call has disconnected 1 25 SEC 07 PAUSE TIME This is the length of time the system will wait before sending the next digit for a pause in a speed dial bin 1 25 SEC 08 PRS DET TM This means the duration of PRS s...

Page 214: ...TIME 0090 MSEC DISAANSWR 01 SEC NO RING TM 04 SEC CONN DELAY 0000 MSEC PAUSE TIME 03 SEC ACTION DISPLAY 1 Press Transfer button and enter 503 Display shows 701 ANS BAK TM 0600 MS 2 Dial trunk number e g 704 OR 704 ANS BAK TM 0600 MS Press Volume button to select trunk and press Right Soft button to move cursor OR Select all trunks ALL ANS BAK TM 0600 MS _ 3 Dial timer number from the list OR 704 D...

Page 215: ... PULSE PER SECOND Number of dial pulses per second 10 or 20 DEFAULT DATA MAKE BREAK 33 MAKE PULSES PER SECOND 10 PPS ACTION DISPLAY 1 Press Transfer button and enter 504 Display shows MAKE BREAK RATIO 33 MAKE 2 Dial 0 or 1 for option OR PULSE PER SECOND 10 PPS _ Press Volume button for selection and press Right Soft button to move cursor 3 Dial new value System returns to step 2 PULSE PER SECOND 1...

Page 216: ... SAT HH Hour 00 23 MM Minute 00 59 DEFAULT DATA NONE ACTION DISPLAY 1 Press Transfer button and enter 505 Display shows OLD 0111095 0901 NEW YYMMDDW HHMM 2 Enter new time and date using above table System returns to step 2 OLD 0111095 0901 NEW 0111121 1445 3 Verify time and date Re enter if necessary OLD 0111121 1445 NEW YYMMDDW HHMM 4 Press Transfer button to save and exit OR Press Speaker button...

Page 217: ...s dialed digits 03 DND NO MORE The called station is in DND or has no free CALL buttons 04 ERROR TONE An error has been made 05 HOLD CAMPON This is the system generated hold tone 06 MSGWAT TONE This is the tone heard at an SLT with a message waiting 07 RGBACK TONE The called station is ringing 08 RING TONE This is the tone heard from a ROP device or Loud Bell when these devices are called 09 TRANS...

Page 218: ...ID RINGBACK TONE 1000 3000 1000 3000 CO BUSY TONE 350 350 350 350 CO RINGBACK TONE 400 200 400 2000 CO DIAL TONE 1000 250 1000 250 ACTION DISPLAY 1 Press Transfer button and enter 506 Display shows BUSY TONE INTERRUPT TONE 2 Dial tone number from above list 00 13 e g 09 OR TRANSFER TONE INTERRUPT TONE Press Volume button to select tone press Left Soft button and advance to step 3 3 Dial tone optio...

Page 219: ... for interrupt times must be four digits TRANSFER TONE 0100 9900 0100 9900 Press Right Soft button advances cursor and press Left Soft button retreats cursor If valid entry system returns to step 2 5 Press Transfer button to save and exit OR Press Speaker button to advance to next MMC RELATED ITEMS NONE ...

Page 220: ...ST 0800 END 2200 MON 3 ST 1000 END 2000 MON 4 ST 1200 END 1800 MON 5 ST 1300 END 1600 MON 6 ST 1400 END 1500 Using a 24 hour clock in the example above notice that the END time is within the same 24 hour period as the START time The system will stay in the last active Ring Plan from the previous day until the end time which is 23 59 Monday starts Ring Plan 1 at 00 00 The system will stay in Ring P...

Page 221: ...or Weds OR RING PLAN WED 1 ST END Press Volume button to select day Press Right Soft button to advance cursor to step 3 3 Dial ring plan number 1 6 e g 2 OR RING PLAN WED 2 ST _ END Press Volume button to select day Press Right Soft button to advance cursor to step 4 4 Dial start time e g 1030 If valid cursor moves to end time RING PLAN WED 1 ST 1030 END 1800 Enter end time If valid system returns...

Page 222: ...dditional call cost calculated by multiplying this rate by the original call cost Ranges from 100 to 255 CALL COST Changing this value when there is a call in progress may result in an inaccurate call cost This MPD facility requires the Meter Pulse Detection version of the trunk card DEFAULT DATA UNIT COST PER MP 0200 PENCE CALL COST RATE 100 PERCENT ACTION DISPLAY 1 Press Transfer button and ente...

Page 223: ...LM RING This is the cadence alarm reminder calls will ring at 5 CBK RING This is the cadence callbacks will ring at DEFAULT DATA unit milliseconds Item ON OFF ON OFF STN RING 1000 3000 1000 3000 TRK RING 0400 0200 0400 3000 DOOR RING 0400 0100 0400 2000 ALM RING 0200 0200 0200 2000 CBK RING 0200 0200 0200 4000 ACTION DISPLAY 1 Press Transfer button and enter 510 Display shows 1 STN RING 0400 0200 ...

Page 224: ...CHAPTER 2 MMC Programming 2 186 SAMSUNG Electronics Co Ltd 4 Press Transfer button to save and exit OR Press Speaker button to advance to next MMC RELATED ITEMS NONE ...

Page 225: ...a message the lamp will be lit steady CONDITIONS Systems with MWSLI cards only DEFAULT DATA INTERRUPT LED 1000MS ON 1000MS OFF ACTION DISPLAY 1 Press Transfer button and enter 511 Display shows MW LAMP CADENCE INTERRUPT LED 2 Press 0 or 1 to select CADENCE OR Press Volume button to make selection Press Right Soft button to advance step 3 MW LAMP CADENCE INTERRUPT LED 3 Dial new values for interrup...

Page 226: ...N 1 ACTION DISPLAY 1 Press Transfer button and enter 512 Display shows the Ring Plan MM DD RP VM 01 2 Press the index number 1 60 MM DD RP VM 02 _ Press Right Soft button advance cursor 3 Enter the holiday MM DD MM DD RP VM 02 08 09 _ Press Right Soft button advance cursor 4 Press Volume button to select Ring plan and press Right Soft button enter and advance cursor MM DD RP VM 02 08 09 1 _ Press ...

Page 227: ...is is used to decide if an additional day s room charge will be automatically added to the room bill when the first Check Out Time is reached For example if you set the Check In End time as 5 am all rooms checked in before 5 am will be automatically charged an extra day at the Check Out Time which might be say 11 am Rooms checked in after 5 am will not be charged extra until the next day if still ...

Page 228: ... 6 RINGBACK TONE DEFAULT DATA TONE ACTION DISPLAY 1 Press Transfer button and enter 514 Display shows BUSY TONE TONE 2 Enter the tone number 0 6 e g 1 OR DIAL TONE TONE Press Volume button to select tone number and press Right Soft button to move cursor 3 Dial a number for external tone source e g 3762 OR DIAL TONE 3762 Press Volume button to select tone number and press Right Soft button to store...

Page 229: ...MDD e g 0801 is 1st August END end date MMDD e g 0910 is 10th September For example the entry might be NO YY START END 01 05 3103 2710 DEFAULT DATA NONE ACTION DISPLAY 1 Press Transfer button and enter 515 Display shows NO YY START END 01 2 Dial 01 10 to select entry number e g 01 OR NO YY START END 01 _ Press Volume button to select and press Right Soft button to move cursor 3 Enter dates as desc...

Page 230: ...nd enter 600 Display shows OPERATOR GROUP 1 500 2 500 2 Dial the ring plan number 1 6 OR OPERATOR GROUP 1 500 2 500 Press Right Soft button to advance the cursor 3 Dial the group number OR OPERATOR GROUP 1 501 2 500 Press Volume button to select group and press Right Soft button 4 Press Transfer button to save and exit OR Press Speaker button to advance to next MMC RELATED ITEMS MMC 601 ASSIGN STA...

Page 231: ...ey are on hold Please note that this type of UCD group has the following limitations a The announcement device must be able to terminate the announcement with a hook flash and a transfer back to the UCD group b Only one caller at a time can hear the announcement c Each caller connected to the announcement must hear the announcement in its entirety d It is possible that a new caller may jump ahead ...

Page 232: ...ts 8 MCS GROUP This group is used to assign MCS ports for MCS conference feature 9 IVR GROUP This group is used to assign IVR ports 10 VCS GROUP This group is used to assign VCS ports 1 RING MODE Each group can have one of the following ring modes This will decide how calls are placed to the group 0 SEQUENTIAL The stations listed as members see below will be called on a first available basis Calls...

Page 233: ...UNT The length of time a call will ring at a station before it hunts to the next group member 7 GROUP BUSY When this option is set to ON a busy signal will be sent to the caller if all group members are busy When this option is set to OFF the ring back tone is sent to the caller even if all group members are busy UCD is an exception to this rule This option only works when MMC 210 SGR INC BUSY is ...

Page 234: ...l group number e g 505 OR 505 STN GROUP TYPE NORMAL GRP Press Volume button to select group and Press Right Soft button to move cursor 3 Dial feature option number 0 7 e g 0 OR 505 STN GROUP TYPE VMAA GROUP Press Volume button to scroll options and press Right Soft button to move cursor 4 DIAL group type e g 1 OR 505 STN GROUP TYPE VMAA GROUP Press Volume button to make selection and press Left So...

Page 235: ...n and continue OR 505 STN GROUP RING SEQUENTIAL Press Volume button to select option and press Right Soft button OR Press Left Soft button to return to step 2 8 Press Transfer button to save and exit OR Press Speaker button to advance to next MMC RELATED ITEMS MMC 203 ASSIGN UA DEVICE MMC 204 COMMON BELL CONTROL ...

Page 236: ...T DATA NONE ACTION DISPLAY 1 Press Transfer button and enter 602 Display shows 500 SGR NAME 2 Dial group number e g 505 OR 505 SGR NAME Press Volume button to make selection and press Left or Right Soft button to move cursor 3 Enter name 505 SGR NAME TELECOMS 4 Press Left or Right Soft button to return to step 2 OR Press Transfer button to save and exit OR Press Speaker button to advance to next M...

Page 237: ...up If necessary delete the trunk member from other groups to prevent accidental access No Item Description 0 TYPE Specify the type of trunk group This option has 7 kinds of values MIXED TRUNK default Associated in various kind of trunk channel NORMAL TRK ISDN TRK SIP TRK H 323 TRUNK SPNET TRUNK QSIG PRI 1 MODE Select the way searching idle channel of trunk 2 MEMBER Trunk channel member You can inp...

Page 238: ...ight Soft button to change mode OR 9 TRK GROUP MEMBER 01 NONE Press Volume button to change mode to member 5 Press Right Soft button to move cursor to number of member and enter valid member number 9 TRK GROUP MEMBER 05 NONE e g 05 via dial keypad OR Press Volume button to make selection and press Right Soft button to move cursor 6 Enter valid trunk number e g 729 OR 9 TRK GROUP MEMBER 01 729 Pres...

Page 239: ...amming Manual SAMSUNG Electronics Co Ltd 2 201 RELATED ITEMS LCR PROGRAMMING MMC 710 LCR DIGIT TABLE MMC 711 LCR TIME TABLE MMC 712 LCR ROUTE TABLE MMC 713 LCR MODIFY DIGIT TABLE VoIP PROGRAMMING MMC 832 VoIP ACCESS CODE MMC 833 VoIP IP TABLE ...

Page 240: ...enter 604 Display shows INT PAGE ZONE 0 MEMBER 01 NONE 2 Enter the page zone number 0 4 e g 3 OR INT PAGE ZONE 3 MEMBER 01 NONE Press Volume button to make selection and press Right Soft button to move cursor 3 Enter index number e g 05 via dial keypad OR INT PAGE ZONE 3 MEMBER 05 NONE Press Volume button to make selection and press Right Soft button to move cursor 4 Enter station number e g 205 v...

Page 241: ...MBER 1 NONE 2 Dial page zone number e g 6 OR EXT PAGE ZONE 6 MEMBER 1 NONE Use Volume button to select desired page zone numbers and press Right Soft button to move the cursor 3 Dial member number e g 3 OR EXT PAGE ZONE 6 MEMBER 3 NONE Use Volume button to select member numbers and press Right Soft button to move the cursor OR Press Left Soft button to return to step 2 4 Dial relay number via dial...

Page 242: ... may contain up to 24 digits DEFAULT DATA SYSTEM 200 ENTRIES STATIONS 1 BLOCK ASSIGNED ACTION DISPLAY 1 Press Transfer button and enter 606 Display shows FREE LIST 20 SYSTEM 20 2 Press Right Soft button to advance to next line OR FREE LIST 20 SYSTEM 20 You can view BUSY LIST using Volume button BUSY LIST 180 SYSTEM 20 3 Make a selection of SYSTEM or EXT using Volume button and press Right Soft but...

Page 243: ...000 Series Call Server Programming Manual SAMSUNG Electronics Co Ltd 2 205 RELATED ITEMS MMC 105 STATION SPEED DIAL MMC 106 STATION SPEED DIAL NAME MMC 705 ASSIGN SYSTEM SPEED DIAL MMC 706 SYSTEM SPEED DIAL BY NAME ...

Page 244: ...ssage will be repeated for as long as the caller is in queue at an interval specified in the UCD Recall timer below 02 EXIT CODE While the caller is hearing a message but not during MOH the caller may dial the DTMF digit specified here and be transferred immediately to the final destination see Final Destination The exit code is optional and does not need to be used If used the first and second me...

Page 245: ...s advisable to make the final destination a group even if the group has only one station in it 05 RING NEXT TIME This timer must be shorter than the overflow timer in MMC 601 If a higher value is entered the display will show invalid entry In the case where a UCD group has the ring next timer set at 000 an unanswered call will rotate evenly among all agents until it is answered The UCD greetings w...

Page 246: ... of the UCD group If no UCD final destination is assigned then the call will disconnect 11 AGENT PIN NO This YES NO option determines if an agent is required to enter an Agent ID when logging on to this group The Agent ID can be entered in MMC 717 12 GROUP BUSY NEXT This YES NO option determines if all agents are busy specifies whether the next port is called immediately during overflow time DEFAU...

Page 247: ...G 25 OR Press Right Soft button and advance to next option using the Volume buttons to select an option 530 UCD GROUP UCD RECALL 10 SEC 3 Press Right Soft button and advance to next option Use the Volume buttons to make a selection 530 UCD OPTION UCD RECALL 10 SEC OR Make a selection using the dial keypad 4 Press Left Soft button to enter the selection and to return to step 1 530 UCD OPTION EXIT C...

Page 248: ...d a maximum of 50 bins DEFAULT DATA PHONES 10 BINS ACTION DISPLAY 1 Press Transfer button and enter 608 Display shows first station 201 REVIEW BLK 10 0060 FREE 2 Enter desired EXT number e g 205 OR 205 REVW BLOCK 10 0060 FREE Press Volume button to make selection and press Right Soft button to advance cursor 3 Enter valid number for bins e g 50 OR 205 REVW BLOCK 50 0010 FREE Press Volume button to...

Page 249: ...ssigned Each phone may be assigned a maximum of 50 bins DEFAULT DATA PHONES 10 BINS ACTION DISPLAY 1 Press Transfer button and enter 609 Display shows first station 201 LOG BLOCK 10 0070 FREE 2 Enter desired EXT number e g 205 OR 205 LOG BLOCK 10 0070 FREE Press Volume button to make selection and press Right Soft button to advance cursor 3 Enter valid number for bins e g 50 OR 205 LOG BLOCK 50 00...

Page 250: ... automatically set to USED text messaging allowed ACTION DISPLAY 1 Press Transfer button and enter 611 Display shows 201 TMSG STN NOT USED 100 FREE 2 Enter the number of a station OR 202 TMSG STN NOT USED 100 FREE Press Volume button to make selection and press Right Soft button to advance cursor 3 Specify whether text messaging will be used or not 202 TMSG STN USED 4 Press Transfer button to save...

Page 251: ... 5000M DEFAULT DATA Large LCD phones are automatically set to allow this feature USED ACTION DISPLAY 1 Press Transfer button and enter 612 Display shows 201 CONF STN NOT USED 100 FREE 2 Enter the number of a station OR 202 CONF STN NOT USED 100 FREE Press Volume button to make selection and press Right Soft button to advance cursor 3 Specify whether Group Conference feature can be used or not 205 ...

Page 252: ...isplay shows first station STATION GROUP 201 001 2 Enter 0 if you want to set a station group Enter 1 if user want to set a trunk group TRUNK GROUP 701 301 OR Press Volume button to make selection and press Right Soft button to advance cursor 3 Enter number of station trunk OR TRUNK GROUP 702 301 Press Volume button to make selection and press Right Soft button to advance cursor 4 Enter the number...

Page 253: ...s across a private IP network 3 PUB IP NTWK This determines what MGI ports can be used for enhanced proprietary Samsung VoIP networking between OfficeServ 7000 Series systems on a public IP network 4 VOIP TRUNK This determines what MGI ports can be used as industry standard H 323 or SIP VoIP trunks for communications across a private network 5 PUB IP TRK This determines what MGI ports can be used ...

Page 254: ... type Press Right Soft button to move cursor USER LOCAL ITP MODE SEQUENTIAL 3 Press Volume button to select an option and press Right Soft button to move cursor USER LOCAL ITP MODE SEQUENTIAL 4 Press Volume button to select and press Right Soft button to store data and return to step 1 USER LOCAL ITP MODE SEQUENTIAL 5 Press Transfer button to save and exit OR Press Speaker button to advance to nex...

Page 255: ...etworking trunks 83XX H 323 trunks 84XX SIP trunks 85XX and MGI3 facsimile Only one assignment per MGI port is permitted Any entries made here will override entries made in MMC 615 DEFAULT DATA NONE ACTION DISPLAY 1 Press Transfer button and enter 616 Display shows the first available option 3801 MGI USER NONE 2 Enter MGI dial number OR 3801 MGI USER NONE Press Volume button to select an MGI port ...

Page 256: ... to copy e g 05 OR COPY COS ITEMS COS05 COS01 Press Volume button to select COS and press Right Soft button to move cursor and advance to next step 3 Dial target COS e g 06 OR COPY COS ITEMS COS05 COS06 Press Volume button to select COS and press Right Soft button to move cursor back to step 2 4 Press F key to advance MMC 701 and press Right Soft to advance cursor COS CONTENTS 06 TOLL LEVEL A 5 Pr...

Page 257: ...in MMC 702 703 F Follow toll class F in MMC 702 703 G Follow toll class G in MMC 702 703 H Follow toll class H All restricted 1 USABLE FEATURE No COS Default Description 00 AA CALER YES Auto answer control by caller 01 ABSENCE YES Absence 02 ALM CLR YES Alarm Clear 03 AUTO RDL YES Retry on busy 04 CALLBACK YES Callback 05 CLIP ABN YES Caller ID Abandon 06 CLIP INQ YES Caller ID Inquire 07 CLIP INV...

Page 258: ...9 IPP CMG YES IPP Call Manager USE 30 IPP LOUT YES IPP LOGOUT USE 31 MESSAGE YES Message 32 MM PAGE YES Meet me page 33 MMC PSWD NO All MMC require password 34 NEW CALL YES New call 35 OHVAED YES Receive Off hook voice announcement 36 OHVAING YES Make Off hook voice announcement 37 ONEA2 YES 1A2 emulation 38 OPERATOR YES Call to Operator 39 OUT TRSF YES Outgoing transfer 40 OVERRIDE NO Barge In 41...

Page 259: ...e available in certain OfficeServ models 63 TRK EHLD YES Trunk call exclusive hold 64 TRSF RCV YES Incoming call received from the outside and forwarded to 65 UNCO CNF YES Unsupervised Conference 66 VM AREC NO Auto Record SVMi 67 VM AME NO Answer Machine Emulation SVMi 68 VM REC NO Call Record SVMi 69 VMS PSWD YES VMS password SVM 800 This option may not be available in certain OfficeServ models 7...

Page 260: ... Usable Features COS CONTENTS 06 00 AA CALER YES OR Press Volume button to select COS categories and press Right Soft button to move cursor 4 Dial COS usable feature option e g 12 OR COS CONTENTS 06 12 DND YES Press Volume button to select option and press Right Soft button to move cursor 5 Dial 0 for NO or 1 for YES OR COS CONTENTS 06 12 DND NO Press Volume button to select option and press Right...

Page 261: ... toll level H is set as in house only by default DEFAULT DATA ALL ENTRIES ARE SET TO 0 PROGRAM BUTTONS A Used to enter wild card X B Used to enter wild card Y C Used to enter wild card Z ACTION DISPLAY 1 Press Transfer button and enter 702 Display shows DENY 001 BCDEFG 000000 2 Dial index number e g 005 OR DENY 005 BCDEFG 000000 Press Volume button to select index and press Right Soft button to mo...

Page 262: ... MMC Programming 2 224 SAMSUNG Electronics Co Ltd 5 Press Transfer button to save and exit OR Press Speaker button to advance to next MMC RELATED ITEMS MMC 703 TOLL ALLOWANCE TABLE MMC 704 ASSIGN WILD CHARACTER ...

Page 263: ...ed to enter wild card X B Used to enter wild card Y C Used to enter wild card Z ACTION DISPLAY 1 Press Transfer button and enter 703 Display shows ALOW 001 BCDEFG 000000 2 Dial index number e g 005 OR ALOW 005 BCDEFG 000000 Press Volume button to select index and press Right Soft button to move cursor 3 Enter toll pattern via dial pad e g 202 ALOW 005 BCDEFG 202 000000 OR Enter wild card e g 20X a...

Page 264: ...CHAPTER 2 MMC Programming 2 226 SAMSUNG Electronics Co Ltd RELATED ITEMS MMC 702 TOLL DENY TABLE MMC 704 ASSIGN WILD CHARACTER ...

Page 265: ...ansfer button and enter 704 Display shows 0123456789 X 111111111111 2 Press Volume button to select X Y or Z e g Z and press Right Soft button to advance cursor to option 0123456789 Z 000000000000 line 3 Press Volume button to move cursor to option digit desired e g 5 and enter 1 0123456789 Z 000001000000 put under other digits as required Press Left Soft button to return to step 2 OR Press Right ...

Page 266: ...mbers are 050 999 DEFAULT DATA NONE PROGRAM BUTTONS B Used to insert a flash code F C Used to insert a pause code P D Used to insert a pulse tone conversion code C E Used to mask unmask following digits shows as or F Used to enter name for speed dial bin see MMC 706 ANS RLS Used to save the speed dial number and name to the CID translation table MMC 728 ACTION DISPLAY 1 Press Transfer button and e...

Page 267: ...al number and name to the CID translation table MMC 728 SYS SPEED DIAL ADD CLI XLT NO Press the ANS RLS button and dial 1 for YES The speed dial name must exist 6 Press Transfer button to save and exit OR Press Speaker button to advance to next MMC RELATED ITEMS MMC 606 ASSIGN SPEED BLOCK MMC 706 SYSTEM SPEED DIAL BY NAME ...

Page 268: ...nd enter 706 Display shows SYS SPEED NAME 500 2 Dial system speed entry number e g 505 OR SYS SPEED NAME 505 Press Volume button to select entry number and press Right Soft button to move cursor 3 Enter name using dial keypad and press Right Soft button to return to step 2 SYS SPEED NAME 505 TELECOMS OR Press the F key to return to MMC 705 step 3 SYS SPEED DIAL 505 4 If you want to save the speed ...

Page 269: ...OfficeServ 7000 Series Call Server Programming Manual SAMSUNG Electronics Co Ltd 2 231 RELATED ITEMS MMC 606 ASSIGN SPEED BLOCK MMC 705 ASSIGN SYSTEM SPEED DIAL ...

Page 270: ...ss Volume button to selected index number and press Right Soft button to move cursor 3 Enter authorization code minimum of four digits and a maximum of 10 digits via dial keypad AUTHOR CODE 005 1234567890 C 01 e g 1234567890 and press Right Soft button to move cursor 4 Enter class of service number 01 30 e g 05 OR AUTHOR CODE 005 1234567890 C 05 Press Volume button to select COS and press Right So...

Page 271: ...8 Display shows ACCOUNT CODE 001 2 Dial code index number e g 005 OR ACCOUNT CODE 005 Press Volume button to selected index number and press Right Soft button to move cursor 3 Enter account code maximum 12 digits via dial keypad e g 1234 and press Right Soft button ACCOUNT CODE 005 1234 to move cursor back to step 2 4 Press Transfer button to save and exit OR Press Speaker button to advance to nex...

Page 272: ...aiting Disable The special feature codes can be used on a per call basis without affecting LCR or toll restriction programming There is a maximum of 10 entries available each of which may be up to four digits long 2 TOLL OVERRIDE This table of eight entries is used to identify the numbers that will bypass all dialing restrictions This bypass includes toll restriction trunk access and forced author...

Page 273: ...ight Soft button to enter and return to step 3 and enter more entries 5 Press Transfer button to save and exit OR Press Speaker button to advance to next MMC RELATED ITEMS MMC 401 TRUNK LINE PBX LINE MMC 702 TOLL DENY TABLE MMC 703 TOLL ALLOWANCE TABLE MMC 305 ASSIGN FORCED CODE TOLL RESTRICTION MMC 702 TOLL DENY TABLE MMC 703 TOLL ALLOWANCE TABLE MMC 704 ASSIGN WILD CHARACTER ...

Page 274: ... DEFAULT DATA NONE ACTION DISPLAY 1 Press Transfer button and enter 710 Display shows LCR DIGIT 0001 DIGIT 2 Dial LCR entry e g 0005 OR LCR DIGIT 0005 DIGIT _ Press Volume button to select entry and press Right Soft button to move cursor 3 Enter LCR digit string via the dial keypad and press Right Soft button LCR DIGIT 0005 DIGIT 305426 OR Press Left Soft button to return to step 1 4 Enter digit l...

Page 275: ...r button and enter 711 Display shows LCR TIME SUN A HHMM LCRT 2 Dial day of week SUN SAT e g WED OR LCR TIME WED A HHMM LCRT Press Volume button to make day selection and press Right Soft button 3 Dial time band A D e g B OR LCR TIME WED B HHMM LCRT Press Volume button to make selection and press Right Soft button 4 Dial time via keypad 24 hour format e g 0800 Cursor moves to LCRT see MMC 712 LCR ...

Page 276: ...runk groups are busy in a selected route call queue becomes active and allocates trunks as they become available DEFAULT DATA NONE ACTION DISPLAY 1 Press Transfer button and enter 712 Display shows LCR ROUTE 01 1 C 1 G NONE M 2 Dial LCR ROUTE table number e g 05 OR LCR ROUTE 05 1 C 1 G NONE M Press Volume button to selected table and press Right Soft button to move cursor 3 Dial TIME BAND index nu...

Page 277: ... button to selected index number and press Right Soft button to move cursor OR Press Right Soft button to skip step and move cursor LCR ROUTE 05 2 C 4 G 801 M to step 2 7 Press Transfer button to save and exit OR Press Speaker button to advance to next MMC RELATED ITEMS MMC 310 LCR CLASS OF SERVICE MMC 710 LCR DIGIT TABLE MMC 711 LCR TIME TABLE MMC 713 LCR MODIFY DIGIT TABLE ...

Page 278: ...fter dialing string 14 DIGIT STRING KEY Insert String Digit String delete Append String DEFAULT DATA NONE ACTION DISPLAY 1 Press Transfer button and enter 713 Display shows LCR MODIFY 001 NOF DEL DGT 00 2 Enter index number e g 005 OR LCR MODIFY 005 NOF DEL DGT 00 Press Volume buttons to make selection and press Right Soft button to move cursor 3 Enter number of digits to delete OR LCR MODIFY 005 ...

Page 279: ...ing Manual SAMSUNG Electronics Co Ltd 2 241 6 Press Transfer button to save and exit OR Press Speaker button to advance to next MMC RELATED ITEMS MMC 310 LCR CLASS OF SERVICE MMC 710 LCR DIGIT TABLE MMC 711 LCR TIME TABLE MMC 712 LCR ROUTE TABLE ...

Page 280: ... option is set to NO the call held longest in the group queue has the highest priority RING PLAN 1 XXX 2 XXX 3 XXX 4 XXX 5 XXX 6 XXX Ring plan and destination during each ring plan The destination can be a station station group trunk or trunk group If a trunk or trunk group is selected the trunks must be programmed as E M trunks to allow the received digits to be re sent This is referred to as DID...

Page 281: ...005 via dial keypad OR DID DIGIT 005 DGT Press Volume button to make selection and press Right Soft button to move cursor 3 Enter digits to be translated e g 5065 via dial keypad and press Right Soft button to move cursor DID DIGIT 005 DGT 5065 4 Enter the MOH source for this entry OR DID DIGIT 005 MOH NONE PRI NO Press Volume button to select option and press Right Soft button to return to step 3...

Page 282: ...lume button to make selection and press Right Soft button to advance to next step 9 Enter number or delete digit via dial keypad 0 16 OR DID DIGIT 005 CW N MC 99 DC 0 Press Volume button to make selection and press Right Soft button to advance to next step 10 Enter the name via dial keypad and press Right Soft button to return to Step 1 DID DIGIT 005 NAME 11 Press Transfer button to save and exit ...

Page 283: ... A M EETING 02 OUT ON A CALL 03 OUT TO L UNCH 04 LEAVE A MESSAGE 05 PAGE M E 06 OUT O F TOWN 07 IN TOMORROW 08 RETURN AFTERNOON 09 ON VACATION 10 GONE H OME ACTION DISPLAY 1 Press Transfer button and enter 715 Display shows PGM MESSAGE 01 IN A MEETING 2 Enter message number e g 11 OR PGM MESSAGE 11 Blank Message Press Volume button arrow to make selection Press Right Soft button to move cursor 3 E...

Page 284: ...work This table contains up to 4 entries and each code has 10 digits maximum in length Default all tables are empty 2 CCC OPTION This is used to which number used for Call Cost Code Default Station Number 0 STATION NUMBER Station number uses for Call Cost Code 1 NONE Do not use Call Cost Code 3 STATION PIN NO This is assigned to PIN code table number for each station number Default all stations ar...

Page 285: ... Volume button to make selection and press Right Soft button to save and return to step 3 6 Press Transfer button to save and exit OR Press Speaker button to advance to next MMC RELATED ITEMS MMC 400 CUSTOMER ON OFF PER TRUNK MMC 310 LCR CLASS OF SERVICE MMC 710 LCR DIGIT TABLE MMC 711 LCR TIME TABLE MMC 712 LCR ROUTE TABLE MMC 713 LCR MODIFY DIGIT TABLE ...

Page 286: ...ss Transfer button and enter 717 Display shows AGENT PIN 001 ID GRP NONE 2 Dial code entry number e g 005 OR AGENT PIN 005 ID _ GRP NONE Press Volume buttons to select number and press Right Soft button to move cursor 3 Enter ID code via dial keypad e g 1234 and press Right Soft button to move cursor AGENT PIN 005 ID 1234 GRP NONE 4 Enter group number e g 505 OR AGENT PIN 005 ID 1234 GRP 505 Press...

Page 287: ...AULT DATA NONE ACTION DISPLAY 1 Press Transfer button and enter 718 Display shows MY AREA CODE AREA 2 Enter 0 for COUNTRY or 1 for AREA OR MY AREA CODE AREA Press Volume buttons to make selection and press Right Soft button to move cursor 3 Enter area code maximum 4 digits via dial keypad e g 2 and press Right Soft button to move MY AREA CODE AREA 2 cursor back to step 2 4 Press Transfer button to...

Page 288: ...d enter 719 Display shows IDLE DISPLAY 01 2 Enter the number of the line on a large LCD phone 01 12 on which guidance data is to be displayed IDLE DISPLAY 02 OR Press Volume button to make selection and press Right Soft button to move cursor 3 Enter guidance data via dial keypad and press Right Soft button to save and move to step 2 IDLE DISPLAY 02 WELCOME TO ABC 4 Press Transfer button to save an...

Page 289: ...n and enter 720 Display shows 201 COPY KEY FROM NONE 2 Enter the station number to copy to e g 205 OR 205 COPY KEY FROM NONE Press Volume buttons to make selection and press Right Soft button to move cursor OR Select all stations 3 Enter station number to copy from e g 203 and cursor returns to step 2 205 COPY KEY FROM 203 OR Press Volume buttons to make selection and press Right Soft button to re...

Page 290: ...use key programming data is saved to a common programming database When a new phone is connected the system copies data from this database to the new phone DEFAULT DATA RESTORE ACTION DISPLAY 1 Press Transfer button and enter 721 Display shows 201 SAVE KEY RESTORE 2 Enter desired station number e g 205 OR 205 SAVE KEY RESTORE Press Volume button to make selection and press Right Soft button 3 Pres...

Page 291: ...ion from BARGE to BOSS DIAL KEYPAD COUNT 1 2 3 4 DIAL 2 AB BARGE CAD DIAL 3 DGPALM EP FAUTO DIAL 4 GPIK HDSET ICONF DIAL 5 LANREQ LANREQ LANREQ DIAL 6 MMPA NEW OHVA DIAL 7 PAGE PAGE RB SETDND DIAL 8 TG UA VG DIAL 9 WAKEUP XCHIN WAKEUP WAKEUP Programmable Button Assignments Feature Description AB ABSENCE ABAND ABANDONED CALL ABW AGENT BUSY WRAP UP ACC ACCOUNT AG Answer Group Including or excluding ...

Page 292: ...T Hotel Feature CS CALL STATUS CSNR CALLER ID SAVE NUMBER REDIAL DGPALM EASY ALARM SET TO REMOTE STATION DICT DICTATION DIR DIRECTORY DIVERT EXECUTIVE CALL DIVERT TO SECRETARY DLOCK DOOR LOCK DND DO NOT DISTURB DNDO DO NOT DISTURB OVERRIDE DP DIRECT PICKUP DROP CALL DROP DS DSS KEY DT DTS KEY ECT EXPLICIT CALL TRANSFER EP ESTABLISHED CALL PICKUP EXTMIC EXTERNAL MIC FAUTO FORCED AUTO ANSWER FLASH F...

Page 293: ...NR LAST NUMBER REDIAL LOG CALL LOGGING MCONF MCS Progressive Conference MGC MCS Predefined Conference MJOIN MCS Reserved Room Conference Join MMAKE MCS Reserved Room Conference Make MACR MACRO MMPA MEET ME PAGE ANSWER MMPG MEET ME PAGE MOBEX MOBEX MS MANUAL SIGNALING MSG MESSAGE MUTE MUTE MW MESSAGE WAIT NEW NEW CALL NIGHT TRUNK NIGHT GROUP NND NAME NUMBER DATE NOCLIP NO CID SEND NPG NETWORK PAGE ...

Page 294: ...R Display Print Deletion of the Call Charge SNR SAVED NUMBER REDIAL SP UCD SUPERVISOR SPD SPEED DIAL SPKR SPEAKER SSET ISDN SUPPLEMENTARY SERVICE SET STATE SET EXECUTIVE STATE STORE STORE DISPLAYED NUMBER SYSALM SYSTEM ALARMS TCLIP Specify to Differently Send CID Calls Depending on the Type of Calls Temporary CLIP TG TRUNK GROUP TIMER TIMER TP TERMINAL PORTABILITY TRARPT TRAFFIC REPORT TRSF TRANSF...

Page 295: ...SFER WAKEUP WAKE UP Hotel Feature XCHIN EXPRESS CHECK IN Hotel Feature DEFAULT DATA For phones buttons 1 and 2 are set as CALL buttons by default Other settings depend on the keyset type For AOMs all buttons are set as DSS buttons by default ACTION DISPLAY 1 Press Transfer button and enter 722 Display shows 201 KEY MAST 01 CALL1 2 Enter selected station number e g 205 OR 205 KEY MAST 01 CALL1 Pres...

Page 296: ...01 KEY PROG 18 NONE GPIK03 Press Volume button to make selection and press Right Soft button to return to step 2 6 Press Transfer button to save and exit OR Press Speaker button to advance to next MMC RELATED ITEMS MMC 107 KEY EXTENDER MMC 720 COPY KEY PROGRAMMING MMC 721 SAVE STATION KEY PROGRAMMING ...

Page 297: ...s 05 48 64 BTN AOMS AOM with 48 64 program buttons 06 20 BTN SETS Phone with 20 program buttons 07 28 BTN SETS Phone with 28 program buttons 08 18 BTN SETS Phone with 18 program buttons 09 8 BTN SETS Phone with 8 program buttons 10 99 BTN SETS Phone with 99 program buttons 11 38 BTN SETS Phone with 38 program buttons 12 21 BTN SETS Phone with 21 program buttons 13 14 BTN SETS Phone with 14 program...

Page 298: ...press Right Soft button 4 Using table above press dial keypad to select number OR TYPE 12 BTN SETS 03 NONE GPIK Press Volume button to make selection and press Right Soft button to advance cursor to step 5 to enter extender if required OR Press Left Soft button to return to step 3 5 Enter extender if required e g 03 OR TYPE 12 BTN SETS 03 GPIK GPIK03 Press Volume button to make selection and press...

Page 299: ... for relays MOH ports and the alarm sensor are changed or assigned 04 MGI NUMB This is where MGI port directory numbers are changed or assigned 05 S0 NUMBER This is where directory numbers for BRI station ports are changed or assigned This option may not be available in certain OfficeServ models 06 MOBEX NUM This is where MOBEX directory numbers are changed or assigned 07 GROUP NUMBER This is wher...

Page 300: ...NONE AGENT BUSY WRAP UP ACCT 47 ACCOUNT ALLCLR NONE ALL CLEAR ALMCLR 57 ALARM CLEAR This option may not be available in certain OfficeServ models AUTH NONE AUTHORIZATION CODE BARGE NONE BARGE IN BILL NONE BILL Hotel Feature BLOCK NONE OHVA BLOCK BOSS NONE BOSS SECRETARY CAMP 45 STATION CAMP ON CANMG 42 MESSAGE CANCEL CBK 44 CALLBACK CHIN NONE CHECK IN Hotel Feature CHOUT NONE CHECK OUT Hotel Featu...

Page 301: ...4 FORCED AUTO ANSWER FLASH 49 FLASH FPICK NONE INTERCEPTING A CONNECTING CALL FWD 60 CALL FORWARD GRPK 66 GROUP PICKUP HDSET NONE HEADSET MODE HLDPK 12 HOLD PICKUP HOLD 11 HOLD HOTEL NONE HOTEL Hotel Feature ICONF NONE ISDN 3 PARTY CONFERENCE IDISC NONE ISDN 3 PARTY DISCONNECTION IG 53 IN OUT GROUP IHOLD NONE ISDN 3 PARTY HOLD INFDSP NONE INFORMATION DISPLAY Requires News Call Plus IRET NONE ISDN ...

Page 302: ...TH REPLACEMENT RB NONE ROOM BILL Hotel Feature REJECT NONE OHVA REJECT RP NONE RING PLAN RSV NONE ROOM STATUS VIEW Hotel Feature RTO NONE RING PLAN TIME OVERRIDE SELFID NONE SELF SYSTEM ID SETMG 41 SET MESSAGE W O RING SIP CW NONE Specify Call Waiting of the Standard SIP Terminal SLOCAT NONE STAFF LOCATOR Hotel Feature SLTALM NONE EASY ALARM SET TO SELF STATION SLTMMC 15 NORMAL PHONE PROGRAMMING S...

Page 303: ...be available in certain OfficeServ models VMSREC NONE VMS RECORD Requires SVM 800 This option may not be available in certain OfficeServ models VMSVAC NONE VMS VACANT Requires SVM 800 This option may not be available in certain OfficeServ models WAKEUP 18 WAKE UP Hotel Feature WCOS 59 WORKING CLASS OF SERVICE DEFAULT DATA SEE DESCRIPTION FEATURE CODES DEPEND ON COUNTRY ACTION DISPLAY 1 Press Trans...

Page 304: ...oft button to enter change and continue to make changes FEATURE NUMBER PARK 63 If an error message appears indicating duplication of access code enter 1 for YES for change or SAME DIAL EXIST CHANGE _Y 1 N 0 enter 0 for NO for no change 6 Press Transfer button to save and exit OR Press Speaker button to advance to next MMC RELATED ITEMS ALL MMCs ...

Page 305: ...e minimum call time in total call duration 06 IN OUT GROUP YES This option allows a message IN GROUP or OUT GROUP to be printed in the digits dialed column each time a station enters or leaves a group 07 DND CALL YES This option allows a message IN DND or OUT DND to be printed in the digits dialed column each time a station enters or leaves DND 08 WAKE UP CALL YES This option determines whether st...

Page 306: ...EL START LINE 0 This option determines that the number of empty lines per each page on HM REPT Hotel Application Only 23 DID NUM NAME YES If this option is set to YES received DID information will print on SMDR 24 ITP REGISTRATION NO If set to YES the SMDR record will show registration of ITP phones 25 SET RELOCATION NO If set to YES the SMDR record will show Set Relocations 26 CALL INDE NO If set...

Page 307: ...OR LINE PER PAGE 60 LINE PAGE Use the Volume buttons to scroll through the options and press Right Soft button to select an option 3 Enter the option data OR LINE PER PAGE 50 LINE PAGE Use the Volume buttons to press Right Soft button to save the data and return to step 2 4 Press Transfer button to save and exit OR Press Speaker button to advance to next MMC RELATED ITEMS MMC 300 CUSTOMER ON OFF P...

Page 308: ...a sent to a VM AA port is as follows CALL TYPE DN1 SEPARATOR DN2 An example of this would be FORWARD ALL from 225 on trunk 703 Each field can be programmed individually as follows Option Description Default EXTENSION FOR DN1 If set to yes when the voice mail auto attendant system answers a call the system will send data in the DN1 field indicating that a station is ringing the VMAA port If set to ...

Page 309: ...C CALL TYPE ID This is the DTMF digit that is sent first in the in band digit string and can identify any of the following call types No Call Type Description Default 0 DIRECT CALL A call originating directly from another station in the system 1 1 ALL FWD CALL This indicates that a call was forwarded to the VM AA port from a station with CALL FORWARD ALL set 2 2 BSY FWD CALL This indicates that a ...

Page 310: ...ers a call the system will send Caller ID data as DTMF tones to the VMAA port No GENERAL RULES 1 201 is talking to a trunk and presses TRANSFER plus the station number but the station is forwarded to VM AA and VM AA answers When this happens if 201 presses TRANSFER again to return to the trunk the VM AA port is not on hold It is disconnected 2 A VM AA port leaves a message indication for a station...

Page 311: ...05 X 701 In the above example if forward and DN2 Trunk Line information is not used 205 DIL 701 calls group 501 that overflows to VM AA 4 501 x 701 In the above example if overflow information is turned off Nothing i s s ent A DID call rings the VM AA directly B 9999 9999 are the DID digits from Trunk Line In the above example if did information is turned off 9999 A station transfers blind or scre...

Page 312: ...ple if direct information is turned off Nothing i s s ent A station 205 calls using MESSAGE key 9 205 In the above example if message information is turned off Nothing i s s ent A call 702 recalls back from station 225 to the VM AA group 4 225 x 702 In the above example if recall and DN2 CO information are turned off Nothing is sent DEFAULT DATA SEE DESCRIPTION SOME OPTIONS DEPEND ON COUNTRY PROGR...

Page 313: ...number from the above list e g 3 TRK FOR DN2 NO OR Press Volume button to make selection and press Right Soft button to move cursor 3 Enter 1 for YES or 0 for NO OR TRK FOR DN2 YES Press Volume button for selection and press Right Soft button to return to step 2 4 Press Transfer button to save and exit OR Press Speaker button to advance to next MMC RELATED ITEMS MMC 207 ASSIGN VM AA PORT ...

Page 314: ...T DATA NONE ACTION DISPLAY 1 Press Transfer button and enter 727 Display shows MCP VERSION 05 03 16 V2 44 2 Press Volume button to show other cards e g LCP CARD LCP VERSION 05 01 20 V2 43 DLI CARD Cabinet and Slot shown C2 S2 16 DLI NO VERSION DATA SLI CARD Cabinet and Slot shown C2 S3 16 SLI NO VERSION DATA 3 Press Transfer button to save and exit OR Press Speaker button to advance to next MMC RE...

Page 315: ...DISPLAY 1 Press Transfer button and enter 728 Display shows first entry CLIP XLAT 0001 DGT 2 Dial entry number e g 0005 OR CLIP XLAT 0005 DGT _ Use Volume button to scroll through entries and press Right Soft button to select entry 3 Enter telephone number and press Right Soft button to advance to name entry CLIP XLAT 0005 DGT 3054264100 OR Enter telephone number and press Left Soft button to retu...

Page 316: ... Language Country 00 ENGLISH US America 01 KOREAN Korea 02 SPANISH CASTILL Castilian 03 FRENCH Canada 04 DANISH Denmark 05 DUTCH Holland 06 GERMAN AUSTRIA Austria 07 ITALIAN Italy 08 PORTUGUESE Portugal 09 RUSSIAN Russia 10 SPANISH SPAIN Spain 11 SWEDISH Sweden 12 ENGLISH UK UK 13 ENGLISH AUSTRAI Australia 14 GERMAN GERMANY Germany 15 FINNISH Finland 16 GREEK Greece MMC 731 This option may not be ...

Page 317: ... select the message that you want to delete Or select all messages CLEAR AA MSG MSG01 NO 3 If you want to delete the selected message press Volume button and select YES CLEAR AA MSG MSG01 YES 4 Press Transfer button to save and exit OR Press Speaker button to advance to next MMC CLEAR AA MSG ARE YOU SURE YES RELATED ITEMS MMC 732 AA TRANSLATION TABLE MMC 733 AA PLAN TABLE MMC 735 AA USE TABLE MMC ...

Page 318: ...its programmed as a destination are a voice mail port the voice mail port will receive an in band packet of DTMF equal to FWD from EXTENSION NUMBER DIALED There are a number of special characters that are used in translation tables They are as follows Used to represent any digit Pxx Special Key A Plan Used to assign a plan as a destination P01 P12 B Special Key B Buffer When used in the destinatio...

Page 319: ...anslation table programming In these cases the system will compare received digits from AA card after AA TRANS time and transfer to the proper destination MMC 732 This option may not be available in certain OfficeServ models CONDITION NONE DEFAULT DATA Table 01 Entry 001 0 500 or 0 5000 002 2 B or 2 B 003 3 B or 3 B 004 5 B or 5 B 005 8 B 006 9 P03 ...

Page 320: ... number 001 100 AA TRANS TB 01 001 0 500 Press Volume button to make selection and press Right Soft button to move cursor 4 Input access digit AA TRANS TB 01 001 223 500 5 Input routing destination AA TRANS TB 01 001 223 B Press Volume button to make selection and press Right Soft button to move cursor 6 Press Transfer button to save and exit OR Press Speaker button to advance to next MMC RELATED ...

Page 321: ...rty s extension number 50 Invalid number please try again 51 I m sorry there is no answer 52 I m sorry that station is busy 53 One moment please 54 Transferring 55 I ll transfer you 56 Good bye 57 Thank you 58 Please hold for the operator 59 Please hold for assistance 60 Thank you good bye 61 I m sorry all stations are presently busy 62 I m sorry all stations are still busy 63 Please call back lat...

Page 322: ... The default value is 01 second 15 RETRY CNT Determines how many selection errors a caller may make before being transferred to the invalid digits destination In case of no action will not follow this option 16 TRANS TABLE Determines what translation table this plan will use see MMC 732 AA TRANSLATION TABLE The default value is same number of plan number 17 BUSY DEST Determines the destination for...

Page 323: ...TION NONE DEFAULT DATA Option Value PLAN MSG1 6 49 ALTER MSG 49 INVLID MSG 64 NO ANS MSG 51 XFER MSG 53 BUSY MSG 52 NO STN MSG 50 NO ACT MSG 59 CAMP ON OFF ANS DELAY 1 sec RETRY CNT 03 TRANS TABLE 01 BUSY DEST 500 or 5000 NO ANS DEST 500 or 5000 NO ACT DEST 500 or 5000 INVLID DEST 500 or 5000 ...

Page 324: ...e cursor 3 Enter the option 00 20 AA PLAN PROG 01 ALTER MSG 49 Press Volume button to make selection and press Right Soft button to move cursor 4 Enter the data for option AA PLAN PROG 01 ALTER MSG 02 Press Volume button to make selection and press Right Soft button to move cursor 6 Press Transfer button to save and exit OR Press Speaker button to advance to next MMC RELEATED DATA MMC 731 AA MESSA...

Page 325: ...rv models CONDITION NONE DEFAULT DATA PLAN NO 01 ACTION DISPLAY 1 Press Transfer button and enter 735 Display shows 518 AA PLAN PLAN NO 01 2 Enter port or group number of AA OR 305 AA PLAN PLAN NO 01 Press Volume button to make selection and press Right Soft button to move cursor 3 Enter number of option table 01 12 305 AA PLAN PLAN NO 12 Press Volume button to make selection and press Right Soft ...

Page 326: ...ecord this as recording 03 and play it as message 03 but this uses some of the RAM storage on the AA card An easier way is to link recordings 01 and 02 to produce message 03 This is the purpose of this MMC We simply tell the system that message 03 equals recording 01 plus recording 02 In this MMC the top line of the phone display indicates a message number and the bottom line indicates the recordi...

Page 327: ...gramming Manual SAMSUNG Electronics Co Ltd 2 289 4 Press Transfer button to save and exit OR Press Speaker button to advance to next MMC RELATED MMC MMC 731 AA MESSAGE MMC 732 AA TRANSLATION TABLE MMC 733 AA PLAN TABLE MMC 735 AA USE TABLE ...

Page 328: ... and 607 DEFAULT DATA NONE ACTION DISPLAY 1 Press Transfer button and enter 739 Display shows 3958 SET AAMOH MOH MSG NOT USE 2 Enter AA port number OR Press Volume button to select a AA port and press Right Soft button to move cursor 3958 SET AAMOH MOH MSG NOT USE 3 Enter AA MOH message number Press Volume button to select a AA MOH number and press Right Soft button to save and return step 2 3958 ...

Page 329: ...ion in MMC 301 the change affects both stations Messages from the secondary extension will display the secondary extension number DEFAULT DATA NONE ACTION DISPLAY 1 Press Transfer button and enter 740 Display shows 201 PRIMARY SECONDARY NONE 2 Enter the primary station number via dial Keypad e g 201 201 PRIMARY SECONDARY NONE OR Use Volume button to select and press Right Soft button 3 Enter the s...

Page 330: ...Costing and Toll Restriction When all entries are used LAST ENTRY is displayed DIAL PLAN This shows in the programming display as DP and represents a pattern 1 7 8 This pattern is used by MMC 433 TRUNK COST RATE to determine the correct billing according to MMC 749 RATE CALCULATION TABLE When the system finds a DIAL PLAN match for the digits dialed the system checks MMC 749 to see what RATE CALCUL...

Page 331: ...utton to select entry and press Right Soft button to move cursor 3 Enter digit string via the dial keypad and press Right Soft button COST DP 005 DIGIT 1305 4 Enter DIAL PLAN 1 8 e g 8 OR COST DP 005 CALL RATE 8 Press Volume button to select dial plan and press Right Soft button to save and return to step 2 5 Press Transfer button to save and exit OR Press Speaker button to advance to next MMC REL...

Page 332: ...DUR SECOND INTERVAL DURATION This is the duration of each billing increment after the first interval has expired The range is 0 999 seconds e g 006 seconds six seconds 3 2ND COST SECOND INTERVAL COST This is the cost for each billing increment in s sterling or Euros after the first interval has expired The range is 0 999 e g 100 1 00 or 1 00 4 SURCHARGE This is a one time charge in s sterling or E...

Page 333: ...to select option and press Right Soft button to move cursor 4 Enter data via dial keypad e g 125 1 25 OR COST RATE 3 1ST COST 125 Press Volume button to select data and press Right Soft button to save and return to step 3 5 Press Transfer button to save and exit OR Press Speaker button to advance to next MMC RELATED ITEMS MMC 433 COST RATE MMC 746 COSTING DIAL PLAN ...

Page 334: ... be available in certain OfficeServ models 3 DOWNLOAD OPTIONS This option is determine which type of Tel number will be download VM No Option Description 00 STATION NAME This option is determine whether download station name or not 01 DLI SLI This option is determine whether download DLI SLI tel number or not 02 DESKTOP ITP This option is determine whether download IP phone tel number or not 03 Wi...

Page 335: ...ice Mail database will be overwritten according to the data in MMC 751 and the default numbering plan If you plan this type of test remove the Built In Voice Mail card until the procedure is finished and the customer database is reloaded DEFAULT DATA ALL OPTIONS ARE NO ACTION DISPLAY 1 Press Transfer button and enter 750 Display shows SVM AUTO SETUP YES 2 Press Volume button to make selection and ...

Page 336: ...01 3 SIP PHONE NONE 01 4 VIR DLI SLI NONE 01 5 S0 TERMINAL NONE 01 7 MOBEX STN NONE 01 8 STN GROUP EXT 01 ACTION DISPLAY 1 Press Transfer button and enter 751 Display shows DLI SLI 201 MAKE BOTH GRP 01 2 Selet the port type OR DLI SLI 201 MAKE BOTH GRP 01 Press Volume button to scroll the number and press Right Soft button to move cursor 3 Enter the Sync option NONE 0 EXT 1 MBX 2 BOTH 3 DLI SLI 20...

Page 337: ... Before using the Auto Record feature make sure that you are not violating any laws Samsung is not responsible for any illegal use of this feature CONDITIONS A maximum of eight stations can use this feature at one time The same port cannot be assigned to more than one station Attempts to do this will result in an error message When a Voice Mail port is assigned here it is automatically removed fro...

Page 338: ...e button to make selection and press Right Soft button to move cursor 5 Dial call type via dial keypad 0 I 1 O or 2 B OR AUTO RECORD PORT 209 CALL B Press Volume button to make selection and press Right Soft button to move cursor 6 Press Transfer button to save and exit OR Press Speaker button to advance to next MMC RELATED ITEMS NONE ...

Page 339: ...that are forwarded to the card will not forward they will remain ringing at the fwd from station until answered This destination can be a station number or a group number DEFAULT DATA 5000 ACTION DISPLAY 1 Press Transfer button and enter 753 Display shows WARNING DEST DEST 500 2 Dial station number or group number OR WARNING DEST DEST 501 Press Volume button to scroll through numbers and select 3 ...

Page 340: ...splayed in STATUS option instead of PROC it is impossible to halt VM module only take it offline DEFAULT DATA OfficeServ 7400 7200 MCP 7200 MP20 System PROC process Others Restart ACTION DISPLAY 1 Press Transfer button and enter 754 Display shows VM HALT STATUS PROC 2 Enter 1 to HALT or 0 to PROC OR VM HALT STATUS PROC Press Volume button to select 3 If you select 1 to halt display shows Press 1 t...

Page 341: ...ve reaches a threshold The threshold is measured as a percentage of capacity This means that if the MMC is set for 80 the alarm will be generated when the disk exceeds 80 of the available drive space DEFAULT DATA THRESHOLD 80 ACTION DISPLAY 1 Press Transfer button and enter 755 Display shows VM ALARM THRESHOLD 80 2 Enter new threshold level e g 70 VM ALARM THRESHOLD 70 3 Press Transfer button to s...

Page 342: ...id music source in MMCs 308 309 and 408 Each Music On Hold source assigned here requires one Voice Mail port When the first Built In Voice Mail port is used for VMMOH If the first Built In Voice Mail port is used for VMMOH it must be disabled before boot up since Built In Voice Mail Card and the system use port 1 during boot up to exchange critical information For this reason we suggest you use th...

Page 343: ...r outbound follow me or outbound notification is used DEFAULT DATA IN OUT ACTION DISPLAY 1 Press Transfer button and enter 757 Display shows VM IN OUT 209 IN OUT 2 Dial VM number e g 215 OR VM IN OUT 215 IN OUT Press Volume button to make a selection and press Right Soft button to move cursor 3 Enter option via dial keypad e g IN OR VM IN OUT 215 IN Press Volume button to make a selection and pres...

Page 344: ...C This MMC contains either a DAY or NIGHT instruction for each Ring Plan DEFAULT DATA ALL RING PLANS DAY ACTION DISPLAY 1 Press Transfer button and enter 758 Display shows VM DAY NIGHT RING 1 01 2 Enter ring plan number OR VM DAY NIGHT RING 3 01 Press Volume button to make a selection and press Right Soft button to move cursor 3 Enter voice mail ring mode 01 99 OR VM DAY NIGHT RING 3 04 Press Volu...

Page 345: ...hed CLI number and CLI field then the system will be reject call PRI CLI priority option There are 9 priority levels priority 1 is the highest and priority 9 is the lowest When calls into station group come and group members are all busy the system will assign a priority to the CLI number so that calls from a high priority CLI number will be placed at the front of the group queue If this option se...

Page 346: ...ve cursor 5 Enter priority level via dial keypad 1 9 or NO OR CLI RINGING 005 REJ NO PRI NO Press Volume button to make selection and press Right Soft button to move cursor 6 Enter station or group number for each Ring Plan destination via dial keypad e g 501 CLI RINGING 005 R1 501 R2 NONE OR Press Volume button to make selection and press Right Soft button to move cursor 7 Dial 1 8 or NO to selec...

Page 347: ...x codes or rates defined in MMC 761 can be applied to each item PRE DEFINED CODES No Code Description 00 Room Deposit This is the code used for pre pay room deposits 01 Phone Deposit This is the code used for pre pay phone deposits 02 88 User Assignable code 89 W UP SET A wake up call was set 90 W UP ANS A wake up call was answered 91 W UP N ANS A wake up call was not answered 92 W UP CANCL A wake...

Page 348: ...and press Right Soft button to move cursor 3 Enter item name e g ROOM COST via keypad ITEM CODE 02 NAME ROOM COST 4 Press Right Soft button to move cursor to tax entries ITEM CODE 02 TAXES 00000000 5 Enter the tax rates that apply to this item 1 selects each rate and press Right Soft button to return to step 2 ITEM CODE 02 TAXES 11000000 6 Press Transfer button to save and exit OR Press Speaker bu...

Page 349: ...d currency value C to an item or is applied as a Inclusive VAT percentage I of the cost of an item VALUE The actual tax rate that will be applied to the item cost NAME A 10 character name that will be displayed on the room bill alongside the tax CONDITIONS This function can be used only when the Hotel function is enabled in MMC 813 HOTEL OPERATION ENTERING CHARACTERS Refer to ENTERING CHARACTERS i...

Page 350: ...X RATE 2 TYPE C VAL 01 25 Press Volume button to make selection If valid entry system advances cursor 5 Enter name and press Right Soft button to return to step 2 TAX RATE 2 NAME MIA BED 6 Press Transfer button to save and exit OR Press Speaker button to advance to next MMC RELATED ITEMS MMC 760 ITEM COST TABLE ...

Page 351: ... cost will be 150 on Sunday 100 on Monday and 90 on Tuesday CONDITIONS This function can be used only when the Hotel function is enabled in MMC 813 HOTEL OPERATION DEFAULT DATA ALL RATES ARE 100 ACTION DISPLAY 1 Press Transfer button and enter 762 Display shows RM COST RAT SUN 100 2 Dial day number 0 6 e g 2 OR RM COST RAT TUE 100 Press Volume button to select day and press Right Soft button to mo...

Page 352: ...ts Max 16 digits USE LCR NUM Select which E LCR code E LCR1 E LCR2 E LCR3 E LCR4 used for this table index ALL NEXT ROUTE Select LCR or trunk group to seizure LCR means that MMC710 LCR DIGIT table will be used with outgoing digits OUT DIGIT LCR CONDITIONS MMC724 FEATURE CODE E LCR1 E LCR2 E LCR3 E LCR4 addition DEFAULT DATA SEE DESCRIPTION ACTION DISPLAY 1 Press Transfer button and enter 763 Displ...

Page 353: ...nter USE LCR NUM maximum 16 digits and press Right Soft button to move cursor 001 USE LCR NUM 9 8 Enter NEXT ROUTE option number 3 OR 001 NEXT ROUTE Press Volume button to select NEXT ROUTE and press Right Soft button to move cursor 9 Enter USE LCR NUM maximum 16 digits and press Right Soft button to move cursor 001 NEXT ROUTE LCR 10 Press Transfer button to save and exit OR Press Speaker button t...

Page 354: ...word although the MMC210 DISA PSWD is designated as ON CONDITIONS None DEFAULT DATA None ACTION DISPLAY 1 Press the Transfer button and the 764 DISA PASS 001 CLI 2 Enter the table number 001 500 Otherwise select the table number by the Volume button Move the cursor by pressing the Right soft button DISA PASS 001 CLI 3 Enter the CLI number within maximum 16 digits and move the cursor by pressing th...

Page 355: ...s ENABLE TECH PROG PASSCODE 2 Enter passcode ENABLE TECH PROG PASSCODE Correct code shows ENABLE TECH PROG DISABLE TENANT 1 Incorrect code shows ENABLE TECH PROG PASSCODE ERROR 3 Enter 1 to enable or 0 to disable OR ENABLE TECH PROG ENABLE TENANT 1 Press Volume button to select and press Right Soft button to move tenant number and enter tenant number 1 2 4 Press Speaker button to advance to MMC en...

Page 356: ...ATA DEFAULT PASSCODE 4321 ACTION DISPLAY 1 Press Transfer button and enter 801 TECH PASSCODE NEW CODE _ 2 Enter new passcode TECH PASSCODE NEW CODE 3 Enter new passcode again TECH PASSCODE VERIFY 4 If passcode is correct press Right Soft key to continue and enter desired MMC TECH PASSCODE VERIFY SUCCESS If passcode is incorrect TECH PASSCODE VERIFY FAILURE System returns to step 2 TECH PASSCODE NE...

Page 357: ...enter 802 Display shows CUST USE MMC 1 100 STN LOCK YES 2 Enter desired tenant number 1 2 via dial keypad OR CUST USE MMC 1 100 STN LOCK YES Press Volume button to make selection and press Right Soft button to move cursor 3 Enter desired MMC number via dial keypad OR CUST USE MMC 1 102 CALL FWD YES Press Volume button to make selection and press Right Soft button to move cursor 4 Enter 1 for YES o...

Page 358: ...ss Transfer button and enter 803 Display shows TENANT GROUP C 1 S 1 01 T 1 2 Enter cabinet number if no change press Right Soft button to move cursor TENANT GROUP C 1 S 1 01 T 1 3 Enter slot number if no change press Right Soft button to move cursor TENANT GROUP C 1 S 2 01 T 1 4 Enter port number if no change press Right Soft button to move cursor TENANT GROUP C 1 S 2 03 T 1 5 Enter tenant number ...

Page 359: ...vice Type Description 00 NOT USE Not using 01 IT IT Remote Programming BAUD RATE Transmission time Option Setting Value 0 4800 bps 1 9600 bps 2 19200 bps 3 38400 bps CHAR LENGTH Length of the characters Option Setting Value 7 7 bits 8 8 bits PARITY Parity bit Option Setting Value 0 NONE 1 ODD 2 EVEN RETRY COUNT Number of retry attempts 01 99 STOP BIT Stop bit Option Setting Value 1 1 bit 2 2 bit ...

Page 360: ...ransfer button and the 804 SYS I O PORT 2 SERVICE PCMMC 2 Enter the input output port number 2 3 5 OR Press the Volume button to select the input output port and press the Right soft button to move the cursor SYS I O PORT 2 SERVICE PCMMC 3 Enter the option number 0 7 OR Press the Volume button to select the option and press the Right soft button to move the cursor SYS I O PORT 2 SERVICE PCMMC 4 En...

Page 361: ...ics Co Ltd 2 323 5 Press the Transfer button to store the data and complete the procedure or press the Speaker button to store the data and execute the programming process for the next program RELATED ITEMS Program 725 Designate the option for the call information output ...

Page 362: ...is option may not be available in certain OfficeServ models 2 TSW GAIN CONTROL Adjusts the tone sensitivity There are 11 types of matrix connections of the T Switch that adjust the tone sensitivity If the gain value of each trunk channel is configured in MMC421 this option is ignored 3 CID TYPE LEVEL Adjusts the CID type and TX RX Gain TYPE CID TYPE control BELLCORE ETSI RX LEVEL TX gain control 0...

Page 363: ...to select desired MISC BGM TSW gain and press Right Soft button 5 When the TSW GAIN CONTROL is selected a Select the TX TWS connect type via dial keypad OR TSW GAIN CONTROL SLT DGP 0 0 Press Volume button to go to the next TX TSW connect type and press Right Soft button b Select the RX TSW connect type via dial keypad OR TSW GAIN CONTROL SLT ATRK 0 0 Press Volume button to go to the next RX TSW co...

Page 364: ...ciated with the previous card e g key programming will be erased DEFAULT DATA NONE ACTION DISPLAY 1 Press Transfer button and enter 806 Display shows C 1 S 1 8 DLI 8 DLI 2 Enter cabinet number via dial keypad e g 1 OR C 1 S 1 8 DLI 8 DLI Press Volume button to make selection and press Right Soft button 3 Enter slot number via dial keypad e g 6 OR C 1 S 6 16 DLI 16 DLI Press Volume button to make s...

Page 365: ...OfficeServ 7000 Series Call Server Programming Manual SAMSUNG Electronics Co Ltd 2 327 RELATED ITEMS MMC 724 DIAL NUMBERING PLAN ...

Page 366: ...HANDSET TX 3 MIC TX LEVEL 4 NOISE GUARD 5 NOISE THRES 6 ALC THRES 7 TX RX THRES 8 TX RX COMP 9 MIN RX VOL WIP 0 SIDETONE VOL 1 HANDSET TX 2 MIC TX LEVEL 3 HEADSET TX FX 0 LINE VOLUME 1 SPEAKER VOLUME 2 NOR LP ATTEN 3 MIC LP ATTEN 4 ACOU DECOUPL 5 ELEC DECOUPL 6 T R RATIO 7 R T RATIO When changing the MMC 807 MMC 807 PHONE VOLUME CONTROL should not be changed from the default levels without the ass...

Page 367: ... Volume button to make selection and press Right Soft button to move cursor 3 Enter volume item via dial keypad OR VOL CONTROL EU24 SIDETONE VOL 1 Press Volume button to make selection and press Right Soft button to move cursor 4 Enter volume data via dial keypad OR VOL CONTROL EU24 HANDSET TX 6 Press Volume button to make selection and press Right Soft button to save and return to step 3 5 Press ...

Page 368: ...SSING C 1 S ALL PROC Press Volume button to make selection and press Right Soft button to advance cursor OR Select all cabinets and slots and go to step 4 HALT PROCESSING C ALL S ALL PROC 3 Enter slot number via dial keypad OR HALT PROCESSING C 1 S 2 PROC Press Volume button to make selection and press Right Soft button to advance cursor 4 Enter 1 for HALT or 0 for PROC OR Press Volume button to m...

Page 369: ...make default system with Media read DEFAULT DATA NONE ACTION DISPLAY 1 Press Transfer button and enter 811 Display shows SYSTEM RESTART RESET SYSTEM NO 2 Enter reset type 0 2 via dial keypad OR SYSTEM RESTART CLEAR MEMORY NO Press Volume button to make selection and press Right Soft button to move cursor 3 Dial 1 for YES or 0 for NO OR SYSTEM RESTART CLEAR MEMORY YES Press Volume button to make se...

Page 370: ... of the local SAMSUNG distributor DEFAULT DATA NONE ACTION DISPLAY 1 Press Transfer button and enter 812 Display shows SELECT COUNTRY Undefined 2 Press Volume button to make selection and press Right Soft button SELECT COUNTRY RUSSIA CIS 3 Press Volume button to select YES or NO and press Right Soft button DEFAULTING SYSTM ARE YOU SURE NO 4 Press Transfer button to save and exit OR Press Speaker b...

Page 371: ...tton to make selection and press Right Soft button 3 Dial 1 for YES or 0 for NO OR HOTEL OPERATION CHANGE NOW NO Press Volume button to make selection and press Right Soft button 4 Dial 1 for YES or 0 for NO OR HOTEL OPERATION ARE YOU SURE YES Press Volume button to make selection and press Right Soft button 5 Press Transfer button to save and exit OR Press Speaker button to advance to next MMC RE...

Page 372: ...re the SYSDB is copied to it When the SYSDB is copied to the MCDB there is no interruption in service If the MCDB is copied to the SYSDB the system will reset to accept the new data MCDB Media card database Option Description S mm dd yy hh mm Indicates the time SYSDB was saved to the MCDB CLEAR MCDB Clear MCDB COPY TO SYS Copy MCDB to SYSDB SYSDB on board system database Option Description S mm dd...

Page 373: ...s Right Soft button CUST DBASE MCDB ARE YOU SURE NO If you select YES the display shows CUST DBASE MCDB Cleared 6 Press Volume button to make selection and press Right Soft button to move cursor CUST DBASE SYSDB DAILY SAVE 00 00 7 Press Volume button to make selection and press Right Soft button to move cursor CUST DBASE SYSDB DAILY SAVE 00 00 8 Input save time OR CUST DBASE SYSDB DAILY SAVE 23 30...

Page 374: ...N is not to correct low volume To be used with the support of local SAMSUNG Electronics Co distributor DEFAULT DATA YES ACTION DISPLAY 1 Press Transfer button and enter 816 Display shows CONFERENCE GAIN USE DEFAULT YES 2 Press Volume button to select YES or NO and press Right Soft button to move cursor CONFERENCE GAIN USE DEFAULT YES 3 Press Transfer button to save and exit OR Press Speaker button...

Page 375: ...EFAULT DATA NONE ACTION DISPLAY 1 Press Transfer button and enter 817 Display shows STOP MEMORY STOP MEMORY NO 2 Press Volume button to select Yes No and press Right Soft button to move cursor STOP MEMORY STOP MEMORY NO 3 Press Volume button to select YES and press Right Soft button to move cursor STOP MEMORY STOP MEMORY YES 4 Press Volume button to select YES and press Right Soft button to move c...

Page 376: ...d each file in MMC819 DEFAULT DATA NONE ACTION DISPLAY 1 Press Transfer button and enter 818 Display shows PGM DOWNLOAD MCP MPE08301 PGM 2 Press Volume button to select program type and press Right Soft button to move cursor PGM DOWNLOAD LP4 LP450824 PGM 3 Press Cabinet number 1 3 to download program LP40 PGM C1 DOWNLOAD NOW NO 4 Press Volume button to select YES and press Right Soft button to mov...

Page 377: ...he card itself The one included in Media Card is used for software version upgrade PR2xxxxx PGM TEPRI2 program The TEPRI2 program is installed on the card itself The one included in Media Card is used for software version upgrade PRIxxxxx PGM TEPRI program The TEPRI program is installed on the card itself The one included in Media Card is used for software version upgrade DATABASE ENT DATABASE SME...

Page 378: ...used for software version upgrade Tone_db inf Tond DB file for MGI and VM DEFAULT DATA NONE ACTION DISPLAY 1 Press Transfer button and enter 819 Display shows STARTUP INI sz 512 bytes 2 Press Volume button to select program type and press Hold button to move cursor delete Selection MPE08301 PGM sz 14418432 bytes 3 Dial 1 for YES or 0 for NO OR MPE08301 PGM DELETE FILE NO Press Volume button to mak...

Page 379: ...d Yes Don t use MGI This option can be shown in case that MMC 861 MPS SERVICE set to ENABLE CODEC Preferentially used CODEC for SPNET CONDITIONS SELF represents self node and must be set to use the networking function Items other than SELF are used for station numbers and can be omitted DEFAULT DATA NONE ACTION DISPLAY 1 Press Transfer button and enter 820 Display shows SELF LINK ID 2 Enter SELF l...

Page 380: ...CHAPTER 2 MMC Programming 2 342 SAMSUNG Electronics Co Ltd RELATED ITEMS MMC 821 ASSIGN NETWORK TRUNK MMC 823 ASSIGN NETWORK COS MMC 824 NETWORK DIAL TRANSLATION MMC 830 LAN PARAMETERS ...

Page 381: ...rts only basic functions QSIG BASIC 2 Assigns the Q Signaling PRI trunk for networking between OfficeServ System and the other system It can support caller name DEFAULT DATA NORMAL ACTION DISPLAY 1 Press Transfer button and enter 821 Display shows 701 Q SIG TRK NORMAL TRUNK 2 Enter first trunk number of PRI card OR Press Volume button to make selection and press Right Soft button to move cursor 70...

Page 382: ...phone 09 21 BTN SET 21 buttons phone 10 14 BTN SET 14 buttons phone 11 LARGE SET Large LCD phone 12 7 BTN LCD 7 buttons LCD phone 13 0 BTN LCD 0 button LCD phone 14 NONE not used DEFAULT DATA 3501 3522 SLT 3401 3440 21 BTN SET ACTION DISPLAY 1 Press Transfer button and enter 822 Display shows 3501 PORT TYPE SLT 2 Enter virtual extension number OR 3501 PORT TYPE SLT Press Volume button to make sele...

Page 383: ...OfficeServ 7000 Series Call Server Programming Manual SAMSUNG Electronics Co Ltd 2 345 4 Press Transfer button to save and exit OR Press Speaker button to advance to next MMC RELATED ITEMS NONE ...

Page 384: ...l Forward Busy 09 CFNR Y Call Forward No Reply 10 CFU Y Call Forward Unconditional 11 CI N Call Intrusion 12 CI CAPABIL 2 Intrusion Capability Level 1 3 14 CI PROTECT 2 Intrusion Protection Level 0 3 23 CONP LEVEL 3 CONP Level 0 none 1 Alert 2 Busy 3 Both 26 CT RE ROUTE N Transfer By Rerouting 27 DND TONE N DND Announcement 28 DNDO Y Do Not Disturb Override 29 DNDO CAPABL 2 DNDO Capability Level 0...

Page 385: ...me button to select and press Right Soft button to move cursor 3 Dial the feature number OR NETWORK COS 02 03 CC PATH RSV Y Press Volume button to select and press Right Soft button to move cursor 4 Enter 0 for NO or 1 for YES OR NETWORK COS 01 03 CC PATH RSV N Press Volume button to select YES or NO and Press Right Soft button to store data 5 Press Transfer button to save and exit OR Press Speake...

Page 386: ...ransfer button and enter 824 Display shows 01 601 SIZE 0 MAX 00 2 Dial the entry number OR 01 601 _ SIZE 0 MAX 00 Press Volume button to select and press Right Soft button to move cursor 3 Enter digit string for access to node max 8 digits and press Right Soft button to move cursor 01 601 60201 SIZE 0 MAX 00 4 Enter number of digits user will dial e g 3 for 3 digit extension 01 601 60201 SIZE 3 MA...

Page 387: ... to remote extension automatically 01 601 60201 DISP Y MBX N OR Press Volume button to select and press Right Soft button to move cursor 8 Press Transfer button to save and exit OR Press Speaker button to advance to next MMC RELATED ITEMS MMC 710 LCR DIGIT TABLE MMC 724 DIAL NUMBERING PLAN MMC 820 ASSIGN SYSTEM LINK ID ...

Page 388: ...remote system RING 1 6 Y N 5 REMOTE ATTN NUMB Access number of remote Attendant when the remote Attendant is used RING 1 6 6 SPNET DIGIT SEND Specify by which method dialed digits are sent across the network DEFAULT DATA ADD NUMB TO NAME YES USE REMOTE VM NO REMOTE VM NUMBER NONE REMOTE CID NUMB YES USE REMOTE ATTN NO REMOTE ATTN NUMB NONE SPNET DIGIT SEND MGI SIGNALING ACTION DISPLAY 1 Press Tran...

Page 389: ...OfficeServ 7000 Series Call Server Programming Manual SAMSUNG Electronics Co Ltd 2 351 4 Press Transfer button to save and exit OR Press Speaker button to advance to next MMC RELATED ITEMS NONE ...

Page 390: ...l clock source is used ACTION DISPLAY 1 Press Transfer button and enter 826 Display shows REFERENCE CLOCK PRIORITY 1 C1 S3 2 Dial the priority number 1 6 OR REFERENCE CLOCK PRIORITY 1 C1 S3 Press Volume button to select and press Right Soft button to move cursor 3 Dial the priority data OR REFERENCE CLOCK PRIORITY 1 C1 S3 Press Volume button to select and Press Right Soft button to store 4 Press T...

Page 391: ...e Option OfficeServ7400 C 1 LOC 1 DSP 1 DTMFR DTMFR OfficeServ7200 CRM DSP MODE SET C1 B1 DTMFR CONDITION CRM board must be equiped in LP40 or MPC MP20 DEFAULT DATA DSP1 DTMFR DSP2 DTMFR ACTION DISPLAY 1 Press Transfer button and enter 827 Display shows C 1 LOC 1 DSP 1 DTMFR DTMFR 2 Dial the cabinet number 1 3 OR C 1 LOC 1 DSP 1 DTMFR DTMFR Press Volume button to select and press Right Soft button...

Page 392: ...Co Ltd 5 Dial digit to select CRM mode 0 2 OR C 1 LOC 1 DSP 1 DTMFR DTMFR Press Volume button to select and press Right Soft button to move cursor 6 Press Transfer button to save and exit OR Press Speaker button to advance to next MMC RELATED ITEMS NONE ...

Page 393: ...ss Transfer button and enter 828 Display shows R2MFC CID SELECT C1 B1 R2 CID 2 Dial the cabinet number 1 2 OR R2MFC CID SELECT C2 B1 R2 CID Press Volume button to select and press Right Soft button to move cursor 3 Dial the LOC number 1 3 OR R2MFC CID SELECT C2 B1 R2 CID Press Volume button to select and press Right Soft button to move cursor 4 Dial digit to select RCM2 mode 0 2 OR R2MFC CID SELEC...

Page 394: ...s MMC 04 DESTINATION OFF Data transmit destination Off Printer PC Both 05 PRINTER IP 0 0 0 0 The IP address of the LAN printer 06 PRINTER TCP 09100 The TCP port of the printer 07 LAN TCP 10020 LAN TCP port 08 RETRY COUNT 03 Re transmit attempt count 00 10 09 RETRY WAIT 010 sec Wait time for re transmit 005 250 sec 10 PJL ENABLE FALSE Sets PJL 0 FALSE 1 TRUE 11 LANGUAGE RAW Printer language 0 RAW 1...

Page 395: ...tton to select the type and press the Right Soft button to move the cursor 3 Enter the item number OR 02 PRINTER IP 200 1 1 1 Press Volume button to select the item and press the Right Soft button to move the cursor 4 Select the data OR 02 PRINTER IP 168 219 83 101 Press Volume to select the data and press Right Soft button to move the cursor 5 Press Transfer button to save and exit OR Press Speak...

Page 396: ... public This allows devices on remote networks subnets to establish communications with the system without exposing the LAN See SYSTEM IP TYPE 06 SYS PUBLIC IP2 The MCP will originate communications to IP phones and VoIP connections outside the local network using this IP address Communications to from this IP will require involvement of the MGI card The system identifies communications to from th...

Page 397: ...er 26 EMAIL SERVER Specify an EMAIL SERVER IP address This option may not be available in certain OfficeServ models 27 MMS SERVER ADDR Specify an MMS SERVER IP address This option may not be available in certain OfficeServ models 28 MMS WEB SERVER Specify an MMS WEB SERVER IP address This option may not be available in certain OfficeServ models 29 IMPS SERVER ADDR Specify an IMPS SER SERVER IP add...

Page 398: ...IP address entry 4 Press Volume button to make selection and Press Right Soft button to move cursor SYSTEM GATEWAY 165 213 97 1 5 Using the keypad enter 3 digit IP numbers e g 192 168 001 001 for 192 168 1 1 SYSTEM GATEWAY 192 168 001 001 Cursor will return to this step on completion of system gateway entry 6 Press Volume button to make selection and press Right Soft button to move cursor SYSTEM R...

Page 399: ... system binds IP Address with Public IP and processes a voice stream See System IP Type on MMC 830 7 PUB RTP1 Public RTP Port which NAT system binds a private RTP port with 8 PUB IP2 Pulbic IP Address is only used for VoIP signaling protocols in a NAT network NAT system binds IP Address with Public IP and processes a voice stream See System IP Type on MMC 830 9 PUB RTP2 Public RTP Port which NAT s...

Page 400: ...d in the system ACTION DISPLAY 1 Press Transfer button and enter 831 Display shows the first MGI card 3801 IP ADDRESS 168 219 76 101 2 Enter MGI number OR 3801 IP ADDRESS 168 219 76 101 Press Volume button to make selection and press Right Soft button to move cursor 3 Enter MGI parameter number OR 3801 IP ADDRESS 168 219 76 101 Press Volume button to make selection and press Right Soft button to m...

Page 401: ... is the number of digits to delete after receiving the access code If no digits are deleted the access code will be sent as part of the call to the destination to continue routing 4 IP TABLE 1 This is the first table referenced for routing the access code to an IP address The system has 251 IP tables 000 250 with 4 entries 1 4 in each table See MMC 833 6 IP START This entry indicates where in a ta...

Page 402: ...evious character press the Volume Up button to move the cursor to the right or the Volume Down button to move the cursor to the left A space can be entered using these keys COUNT 1 2 3 4 5 DIAL 0 0 DIAL 1 1 DIAL 2 A B C 2 DIAL 3 D E F 3 DIAL 4 G H I 4 DIAL 5 J K L 5 DIAL 6 M N O 6 DIAL 7 P Q R 7 DIAL 8 T U V 8 DIAL 9 W X Y Z 9 DIAL The button can be used for the following special characters _ DEFA...

Page 403: ...ial keypad O 01 ACCESS DGT 1 OR Press Volume button to make selection and press Right Soft button to move cursor 4 Enter access code item 0 6 via dial keypad OR O 01 ACCESS DGT 1 Press Volume button to make selection and press Right Soft button to move cursor 5 Enter access code data via dial keypad OR O 01 ACCESS DGT 840 Press Volume button to make selection and press Right Soft button to save an...

Page 404: ...ion IP address table 3 ENTRY 4 This indicates the fourth entry of each destination IP address table 4 PROTOCOL Default value is SIP Set PROTOCOL to H323 when the table is used for H323 signaling 6 ALIVE CHK Set ALIVE CHK to OPTION when the link test is required When set system sends OPTIONS message to the destination SIP Server 7 USER INFO Alphanumeric System username of To and From header in OPTI...

Page 405: ...d press Right Soft button to move cursor 3 Enter entry number 00 15 via dial keypad OR TB 000 IP ADDR 1 0 0 0 0 Press Volume button to make selection and press Right Soft button to move cursor 4 Enter IP address via dial keypad Cursor will be return step 3 TB 000 IP ADDR 1 165 213 87 110 5 Press Transfer button to save and exit OR Press Speaker button to advance to next MMC entry RELATED ITEMS MMC...

Page 406: ...ith the Q 931 channel ENABLE 07 DEFAULT DIL NO This allows programming of the default direct in line number when digits are missing or incorrect on an inbound call 500 11 CODEC AUTO NEGO Enables or disables Auto CODEC Negotiation when the MGI is used as an H 323 gateway ON 14 SIGNAL PORT Indicate the port number for H 323 Signaling and sets a range of numbers allowed by firewall equipment The comm...

Page 407: ...P DIAL Enables use of overlap dialing ENBLOC DEFAULT DATA SEE DESCRIPTION ACTION DISPLAY 1 Press Transfer button and enter 834 Display shows the first option GATEWAY CALL ID 1234 2 Enter H 323 option number 00 20 via dial keypad H 323 FAST SETUP DISABLE OR Press Volume button to make selection and press Right Soft button to move cursor 3 Enter H 323 option data via dial keypad OR H 323 FAST SETUP ...

Page 408: ... unpleasant voice artifacts like choppiness at the beginning of the call in heavy double talk situations the Host may select the NLP Tune Option 2 setting to reduce the level of NLP engagement NLP Tune Option 1 Increased level of NLP engagement For certain 2 to 4 wire hybrid or line conditions where a larger than normal non linear component in the echo is present the Host may select the NLP Tune O...

Page 409: ...rds when current network conditions allow The larger the value the slower the jitter buffer adapts down when jitter decreases The value is programmed in milliseconds with a default of 10000ms 10seconds and a minimum value of 1000ms 1 second 1 sec 12 JITTER AT When the jitter buffer grows past the Deletion Threshold frames exceeding the deletion threshold are deleted immediately Audio quality may b...

Page 410: ...hat the Comcerto MAC address is unique When sending a payload Ethernet frame each channel uses its own Ethernet header if it has one This option is enable or disable for 802 1p q including 802 1 VLAN and 802 1 Priority NOTE These options apply to RTP RTCP Disable 20 802 1 P Set the 802 1 priority The range is 0 7 0 21 802 1 VLAN Set the VLAN tag The range is 0 4095 0 22 G711 FRAME specify the tran...

Page 411: ...GAIN This value selects the voice volume The range is 0 63 31 dB 31 dB 32 0 dB 07 JITTER OPT This is a scale value that introduces a intentional buffer delay of the transmission of VoIP packets generated by the MGI card This value determines whether the focus is on packet loss or packet delay The range is 00 12 4 08 MIN JITTER Decides the minimum time to consider delay for jitter adjustment The ra...

Page 412: ...the VoIP packet for G 711 codec 20 ms 18 G729 FRAME specify the transmission interval time of the VoIP packet for G 719 codec 20 ms 19 G729s FRAME specify the transmission interval time of the VoIP packet for G 729a codec 20 ms 20 G723 FRAME specify the transmission interval time of the VoIP packet for G 711 codec 30 ms DEFAULT DATA SEE DESCRIPTION ACTION DISPLAY 1 Press Transfer button and enter ...

Page 413: ...eServ 7000 Series Call Server Programming Manual SAMSUNG Electronics Co Ltd 2 375 5 Press Transfer button to save and exit OR Press Speaker button to advance to next MMC RELATED ITEMS MMC 831 MGI PARAMETERS ...

Page 414: ...s through a gatekeeper DISABLE 03 GK RAS TYPE Select if AUTO or MANUAL depending on your gatekeeper s capabilities AUTO 04 GK IP ADDRESS This is the gatekeeper s IP address 0 0 0 0 05 ALTER GK IP ADDR This provides an alternate gatekeeper address 0 0 0 0 06 GK NAME This is the alphanumeric identifier of the gatekeeper Up to 16 characters Gatekeeper 07 H 323 ID This is the H 323 identifier used by ...

Page 415: ...eeper There is a maximum 32 E 164 identifier lists with a digit string length of 16 digits NONE ENTERING GK NAME H 323 ID The characters which are related to VoIP are limited So it is different to entering special characters in normal case Refer to the below Volume Up Down keys When the character you want appears on the same dial pad key as the previous character press the Volume Up button to move...

Page 416: ... Enter H 323 GK option via dial keypad OR GK ROUTING DISABLE Press Volume button to make selection and press Right Soft button to move cursor 3 Enter H 323 GK option data OR GK ROUTING ENABLE Press Volume button to make selection and press Right Soft button to save and return step 3 4 Press Transfer button to save and exit OR Press Speaker button to advance to next MMC RELATED ITEMS MMC 834 H 323 ...

Page 417: ...C2543 specification The range is 0 9900 ms 5000 ms 03 GENERAL RING The server retransmits the response for this length of time until the requested retransmission is received For example the wait time after sending 200 OK for INFO The range is 0 99900 ms 5000 ms 04 INVITE RING After the client sends ACK for the INVITE Final Response the client cannot confirm if the server received the ACK message T...

Page 418: ...message to system for link test purpose The iBG EXPIRE value indicates the expiration time for the iBG s registration 10 02 LCR SETUP When making SIP Trunk outbound call there exists time interval till the outbound INVITE message is actually sent out unless attaching key in order to let system know that dialing is done When LCR SETUP value is set to Enable the system sends the outbound INVITE mess...

Page 419: ... fails 0 0 0 0 07 PROXY PORT Sets the port to use on the SIP Server 5060 08 PROXY NAME Domain name which is set for the user authentication when using the SIP server NONE 09 DNS SERVER1 Designates the IP address of any external name server DNS server The DNS server resolves the SIP server name to an IP address This option may not be available in certain OfficeServ models 0 0 0 0 10 DNS SERVER2 Des...

Page 420: ... 20 EXCLUSIVE When Set to Enable system will only respond specifically to the enabled SIP server It will ignore all other SIP messages not from the specified SIP server Disable 21 IMS OPTION When enabled SIP headers that are commonly used in IMS environment will automatically be applied Disable 22 ASSERTED ID If the value is set to PRIMARY outbound message s FROM header will contain individual sta...

Page 421: ...ion is set to Enable system responds back to the SIP carrier with a 302 message which will allow the SIP carrier to handle the call forward If this option is disabled then the OfficeServ system will initiate a second invite message to the final forward destination When OfficeServ handles the forwarding to the final destination then more MGI resources will be used If the SIP provider supports the 3...

Page 422: ...P URI type in SIP messages According to SIP standard this system supports TEL URI as well as SIP URI which is set by default 33 SIG TYPE This indicates the transport type in SIP message Signaling SIP message can be transported either using UDP or TCP This option may not be available in certain OfficeServ models ENTERING SIP CARRIER PROXY NAME USER NAME AUTH USER AUTH PSWD The characters which are ...

Page 423: ...DEFAULT DATA SEE DESCRIPTION ACTION DISPLAY 1 Press Transfer button and enter 837 Display shows the first option SIP TLS USE NO 2 Select Extension option e g 01 via dial keypad OR EXT SIGNAL PORT 05060 Press Volume button to make selection and press Right Soft button to move cursor 3 Enter SIGNAL PORT via dial keypad OR EXT SIGNAL PORT 05060 Press Volume button to make selection and press Right So...

Page 424: ...UNG Electronics Co Ltd RELATED ITEMS MMC 323 CALLING PARTY NUMBER MMC 405 TRUNK CO TEL NUMBER MMC 306 TRUNK RING ASSIGNMENT MMC 714 DID NUMBER AND NAME TRANSLATION MMC 724 DIAL NUMBERING PLAN MMC 832 VoIP ACCESS CODE MMC 834 H 323 OPTIONS ...

Page 425: ...igits must be input for each octet field Example 192 168 1 10 input must be 192 168 001 010 ACTION DISPLAY 1 Press Transfer button and enter 838 Display shows the first table number PRIVATE IP 01 0 0 0 0 2 Enter table number 01 80 via dial keypad OR PRIVATE IP 01 0 0 0 0 Press Volume button to make selection and press Right Soft button to move cursor 3 Enter IP address via dial keypad Cursor will ...

Page 426: ...idual number 03 TEL NO This numbers are used to match alphabetical usernames to internal CLI and DDI numbers Matched to CLI for outgoing and DDI for Incoming Out site Information No Parameter Description Default 00 SITE URL When dialed number is matched with TEL NO in this table this value should be put into To Header in outgoing INVITE message 01 TEL NO This numbers are used to match with dialed ...

Page 427: ...character you want appears on the same dial pad key as the previous character press the Volume Up button to move the cursor to the right or the Volume Down button to move the cursor to the left A space can be entered using these keys COUNT 1 2 3 4 5 DIAL 0 0 DIAL 1 1 DIAL 2 A B C 2 DIAL 3 D E F 3 DIAL 4 G H I 4 DIAL 5 J K L 5 DIAL 6 M N O 6 DIAL 7 P Q R 7 DIAL 8 T U V 8 DIAL 9 W X Y Z 9 DIAL The b...

Page 428: ...essing the Right Soft button SP1 001 USERNAME 3 Select the AUTH UID by using the Volume button and move the cursor by pressing the Right Soft button SP1 001 AUTH UID 4 Enter the AUTH UID The AUTH UID can be entered as characters and numbers of 16 digits SP1 002 AUTH UID 5 Press the Transfer button to store the data and complete the procedure or press the Speaker button to store the data RELATED IT...

Page 429: ...Serv 7000 Series system alphanumeric 1234 02 IP ADDR This is the IP address of the IP phone when registered with the system Read only 0 0 0 0 03 MAC ADDR This is MAC address of the IP phone when registered with the system Read only FFFFFFFFFFFF 04 SIG PORT This is the IP UDP port of the IP phone when registered with the system Read only This information will be needed when traversing NAT routers f...

Page 430: ...e software upgrade request command When YES is selected and Right Soft button is pressed the system requests IP phone software upgrade with TFTP IP address 15 TIME ZONE Allows remote IP phones to display own time zone 00 00 17 SIG TYPE This option can change UDP TCP signal type for IP phone ITP V3 xx only supports the TCP signal type If TCP is set and ITP V2 xx attempts to connect the TCP signal t...

Page 431: ...or 3 Enter IP phone option number via dial keypad OR 3210 DSP TYPE G 729A Press Volume button to make selection and press Right Soft button to move cursor 4 Enter option data via dial keypad OR 3210 DSP TYPE G 711 Press Volume button to make selection and press Right Soft button to save and return to step 3 5 Press Transfer button to save and exit OR Press Speaker button to advance to next MMC REL...

Page 432: ...e boot program 11 SOFT VIDEO 12 ITP SIMPLE 13 SOFT MENU Soft menu version NONE 01 PHONE TFTP IP Sets phone software upgrade TFTP server IP address 0 0 0 0 02 ITP REGISTRATION Defines the method that IP based phones use to register with the system 0 TYPE a SYS PSWD System will authenticate the IP based phones with the value in ITP REGISTRATION PSWD parameter see 1 below B PHONE PSWD System will aut...

Page 433: ...r adjustment This data uses DOWN SYS DATA only see 3 below The range is 10 90 ms 20 ms 2 TOS Dif An 8 bit binary value that will be used by external routers switches etc that optionally support TOS bit prioritization to identify the transport priority value of data packets generated by the IP phone This value can be left at the default value 00000 if your network infrastructure does not support th...

Page 434: ...EVEL 7 34 LEVEL 8 36 09 ITP RX GAIN SPKR Sets IP based phone SPKR gain value of each level LEVEL 01 16 LEVEL 02 18 LEVEL 03 20 LEVEL 04 22 LEVEL 05 24 LEVEL 06 26 LEVEL 07 28 LEVEL 08 30 LEVEL 09 32 LEVEL 10 34 LEVEL 11 36 LEVEL 12 38 LEVEL 13 40 LEVEL 14 42 LEVEL 15 44 LEVEL 16 46 10 ITP VERS UPGRADE Sets IP based phone software upgrade option with the system 0 TYPE a MMC COMMAND IP based phone s...

Page 435: ... LEVEL 7 08 LEVEL 8 09 14 ITP MAX TX LIMIT TX level which is in case of using MGI or not can be restricted for voice quality of IP Phone NO 15 WIP DSP PARA Designate the DSP parameter of the WLAN phone M FRAME The length of voice data ECHOCNCL The option for using Echo Cancel function 40MSEC ENABLE 16 ALL IDLE ITP OUT All IP based phone supporting IDLE MODE can logout except IP LOUT COS is limited...

Page 436: ...ION TYPE SYS PSWD OR Press Volume button to make select and press Right Soft button to move cursor 3 Enter option number via dial keypad OR ITP REGISTRATION PSWD 1234 Press Volume button to make select and press Right Soft button to move cursor 4 Enter option data OR ITP REGISTRATION PSWD 8228 Press Right Soft button to save and return to step 3 5 Press Transfer button to save and exit OR Press Sp...

Page 437: ... as the call between the SIP terminals or the call with the IP phone the holding tone ring back tone is emitted by allocating the MGI 1 USE SIPP TONE Use the own tone of the SIP terminal CALL WAIT This indicates whether to receive the second call without treating it as the busy status when the second call is received in the SIP terminal DISABLE ENABLE 8 PHONE TYPE This indicates the manufacturer o...

Page 438: ...s Transfer button and enter 842 3201 USER ID 3201 2 Enter IP phone number via dial keypad OR 3202 USER ID 3202 Press Volume button to make select and press Right Soft button to move cursor 3 Enter option number via dial keypad OR 3202 IP TYPE PRIVATE Press Volume button to make select and press Right Soft button to move cursor 4 Enter option data OR 3202 IP TYPE PUBLIC Press Right Soft button to s...

Page 439: ...tocols in a NAT network NAT system binds IP Address with Public IP and processes a voice stream See System IP Type on MMC 830 8 PUBLIC RTP1 Public RTP Port which NAT system binds a private RTP port with 9 PUBLIC IP2 Pulbic IP Address is only used for VoIP signaling protocols in a NAT network NAT system binds IP Address with Public IP and processes a voice stream See System IP Type on MMC 830 10 PU...

Page 440: ...nd press Right Soft button to move cursor MPS IP ADDRESS 168 219 76 101 3 Enter MPS parameter number OR MPS IP ADDRESS 168 219 76 101 Press Volume button to make selection and press Right Soft button to move cursor 4 Enter MPS parameter OR MPS IP ADDRESS 165 10 1 100 Press Right Soft button to move cursor 5 Press Transfer button to save and exit OR Press Speaker button to advance to next MMC RELAT...

Page 441: ...ver url for the SNMP Trap 6 SNMP S G SERVER Specifies the set get server url for the SNMP 7 SNMP COMMUNITY Specifies community name for the SNMP CONDITIONS NONE ACTION DISPLAY 1 Press Transfer button and enter 844 Display shows the first XML SERVER URL XML SERVER URL 2 Press Volume button to make selection and press Right Soft button to move cursor XML SERVER URL 3 Enter the parameter number OR XM...

Page 442: ...this option can be shown DISABLE SIP PARAMETER No Parameter Description Default ms 0 RE TRANS T1 When using an unreliable transmission protocol such as UDP retransmission is required when no reply is received RE TRANS T1 TIME is the initial retransmission interval defined in RFC2543 500 1 RE TRANS T2 Maximum retransmission interval defined in RFC 2543 4000 2 RE TRANS T4 RFC 2543 defines this param...

Page 443: ...se for SIP related Request 5000 8 PROVISIONAL On receiving Provision Response the User Agent must wait for this length of time until Timeout 180000 ACTION DISPLAY 1 Press Transfer button and enter 845 WLAN CODEC LIST G 729 2 When the cursor is on WLAN press Volume button and select WLAN WBS or SIP WLAN CODEC LIST G 729 3 Press Right Soft button to move to the SYSTEM ID When the cursor is below SYS...

Page 444: ... provided the entered numbers do not start with a C O number C O group number LCR network LCR or function code 12 HO THRSH Handover Thresh Hold Value 99 0 Thresh Hold is a signal level which makes WLAN phone start scanning for handover If this signal level is under the registered Thresh Hold WLAN phone will start scanning This parameter has a minus value but system only displays the value without ...

Page 445: ...button and enter 846 3301 REGISTERED NO 2 Dial the WIP number OR 3301 REGISTERED NO Press Volume button to select station and press Right Soft button to move cursor 3 Set the items below at the menu Confirm the status of terminal registration for each phone number 3301 REGISTERED NO RELATED ITEMS MMC 848 WLAN IP MAC LIST MMC 849 WLAN CONFIGURATION ...

Page 446: ...n the USED field Also the MMC is used to set MAC addresses in the terminal in order to use the wireless LAN not yet implemented DEFAULT DATA NONE ACTION DISPLAY 1 Press Transfer button and enter 848 IP 001 USED 0 0 0 0 2 Select the menu 0 IP LIST IP 001 USED 0 0 0 0 3 Select the table number IP 001 USED _ 0 0 0 0 4 Enter the IP ADDRESS IP 001 USED 168 0 0 0 5 A number next to USED indicates the te...

Page 447: ...s not connected normally e g device broken otherwise the NORMAL mode clearing can be used STATIC WIP IP Select the use of Static WIP IP SELECT AP Must select dual AP ACTION DISPLAY 1 Press Transfer button and press 849 ENTER PASSWORD _ 2 Enter the PASSCODE This PASSCODE is assigned in MMC 202 ENTER PASSCODE WLAN REGST 3 Select ENABLE to register a terminal REGISTER VoWLAN ENABLE 4 Select WIP REGIS...

Page 448: ...MMC 0 DTMFR D SP S 1 CID D SP S 2 R2MFC D SP S 3 CONF G ROUP S 4 MOBEX DEFAULT DATA NONE ACTION DISPLAY 1 Press Transfer button and enter 850 Display shows DTMFR DSP S USE 000 FREE 012 2 Enter the option number 0 3 OR CID DSP S USE 000 FREE 014 Press Volume button to select 3 Press Transfer button to save and exit OR Press Speaker button advance to next MMC RELATED ITEMS NONE ...

Page 449: ...rt and or slot will be displayed If an ALARM SIO port is programmed MMC 804 alarm information can be printed on demand and as it is provided ALARM REPORTING OPTIONS Select one of the options No Option Description 0 VIEW ALARMS View alarm buffer 1 OVERFLOW CONTROL Determines buffer control when buffer is full 0 OVERWRITTEN When buffer is full the oldest entry in buffer is overwritten Default 1 STOP...

Page 450: ...2 18 14 30 MNF02 C1 S02 Alarm type and cause code will display 4 Press Volume button to scroll through other alarms OR SYS ALARM REPORT VIEW ALARMS Press Right Soft button to return to step 2 5 Press Transfer button to save and exit OR Press Speaker button to advance to next MMC RELATED ITEMS MMC 852 SYSTEM ALARM ASSIGNMENTS ...

Page 451: ...otification Off On 0 1 determines if the alarm provides a visual and audible notification to the System Alarm key station s Pressing the System Alarm key and the release key will silence the audible alarm only at the station that pressed the System Alarm key and the release key See alarm displays table for assignments Alarm Code Definitions No Code Alarm Name Definition MJA MCP2 Error System Fault...

Page 452: ...PWR FAN Recov Dual Power FAN recovery alarm 18 MJA18 PoE PWR Error PoE Power Error alarm 19 MJA19 PoE PWR Recovry PoE Power recovery alarm 20 MJA20 PoE FAN Error PoE Power FAN Error alarm 21 MJA21 PoE FAN Recovry PoE Power FAN recovery alarm 22 MJA22 PoE Battry Error PoE Power Battery Error alarm 23 MJA23 PoE Battry Recov PoE Power Battery recovery alarm 24 MJA24 MAIN PWR Error PoE Power Battery E...

Page 453: ... 41 MJC07 AC Pwr Recovery AC Power Recovery 42 MJC08 Low Battery Low Battery 43 MJC09 Low Battery Rec Low Battery Recovery MJC18 D BD Init Fault D board Initial Fault MJC19 D BD Init Rec D board Initial Recovery MJC20 Card Init Fault Card Initial Fault MJC21 Card Init Rec Card Initial Recovery MJD DTRK Error ISDN or E1 card Fault 52 MJD01 Sync Failure Clocking on TEPRI cards has become asynchronou...

Page 454: ...data link is out of service Alarm Data Cabinet Slot Channel Cx Syy czz 67 MJD16 BRI DL Recovery A BRI data link is back in service Alarm Data Cabinet Slot Channel Cx Syy czz MJD DTRK Error ISDN or E1 card Fault 69 MJD18 E1 Restart The E1 card has restarted Alarm Data Cabinet Slot Cx Syy 70 MJD19 PRI Restart The PRI card has restarted Alarm Data Cabinet Slot Cx Syy 71 MJD20 BRI Restart The BRI card...

Page 455: ...tart 86 MJE11 SVMi Halt Whether to halt the SVMi card 87 MJE12 SVMi Down Whether to shut down the SVMi card 88 MJE13 MGI Self Restart MGI Self Restart 89 MJE14 MPS Restart MPS module Restart 90 MJE15 MPS Stop MPS module Stop MJE16 OAS NTWK Error OAS Network Error MJE17 OAS NTWK Recovery OAS Network Recovery MJE18 OAS IP CONFLICT OAS IP CONFLICT MJE19 OAS IP Recovery OAS IP Recovery MJE20 OAS Start...

Page 456: ... Fault An SLI card has been detected as out of service via an internal CODEC test Alarm Data Cabinet Slot Port Cx Syy Pzz 109 MNF19 SLI Recovery An SLI card detected as out of service has been detected as recovered and is in service via internal CODEC test Alarm Data Cabinet Slot Port Cx Syy Pzz 118 MNF28 LAN Printer Err LAN printer error has occurred in the MCP2 Alarm Data Data Type SMDR 119 MNF2...

Page 457: ...mber or Cx Syy Pzz 92 MNG04 On Hook Indicates the Off Hook Alarm Extension is on hook Alarm Data Tel number or Cx Syy Pzz 93 MNG05 MGI Packet Loss Indicates the MGI connection RTP packet loss is more than 10 Alarm Data Tel number or Cx Syy Pzz 94 MNG06 MGI Packet Delay Indicates the MGI connection RTP packet delay is more than 500 ms Alarm Data Tel number or Cx Syy Pzz DEFAULT DATA ALL OFF ACTION ...

Page 458: ...onics Co Ltd 4 Press Transfer button to save and exit OR Press Speaker button to advance to next MMC RELATED ITEMS MMC 501 SYSTEM TIMERS MMC 722 STATION KEY PROGRAMMING MMC 723 SYSTEM KEY PROGRAMMING MMC 851 ALARM REPORTING MMC 853 MAINTENANCE BUSY ...

Page 459: ... is accessed it will function like a locked all station Trunks made busy cannot originate calls Ring down type trunks will still ring the programmed destination Common resource equipment such as DSPs CID DSPs and miscellaneous equipment such as page ports and voice mail card ports can also be placed in a maintenance busy state MAINTENANCE BUSY OPTIONS No Option Description 0 TRK Trunks 1 STN Stati...

Page 460: ...ight Soft button to move cursor 3 Enter station number OR MAINTENANCE BUSY STN 201 IDLE Press Volume button to make selection and press Right Soft button to move cursor 4 Press 1 to make busy or 0 to make idle OR MAINTENANCE BUSY STN 201 BUSY Press Volume button to make selection and press Right Soft button to save and return step 3 5 Press Transfer button to save and exit OR Press Speaker button ...

Page 461: ... to assign the diagnostic time during non peak traffic periods DEFAULT DATA NO DIAGNOSTIC TIME SET ACTION DISPLAY 1 Press Transfer button and enter 854 Display shows DIAGNOSTIC TIME SUN 2 Enter weekday number 0 Sun 1 Mon 6 Sat DIAGNOSTIC TIME SUN _ OR Press Volume button to make selection and press Right Soft button to move cursor 3 Enter hour 24 hour clock via the dial keypad Cursor will advance ...

Page 462: ...ation Daughter Board of Cabinet x Slot y CxSy SW Shows the DIP software status of TEPRI card Cx RINGETy Shows the external ringer s existence This option is only showed using supported LP40 supported cabinet OfficeServ7200 MCP MP20 Main System Option Description MCP LOC x Shows location Daughter Board of Slot x MCP SW Shows DIP software status of MCP LCP ONLINE Shows operation status of LCP CxSxSW...

Page 463: ...NN The extension number of a phone that accessed programming directly e g 3203 MODEM Programming was accessed by PCMMC via the integrated V90 modem attached to the IOM board of the main cabinet LAN Programming was accessed by PCMMC via the LAN connection on the MCP2 card of main cabinet SIOx Programming was accessed by PCMMC via one of the SIO connections on the IOM board of the main cabinet where...

Page 464: ...sfer button and enter 857 Display shows C4 S01 SLT SLT 2 Enter number 1 3 for cabinet number and enter number 1 12 for slot number C4 S01 SLT SLT OR Press Volume button to scroll 3 Press Volume button to scroll card type and Select card type by pressing Right soft button C4 S01 SLT DGP 4 Press Transfer button to save and exit OR Press Speaker button to advance to next MMC RELATED ITEMS MMC 724 NUM...

Page 465: ...mber of MFR channels depends on the channel supported in a slot MOBEX 16 ONLY 16 channels in a slot MOBEX 32 ONLY 32 channels in a slot MOBEX 64 ONLY 64 channels in a slot 2 RESTART CARD Restart OAS Card 3 NO MOBEX CARD Notify that OAS card is not installed DEFAULT DATA Different value according to an installation slot ACTION DISPLAY 1 Press Transfer button and enter 858 Display shows C1 S1 SERVIC...

Page 466: ... the TEPRI card or MGI64 card and EPLD PCB version OfficeServ7200 MCP MP20 Main System No Option Description 1 MCP M BOARD Shows the Mother board and EPLD PCB version cabinet 2 MCP CARD Shows the EPLD PCB version of MCP 3 MCP B x Shows the MCP s Daughterboard x and EPLD PCB version 4 CxSy Shows the card and EPLD PCB version of cabinet x slot y 5 LCP M BOARD Shows the LCP board 6 LCP CARD Shows the...

Page 467: ...TION DISPLAY 1 Press Transfer button and enter 859 Display shows EPLD PCB VERSION MP40 CARD V11 2 Enter the option number OR EPLD PCB VERSION C1 M BOARD V11 Press Volume button to scroll 3 Press Transfer button to save and exit OR Press Speaker button advance to next MMC RELATED ITEMS NONE ...

Page 468: ...ed information of sip stack for SIP Trunk SIP Station including 3 rd party SIP application e g IP UMS IVR 5 SERVICE LICENSE Insert license for H323 Soft phone MOBEX IP Phone WIFI Phone Call Manager 6 SERVICE LIC STS If inserted license is valid license details are shown 7 RESOURCE Insert the license for MGI VMS This option may not be available in certain OfficeServ models 8 RESOURCE LIC STS If ins...

Page 469: ...E DESCRIPTION ACTION DISPLAY 1 Press Transfer button and enter 860 Display shows the first available option PBX LICENSE OLD 2 Press Volume button to make select or press Right Soft button to move cursor PBX LICENSE OLD _ 3 Enter license data OR PBX LICENSE OLD NTOXNBML IJJ02Y0X 3YUL Press Volume button to make select and press Right Soft button to move cursor 4 Press Right Soft button to save and ...

Page 470: ...whether LB port of MISC card is used as ROP port or not This option may not be available in certain OfficeServ models 6 LP TRK TONE DISC When this option is set to ON loop trunk can be disconnected by detecting busy tone 7 SPNET OVERLAP Designate whether to operate as the OVERLAP Mode in case of SPNET Dialing 8 SPNET CLI TABLE This is the option to display the designated CLI number instead of the ...

Page 471: ...When this option is set to ON user can select tone which is played for incoming MOBEX call during authorization process TONE SOURCE Select between TONE and 371 for Authorization tone BLF BY CLI If incoming MOBEX call has registered CLI BLF service is set to the paired extension ANSWER TIME This is waiting time before MOBEX call is connected 18 VOIP RTP OPTION DTMF There are three types of DTMF tra...

Page 472: ...er the option number OR AUTO UPDATE TIME DISABLE Press Volume button to select and press Right Soft button to move cursor 3 Enter 1 or 0 to enable or disable OR AUTO UPDATE TIME ENABLE Press Volume button to select and press Right Soft button to store 4 Press Transfer button to save and exit OR Press Speaker button to advance to next MMC RELATED ITEMS NONE ...

Page 473: ... you dial a valid digit string until Max Count number the system set up call 4 NO MGI No Use MGI as of old Yes Don t use MGI This option can be shown in case that MMC 861 MPS SERVICE set to ENABLE SPNET is VoIP Network function developed by Samsung it is not standard function CONDITIONS LINK ID should not be inputted at MMC 820 SYSTEM LINK and ACCESS NUMBER TEL NUMBER should be inputted at LCR tab...

Page 474: ...CHAPTER 2 MMC Programming 2 436 SAMSUNG Electronics Co Ltd 5 Press Transfer button to save and exit OR Press Speaker button to advance to next MMC RELATED ITEMS MMC 710 LCR DIGIT ...

Page 475: ...OL DEFAULT DATA NONE ACTION DISPLAY 1 Press Transfer button and enter 865 Display shows FAN PWR CONTROL CABINET1 FAN OFF 2 Select the cabinet number 1 3 OR FAN PWR CONTROL CABINET1 FAN OFF Press Volume button to select and press Right Soft button to move cursor 3 Enter OFF if power off fan or ON if power on OR FAN PWR CONTROL CABINET1 FAN ON Press Volume button to select and press Right Soft butto...

Page 476: ... IRM board must be equiped in LP40 DEFAULT DATA CH01 16 DTMFR ACTION DISPLAY 1 Press Transfer button and enter 867 Display shows C 1 LOC 1 CH 01 DTMFR DTMFR 2 Dial the cabinet number 1 3 OR C 1 LOC 1 CH 01 DTMFR DTMFR Press Volume button to select and press Right Soft button to move cursor 3 Dial the LOC number 1 2 OR C 1 LOC 1 CH 01 DTMFR DTMFR Press Volume button to select and press Right Soft b...

Page 477: ...tronics Co Ltd 2 439 5 Dial digit to select CRM mode 0 2 OR C 1 LOC 1 CH 01 DTMFR DTMFR Press Volume button to select and press Right Soft button to move cursor 6 Press Transfer button to save and exit OR Press Speaker button to advance to next MMC RELATED ITEMS NONE ...

Page 478: ...NE ACTION DISPLAY 1 Press Transfer button and enter 868 Display shows 0001 TEL 2201 DGP 2 Select the remote station number 0001 2000 OR 0001 TEL 2201 DGP Press Volume button to select and press Right Soft button to move cursor 3 Enter digit string for access to node and press Right Soft button to move cursor 0001 TEL 2201 DGP 0022201 4 Press Transfer button to save and exit OR Press Speaker button...

Page 479: ...o clear the recorded history log When using the MMC 889 This option may not be available in certain OfficeServ models DEFAULT DATA NONE ACTION DISPLAY 1 Press Transfer button and enter 889 Display shows TOTAL LOG CNT 00 CLR RECORDED NO 2 Press Volume button to scroll displays 01 11 11 11 10 CONN FEAT SERVER 3 Press Transfer button to save and exit OR 02 11 13 11 20 CONN FEAT SERVER Press Speaker b...

Page 480: ...ne OR 202 CALL CLEAR ARE YOU SURE NO Press Volume button to make selection and press the Right Soft button to move cursor 3 Enter 0 to call clear only or 1 to initialize port OR 202 DB INITIAL ARE YOU SURE NO Press Volume button to make selection and press the Right Soft button to move cursor 4 Enter 1 for YES or 0 for NO OR 202 DB INITIAL ARE YOU SURE YES Press Volume button to make selection and...

Page 481: ...e AP Access Point B BGM Background Music BRI Basic Rate Interface BWBS Basic Wireless Base Station Access Point C CA Call Agent CCBS Call Completion to Busy Subscriber CCNR Cell Completion on No Reply CID Caller Identification CLI Call Line Identification COM Communication COS Class Of Service CPLD Complex Programmable Logic Device CRC Cyclic Redundancy Code CR Mode Constant Resistance Mode CSU Co...

Page 482: ...le G GARP Generic Attribute Registration Protocol GK Gatekeeper GVRP GARP VLAN Registration Protocol H HDLC High level Data Link Control HLR Home Location Register HTML Hypertext Markup Language HTTP Hypertext Transfer Protocol I ID Identification IDS Intrusion Detection System IGMP Internet Group Management Protocol IMAP Internet Messaging Access Protocol IN SCP Intelligent Network Service Contro...

Page 483: ... Emitting Diode LIM LAN Interface Module M MCP Main Control Processor MDF Main Distribution Frame MEGACO Media Gateway Control MFM Multi Frequency Module MG Media Gateway MGC Media Gateway Controller MGI Media Gateway Interface MGCP Media Gateway Control Protocol MISC Miscellaneous Function Module MMC Man Machine Communication MPD Metering Pulse Detection MWSLI Message Waiting Single Line Interfac...

Page 484: ...gnaling QoS Quality of Service R RCM R2 CID Module RIP Routing Information Protocol RPO Ring Plan Override RTCP Real time Transmission Control Protocol RTP Real time Transmission Protocol S SCP Signal Control Processor SDP Session Description Protocol SG Signaling Gateway SGCP Simple Gateway Control Protocol SIGTRAN Signaling Transport SIO Serial Input Output SIP Session Initiation Protocol SLI Si...

Page 485: ...UAC User Agent Client UART Universal Asynchronous Receiver and Transmitter UAS User Agent Server UCD Uniform Call Distribution UDP User Datagram Protocol UMS Unified Messaging System UPS Uninterruptible Power System USB Universal Serial Bus V VDIAL Voice Dial VLAN Virtual LAN VoIP Voice over Internet Protocol VPM Voice Processing Module VPN Virtual Private Network W WAN Wide Area Network WBS Wirel...

Page 486: ...ABBREVIATION VI SAMSUNG Electronics Co Ltd This page is intentionally left blank ...

Page 487: ...All rights reserved Information in this manual is proprietary to SAMSUNG Electronics Co Ltd No information contained here may be copied translated transcribed or duplicated by any form without the prior written consent of SAMSUNG Information in this manual is subject to change without notice ...

Reviews: