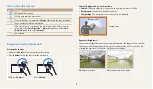
background image

USER  

MANUAL

DV180F

Click a topic

This user manual includes detailed usage instructions for 

your camera. Please read this manual thoroughly.

Basic troubleshooting

Quick reference

Contents 

Basic functions

Extended functions

Shooting options

Playback/Editing

Wireless network

Settings

Appendixes

Index

Summary of Contents for DV180F

Page 1: ...al includes detailed usage instructions for your camera Please read this manual thoroughly Basic troubleshooting Quick reference Contents Basic functions Extended functions Shooting options Playback Editing Wireless network Settings Appendixes Index ...

Page 2: ...f swallowed Moving parts and accessories may present physical dangers as well Do not expose the camera to direct sunlight or high temperatures for an extended period of time Prolonged exposure to sunlight or extreme temperatures can cause permanent damage to your camera s internal components Warning situations that could cause injury to yourself or others Do not disassemble or attempt to repair yo...

Page 3: ...r camera can cause interference with aircraft equipment Follow all airline regulations and turn off your camera when directed by airline personnel Turn off the camera near medical equipment Your camera can interfere with medical equipment in hospitals or health care facilities Follow all regulations posted warnings and directions from medical personnel Avoid interference with pacemakers Maintain t...

Page 4: ...e a fire or electric shock Do not touch the flash while it fires The flash is very hot when fired and may burn your skin When you use the AC charger turn off the camera before you disconnect the power to the AC charger Failing to do so may result in fire or electric shock Disconnect the charger from the wall socket when not in use Failing to do so may result in fire or electric shock Do not use a ...

Page 5: ...era If the cable is reversed it may damage your files The manufacturer is not responsible for any loss of data Avoid interference with other electronic devices Your camera emits radio frequency RF signals that may interfere with unshielded or improperly shielded electronic equipment such as pacemakers hearing aids medical devices and other electronic devices in homes or vehicles Consult the manufa...

Page 6: ...y where you purchased Use this camera responsibly and adhere to all laws and regulations concerning its use You are not allowed to reuse or distribute any part of this manual without prior permission Outline of the User Manual Basic functions 13 Learn about what is in the product box the camera s layout what the icons mean and basic shooting functions Extended functions 38 Learn how to capture a p...

Page 7: ...ter Press the shutter halfway down Press Shutter Press the shutter all the way down Half press Shutter Press Shutter Subject background and composition Subject The main object in a scene such as a person animal or still life Background The objects around the subject Composition The combination of a subject and background Composition Background Subject Exposure Brightness The amount of light that e...

Page 8: ...is in focus p 36 Photos are blurred when shooting at night As the camera tries to let in more light the shutter speed slows This can make it difficult to hold the camera steady long enough to capture a clear photo and may result in camera shake Select Night Shot mode p 50 Turn on the flash p 61 Set ISO sensitivity options p 63 Use a tripod to prevent your camera from shaking Subjects come out too ...

Page 9: ... eye f 61 Face Detection f 67 Capturing photos at night or in the dark Scene mode Sunset Dawn f 43 Night Shot mode f 50 Flash options f 61 ISO sensitivity to adjust the sensitivity to light f 63 Capturing action photos Jump Shot mode f 48 Continuous Motion Capture f 73 Capturing photos of text insects or flowers Scene mode Text f 43 Close up Shot mode f 50 Macro f 64 Reducing camera shake Digital ...

Page 10: ...ter mode 53 Using the Movie Filter mode 54 Using the Split Shot mode 55 Using the Motion Photo mode 56 Basic functions 13 Unpacking 14 Camera layout 15 Using the DIRECT LINK button 17 Inserting the battery and memory card 18 Charging the battery and turning on your camera 19 Charging the battery 19 Turning on your camera 19 Performing the initial setup 20 Learning icons 22 Using the Home screen 23...

Page 11: ...ro 64 Changing the focus option 64 Adjusting the focus area 65 Using Face Detection 67 Detecting faces 67 Capturing a smile shot 67 Detecting eye blinking 68 Tips for detecting faces 68 Adjusting brightness and color 69 Adjusting the exposure manually EV 69 Compensating for backlighting ACB 70 Changing the metering option 70 Selecting a White Balance setting 71 Using burst modes 73 Adjusting image...

Page 12: ... network settings 103 Connecting to a WLAN 103 Using the login browser 105 Network connection tips 106 Entering text 107 Saving files to a smart phone automatically 108 Sending photos or videos to a smart phone 109 Using a smart phone as a remote shutter release 110 Using Auto Backup to send photos or videos 112 Installing the program for Auto Backup on your PC 112 Sending photos or videos to a PC...

Page 13: ...Display 124 Connectivity 125 General 126 Appendixes 128 Error messages 129 Camera maintenance 130 Cleaning your camera 130 Using or storing the camera 131 About memory cards 132 About the battery 135 Before contacting a service center 139 Camera specifications 142 Glossary 146 Index 151 ...

Page 14: ... the Home screen 23 Accessing the Home screen 23 Icons on the Home screen 24 SettingWallpaper 26 Selecting options or menus 27 Setting the display and sound 29 Setting the display type 29 Setting the sound 30 Capturing photos 31 Turning on the front display 32 Zooming 32 Reducing camera shake DIS 34 Tips for getting a clearer photo 36 Basic functions Learn about what is in the product box the came...

Page 15: ...Camera case A V cable Battery charger Memory card Memory card adapter The illustrations may differ slightly from the items shipped with your product The items included in the box may differ depending on the model You can purchase optional accessories at a retailer or a Samsung service center Samsung is not responsible for any problems caused by using unauthorized accessories ...

Page 16: ...ttery chamber cover Insert a memory card and battery Tripod mount USB and A V port Accepts USB cable and A V cable Flash Lens Microphone Shutter button AF assist light Timer lamp Speaker Power button Internal antenna Avoid contact with the internal antenna while using the wireless network Front display Front LCD button ...

Page 17: ...us Enter Playback mode Delete files in Playback mode Status lamp Blinking When the camera is saving a photo or video being read by a computer when the image is out of focus there is a problem charging the battery or when the camera is connecting to WLAN or sending a photo Steady When the camera is connected to a computer charging the battery or when the image is in focus Zoom button In Shooting mo...

Page 18: ... Press x to activate the Wi Fi function that you have designated Press x again to return to the previous mode Setting a DIRECT LINK button option You can select a Wi Fi function to launch when you press x 1 On the Home screen scroll to Basic 2 Select 3 Select General DIRECT LINK Wi Fi Button 4 Select an option p 127 ...

Page 19: ...y Battery lock Slide the lock up to release the battery Memory card Push the card gently until it disengages from the camera and then pull it out of the slot You can use the internal memory for temporary storage if a memory card is not inserted Memory card Insert a memory card with the gold colored contacts facing up Rechargeable battery Insert the battery with the Samsung logo facing up ...

Page 20: ...ediately accesses Playback mode Charging the battery Before you use the camera for the first time you must charge the battery Plug the small end of the USB cable into your camera and then plug the other end of the USB cable into the AC adapter Status lamp Red light on Charging Red light off Fully charged Red light blinking Error Use only the AC adapter and USB cable supplied with your camera If yo...

Page 21: ...Press c to select Date Time Set and then press t or o Cancel Set Date Time Set Year Month Day Hour Min DST The screen may differ depending on the language selected 5 Press F t to select an item 6 Press D c to set the date time and daylight saving time and then press o Performing the initial setup When the initial setup screen appears follow the steps below to configure the camera s basic settings ...

Page 22: ...21 7 Press c to select DateType and then press t or o 8 Press D c to select a date type and then press o 9 Press c to select TimeType and then press t or o 10 Press D c to select a time type and then press o 11 Press m to finish the initial setup ...

Page 23: ...erture value Shutter speed Available recording time Auto focus frame Camera shake Zoom indicator Photo resolution when the Intelli zoom is on Zoom ratio 2 Shooting options right Icon Description Intelli zoom on Photo resolution Video resolution Metering Frame rate Flash Sound Alive on Digital Image Stabilization DIS Focus option Image adjustment sharpness contrast and saturation Timer 3 Shooting i...

Page 24: ...n 1 Current Home screen Rotate Zoom to the left or right to switch to another Home screen Press D to scroll to the Home screen name and then press F t to switch to another Home screen Press F t repeatedly to switch to another Home screen 2 Mode icons Press D c F t to scroll to a desired mode and then press o to access the mode Using the Home screen You can select a shooting mode or access the sett...

Page 25: ...e a series of photos to create a panoramic image p 44 Settings Adjust settings to match your preferences p 123 Wi Fi Icon Description MobileLink Send photos or videos to a smart phone p 109 RemoteViewfinder Use a smart phone as a remote shutter release and see a preview on your smart phone of an image from your camera p 110 Auto Backup Send photos or videos that you captured with the camera to a P...

Page 26: ...tter speed p 50 Close up Shot Capture close up photos of subjects p 50 Magic Icon Description Magic Frame Capture a photo with various frame effects p 51 Beauty Palette Capture a portrait and then add various beautifying effects p 52 Photo Filter Capture a photo with various filter effects p 53 Movie Filter Record a video with various filter effects p 54 Split Shot Capture several photos and arran...

Page 27: ...lt gallery Album Set a photo you have captured as wallpaper 5 Scroll to the desired wallpaper and then press o If you select a photo you have captured you can set a specified area as wallpaper Rotate Zoom to the left or right to reduce or enlarge the area Press D c F t to move the area 6 Press o to save If you select a photo you have captured press o and then select Yes You can also set the photo ...

Page 28: ...c F t or o Going back to the previous menu Press m to go back to the previous menu Half press Shutter to return to Shooting mode 1 In Shooting mode press m 2 Select an option or a menu To move up or down press D or c To move left or right press F or t 3 Press o to confirm the highlighted option or menu ...

Page 29: ... screen scroll to Basic 2 Select 3 Press m Exit Select AutoShare EV White Balance ISO Flash Focus 4 Press D c to select White Balance and then press t or o AutoShare EV White Balance ISO Flash Focus Exit Select 5 Press F t to select a White Balance option Back Select White Balance Daylight 6 Press o to save your settings ...

Page 30: ... example in Scene mode Setting the display type You can select a display type for the Shooting or Playback mode Each type displays different shooting or playback information See the table below Press D repeatedly to change the display type Mode Display type Shooting Hide all information about shooting options Show all information about shooting options Playback Hide all information about the curre...

Page 31: ... the sound Turn on or off the sound your camera emits when you perform functions 1 On the Home screen scroll to Basic 2 Select 3 Select Sound Beep Sound 4 Select an option Option Description Off The camera does not emit any sounds On The camera emits sounds ...

Page 32: ...he subject is in focus A red frame means the subject is out of focus 5 Press Shutter to capture a photo 6 Press P to view the captured photo To delete the photo press f and then select Yes 7 Press P to return to Shooting mode See page 36 for tips to get clearer photos Capturing photos Learn how to capture photos easily and quickly in Smart Auto mode ...

Page 33: ... activate automatically When you set timer options the front display will remain active p 60 When you use the camera in brightly lit or sunny areas you may not be able to see the front display clearly The front display will not activate when you press F LCD in Playback mode When the front display is on the camera consumes more battery power Zooming You can capture close up photos by adjusting the ...

Page 34: ...e Intelli range your camera is using the Intelli zoom Photo resolution varies according to the zoom rate if you use the Intelli zoom By using both the Optical zoom and Intelli zoom you can zoom in up to 10 times Zoom indicator Optical range Intelli range Photo resolution when the Intelli zoom is on Intelli zoom is not available with the Tracking AF option The Intelli zoom helps you capture a photo...

Page 35: ...tion Icon Description Off The Intelli zoom is deactivated On The Intelli zoom is activated Reducing camera shake DIS Reduce camera shake digitally in Shooting mode S Before correction S After correction 1 In Shooting mode press m 2 Select DIS 3 Select an option Icon Description Off DIS is deactivated On DIS is activated ...

Page 36: ...moving subject you use the Digital zoom there is too much camera shake the shutter speed is slow for example when you capture night scenes the battery is low you capture a close up shot If the camera is hit or dropped the display will be blurry If this occurs turn off the camera and then turn it on again ...

Page 37: ...us frame appears in green Change the composition and half press Shutter again if the focus frame appears in red Reducing camera shake Set the Digital Image Stabilization option to reduce camera shake digitally p 34 When is displayed Camera shake When you shoot in the dark avoid setting the flash option to Slow Sync or Off The aperture remains open longer and it may be harder to hold the camera ste...

Page 38: ... subject is too bright the subject is shiny or reflective the subject includes horizontal patterns such as blinds the subject is not positioned in the center of the frame When you capture photos in low light Turn on the flash p 61 When subjects are moving rapidly Use the Continuous or Motion Capture function p 73 Using the focus lock Half press Shutter to focus When the subject is in focus you can...

Page 39: ... Using the Self Shot mode 46 Using the Children mode 48 Using the Jump Shot mode 48 Using the Night Shot mode 50 Using the Close up Shot mode 50 Using Magic modes 51 Using the Magic Frame mode 51 Using the Beauty Palette mode 52 Using the Photo Filter mode 53 Using the Movie Filter mode 54 Using the Split Shot mode 55 Using the Motion Photo mode 56 Extended functions Learn how to capture a photo a...

Page 40: ...pod and the subject is not moving for a certain period of time when shooting in the dark Actively moving subjects Fireworks when using a tripod Using the Smart Auto mode In Smart Auto mode your camera automatically chooses the appropriate camera settings based on the type of scene it detects The Smart Auto mode is helpful if you are not familiar with the camera settings for various scenes 1 On the...

Page 41: ...o 4 Half press Shutter to focus 5 Press Shutter to capture the photo If the camera does not recognize an appropriate scene mode it uses the default settings for Smart Auto mode Even if it detects a face the camera may not select a portrait mode depending on the subject s position or lighting The camera may not select the correct scene depending on the shooting conditions such as camera shake light...

Page 42: ...orrect scene depending on the shooting conditions such as camera shake lighting and distance to the subject Using the Smart Movie mode In Smart Movie mode your camera automatically chooses the appropriate camera settings based on the scene it has detected This mode is available only when you insert a memory card into the camera 1 On the Home screen scroll to Basic 2 Select 3 Align your subject in ...

Page 43: ... established by the international standards organizations ISO IEC and ITU T If you use memory cards with slow write speeds the camera may not save videos properly Video recordings may be corrupted or fail to play back correctly Memory cards with slow writing speeds will not support high resolution videos To record high resolution videos use memory cards with faster write speeds If you use the zoom...

Page 44: ...ch Snow Reduce underexposure of subjects caused by sunlight reflected from sand or snow Text Clearly capture text from printed or electronic documents 4 Align your subject in the frame and then half press Shutter to focus 5 Press Shutter to capture the photo Using the Scene mode In Scene mode you can capture a photo with options that are preset for a specific scene 1 On the Home screen scroll to B...

Page 45: ...th the far left or the far right or very top or bottom of the scene you want to capture 4 Press and hold Shutter to start shooting 5 With Shutter pressed slowly move the camera in the direction that will let it capture the rest of the panorama Arrows toward the direction of motion are displayed and the entire shooting image is displayed in the preview box When the scenes are aligned the camera cap...

Page 46: ...ons if you change the shooting direction while shooting if you move the camera too rapidly if you don t move the camera Selecting Live Panorama mode will disable the digital and optical zoom functions If you select Live Panorama mode while the lens is zoomed in the camera automatically zooms out to the default position Some shooting options are not available The camera may stop shooting due to the...

Page 47: ...lf press Shutter to focus 6 Press Shutter to capture the photo Using the Self Shot mode Conveniently capture photos of yourself with the front display 1 On the Home screen scroll to Scene 2 Select Your camera will automatically detect your face and display a frame to indicate the detected face 3 Half press Shutter to focus 4 Press Shutter to capture the photo The front display will activate automa...

Page 48: ...ill turn off and the main display will turn on when you press h In this mode you cannot use m or D c F t to set shooting options Customizing the front display You can let subjects know when to smile or attract their attention to the lens 1 In Self Shot mode press m 2 Select Half Shutter an option Half Shutter Off Smile Icon Eyesight catching Back Select Icon Description Off No icon will appear on ...

Page 49: ... frame and then half press Shutter to focus 6 Press Shutter to capture the photo You can download animations for the front display from i Launcher p 97 Using the Jump Shot mode Capture a photo of people jumping An icon will appear on the front display to tell your subjects when to jump 1 On the Home screen scroll to Scene 2 Select To capture animated jump shots refer to Capturing animated jump sho...

Page 50: ...tripod to prevent your camera from shaking Capturing animated jump shots Capture multiple jump shots and then save them as a GIF animation This feature is available only when you insert a memory card into the camera 1 In Jump Shot mode press m 2 Select Jump Shot GIF animation If you select GIF animation the resolution is automatically set to If you select GIF animation it may take longer to save f...

Page 51: ...djust the shutter speed Shutter Speed 1 sec Panel off 4 Align your subject in the frame and then half press Shutter to focus 5 Press Shutter to capture the photo Use a tripod to prevent blurry photos Using the Close up Shot mode In Close up Shot mode you can capture close up photos of subjects such as flowers or insects 1 On the Home screen scroll to Scene 2 Select 3 Align your subject in the fram...

Page 52: ...ss Shutter to focus 5 Press Shutter to capture the photo The resolution is automatically set to Using the Magic Frame mode In Magic Frame mode you can apply various frame effects to your photos The shape and the feel of the photos will change according to the frame you select 1 On the Home screen scroll to Magic 2 Select 3 Select a desired frame ...

Page 53: ...recognize a subject s face only when the angle of the face is 90 or 270 from normal orientation If you rotate the camera while shooting or a subject s face is rotated the camera may not recognize the subject s face To increase the face recognition rate the subject s face size should be bigger than 1 12 of the screen Using the Beauty Palette mode In Beauty Palette mode capture a portrait and then a...

Page 54: ...effect of Lomo cameras Ink Painting Apply a watercolor painting effect Oil Painting Apply an oil painting effect Cartoon Apply a cartoon painting effect Cross Filter Add lines that radiate outward from bright objects to imitate the visual effect of a cross filter Sketch Apply a pen sketch effect Soft Focus Hide facial imperfections or apply dreamy effects Fish eye Distort close objects to imitate ...

Page 55: ...ottom of the video will be blurred Vignetting Apply the retro looking colors high contrast and strong vignette effect of Lomo cameras Option Description HalfTone Dot Apply a halftone effect Sketch Apply a pen sketch effect Fish eye Distort close objects to imitate the visual effect of a fisheye lens Classic Apply a black and white effect Retro Apply a sepia tone effect Palette Effect 1 Create a vi...

Page 56: ...desired value To apply a Smart Filter effect to part of the shot press m and then select Smart Filter a desired option You can apply different Smart Filter effects to each part of the shot Panel off 4 Align your subject in the frame and then half press Shutter to focus 5 Press Shutter to capture a photo Repeat steps 4 and 5 to capture the rest of the photos To recapture a photo press f The resolut...

Page 57: ...agic 2 Select 3 Align your subject in the frame and then half press Shutter to focus 4 Press Shutter to capture the photo The camera captures multiple photos while the status lamp is blinking 5 Press D c F t to scroll to an area to be animated To recapture a photo press m 6 Rotate Zoom to the left or right to reduce or enlarge the area Cancel Save Frame Size 7 Press o to save the photo The resolut...

Page 58: ...e focus area 65 Using Face Detection 67 Detecting faces 67 Capturing a smile shot 67 Detecting eye blinking 68 Tips for detecting faces 68 Adjusting brightness and color 69 Adjusting the exposure manually EV 69 Compensating for backlighting ACB 70 Changing the metering option 70 Selecting aWhite Balance setting 71 Using burst modes 73 Adjusting images 74 Reducing the sound of the zoom 75 Available...

Page 59: ...A1 paper in panorama ratio 16 9 or play back on an HDTV 3648 X 2736 Print on A2 paper 2592 X 1944 Print on A4 paper 1984 X 1488 Print on A5 paper 1920 X 1080 Print on A5 paper in panorama ratio 16 9 or play back on an HDTV 1024 X 768 Attach to an email Setting the video resolution 1 In Video Shooting mode press m 2 Select Movie Size 3 Select an option Icon Description 1280 X 720 HD files to play b...

Page 60: ...uality settings will result in larger file sizes The camera compresses and saves the photos you capture in the JPEG format 1 In Shooting mode press m 2 Select Quality 3 Select an option Icon Description Super Fine Capture photos in super high quality Fine Capture photos in high quality Normal Capture photos in normal quality ...

Page 61: ...on the shooting conditions 3 Press Shutter to start the timer The AF assist light Timer lamp blinks The camera will automatically capture a photo after the specified time has elapsed The front display will start a countdown before shooting Press Shutter or t to cancel the timer Depending on the Face Detection options you selected the timer function may not be available Timer options are not availa...

Page 62: ... you capture photos in the dark or when you need more light in your photos 1 In Shooting mode press F 2 Select an option Icon Description Off The flash will not fire The camera will display the shake warning when you are shooting in low light Auto The camera will select a proper flash setting for the scene it detects in Smart Auto mode Auto The flash will fire automatically when the subject or bac...

Page 63: ... to capture more ambient light to reveal more details in the background Use a tripod to prevent your photos from blurring The camera will display the shake warning when you are shooting in low light Available options may differ depending on the shooting conditions Flash options are not available if you set burst options or select Blink Detection Make sure that your subjects are within the recommen...

Page 64: ... ISO The higher ISO sensitivity you select the more sensitive to light your camera becomes Use a higher ISO sensitivity to capture better photos and reduce camera shake when not using the flash 1 In Shooting mode press m 2 Select ISO 3 Select an option Select to use an appropriate ISO sensitivity based on the brightness of the subject and lighting Higher ISO sensitivities may result in more image ...

Page 65: ...ting an appropriate focus option according to the distance between the camera and subjects 1 In Shooting mode press c Exit Select Focus Normal AF Macro Using macro Use macro to capture close up photos of subjects such as flowers or insects Refer to Changing the focus option Try to hold the camera firmly to prevent blurry photos Turn off the flash if the distance to the subject is less than 40 cm ...

Page 66: ...66 Available shooting options may differ depending on the shooting conditions 2 Select an option Icon Description Normal AF Focus on a subject farther than 31 in 80 cm away Farther than 98 in 250 cm away when you use the zoom Macro Focus on a subject that is 2 31 in 5 80 cm from the camera 39 98 in 100 250 cm when you use the zoom Auto Macro Focus on a subject farther than 2 in 5 cm away Farther t...

Page 67: ...ack If the camera fails to focus the focus frame will change to red and the focus will be reset If you use this function you cannot set Face Detection options Timer options Burst options and Intelli zoom Using tracking auto focus Tracking AF allows you to track and automatically focus on your subject even when you are moving 1 In Shooting mode press m 2 Select Focus Area Tracking AF 3 Focus on the...

Page 68: ...ing a smile shot The camera automatically releases the shutter when it detects a smiling face 1 In Shooting mode press m 2 Select Face Detection Smile Shot 3 Compose your shot The camera automatically releases the shutter when it detects a smiling face When your subject smiles broadly your camera can detect the smile more easily Using Face Detection If you use Face Detection options your camera ca...

Page 69: ... from the camera The focus frame will appear orange for Smile Shot and Blink Detection it is too bright or too dark the subject is not facing the camera the subject is wearing sunglasses or a mask the subject s facial expression changes drastically the subject is backlit or the lighting conditions are unstable When you set Face Detection options the AF area is automatically set to Multi AF Dependi...

Page 70: ... an appropriate exposure select the AEB Auto Exposure Bracket option The camera will capture 3 consecutive photos each with a different exposure normal underexposed and overexposed p 73 Adjusting the exposure manually EV Depending on the intensity of the ambient light your photos may be too bright or dark In these cases you can adjust the exposure to get a better photo S Darker S Neutral 0 S Brigh...

Page 71: ...e frame your photo may be improperly exposed Suitable for a subject with backlighting Center weighted Your camera averages the meter reading of the entire frame with emphasis placed on the center Suitable for photos with subjects in the center of the frame Compensating for backlighting ACB When the light source is behind your subject or there is high contrast between your subject and the backgroun...

Page 72: ...t fluorescent or 3 way fluorescent light Fluorescent_L For shooting under white fluorescent light Tungsten For shooting indoor photos under incandescent bulbs or halogen lamps Custom Set To use White Balance settings that you define p 72 Selecting a White Balance setting The color of your photo depends on the type and quality of the light source If you want the color of your photo to be realistic ...

Page 73: ...oto of a white surface such as a piece of paper under the lighting conditions in which you intend to capture a photo The White Balance feature will help you to match the colors in your photo with the actual scene 1 In Shooting mode press m 2 Select White Balance Custom Set 3 Aim the lens at a piece of white paper and then press Shutter ...

Page 74: ...t may take longer to capture the photo Use a tripod for best results You can use the flash timer and ACB only when you select Single When you select Motion Capture your camera will set the resolution to and set the ISO sensitivity to Auto Depending on the Face Detection option you selected some Burst options may not be available It may take longer to save the photos depending on the memory card ca...

Page 75: ...iting the photos on your computer Sharpen the edges to improve the clarity of your photos This may also increase the noise in your photos Contrast Description Decrease the color and brightness Increase the color and brightness Saturation Description Decrease the saturation Increase the saturation 5 Press o to save your settings Select 0 if you do not want to apply any effects suitable for printing...

Page 76: ...rn off the Sound Alive function The camera can record the zoom noise Mute Do not record sounds Do not block the microphone when you use the Sound Alive function Recordings made with Sound Alive may differ from actual sounds Reducing the sound of the zoom When you use the zoom while recording videos the camera can record the sound of the zoom Use the Sound Alive function to reduce the zoom noise ...

Page 77: ...mp Shot Resolution O O O O O O O O O Quality O O O O O O O Timer O O O O O O O Flash O O O O O ISO sensitivity O Macro O O O O O O Focus area O O Face detection O O O O O EV O O ACB O O O O Metering O O White balance O O Drive O O Image adjust O Sound Alive O O Digital zoom O O Intelli zoom O O O DIS O O The option is available Some options may be limited or may not be changeable The option is not...

Page 78: ...otion Photo Resolution O O O O O O O O O Quality O O O O O O O O Timer O O O O O O O O O Flash O O O O O O ISO sensitivity Macro O O O Focus Area Face detection O O EV ACB O Metering White balance Drive Image adjust O Sound Alive O Digital zoom Intelli zoom DIS O The option is available Some options may be limited or may not be changeable The option is not available ...

Page 79: ...djusting your photos 91 Viewing files on aTV 93 Transferring files to the computer 94 Transferring files to yourWindows OS computer 94 Transferring files to your Mac OS computer 95 Using programs on a computer 96 Installing i Launcher 96 Using i Launcher 97 Playback Editing Learn how to play back photos or videos and edit photos or videos Also learn how to connect your camera to your computer or T...

Page 80: ...t recent file will be displayed If the camera is off it will turn on and display the most recent file 2 Press F t to scroll through files Press and hold F t to scroll through files quickly If you want to view files stored in the internal memory remove your memory card You may not be able to edit or play back files that were captured with other cameras due to unsupported sizes image size etc or cod...

Page 81: ...splay file information on the screen press D Viewing files as thumbnails Scan thumbnails of files In Playback mode rotate Zoom to the left to view thumbnails 12 at a time Rotate Zoom to the left once more to display more thumbnails 24 at a time Rotate Zoom to the right to return to the previous view Menu You can also view files as thumbnails by scrolling to Album on the Home screen and then select...

Page 82: ...ect Filter a category All Date File Type Back Select Filter Icon Description All View files normally Date View files by the date they were saved FileType View files by the file type 4 Scroll to a desired list and then press o to open the list 5 Scroll to a desired file and then press o to view the file 6 Rotate Zoom to the left and then press m to return to the previous view If you change the cate...

Page 83: ...n Playback mode select a file and then press f 2 When the pop up message appears select Yes You can also delete files in Playback mode by pressing m and then selecting Delete Delete Yes Deleting multiple files You can select multiple files and then delete them at once 1 In Playback mode press f When in thumbnails view press m select Delete Select and then skip to step 3 or press f select Select an...

Page 84: ...then skip to step 3 2 Select Delete Delete All 3 When the pop up message appears select Yes All unprotected files are deleted Copying files to a memory card Copy files from the internal memory to a memory card 1 In Playback mode press m 2 Select Copy to Card Viewing photos Enlarge part of a photo or view photos as a slide show Enlarging a photo In Playback mode rotate Zoom to the right to enlarge ...

Page 85: ...The entire panoramic photo appears on the screen 2 Press o The camera automatically scrolls through the photo from left to right for a horizontal panoramic photo and from top to bottom for a vertical panoramic photo The camera then switches to Playback mode While playing back a panoramic photo press o to pause or resume After you have paused the playback of a panoramic photo press D c F t to move ...

Page 86: ...does not work for videos and GIF files 1 In Playback mode press m 2 Select Slide Show Options 3 Select a slide show effect option Skip to step 4 to start a slide show with no effects Default Option Description Play Mode Set whether or not to repeat the slide show One Play Repeat Interval Set the interval between photos 1 sec 3 sec 5 sec 10 sec You must set the Effect option to Off to set the inter...

Page 87: ...then press F t to stop the slide show and return to Playback mode Rotate Zoom to the left or right to adjust the volume level Playing a video In Playback mode you can view a video and then capture or trim parts of the playing video You can save the captured or trimmed segments as new files 1 In Playback mode select a video and then press o 2 View the video Pause Stop Current playback time Video le...

Page 88: ...ng features such a scanning backward scanning forward or pausing after the video has run for 2 seconds Trimming a video 1 In Playback mode select a video and then press m 2 Select Trim Movie 3 Press o to start playing the video 4 Press o c at the point where you want the trimming to begin 5 Press o to resume playing the video 6 Press o c at the point where you want the trimming to end 7 Press c to...

Page 89: ...k Editing 88 Capturing an image from video 1 While viewing a video press o at the point where you want to capture an image 2 Press c The resolution of the captured image will be the same as the original video The captured image is saved as a new file ...

Page 90: ...left and then select a photo 4 Select Rotate an option 5 Press c to save Cancel Save Rotate Right 90 The camera will overwrite the original file In Playback mode press m and then select Rotate to rotate a photo Resizing photos Change the size of a photo and save it as a new file 1 In Playback mode select a photo and then press m 2 Select Resize 3 Select an option Back Select 2592 X 1944 1984 X 148...

Page 91: ... and strong vignette effect of Lomo cameras Ink Painting Apply a watercolor painting effect Oil Painting Apply an oil painting effect Cartoon Apply a cartoon painting effect Cross Filter Add lines that radiate outward from bright objects to imitate the visual effect of a cross filter Sketch Apply a pen sketch effect Soft Focus Hide facial imperfections or apply dreamy effects Fish eye Distort clos...

Page 92: ...ontrast and saturation and apply Smart Filter effects at the same time Adjusting brightness contrast or saturation 1 On the Home screen scroll to Album 2 Select 3 Rotate Zoom to the left and then select a photo 4 Select an adjusting option Icon Description Brightness Contrast Saturation 5 Press F t to adjust the option 6 Press o 7 Press c to save Adjusting dark subjects ACB 1 On the Home screen sc...

Page 93: ...ng faces 1 On the Home screen scroll to Album 2 Select 3 Rotate Zoom to the left and then select a photo 4 Select Face Retouch 5 Press F t to adjust the option As the number increases the skin tone becomes brighter and smoother 6 Press c to save ...

Page 94: ...n your TV and then select the A V video source 8 Turn on your camera The camera automatically enters into Playback mode when you connect it to a TV 9 View photos or play videos using the camera buttons Depending on the TV model you may see some digital noise or part of an image may not appear Images may not be centered on the TV screen depending on your TV settings Viewing files on aTV Play back p...

Page 95: ...rer is not responsible for any loss of data 6 Turn on the camera The computer recognizes the camera automatically 7 On your computer select My Computer Removable Disk DCIM 100PHOTO 8 Drag or save files to your computer Disconnecting the camera for Windows 7 With Windows 8 the methods for disconnecting the camera are similar 1 If the status lamp on your camera is blinking wait until it stops 2 Clic...

Page 96: ...g any programs Mac OS 10 7 or later is supported 1 Turn off the camera 2 Connect your camera to your Mac OS computer with the USB cable You must plug the small end of the USB cable into your camera If the cable is reversed it may damage your files The manufacturer is not responsible for any loss of data 3 Turn on the camera The computer recognizes the camera automatically and displays a removable ...

Page 97: ...atically 8 Follow the on screen instructions to complete the installation An i Launcher shortcut will appear on the computer Before installing the program ensure that the PC is connected to a network To install i Launcher on your Mac OS computer click Devices i Launcher Mac iLinker Installing i Launcher 1 On the Home screen scroll to Basic 2 Select 3 Select Connectivity i Launcher On 4 Turn off th...

Page 98: ...tured with the camera to a PC wirelessly If you use a Mac OS computer only Software Update Front LCD Animation Download and PC Auto Backup are available Using i Launcher i Launcher allows you to play back files with Multimedia Viewer and provides a link to download the PC Auto Backup program The requirements are recommendation only i Launcher may not work properly even when the computer meets the ...

Page 99: ... 1280X1024 pixels 32 bit color display recommended USB 2 0 port nVIDIA Geforce 7600GT or higher ATI X1600 series or higher Microsoft DirectX 9 0c or higher A 32 bit version of i Launcher will be installed even on 64 bit editions of Windows 7 and Windows 8 Mac OS requirements Item Requirements OS Mac OS 10 7 or higher RAM Minimum 256 MB RAM 512 MB or more recommended Hard disk capacity Minimum 110 ...

Page 100: ...VI MJPEG Photos JPG GIF BMP PNG TIFF MPO Files that have been recorded with other manufacturers devices may not play back smoothly Viewing photos 6 7 9 0 8 5 4 3 1 2 33 33 No Description 1 File name 2 Enlarged area 3 Histogram 4 Open the selected file 5 Histogram button 6 Rotate to the left Rotate to the right 7 Move to the previous file Move to the next file 8 Fit the photo to the screen 9 View t...

Page 101: ...n a computer Playback Editing 100 Viewing videos 6 8 5 4 3 1 2 7 No Description 1 File name 2 Adjust the volume 3 Open the selected file 4 Move to the next file 5 Stop 6 Pause 7 Move to the previous file 8 Progress bar ...

Page 102: ...een click Software Update Downloading the front LCD animation From the Samsung i Launcher screen click Front LCD Animation Download Downloading the PC Auto Backup program From the Samsung i Launcher screen click PC Auto Backup For information about installing the PC Auto Backup program refer to page 112 ...

Page 103: ... videos 112 Installing the program for Auto Backup on your PC 112 Sending photos or videos to a PC 112 Sending photos or videos via email 114 Changing email settings 114 Sending photos or videos via email 115 Using photo or video sharing websites 117 Accessing a website 117 Uploading photos or videos 117 Using Samsung Link to send files 119 Uploading photos to online storage 119 Viewing photos or ...

Page 104: ...ung 2 Samsung 3 Samsung 4 Back Manual Select Refresh to refresh connectable APs Select Add wireless network to add an AP manually Your AP name must be in English to add the AP manually Connecting to a WLAN 1 On the Home screen scroll to Wi Fi 2 Select or 3 Press m and then select Wi Fi Setting In some modes follow the on screen instructions until the Wi Fi Setting screen appears The camera automat...

Page 105: ...rowser p 105 When you select an unsecured AP the camera will connect to the WLAN If you select a WPS profile supported AP select WPS PIN connection and then enter a PIN on the AP device You can also connect to a WPS profile supported AP by selecting WPS button connection on the camera and then pushing the WPS button on the AP device Setting network options 1 In the Wi Fi Setting screen move to an ...

Page 106: ...servers Button Description D c F t Move to an item or scroll the page o Select an item m Access the following options Previous Page Move to the previous page Next Page Move to the next page Reload Reload the page Stop Stop loading the page Exit Close the login browser f Close the login browser You may not be able to select some items depending on the page you connected to This does not indicate a ...

Page 107: ...twork and a TV simultaneously Connecting to a network may incur additional charges Costs will vary based on the conditions of your contract If you cannot connect to a WLAN try another AP from the available AP list A login page may appear when you select free WLANs provided by some network service providers Enter your ID and password to connect to the WLAN For information about registering or the s...

Page 108: ... key Cancel Backspace Done Icon Description Delete the last letter Move the cursor In ABC mode change the case Enter com Icon Description Switch between Symbol mode and ABC mode Enter a space Done Save the displayed text View the entering text guide You can use only the English alphabets in some modes regardless of the display language To move to Done directly press P You can enter up to 64 charac...

Page 109: ...ed even when you change the Shooting mode This feature may not be supported in some modes 5 On the camera allow the smart phone to connect to your camera If the smart phone has been connected to your camera before it is connected automatically An icon that shows the connection status will appear on the camera s screen 6 On the camera capture a photo The captured photo is saved to the camera and th...

Page 110: ...you can view files that were selected from the camera The maximum number of files that can be sent varies depending on the storage space of the smart phone 5 Select the camera from the list and connect the smart phone to the camera The smart phone can connect to only one camera at a time 6 On the camera allow the smart phone to connect to your camera If the smart phone has been connected to your c...

Page 111: ... available on your camera The zoom button and the shutter button on your smart phone will not function when using this feature Remote Viewfinder mode supports the and photo sizes only Using a smart phone as a remote shutter release The camera connects to a smart phone that supports the Remote Viewfinder feature via a WLAN Use the smart phone as a remote shutter release with the Remote Viewfinder f...

Page 112: ...e When you use this feature the ideal distance between the camera and the smart phone may vary depending on your surroundings The smart phone must be within 7 m of the camera to use this feature It will take some time to capture the photo after you release on the smart phone The Remote Viewfinder function will deactivate when either the camera or the smart phone turns off either device loses its c...

Page 113: ...iously been connected to a WLAN it will search for available AP devices p 103 3 Select a backup PC If you have performed a backup before skip to step 4 4 Select OK To cancel sending select Cancel You cannot select individual files to backup This function backs up only new files on the camera The backup s progress will be shown on the PC monitor Installing the program for Auto Backup on your PC 1 I...

Page 114: ...mera or remove the battery while sending files the file transfer will be interrupted While you are using this feature the shutter control is disabled on your camera You can connect only one camera to the PC at a time for sending files The backup may be canceled due to network conditions Photos or videos can be sent to a PC one time only Files cannot be sent again even if you reconnect your camera ...

Page 115: ...der Setting 6 Select the Email box enter your email address and then select Done 7 Select Save to save your changes To delete your information select Reset Setting an email password 1 On the Home screen scroll to Wi Fi 2 Select The camera will automatically attempt to connect to a WLAN via the most recently connected AP device If the camera has not previously been connected to a WLAN it will searc...

Page 116: ...ppears press o Sending photos or videos via email You can send photos or videos stored on the camera via email For information about entering text refer to Entering text p 107 1 On the Home screen scroll to Wi Fi 2 Select The camera will automatically attempt to connect to a WLAN via the most recently connected AP device If the camera has not previously been connected to a WLAN it will search for ...

Page 117: ...etwork connection is available or if your email account settings are incorrect You cannot send an email if the file size exceeds the limit The maximum photo resolution you can send is 2M and the longest video you can send is 30 seconds at resolution or a video recorded using If the selected photo resolution is higher than 2M it will be automatically resized to a lower resolution If you cannot send...

Page 118: ...d in automatically You must have an existing account on the file sharing website to use this feature Uploading photos or videos 1 Access the website with your camera 2 Scroll to the files you want to upload and then press o You can select up to 20 files The total size must be 10 MB or less On some websites the total size or number of files may vary 3 Select Upload If you connected to Facebook sele...

Page 119: ...s the maximum photo resolution may vary The method of uploading photos or videos may differ depending on the selected website If you cannot access a website because of firewall or user authentication settings contact your network administrator or network service provider Uploaded photos or videos may be automatically titled with the date they were captured The speed of your internet connection may...

Page 120: ... the list select an ID If you have previously logged in to the website you may be logged in automatically To use this feature you must create a Samsung Link account and an account with an affiliated online storage service using your PC After you have finished creating the accounts add your online storage account to Samsung Link 5 Scroll to the files you want to upload and then press o 6 Select Upl...

Page 121: ... the Samsung Link device to a network and then turn on the Samsung Link feature Refer to your device s user manual for more information 5 On the camera allow the Samsung Link device to connect to your camera 6 On the Samsung Link device select a camera to connect to 7 On the Samsung Link device browse the shared photos or videos For information about searching for the camera and browsing the photo...

Page 122: ...tos or videos on a Samsung Link device for example by removing the battery the device considers the camera to still be connected The order of photos or videos on the camera may be different than on the Samsung Link device Depending on the number of photos or videos you want to share it may take some time to load your photos or videos and complete the initial set up process While viewing photos or ...

Page 123: ...Settings menu 123 Accessing the settings menu 123 Sound 124 Display 124 Connectivity 125 General 126 Settings Refer to options to configure your camera s settings ...

Page 124: ...he settings menu 1 On the Home screen scroll to Basic 2 Select 3 Select a menu Settings Sound Display Connectivity General Icon Description Sound Set various camera sounds and the volume p 124 Display Customize the display settings p 124 Connectivity Set the connection options p 125 General Change the settings for the camera system such as memory format and default file name p 126 Settings menu Le...

Page 125: ... Guide Line Select a guide to help you compose a scene Off 3 X 3 2 X 2 Cross Diagonal Date Time Display Set whether or not to display the date and time on the camera s display Off On Help Guide Display Display a brief description of an option or menu Off On Sound Default Item Description Volume Set the volume of all sounds Off Low Medium High Beep Sound Set the sound the camera emits when you pres...

Page 126: ...cher to launch automatically when you connect your camera to your computer Off On Default Item Description Display Brightness Adjust the brightness of the screen Auto Dark Normal Bright Normal is fixed in Playback mode even if you have selected Auto Quick View Set whether or not to review a captured image before returning to the Shooting mode Off On This feature does not work in some modes Power S...

Page 127: ... folder is full The maximum number of files that can be stored in one folder is 9 999 The camera defines file names according to the Design rule for Camera File system DCF standard If you intentionally change file names the camera may not play back the files General Default Item Description Network Information See the Mac address and serial number of your camera Language Set a language for the dis...

Page 128: ...eset Yes No Open Source Licenses View open source licenses Default Item Description Imprint Set whether or not to display the date and time on captured photos Off Date Date Time The date and time will be displayed on the bottom right corner of the photo Some printer models may not print the date and time properly The photo will not display the date and time if you select Text in Scene mode you sel...

Page 129: ...r camera 130 Using or storing the camera 131 About memory cards 132 About the battery 135 Before contacting a service center 139 Camera specifications 142 Glossary 146 Index 151 Appendixes Get information about error messages specifications and maintenance ...

Page 130: ...eing transferred to supported devices Re select a supported device File Error Delete the damaged file or contact a service center Error message Suggested remedies File system not supported Your camera does not support the FAT file structure of the inserted memory card Format the memory card on the camera Initialization failed The camera has failed to locate a device that supports Samsung Link Turn...

Page 131: ...ust remains apply lens cleaning liquid to a piece of lens cleaning paper and wipe gently Camera body Wipe gently with a soft dry cloth Never use benzene thinners or alcohol to clean the device These solutions can damage the camera or cause it to malfunction Do not press on the lens cover or use a blower brush on the lens cover Camera maintenance ...

Page 132: ...is not waterproof Do not handle the battery adapter or memory card with wet hands Operating the camera with wet hands may cause damage to your camera Storing for extended period of time When you store the camera for an extended period place it in a sealed container with an absorbent material such as silica gel Over time unused batteries will discharge and must be recharged before use You must rese...

Page 133: ... normal and should not affect your camera s lifespan or performance When you use the camera in low temperatures it may take some time to turn on the color of the display may be changed temporarily or after images may appear These conditions are not malfunctions and they will correct themselves when the camera is returned to milder temperatures Paint or metal on the outside of the camera may cause ...

Page 134: ...18 432 639 245 483 714 288 566 835 341 669 984 638 1 228 1 777 1 006 1 897 2 692 1 329 2 461 3 437 2 508 4 359 5 780 Video Size 30 fps 1280 X 720 Approx 26 20 640 X 480 Approx 46 55 320 X 240 Approx 261 11 For Sharing Approx 261 11 The figures above are measured without using the zoom function Available recording time may vary if you use the zoom Several videos were recorded in succession to deter...

Page 135: ... new memory card Do not bend drop or subject memory cards to heavy impact or pressure Avoid using or storing memory cards near strong magnetic fields Avoid using or keeping memory cards in areas with high temperatures high humidity or corrosive substances Prevent memory cards from making contact with liquids dirt or foreign substances If dirty wipe the memory card clean with a soft cloth before yo...

Page 136: ...easured under the following conditions in Program mode in darkness resolution Fine quality DIS on 1 Set the flash option to Fill in take a single shot and zoom in or out 2 Set the flash option to Off take a single shot and zoom in or out 3 Perform steps 1 and 2 waiting 30 seconds between each step Repeat the process for 5 minutes and then turn off the camera for 1 minute 4 Repeat steps 1 to 3 Vide...

Page 137: ...rge a fully discharged battery When you do not use the camera for an extended period 3 months or more check the battery and recharge it regularly If you let the battery discharge continually its capacity and life may decrease which can lead to a malfunction fire or explosion Cautions about using the battery Protect batteries chargers and memory cards from damage Prevent batteries from making conta...

Page 138: ...fe After charging is finished disconnect the cable from your camera Do not bend or place heavy objects on the AC cable Doing so may damage the cable Notes about charging with a computer connected Use only the provided USB cable The battery may not charge when you use a USB hub other USB devices are connected to your computer you connect the cable to the port on the front side of your computer the ...

Page 139: ... prolonged period When the device is switched on do not leave it in any confined space for a prolonged period Do not allow battery terminals to come in contact with metallic objects such as necklaces coins keys or watches Use only authentic manufacturer recommended Lithium ion replacement batteries Do not disassemble the battery or puncture it with any sharp object Avoid exposing the battery to hi...

Page 140: ...There is no space on the memory card Delete unnecessary files or insert a new card Format the memory card The memory card is defective Get a new memory card Make sure that the camera is switched on Charge the battery Make sure that the battery is inserted correctly The camera freezes Remove the battery and insert it again The camera heats up While you use the camera it may heat up This is normal a...

Page 141: ... again Format your memory card See Cautions when using memory cards for more detail p 134 Situation Suggested remedies Cannot play back files If you change the name of a file your camera may not play the file the name of the file should meet the DCF standard If you encounter this situation play back the files on your computer The photo is blurry Make sure that the focus option you set is suitable ...

Page 142: ...our computer Situation Suggested remedies i Launcher is not functioning properly End i Launcher and restart the program Make sure that i Launcher is set to On in the settings menu p 125 Depending on your computer s specifications and environment the program may not launch automatically In this case click Start All Programs Samsung i Launcher Samsung i Launcher on your Windows computer For Windows ...

Page 143: ...lay 2 7 67 5 mm 230 K Front display 1 48 37 6 mm 61 K Focusing Type TTL auto focus Center AF Multi AF Tracking AF Face Detection AF Range Wide W Tele T Normal AF 31 in 80 cm infinity 98 in 250 cm infinity Macro 2 31 in 5 80 cm 39 98 in 100 250 cm Auto Macro 2 in 5 cm infinity 39 in 100 cm infinity Shutter speed Auto 1 8 1 2 000 sec Program 1 1 2 000 sec Night 16 1 2 000 sec Fireworks 2 sec Exposur...

Page 144: ...dy Fluorescent_H Fluorescent_L Tungsten Custom Set Date Imprinting Date Time Date Off Shooting Photos Modes Smart Auto Portrait Night Portrait Backlight Portrait Night Backlight Landscape White Natural Green Blue Sky Sunset Macro Macro text Macro Color Tripod Action Fireworks Candle Spotlight Spotlight Macro Spotlight Portrait Program Scene Landscape Sunset Dawn Backlight Beach Snow Text Live Pano...

Page 145: ...t Videos Edit Still image capture Time trimming Storage Media Internal memory Approximately 10 MB External memory Optional microSD card 2 GB guaranteed microSDHC card up to 32 GB guaranteed microSDXC card up to 64 GB guaranteed Internal memory capacity may not match these specifications File format Still Image JPEG DCF EXIF 2 21 GIF Movie Clip MP4 Video MPEG 4 AVC H 264 Audio AAC Photo Size Icon R...

Page 146: ...Rechargeable battery Lithium ion battery BP70A 700 mAh Connector type Micro USB 5 pin The power source may differ depending on your region Dimensions W X H X D 3 8 X 2 2 X 0 7 in 95 5 X 55 2 X 18 7 mm without protrusions Weight 3 9 oz 112 g without battery and memory card OperatingTemperature 0 40 C 32 104 F Operating Humidity 5 85 Software i Launcher Specifications may change without notice to im...

Page 147: ...ens Optical zoom When using the Digital zoom the image quality will deteriorate as the magnification increases ACB Auto Contrast Balance This feature automatically improves the contrast of your images when the subject is backlit or when there is a high contrast between your subject and the background AEB Auto Exposure Bracket This feature automatically captures several images at different exposure...

Page 148: ...ains a photosite for each pixel in the image Each photosite records the brightness of the light that strikes it during an exposure Common sensor types are CCD Charge coupled Device and CMOS Complementary Metal Oxide Semiconductor DIS Digital Image Stabilization This feature compensates in real time for shaking and vibrating while shooting There can be a certain amount of image degradation compare ...

Page 149: ...sensitivity The sensitivity of the camera to light based on the equivalent film speed used in a film camera At higher ISO sensitivity settings the camera uses a higher shutter speed which can reduce blur caused by camera shake and low light However images with high sensitivity are more susceptible to noise JPEG Joint Photographic Experts Group A lossy method of compression for digital images JPEG ...

Page 150: ... let light in and the photo becomes darker and more easily freezes subjects in motion Vignetting A reduction of an image s brightness or saturation at the periphery outer edges compared to the center of the image Vignetting can draw interest to subjects positioned in the center of an image White balance color balance An adjustment of the intensities of colors typically the primary colors red green...

Page 151: ...he terms and conditions of the purchase contract This product and its electronic accessories should not be mixed with other commercial wastes for disposal PlanetFirst represents Samsung Electronics commitment to sustainable development and social responsibility through eco driven business and management activities Correct disposal of batteries in this product Applicable in countries with separate ...

Page 152: ...cket AEB 73 Continuous 73 Motion Capture 73 C Camera maintenance 130 Camera specifications 142 Capturing an image from video 88 Charging 19 Children mode 48 Cleaning Camera body 130 Display 130 Lens 130 Close up Shot mode 50 Connecting to a computer Mac 95 Windows 94 Contrast Playback mode 91 Shooting mode 74 D Date Time Set 126 Deleting files 82 Digital Image Stabilization DIS 34 Digital zoom 33 ...

Page 153: ... mode 22 i Launcher 96 Image Adjustment ACB 91 Brightness Playback mode 91 Shooting mode 69 Contrast Playback mode 91 Shooting mode 74 Saturation Playback mode 91 Shooting mode 74 Sharpness 74 Image quality 59 Imprint 127 Intelli zoom 33 ISO sensitivity 63 J Jump Shot mode 48 L Language settings 126 Live Panorama mode 44 M Macro 65 Magic Frame mode 51 Memory card Caution 134 Insert 18 Menu button ...

Page 154: ...lide show 85 Smart Auto mode 39 Smart Filter Photo shooting mode 53 Playback mode 90 Video recording mode 54 Smart Movie mode 41 Smile Shot 67 Sound settings 30 Split Shot mode 55 R RemoteViewfinder 110 Reset 127 Resolution Playback mode 89 Shooting mode 58 Retouching faces Playback mode 92 Shooting mode 46 Rotating 89 S Samsung Link 119 Saturation Playback mode 91 Shooting mode 74 O Open source l...

Page 155: ...de 42 Video out 125 Viewing files Animated photos 85 Category 81 Panoramic photos 84 Slide show 85 Thumbnails 80 TV 93 W Website Accessing 117 Uploading photos or videos 117 White Balance 71 Wireless network 103 Z Zoom Using the zoom 32 Zoom button 16 Zoom sound settings 75 Index ...

Page 156: ...Please refer to the warranty that came with your product or visit our website www samsung com for after sales service or inquiries ...

Reviews: