background image

Electric Dryer 
Owner’s Manual

Register your product at 

www.samsung.com/global/register

Code No.: DC68-02347B-05_EN

DV316LGW-02347B-05_EN-NO LINE.indd   1

2007-04-06   ø¿»ƒ 5:06:38

Summary of Contents for DC68-02347B-05

Page 1: ...Electric Dryer Owner s Manual Register your product at www samsung com global register Code No DC68 02347B 05_EN ...

Page 2: ...ycle removes odors adding that extra freshness to give more mileage to your clothes Time Saving Our cycles are designed with you in mind All our dryers are designed to dry your clothes in less time just 44 minutes Giving you time for more important things in life Energy Saving Samsung dryers are super energy efficient using only 3 01 kWh per pound of laundry And both the large capacity and Fuzzy Log...

Page 3: ...onsibility to use common sense caution and care when installing maintaining or operating your dryer Always contact your manufacturer about problems or conditions you do not understand RECOGNIZE SAFETY SYMBOLS WORDS LABELS WARNING Hazards or unsafe practices that COULD result in severe personal injury or death CAUTION Hazards or unsafe practices that COULD result in minor personal injury or propert...

Page 4: ...mable liquids or solids and their fumes have been removed There are many highly flammable items used in homes such as acetone denatured alcohol gasoline kerosene some liquid household cleaners some spot removers turpentine waxes and wax removers b Items containing foam rubber may be labeled latex foam or similarly textured rubber like materials must not be dried on a heat setting Heated foam rubber...

Page 5: ... dangerous situation Gas leaks may not be detected by smell alone Gas suppliers recommend you purchase and install a UL approved gas detector Install and use in accordance with the manufacturer s instructions WARNING Do not place items in your dryer that have been spotted or soaked with vegetable oil or cooking oil Even after being washed these items may contain significant amounts of these oils Th...

Page 6: ...T A 5 Dryer ExhaustTips A 6 Door Reversal A 7 Operating Instructions Tips B 1 OVERVIEW OFTHE CONTROL PANEL B 1 CHILD LOCK B 4 MY CYCLE B 4 Rack Dry select models B 5 CLEANTHE LINT FILTER B 6 LOADTHE DRYER PROPERLY B 6 GETTING STARTED B 6 Care and Cleaning C 1 Control Panel C 1 Tumbler C 1 Stainless SteelTumbler select models C 1 Dryer Exterior C 1 Dryer Exhaust System C 1 THINGSTO AVOID D 1 Troubl...

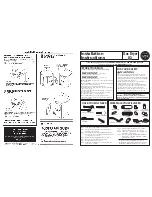
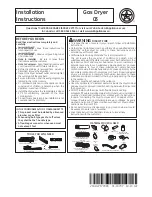
Page 7: ...Y OFTHE INSTALLER Make sure you have everything necessary for proper installation 1 GROUNDED ELECTRICAL OUTLET is required See Electrical Requirements 2 EXHAUST SYSTEM must be rigid metal or flexible stiff walled metal exhaust ducting See Exhaust Requirements Installation Instructions Door Control panel Adjustable leg Pliers Cutting knife Pipe wrench gas only Nut drivers Level Screwdriver standard D...

Page 8: ...mper to prevent back drafts and entry of wildlife Never use an exhaust hood with a magnetic damper The hood should have at least 12 inches 30 5 cm of clearance between the bottom of the hood and the ground or other obstruction The hood opening should point down Never install a screen over the exhaust outlet To avoid lint buildup do not exhaust the dryer directly into a window well Do not exhaust u...

Page 9: ... To exhaust out the bottom or the left use the accessory exhaust kit Instructions are included with the kit It s important to make sure the room has enough fresh air The dryer must be located where there is no air flow obstruction THE DRYER MUST NOT BE INSTALLED OR STORED IN AN AREAWHERE ITWILL BE EXPOSEDTOWATER AND ORWEATHER THE DRYER AREA ISTO BE KEPT CLEAR OF COMBUSTIBLE MATERIALS GASOLINE AND O...

Page 10: ...ust air heat and lint ELECTRICAL REQUIREMENTS NOTE Wiring diagram is located on plate below the control panel WARNING Improper connection of the equipment grounding conductor can result in a risk of electric shock Check with a qualified electrician or serviceman if you are in doubt as to whether your dryer is properly grounded Do not modify the plug provided with your dryer if it doesn t fit the out...

Page 11: ...ion tops 2 Set your dryer back in an upright position 3 Review the Exhausting section before installing the exhaust system Install the ductwork from your dryer to the exhaust hood The crimped end of the duct sections must point away from your dryer DO NOT use sheet metal screws when assembling ducting These joints should be taped Never use plastic flexible exhaust material Tip for tight installatio...

Page 12: ...ng screws 3 Keep ducts as straight as possible 4 Clean all old ducts before installing your new dryer Be sure vent flap opens and closes freely Inspect and clean the exhaust system annually Don t let a poor exhaust system slow drying by 1 2 3 4 1 Restricting your dryer with a poor exhaust system 2 Using a plastic thin foil or non metal flexible duct 3 Using unnecessarily long duct runs with many elb...

Page 13: ...p 4 on the Frame Front 4 Remove a screw on the Frame Front 8 Place the door on the other side and reattach it to the dryer 5 Remove two screws on the opposite side of the door hinge 9 Reassemble the holder lever 6 Remove two screws from the holder lever 10 Reassemble the screws in the remaing holes WARNING The screw mentioned in STEP 4 may not exist Installation Instructions ...

Page 14: ...B 1 SAMSUNG Dryer Owner s Instructions Control Features vary by model OVERVIEW OFTHE CONTROL PANEL Operating Instructions Tips ...

Page 15: ...ct temperature for the load press theTemp button An indicator light will illuminate next to the desired temperature Press the button repeatedly to scroll through the settings High For sturdy cottons or those labeledTumble Dry Medium For permanent press synthetics lightweight cottons or items labeledTumble Dry Medium Medium Low For lower heat than Medium to dry synthetic or washable knit fabrics Lo...

Page 16: ... corduroys or work clothes Towels Dry loads such as bath towels Perm Press Dry wrinkle free cottons synthetic fabrics knits and permanent press fabrics automatically The cycle minimizes wrinkling by providing a longer unheated cool down period at the end of the cycle Delicates The Delicates cycle is designed to dry heat sensitive items at a low drying temperature Freshen Up This cycle removes odor...

Page 17: ...do not respond check the Child Lock indicator MY CYCLE Lets you activate your customized cycle that includes Dry Level Temp Time option etc By pushing the My Cycle button you activate the settings used during the previous My Cycle mode Default Normal Cycle If My Cycle mode is activated My Cycle lamp will be lit YoucanselectalloptionsinMyCyclemodeasfollows 1 Select cycle using Cycle Selector dial 2...

Page 18: ...yer door 6 Use theTime Dry cycle Select time according to moisture and weight of the items Start dryer It may be necessary to reset the timer if a longer drying time is needed SUGGESTED ITEMS SUGGESTEDTEMP SETTINGS Washable sweaters block to shape and lay flat on rack Heat Low Extra Low Stuffed toys cotton or polyester fiberfilled Heat Low Extra Low Stuffed toys foam or rubber filled Air Fluff Foam rubbe...

Page 19: ...drying efficiency Overloading restricts tumbling action resulting in uneven drying as well as excessive wrinkling of some fabrics GETTING STARTED 1 Load your dryer loosely DO NOT overload 2 Close the door 3 Select the appropriate cycle and options for the load see pages B 2 B 3 4 Press the Cycle Selector dial 5 The dryer indicator light will illuminate 6 The estimated cycle time will appear in the d...

Page 20: ...aner Then tumble old towels or rags to remove any excess stain or cleaning substance Once these steps are done stains may still be visible but should not transfer to subsequent loads Stainless SteelTumbler select models To clean the stainless steel tumbler use a damp cloth with a mild non abrasive cleaner suitable for stainless steel surfaces Remove the cleaner residue and dry with a clean cloth D...

Page 21: ... High temperature setting for soft fluffy diapers Down filled Items jackets sleeping bags comforters etc Use the Normal cycle and the Low or Extra Low temperature setting Place a clean pair of sneakers in your dryer with the item to fluff the down comforters etc Adding a couple of dry towels shortens drying time and absorbs moisture Foam Rubber rug backs stuffed toys shoulder pads etc DO NOT dry on a he...

Page 22: ...e buttons nails etc Remove promptly It is normal to hear the dryer gas valve or heating element cycle on and off during the drying cycle Be sure the dryer is leveled properly as outlined in the installation instruction It is normal for the dryer to hum from the high velocity of air moving through the dryer drum and exhaust system dries unevenly Seams pockets and other similarly heavy areas may not ...

Page 23: ...he dryer Code Symbol Meaning Solution Heater temperature control problem Call for service See below Door open sensing problem Call for service See below Door open error When the door is open the dryer will not operate Be sure the door is latched shut If problem continues call for service See below For any codes not listed above call 1 800 726 7864 1 800 SAMSUNG ...

Page 24: ...trol Drip Dry Do NotWring Gentle Delicates Dry Flat Do Not Bleach HandWash Heat Setting Do NotTumble Dry WaterTemperature High No Steam added to iron Hot Medium Do Not Iron Warm Low Cold Any Heat Bleach No Heat Air Any Bleach when needed Iron Dry or SteamTemperatures Line Dry Hang to Dry Only Non Chlorine color safe Bleach when needed High Drip Dry Tumble Dry Cycle Medium Dry Flat Normal Low Perma...

Page 25: ...at the appliance cannot be connected to a power source Remove the door so that animals and small children cannot get trapped inside the appliance DECLARATION OF CONFORMITY This appliance complies with UL2158 SPECIFICATION TYPE FRONT LOADING DRYER DIMENSION Div Inches cm Div Inches cm A Height 38 96 5 C Depth with door open 90 49 124 5 B Width 27 68 6 D Depth 30 25 77 0 WEIGHT 56 8 kg HEATER RATING...

Page 26: ... min 90 min Towels High Medium Normal dry 52 min 47 min 5 min 90 min Perm Press Medium Low No change Normal dry 34 min 24 min 10 min 90 min Delicates Low No change Normal dry 29 min 24 min 5 min 90 min Extra Delicates Extra Low No change Normal dry 29 min 24 min 5 min 90 min Manual Dry Freshen Up High No change 30 min 25 min 5 min Time Dry High 40 min 35 min 5 min Wrinkle Release Medium 25 min 20 ...

Page 27: ...to be defective during the limited warranty period specified above All replaced parts and products become the property of SAMSUNG and must be returned to SAMSUNG Replacement parts and products assume the remaining original warranty or ninety 90 days whichever is longer This limited warranty covers manufacturing defects in materials and workmanship encountered in normal noncommercial use of this pro...

Page 28: ...MSUNG BE GREATER IN AMOUNTTHANTHE PURCHASE PRICE OFTHE PRODUCT SOLD BY SAMSUNG AND CAUSINGTHE ALLEGED DAMAGE WITHOUT LIMITINGTHE FOREGOING PURCHASER ASSUMES ALL RISK AND LIABILITY FOR LOSS DAMAGE OR INJURYTO PURCHASER AND PURCHASER S PROPERTY ANDTO OTHERS ANDTHEIR PROPERTY ARISING OUT OFTHE USE MISUSE OR INABILITYTO USETHIS PRODUCT THIS LIMITEDWARRANTY SHALL NOT EXTENDTO ANYONE OTHERTHANTHE ORIGIN...

Page 29: ...Memo SAMSUNG Dryer Owner s Instructions F 6 ...

Page 30: ...tact SAMSUNGWORLDWIDE If you have any questions or comments relating to Samsung products please contact the SAMSUNG customer care center Samsung Electronics Canada Inc 1 800 SAMSUNG 726 7864 www samsung ca ...

Reviews: