background image

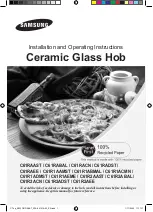
Installation and Operating Instructions 

Ceramic Glass Hob

C61RCCN / C61RCAST / C61RCBAL / C61RCDST

To avoid the risk of accidents or damage to the hob, read all instructions before installing or 

using the appliance. Keep this manual for future reference.

C61RCCN_XSA-00043A_EN.indd   1

2007-02-22   ¿ÀÈÄ 2:04:34

Summary of Contents for C61R1ABMAL

Page 1: ...ting Instructions Ceramic Glass Hob C61RCCN C61RCAST C61RCBAL C61RCDST To avoid the risk of accidents or damage to the hob read all instructions before installing or using the appliance Keep this manual for future reference ...

Page 2: ......

Page 3: ...Before You Begin 14 Initial cleaning 14 Hob Use 14 Using suitable cookware 14 Using the touch control sensors 15 Switching the appliance on 16 Temperature control 16 Switching the appliance off 17 Using the casserole cooking zone 18 Using the double cooking zone 19 Switching a cooking zone off 20 Using the child safety lock 20 Timer 21 Setting the safety shutoff 21 Countdown timer 22 Locking and u...

Page 4: ...used in the text This is the safety alert symbol Warning indicates information concerning your personal safety Important indicates information on avoiding damage to the appliance This symbol indicates useful information and practical tips This symbol refers to measures that can be taken to help protect the environment 1 Numbers like these indicate step by step instructions for using the appliance ...

Page 5: ...s that conform to the relevant standards This ensures sufficient protection against contact for electrical units as required by the VDE Association of Ger man Electrical Engineers If your appliance malfunctions or if fractures cracks or splits appear switch off all cooking zones disconnect the hob from the mains supply and contact your local service centre If the cooktop cracks turn the appliance o...

Page 6: ...do not clean the appliance with a steam jet or high pressure cleaner Clean the hob in accordance with the cleaning and care instructions contained in this manual Safety continued Disposal Instructions Disposing of the packaging material All materials used to package the appliance are fully recyclable Sheet and hard foam parts are appropriately marked Please dispose of packaging materials and old a...

Page 7: ... the electrical installation that allows the appliance to be discon nected from the mains at all poles with a contact opening width of at least 3 mm Suitable isolation devices include line protecting cut outs fuses screw type fuses are to be removed from the holder earth leakage trips and contactors With respect to fire protection this appliance corresponds to EN 60 335 2 6 This type of appliance m...

Page 8: ...onnection must be carried out as shown in the diagram The connecting links should be fitted accord ing to the appropriate connection diagram The earth lead is connected to terminal The earth lead must be longer than leads carrying electric current The cable connections must be made in accordance with regulations and the terminal screws tightened securely The connecting cable is to be secured with t...

Page 9: ...onger ac cessible after installation as it is on the original rating plate on the underside of the appliance Pay special attention to the minimum space and clearance requirements Secure the brackets at both sides with the provided screws before mounting the hob onto the brackets When installing this cook top a board shall be fitted which will limit acess to the cook top base enclosure Min 50mm 560 ...

Page 10: ...8 EN Installing the Hob Continued Model C61RCBAL C61RCCN C61RCDST x4 90 2 100 100 490 1 ...

Page 11: ...9 EN Installing the Hob Continued Model C61RCAST x4 90 2 100 100 490 1 ...

Page 12: ...0 W Single cooking zone 1300 W Control panel Double cooking zone 2380 W Timer indicator and control sensors Double cooking zone control sensor Double cooking zone indicator light Heat setting selectors Casserole zone indicator light Casserole zone control sensor Indicators for heat settings and residual heat Lock control sensor On Off control sensor ...

Page 13: ...11 EN Components 1 Ceramic Glass Hob 2 Installation Brackets 3 Screws 4 Scraper Parts and Features Continued ...

Page 14: ...Safety shutoff A safety shutoff ensures that all cooking zones switch off automatically after a period of time if the setting has not been changed Residual heat indicator An icon for residual heat appears in the display if the cooking zone is so hot that there is a risk of burning Double cooking zone The cooking surface features a double cooking zone This provides the appliance with a cooking zone...

Page 15: ...ones will immediately switch themselves off if liquid boils over and lands on the control panel The automatic shutoff will also be activated if you place a damp cloth on the control panel In both of these instances the appliance will need to be switched on again using the main power sensor after the liquid or the cloth has been removed Residual heat indicator When an individual cooking zone or the...

Page 16: ...e of cast iron or which have damaged bases with rough edges or burrs Permanent scratching can occur if these pan are slid across the surface When cold pan bases are normally bowed slightly inwards concave They should never be bowed outwards convex If you wish to use a special type of pan for example a pressure cooker a simmering pan or a wok please observe the manufacturer s instructions Energy sa...

Page 17: ...g foods warm or for thawing The base of the pan should be the same size as the cooking zone Using a pressure cooker reduces cooking times by up to 50 Using the touch control sensors To operate the touch control sensors touch the desired panel with the tip of your pointed fin ger until the relevant displays illuminate or go out or until the desired function is activated Ensure that you are touching ...

Page 18: ...ctuated to switch on your appliance a heat setting must be selected within approximately 10 seconds Otherwise the appliance will switch itself off for safety reasons Temperature control For setting and adjusting the power level to for cooking touch the corresponding cook ing zone s keys The first time is pressed the heat level is set to The first time is pressed the heat level is set to Use the key ...

Page 19: ...ff the appliance use the On Off control sensor Touch the On Off sensor After switching off a single cooking zone or the entire cooking surface the presence of residual heat will be indicated in the digital displays of the corresponding cooking zones in the form of an for hot ...

Page 20: ...the heat setting display To reset touch the On Off sensor Using the casserole cooking zone By using the casserole cooking zone you can switch from the smaller cooking zone to the larger oval cooking zone You can switch between the two zone settings only if a heat level has already been set for the smaller zone 1 Select a heat setting 2 To switch the casserole cooking zone on or off place your finge...

Page 21: ...ect the set ting with the Double Cooking Zone control sensor You can switch between the two cooking zones only after a heat setting has been selected for the smaller cooking zone 1 Select the desired heat setting 2 Touch the Double Cooking Zone control sensor This will switch on the outer cooking zone The indicator light will illuminate 3 To switch the outer cooking zone off touch the Double Cooki...

Page 22: ...inst unintentionally turning on a cooking zone and activating the cooking surface The lock control sensor can be used only when the power is on Switching the child safety lock on 1 Touch the control sensor for approximately 3 seconds An acoustic signal will sound as confirmation 2 Touch any heat setting control sensor will appear in the displays indicating the child safety lock has been activated H...

Page 23: ...t down The countdown timer cannot be used if a cooking zone has been switched on Setting the safety shutoff The cooking zone s for which you want to apply the safety shutoff must be switched on 1 Using the timer s control sensor select the cooking zone for which the safety shutoff time is to be set After the first active cooking zone is selected touching the timer s control sensor will cause the co...

Page 24: ...es To make the settings more quickly touch any of the or timer setting control sensors until the desired value is reached If the timer setting control sensor is touched first the time setting will begin at 99 minutes if the timer setting control sensor is touched first the time setting will begin at 1 minute Countdown timer For the countdown timer to be used the appliance must be switched on but all...

Page 25: ... The heat settings required for various cooking methods depend on a number of variables including the quality of the cookware being used and the type and amount of food being cooked Switch Setting Cookingmethod Examples for Use 9 Warming Sautéing Frying Warming large amounts of liquid boiling noodles searing meat browning goulash braising meat 8 Intensive Frying Steak sirloin hash browns sausages ...

Page 26: ...ation with the use of a commercially available ceramic glass or stainless steel cleaner Light Soiling 1 Wipe the ceramic glass surface with a damp cloth 2 Rub dry with a clean cloth Remnants of cleaning agent must not be left on the surface 3 Thoroughly clean the entire ceramic glass cooking surface once a week with a commer cially available ceramic glass or stainless steel cleaner 4 Wipe the cera...

Page 27: ...te a cooking zone if there is no pan on the cooktop or if the pan is empty Ceramic glass is very tough and resistant to temperature shock but it is not unbreakable It can be damaged by a particularly sharp or hard object dropping onto the cooktop Do not use pans made of cast iron or which have damaged bases with rough edges or burrs Scratching may occur if these pans are slid across the surface Do...

Page 28: ...ilities A period of more than 10 seconds has elapsed between when the On Off button was actu ated and the desired cooking zone switches on see the section Switching the appliance on The control panel is partially covered by a damp cloth or liquid What should I do if the display except for the residual warmth indicator sud denly disappears This could be a result of one of two possibilities The On O...

Page 29: ... advance for the discussion This will ease the process of diagnosing the problem and also make it easier to decide if a customer service visit is necessary Please take note of the following information What form does the problem take Under what circumstances does the problem occur When calling please know the model and serial number of your appliance This information is provided on the rating plat...

Page 30: ...ns Width 560 mm Depth 490 mm Corner radius 3 mm Cooking rings Position Diameter Power Front left 129 215 mm 810 2 380 W Rear left 148 mm 1 300 W Rear right 170 265 mm 1 590 2 540 W Front right 148 mm 1 300 W Connection voltage 240 V 50 Hz Maximum connected load power 7 52 kW Weight Net 8 0 kg Gross 10 5 kg ...

Page 31: ...29 EN Note ...

Page 32: ...30 EN Note ...

Page 33: ...31 EN Note ...

Page 34: ...Code No DG68 00043A ...

Reviews: