background image

PDP-S40

Operating Instructions
Mode d’emploi
Bedienungsanleitung
Istruzioni per l’uso
Gebruiksaanwijzing
Manual de instrucciones

Speaker System
Enceinte acoustique
Lautsprechersystem
Sistema di diffusori
Luidsprekersysteem
Sistema de altavoces

Summary of Contents for PDP-S40

Page 1: ...tructions Mode d emploi Bedienungsanleitung Istruzioni per l uso Gebruiksaanwijzing Manual de instrucciones Speaker System Enceinte acoustique Lautsprechersystem Sistema di diffusori Luidsprekersysteem Sistema de altavoces ...

Page 2: ...talling the speaker do not use any screws other than those supplied otherwise the speaker may come off from the main unit and fall over When installing the speaker tighten the screws firmly Please handle the speaker with sufficient care as the grille net and the cabinet can become damaged or broken when they are subjected to strong external impacts Placing a CRT computer screen or CRT monitor near...

Page 3: ...ting screw M5 x 10 mm Speaker mounting screw M5 x 10 mm L is inscribed R is inscribed on the fitting for the right side Speaker mounting fitting for the left side the fitting method is the same as the fitting for the right side 1 Tighten the screw in the upper screw hole first 2 Then tighten the screw in the screw hole right under the upper hole 2 Attach the center fitting to the lower center on t...

Page 4: ...t and left sides alike Front side of the speaker The screw hole at the bottom surface of the speaker mounting fitting is used when the Plasma Display is installed on the wall It is not used when installed with the stand Caution To avoid any damage to the speaker and or table top stand from striking against each other fit the speaker to the mounting fittings while confirming their locations As you ...

Page 5: ...minals and the white cable to the terminals Caution Be sure to turn the connected devices off and remove the power cord from the wall outlet beforehand when changing the connection or installation method If you insert the speaker cable too far so that the insulation is touching the speaker terminal you may not get any sound Please insert it with showing the copper wire Check if the end of the spea...

Page 6: ... result in injury 3 Connect the supplied speaker cables to the back of the Plasma Display 4 Place the Plasma Display on the mounting fittings of the hung on wall unit For details refer to the instruction manual supplied with the hung on wall unit 5 Connect the other end of the speaker cables to the speaker 6 Place the speaker on the speaker mounting fittings in the correct direction 7 Tighten from...

Page 7: ...odification without notice due to improvements Published by Pioneer Corporation Copyright 2006 Pioneer Corporation All rights reserved HOW TO ROUTE CABLES Bead bands are included with the Plasma Display For tidying up your speaker cables use the bead bands when needed Speaker cable Bead Band Rear of Display IMPORTANT NOTICE RECORD THE MODEL NUMBER AND SERIAL NUMBERS OF THIS EQUIPMENT BELOW THE NUM...

Page 8: ...English 8 ...
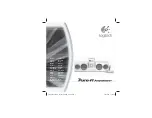
Page 9: ...s A l installation des enceintes serrez les vis à fond Manipuler les enceintes avec suffisamment de soin car autrement l enjoliveur frontal et le coffret risqueraient d être endommagés ou hors d usage en les soumettant à des chocs externes exagérés La présence d un écran d ordinateur ou d un moniteur à tube cathodique près des enceintes peut provoquer des interférences et une distorsion des couleu...

Page 10: ...te pour le centre 1 Serrez d abord la vis dans le trou de forme ronde Remarque Reportez vous à la page 13 pour la méthode de fixation des enceintes lorsque l Écran est suspendu sur une paroi Collier à grains Accessoire pour Écran Plasma Vis de montage d enceintes M5 x 10 mm Effectuez l installation comme décrit aux étapes 1 à 4 ci dessous REMARQUE Avant de monter les enceintes veuillez fixer le pi...

Page 11: ...s entre les enceintes et le socle Si les ferrures de montage d enceintes ne correspondent pas aux rainures à l arrière des enceintes ajustez l angle des ferrures 4 Fixez les ferrures de montage d enceintes et les enceintes au moyen des vis fournies Fixez d abord la partie centrale de l enceinte au moyen des vis fournies puis fixez les côtés gauche et droit de la même façon ATTENTION Si vous voulez...

Page 12: ...nchez l autre bout des câbles d enceintes sur les enceintes Connectez les câbles correctement par rapport à la polarité des bornes de l écran plasma et des enceintes c est à dire câbles aux bornes et câbles aux bornes Pour ce faire connectez le câble portant le trait gris aux bornes et le câble blanc aux bornes 5 Branchez les câbles d enceintes fournis sur l arrière de l Écran Plasma Connectez les...

Page 13: ...l Écran Plasma sur les ferrures de montage de l unité de montage sur paroi Pour plus de détails reportez vous au mode d emploi fourni avec l unité de montage sur paroi 5 Branchez l autre bout des câbles d enceintes sur les enceintes 7 Immobilisez par en dessous au moyen des vis fournies 3 endroits Fixez d abord la partie centrale de l enceinte au moyen des vis fournies puis fixez les côtés gauche ...

Page 14: ...kg Pièces accessoires Câbles d enceinte 2 Supports Droit 1 Gauche 1 Central 1 Vis M5 10 mm 9 Mode d emploi 1 REMARQUE Les spécifications et la finition sont susceptibles d être modifiées sans préavis en vue de l amélioration Câble d enceinte Collier à grains Dos de l écran VEUILLEZ REPORTER CI DESSOUS LES NUMEROS DE MODELE ET DE SERIE DE L EQUIPEMENT CES NUMEROS APPARAISSENT A L ARRIERE Nº MODELE ...

Page 15: ...autsprecher sind vorsichtig zu behandeln da Ziergitter und Gehäuse durch starke Stöße und Erschütterungen verkratzt bzw beschädigt werden können Wenn ein CRT Computer Monitor oder ein CRT Monitor in der Nähe des Lautsprechers aufgestellt wird kann dies Bildrauschen oder Farbstörungen verursachen In einem solchen Fall muss für einen größeren Abstand des Monitors vom Lautsprecher gesorgt werden Hinw...

Page 16: ...recher Befestigungsschraube M5 x 10 mm Nehmen Sie die Installation gemäß den folgenden Schritten 1 bis 4 vor HINWEIS Vor der Lautsprechermontage bringen Sie bitte das Tischgestell PDK TS25 oder ein anderes Pioneer Plasma Display Gestell an der Plasma Display Einheit an 1 Bringen Sie die Lautsprecher Befestigungsteile an der Rückseite des Plasma Displays an Bringen Sie die Befestigungsteile für die...

Page 17: ...her Befestigungsschraube M5 x 10 mm Schraubenloch Lautsprecher Befestigungsschraube M5 x 10 mm VORSICHT Wenn die Plasma Display Einheit an einen anderen Platz gebracht werden soll muss unbedingt zuerst der Lautsprecher abgenommen werden Außerdem darf das Display nicht an den Befestigungsteilen getragen werden Dies kann zu Verletzungen oder zu einer Beschädigung der Einheit führen VORSICHT Um eine ...

Page 18: ... h Pluskabel an positive Klemmen und Minuskabel an negative Klemmen Es gilt Kabel mit grauem Faden an Plus weißes Kabel an Minus 5 Schließen Sie die mitgelieferten Lautsprecherkabel an die Lautsprecherklemmen an der Rückwand des Plasma Displays an Schließen Sie die Kabel richtig bezüglich der Polarität des Plasma Displays und der Lautsprecherklemmen an d h Pluskabel an positive Klemmen und Minuska...

Page 19: ...splay auf den Befestigungsteilen der Wandbefestigungseinheit Einzelheiten hierzu finden Sie in der Bedienungsanleitung der Wandbefestigungseinheit 5 Schließen Sie das andere Ende jedes Lautsprecherkabels an den Lautsprecher an 7 Setzen Sie die mitgelieferten Schrauben von unten her an 3 Stellen ein und ziehen Sie sie an Befestigen Sie zuerst den mittleren Teil des Lautsprechers mit den mitgeliefer...

Page 20: ...chraube M5 10 mm 9 Bedienungsanleitung 1 HINWEIS Die technischen Daten und das Design können aus Gründen der Weiterentwicklung jederzeit ohne vorherige Ankündigung geändert werden Lautsprecherkabel Kugelband Rückseite des Displays Notieren Sie unten die Modellnummer sowie die Seriennummer der Einheit Sie finden diese Nummern auf deren Rückseite Modellnummer Seriennummer Verwahren Sie diese Nummern...

Page 21: ...ingere sempre bene le viti Si prega di maneggiare con cura gli altoparlanti la griglia di schermo e la cassa esterna possono danneggiarsi o rompersi se sottoposte a colpi esterni molto forti Se vicino all altoparlante si trova un monitor televisivo con tubo a raggi catodici questo schermo può subite interferenze e mostrare aberrazioni cromatiche Se questo accade allontanare il monitor dall altopar...

Page 22: ...rlante installate lo schermo al plasma sul supporto da tavolo PDK TS25 o su un altro supporto di Pioneer per schermi al plasma 1 Applicare gli elementi di fissaggio dell altoparlante al retro dello schermo al plasma Applicare gli elementi di fissaggio ai lati destro e sinistro del fondo sul pannello posteriore dello schermo al plasma con le viti apposite in dotazione 2 Applicare l elemento di fiss...

Page 23: ...o alle scanalature sul retro dell altoparlante regolare gli angoli degli elementi di fissaggio stessi 4 Fissare gli elementi di fissaggio dell altoparlante e l altoparlante con le viti in dotazione ATTENZIONE Prima di spostare lo schermo in un altro luogo rimuovete l altoparlante Non afferrate inoltre lo schermo per gli elementi di fissaggio La mancata osservanza di questa precauzione può infatti ...

Page 24: ...e all altoparlante I cavi devono essere collegati correttamente allo schermo al plasma rispettando le polarità dello stesso e quelle dei terminali degli altoparlanti vale a dire cavo ai terminali e cavo ai terminali Più precisamente collegate il cavo provvisto della striscia grigia ai terminali e il cavo bianco ai terminali 5 Collegare i cavi per altoparlante in dotazione al retro dello schermo al...

Page 25: ...i elementi di fissaggio della parete installata su di una parete Per dettagli consultare il manuale in dotazione all unità installata su di una parete 5 Collegare l altra estremità dei cavi per altoparlante all altoparlante 7 Stringere dal basso usando le viti in dotazione 3 posizioni Fissare per prima la parte centrale dell altoparlante con le viti in dotazione poi fissare i lati destro e sinistr...

Page 26: ...nsizione 3 kHz Dimensioni esterne 1 224 L mm 77 A mm 115 P mm Peso 2 9 kg Parti accessorie Cavo dell altoparlante 2 Staffe Destra 1 Sinistra 1 Centrale 1 Viti M5 10 mm 9 Istruzioni per l uso 1 NOTA I dati tecnici e il design sono soggetti a variazioni senza preavviso a seguito di ulteriori miglioramenti del prodotto SCRIVETE QUI SOTTO IL NUMERO DI MODELLO E DI SERIE DI QUESTO APPARECCHIO I NUMERI ...

Page 27: ...fdapparaat losraken en vallen Draai de schroeven stevig vast bij de montage van de luidspreker Wees uitermate voorzichtig met de luidsprekers Het rooster en de behuizing zouden kunnen worden beschadigd wanneer het luidsprekersysteem aan schokken of stoten onderhevig wordt gesteld Wanneer u een computerscherm of monitor met een beeldbuis in de buurt van de luidspreker plaatst kan dit resulteren in ...

Page 28: ... montagebeugel voor midden 1 Draai eerst de schroef in het ronde gat vast Opmerking Zie blz 31 voor de luidspreker montageprocedures wanneer de wandbevestigingseenheid wordt gebruikt Kralenbandje Accessoires van het plasmascherm Luidspreker bevestigingsschroef M5 x 10 mm Voer de installatie uit volgens de onderstaande stappen 1 t m 4 OPMERKING Voor u de luidspreker gaat bevestigen dient u de PDK T...

Page 29: ...rm Steek de luidspreker montagebeugels in de groeven aan de achterkant van de luidspreker Voorkant van de luidspreker Beschermings materiaal Om de duidelijkheid te verbeteren is de tafelstandaard hier niet getekend Luidspreker bevestigingsschroef M5 x 10 mm Schroefgat Schroefgat Luidspreker bevestigingsschroef M5 x 10 mm Schroefgat Luidspreker bevestigingsschroef M5 x 10 mm Let op Om beschadiging ...

Page 30: ... juiste manier aan wat betreft de polariteit zowel op het Plasmascherm als bij de luidspreker aansluitingen dat wil zeggen met de draad naar de aansluiting en de draad naar de aansluiting Om dit makkelijker te maken dient u de draad met de grijze streep te verbinden met de aansluitingen en de witte draad met de aansluitingen 5 Sluit de bijgeleverde luidsprekerkabels op de achterkant van het plasma...

Page 31: ...bevestigingseenheid Zie voor verdere informatie de handleiding die bij de wandbevestigingseenheid wordt geleverd 5 Sluit het andere uiteinde van de luidsprekerkabels op de luidspreker aan 7 Maak vanaf onderen vast met behulp van de bijgeleverde schroeven op 3 plaatsen Bevestig eerst het middelste gedeelte van de luidspreker met behulp van de bijgeleverde schroeven en dan de rechter en linkerkant o...

Page 32: ...requentie 3 kHz Externe afmetingen 1 224 B mm 77 H mm 115 D mm Gewicht 2 9 kg Bijgeleverde onderdelen Luidsprekerkabel 2 Beugel Rechts 1 Links 1 Midden 1 Schroef M5 10 mm 9 Gebruiksaanwijzing 1 OPMERKING Technische gegevens en ontwerp zijn ter productverbetering zonder voorafgaande kennisgeving wijzigbaar Neem het hieronder vermelde model en serienummer van deze apparatuur over Deze nummers treft ...

Page 33: ...idad principal y caerse Cuando instale el altavoz apriete bien los tornillos Manipule los altavoces con mucho cuidado ya que la red de rejilla y el gabinete pueden dañarse o romperse cuando se encuentran sujetos a fuertes impactos externos Si pone una pantalla de TRC de ordenador o un monitor de TRC cerca del altavoz pueden producirse interferencias o distorsión del color Sí así sucede aleje el mo...

Page 34: ...ara el centro 1 Apriete primero el tornillo del orificio de forma redonda Nota Para ver los procedimientos de montaje del altavoz empleando la unidad para colgar o para la pared consulte la página 37 Banda de la base Accesorios de la pantalla de plasma Tornillo de montaje del altavoz M5 x 10 mm Realice la instalación de acuerdo con a los siguientes pasos 1 a 4 NOTA Antes de fijar el altavoz fije e...

Page 35: ...no se acoplan en las ranuras de la parte posterior del altavoz ajuste el ángulo de los accesorios de montaje del altavoz 4 Fije los accesorios de montaje del altavoz y el altavoz empleando los tornillos suministrados PRECAUCIÓN Si desea desplazar la pantalla de plasma asegúrese de sacar el altavoz primero Además no desplace la pantalla agarrando los accesorios de montaje Esto puede causar lesiones...

Page 36: ...les y el cable blanco a los terminales 5 Conecte los cables de altavoz suministrados a la parte posterior de la pantalla de plasma Conecte los cables siguiendo las polaridades correctas de la pantalla de plasma y de los terminales de altavoz o sea cable a los terminales y cable a los terminales Para hacerlo conecte el cable con la línea gris a los terminales y el cable blanco a los terminales Si h...

Page 37: ...a de plasma en los accesorios de montaje de la unidad para colgar o para la pared Para los detalles consulte el manual de instrucciones suministrado con la unidad para colgar o para la pared 5 Conecte el otro extremo de los cables de altavoz al altavoz 7 Fíjelos desde debajo empleando los tornillos suministrados 3 lugares Fije primero la parte central del altavoz con los tornillos suministrados y ...

Page 38: ...z 2 Ménsula Derecho 1 Izquierdo 1 Central 1 Tornillo M5 10 mm 9 Manual de instrucciones 1 NOTA Las especificaciones y diseño están sujetos a posibles cambios sin previo aviso con el objeto de mejoras en el producto ANOTE MÁS ABAJO EL NÚMERO DE MODELO Y EL NÚMERO DE SERIE DE ESTE EQUIPO LOS ENCONTRARÁ DETALLADOS EN LA PARTE POSTERIOR DEL MISMO N º DE MODELO N º DE SERIE GUARDE ESTOS NÚMEROS PARA FU...

Page 39: ...人來進行裝配與安裝 安裝揚聲器時 請勿使用附送螺絲以外的螺絲 否則 揚聲器可能會從本機脫開 甚至於掉落 安裝揚聲器時 請將螺絲擰緊 當揚聲器受到外部的影響時 請充分注意揚聲器的處 理 以免損壞護網和音箱 在揚聲器附近放置CRT電腦屏幕或CRT監視器可能會導 致干擾或色彩失真 如果出現這種情況 請使監視器 遠離揚聲器 關於輸入端子 為防止因輸入過載而導致揚聲器系統損壞 請務必遵 循以下注意事項 請勿將該揚聲器用於指定的先鋒電漿顯示器之外的設 備 否則可能導致損壞或火災 改變連接或安裝方法時 務必先將連接設備的電源關 掉 並將電線插頭從牆壁上的插座中拔出 使用音調控制功能來增強高音時 請勿將放大器音量 開得太大 檢查附件 7 揚聲器電纜 x 2 7 揚聲器安裝配件 左右側托架 中央托架 7 揚聲器安裝螺絲 M5 x 10 mm 黑色 x 9 7 操作手冊 安裝 如果安裝遇到困難 請與經銷商聯絡...

Page 40: ... 1 先將該螺絲擰緊於 上部螺絲孔內 2 然後將該螺絲擰緊 於上孔下面的右側 螺絲孔內 2 然後將螺絲擰 緊於橢圓形螺 絲孔內 揚聲器安裝螺絲 M5 x 10 mm 中央揚聲器安裝配件 1 將螺絲擰緊於圓 形螺絲孔內 注意 使用壁掛式裝置時 有關揚聲器安裝步驟請參見第4 3 頁 串珠皮帶 等離子顯示器的附件 揚聲器安裝螺絲 M5 x 10 mm 根據下列步驟 1 到 4 進行安裝 注意 安裝揚聲器之前 請先將 PDK TS25 桌面支架 或其 他先鋒電漿顯示器支架 安裝到電漿顯示器上 1 將揚聲器安裝配件安裝到電漿顯示器的 後部 用附送的螺絲將左右側配件安裝到電漿顯示器後面板 的底部左右側 2 將中央配件安裝到電漿顯示器後面板的 下部中央 用附送的兩個螺絲將中央配件安裝到電漿顯示器後面 板的下部中央 安裝於電漿顯示器上 ...

Page 41: ...面確認其位置一面將揚聲器固定於安裝配件上 由於很容易碰 撞到支架 請在揚聲器與桌面支架之間使用包裝揚聲器的保護性纏繞材料 揚聲器安裝配件插不進揚聲器後面的槽內時 請調整揚聲器安裝配件角度 4 用附送的螺絲將揚聲器安裝配件與揚聲器固定起來 先用附送的螺絲固定揚聲器的中心部分 然後同樣地固定左右兩側 揚聲器安裝螺絲 M5 x 10 mm 螺絲孔 螺絲孔 揚聲器安裝螺絲 M5 x 10 mm 螺絲孔 揚聲器安裝螺絲 M5 x 10 mm 小心 如果要移動電漿顯示器 務必首先 拆除揚聲器 此外 請勿透過握住安裝配件來移 動顯示器 否則可能導致人身傷害 或設備損壞 揚聲器的上部沒有圓角 從電漿顯示器前面看去 揚聲器的底部有圓角 將揚聲器安裝配件插入 揚聲器後面的的槽內 揚聲器 的前面 保護性纏 繞材料 為了便於說明起見 本圖 沒有顯示桌面支架 ...

Page 42: ...揚聲器端子的極性正確連接電 纜 即 ª電纜接 ª端子 電纜接 端子 為此 請將帶灰線的電纜連接到 ª 端子 而將 白色電纜連接到 端子 5 將附送的揚聲器電纜連接到電漿顯示器 後面 依照電漿顯示器及揚聲器端子的極性正確連接電 纜 即 ª電纜接 ª端子 電纜接 端子 為此 請將帶灰線的電纜連接到 ª端子 而將白 色電纜連接到 端子 若因暴露導線而導致正ª 負 電纜之間短路 過大 的負荷將會施加於等離子顯示器 從而造成操作中斷 或故障 注意對好極性將揚聲器電纜連接於左右電漿顯示器端 子 否則可能會導致立體聲效果不足 低音播放不 良 音像不穩定 束結電纜時 請勿拉著電纜 黑色 灰色 線條 白色 灰色線條 灰色線條 白色 揚聲器端子 揚聲器端子 揚聲器電纜 揚聲器端子 拉桿 紅色 壓下拉桿 插入電纜末端 釋放拉桿時 它又會夾在揚 聲器電纜上 紅色 黑色 紅色 ...

Page 43: ...裝與連接時 要留意揚聲器安裝配件 否則可能會導致人身傷害 3 將附送的揚聲器電纜連接到電漿顯示器的後部 4 將電漿顯示器放置於壁掛式裝置的安裝配件上 有關詳情請參見連同壁掛式裝置附送的使用說明書 5 將揚聲器電纜的另一端連接到揚聲器上 7 使用所提供的螺絲從下方固定 3個位置 先用附送的螺絲固定揚聲器的中心部分 然後同樣地固定左右兩側 揚聲器安裝螺絲 M5 x 10 mm 揚聲器安裝螺絲 M5 x 10 mm 揚聲器安裝螺絲 M5 x 10 mm 6 依照正確方向將揚聲器放置於揚聲器安裝 配件上 使用壁掛式裝置時 請勿使用這些孔 ...

Page 44: ...漿顯示器附送有束帶 需要時 請使用束帶束結揚聲器電纜 揚聲器電纜 串珠皮帶 顯示器背面 規格 機殼 低音反射型 所用揚聲器 兩路系統 低音喇叭 用於低音 4 8 cm x 13 cm 圓型 高音喇叭 用於高音 2 5 cm 半球頂型 標稱阻抗 8 Ω 頻率範圍 66 Hz 到 30 000 Hz 靈敏度 1 m 1 W 80 dB 容許輸入功率 最大輸入功率 13 W 額定輸入功率 4 W 交叉頻率 3 kHz 外形尺寸 1 224 寬 mm x 77 高 mm x 115 深 mm 重量 2 9 kg 附件 揚聲器電纜 x 2 托架 右側 x 1 左側 x 1 中央 x 1 螺絲 M5 x 10 mm x 9 操作手冊 x 1 注意 因產品改進 規格和設計若有變更 恕不另行通知 先鋒公司發行 版權 2006先鋒公司 版權所有 ...

Page 45: ... advance contact for these companies are not repair locations AMERICA PIONEER ELECTRONICS USA INC CUSTOMER SUPPORT DIVISION P O BOX 1760 LONG BEACH CA 90801 1760 U S A EUROPE PIONEER EUROPE NV EUROPEAN SERVICE DIVISION HAVEN 1087 KEETBERGLAAN 1 B 9120 MELSELE BELGIUM ASEAN PIONEER ELECTRONICS ASIACENTRE PTE LTD SERVICE DEPARTMENT 253 ALEXANDRA ROAD 04 01 SINGAPORE 159936 JAPAN AND OTHERS PIONEER C...

Reviews: