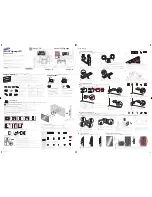
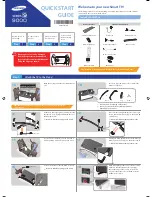
Pioneer L50USD14N, Instruction Manual
The Pioneer L50USD14N is a powerful and innovative product that will transform your entertainment experience. With its high-resolution display, seamless connectivity, and cutting-edge features, this device will surely impress. Enhance your knowledge and maximize its potential by downloading the free Instruction Manual from manualshive.com to unlock endless possibilities.
Share
Download


Reviews:
No comments
Related manuals for L50USD14N
RM40D
Brand: Samsung Pages: 2
UN55F9000AF
Brand: Samsung Pages: 2

IFTD G SERIES
Brand: D3 Pages: 2

65C825
Brand: TCL Pages: 44
QE55S95BAT
Brand: Samsung Pages: 44
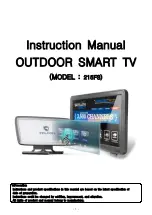
215FS
Brand: Falcon Pages: 42
V605-G3
Brand: Vizio Pages: 51
C745 Series
Brand: TCL Pages: 24
S5400A Series
Brand: TCL Pages: 19
40HL7510U
Brand: Horizon Fitness Pages: 87
S625 Series
Brand: TCL Pages: 11
58ATA6000-U
Brand: Allview Pages: 36
FLS32227H
Brand: F&U Pages: 33

LDS-4371
Brand: Denver Pages: 12
Neptune Partial Sun Series
Brand: peerless-AV Pages: 96
SC-50UK700N
Brand: Seiki Pages: 45
LED-3271S
Brand: Denver Pages: 56
705593
Brand: Bauhn Pages: 56


