background image

User manual

使用手册

Summary of Contents for VoiceTracer

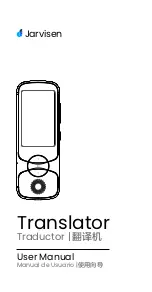
Page 1: ...User manual 使用手册 ...

Page 2: ......

Page 3: ...音笔 7 3 1 供货范围 7 3 2 概览 7 4 开始使用 8 4 1 开 关机 8 5 录音模式 9 5 1 录音设置 11 5 2 录音增益设置 14 6 翻译模式 15 6 1 文本翻译 15 6 2 对话翻译 16 6 3 拍照翻译 16 6 4 离线翻译 17 6 5 设置 17 7 语音转文本 18 7 1 录音文件转文本 18 7 2 备忘录转文本 20 8 录音播放模式 21 8 1 变速播放 22 9 录像模式 23 10 录像回放模式 24 10 1 录像回放 25 11 充电方法 26 ...

Page 4: ...7 12 1 翻译 27 12 2 语音转文本 27 12 3 录音播放 27 12 4 视频回放 27 12 5 照相机 27 12 6 摄像机 28 12 7 文件 28 12 8 录音设置 29 12 9 应用软件 30 13 常见问题 31 13 1 无法启动录音笔 31 13 2 翻译不出来 31 13 3 机器死机 31 14 技术参数 32 14 1 存储器 32 14 2 尺寸和重量 32 14 4 录音 32 14 5 运行条件 32 ...

Page 5: ...技 术支持 如 使用手册 软件下载 保修信息等 www philips com 1 1 产品特点 一键录音 仅仅推上录音键即可实现录音 推下录音键保存 录音 一键录像 长按录像键即可实现录像 短按录像键保存录像 内置高性能编解码芯片 支持无损音频播放 以常见的 MP3 格式及 WAV 格式录音 支持 192KHz 24 位 PCM 录音 声控录音功能 支持 WIFI 蓝牙 4G 支持翻译功能 支持拍照翻译 支持离线翻译 支持扩展 SD 卡 使用高速 USB 2 0 快速存取录音文件和数据 可作为 MTP 存储设备 确保最大的兼容性 ...

Page 6: ...如因人为操作 或不可抗力因素而导致数据丢失 本公司一概不予负责 特别 提醒用户小心操作 注意将资料另外备份 2 2 听力保护 使用耳机时请遵守下列原则 调整至合适的音量 切勿长时间使用耳机 特别需要注意 切勿将音量调至耳朵所能承受的范围之外 切勿将音量调至盖过周边环境的声音 在危险情况下请小心或暂停使用耳机 在驾驶汽车 骑自行车 玩滑板时 切勿使用耳机 否则会 导致交通意外 且违反相关法律法规 移动和联通流量卡使用设置 在设置菜单里打开 更多 选择 移动网络 接入点名称 名称 任意填写 APN cmnet 代理 10 0 0 200 端口 80 设置好后 点一下右上角的 选择保存 运行时选择设置 过的 APN 值即可使用 流量卡使用时请不要随意更换不同设备 流量卡不同于手机卡 随意更换可能会导致用不了 ...

Page 7: ...音笔 3 1 供货范围 3 2 概览 6 7 8 9 10 11 12 13 14 15 17 18 19 16 5 4 3 1 2 1 录音键 2 音量调加 减键 3 录音增益键 4 变速播放键 5 电源键 6 耳机孔 7 咪头 8 工作指示灯 9 YOU 键 10 ME 键 11 录像键 12 MODE 键 13 弹卡孔 14 内存卡 SM 卡 15 USB 16 摄像头 17 最近使用应用键 18 home 键 19 返回键 ...

Page 8: ...8 ZH 4 开始使用 4 1 开 关机 注意 第一次使用机器时 请对该机器充电三小时 以确保机器 有电工作 长按开关键 约 2 秒至 3 秒后开机 开机界面显示飞利浦图标 如下图所示 然后机器进入待机界面 如下图所示 ...

Page 9: ...需的录音类型及保存路径 在主菜单的 录音设置里面选择 文件夹选择 可以在 A B C D 四 个文件夹之间选择进行存储 设置好后请先测试录音 以确 保录音笔设置正确 录音时 请将内置麦克风对准音源 当录音时间超过录音笔可用容量时 录音会自动保存并停止 录音 请删除部分录音或将录音文件移至电脑 录音时请勿断电 否则会导致录音信息丢失和文件损坏 如果需要长时间录音 请在录音前充好电 关机状态和开机过程中不支持一键录音 请在开机完成后才 能一键录音 当电量提示低时 录音自动保存 录音参考界面如下图所示 ...

Page 10: ...录音界面说明 1 当前录音时长 2 可录音时长 3 左右能量条 4 录音文件名 5 当前录音文件数 6 录音状态图标 7 当前录音的采样率和采样位数 8 总录音文件数 9 监听图标 10 声控图标 11 降噪图标 12 当前文件夹 13 录音标志 14 当前日期时间 15 电量指示 注意 电池标记符显示空格时 表明低电 低电时系统会自动关 机 如果正在录音 系统会自动保存录音文件并退出录音 电量不足时 请及时充电 ...

Page 11: ...储路径选择参考界面 1 存储路径选择为内存设备时 录音文件 录像文件以及照片 将保存在机身内存 2 存储路径选择为 SD 卡时 录音文件 录像文件以及照片将 保存在 SD 卡内 3 选择 SD 卡后 在界面的左上角有一个 SD 卡显示图标 4 不支持热插拔 SD 卡 请先关机后再插拔卡 2 录音类型 选 择 录 音 录 音 类 型 PCM 192K 24bit wav N R 48K 16bit wav HP 48K 16bit wav SP 44 1K 16bit mp3 LP 16K 16bit mp3 录音类型参考界面 注意 在嘈杂的环境中录音时 可以选择降噪录音 N R 减少噪音 ...

Page 12: ...B C D 文件夹参考界面如图 4 声控设置 打开或关闭录音时的声控功能 声控设置参考界面 提示 打开声控功能是指把录音键推到 REC 录音时 有声音时 可以自动录音 没有声音时 录音自动暂停 关闭声控功能指的是把录音键推到 REC 录音时 有声音 或没有声音 都能一直录音 打开声控功能 录音界面会显示 VOR 声控录音参考界 面如图 打 开 声 控 功 能 只 支 持 N R 48K 16bit wav HP 48K 16bit wav 录音类型录音 ...

Page 13: ...ZH 13 中文 5 录音监听 打开或关闭录音时的监听功能 监听选择参考界面如图 注意 打开监听指的是录音键推到 REC 录音时 把耳机插入耳 机孔 带上耳机 可以监听到声音 关闭监听功能后 录音键推到 REC 录音时 带上耳机不 能听到录音声音 6 软件版本 查看当前的软件版本 ...

Page 14: ...14 ZH 5 2 录音增益设置 在录音过程中 按下 键 可选择 高 中 低 录音增益 客户根据自己的需要选择合适的增益等级录音 增益设置参考界面 ...

Page 15: ...本翻译 先设置翻译的主语言和翻译语言 然后输入需要 翻译的文字 点击翻译按钮翻译 对话翻译 先设置翻译的主语言和翻译语言 长按 YOU 键或 ME 键开始录制翻译 松开后播报翻译内容 拍照翻译 直接对准翻译的内容拍照 然后涂抹需要翻译的 文字 离线翻译 在翻译界面 关掉有线按扭 切换到离线状态 即可实现离线翻译 翻译之前请先选择好语言 设置 WIFI 设置 增益设置 4G 设置 版本更新 6 1 文本翻译 点击 文本翻译 可进入如下图在线翻译界面 1 触摸上半区域编辑框可输入需要翻译的文字 编辑好后点 击右上角翻译按钮 下半区域生成翻译好的文字 提示 按住 YOU 或 ME 键翻译时 请在翻译文字出来后再松开手 避免最后的文字没有播放 ...

Page 16: ...话翻译 可进入如下图对话翻译界面 长按机器侧边 ME 按键或 YOU 按键可录制需要翻译的语音并生成 文字 松开手后开始播放翻译 6 3 拍照翻译 点击 拍照翻译 可进入如下图拍照翻译预览界面 1 进去拍照预览界面点击 拍照 按钮后 跳转到图片界面 用手指涂抹需要翻译的区域 识别后可翻译相关的文字 注意 拍照翻译的内容必须清晰可见 否则将会影响翻译结果 当网络连接不稳定和信号差时 将会影响翻译的速度及准 确率 建议在网速较好的情况下使用 ...

Page 17: ...换离线 模式 长按 ME 键或 YOU 键进去录制翻译 松开手后播放翻译 内容 离线翻译界面如下 提示 目前只支持中文和英语的离线翻译 后续会持续更新 详 情请关注 PHILIPS 官网最新动态 切换离线模式时 请关闭有线网络 6 5 设置 点击 设置 菜单弹出 WIFI 设置 增益设置 4G 设置 版本 更新等 WIFI 设置 可设置网络 增益设置 可设置翻译的高或低增益 4G 设置 可设置 4G 网络的开或关 版本更新 离线翻译包在线升级 详情请关注 PHILIPS 官网 ...

Page 18: ...H 7 语音转文本 在主界面点击 语音转文本 应用 将会打开语音转文本功能 参考界面如下 语音转文本包含录音文件转文本和备忘录转文本两个功能 录音文件转文本 将已录制好的音频文件转换成文本文件 备忘录转文本 可实时录制 并把语音转成文本文件 7 1 录音文件转文本 点击 录音文件转文本 可进入如下图录音文件转文本界面 1 点击 选择文件 进入录音文件选择界面 点击你要转 文本录音文件 选择文件 界面参考如下图 ...

Page 19: ...写界面或转写过程中 选择 返回 键会直接返回上级 菜单 4 录音文件转写不支持录格式为 MP3 的文件 只支持录音文件 格式为 WAV 5 录音文件转写完成后 录音文件转写完成后 点击右上角的 打开编辑 可对文本文件进行编辑修改 修改后选择 保 存文件 保存当前文件 编辑文本界面参考如下图 6 备忘录转文本文件可以连电脑查看 如需要本机查看 请 先在本机下载一个 QQ 浏览器 或 UC 浏览器 然后在 主菜单里的 应用软件 里打开 文件管理 内部存储 VTR8080 Transfer 文件夹中打开查看 7 在 文件选择 界面选择 SD 卡文件转写时 要插卡 操作 方式参考设备存储文件录音转写 注意 语音转文本 录音文件转写时 注意调节好机器的背光时间 避免出现长时间转写时 背光灭了转写暂停 ...

Page 20: ...击 备忘录转文本 可进入如下图备忘录转文本界面 1 长按 圆圈 按扭即可边说话边转写文字 转写界面参考如下 2 录音转写文本后 点击 保存文件 即可保存文本文件 3 录音转写完后 选择 打开编辑 可对文本文件进行编辑修改 文本编辑参考界面 4 在转写界面或者编辑界面 选择 返回 键会直接返回上 级菜单 5 文本文件查看可参考录音文件转文本部分 注意 当网络连接不稳定和信号差时 将会影响 语音转文本 的反映速度 建议在网速较好的情况下使用 ...

Page 21: ... 中文 8 录音播放模式 录音完后将自动进入录音回放模式 或者在主界面点击 录音 播放 应用 进入录音回放 录音播放参考界面如下如所示 录音播放界面说明 1 当前文件夹 2 当前文件名 3 播放进度条 4 上一曲 5 当前播放时间 6 播放 暂停 7 下一曲 8 文件总播放时间 9 文件信息图标 10 当前变速播放值 11 当前播放循环模式 12 当前日期时间 13 电量显示 14 总文件数 15 当前文件数 ...

Page 22: ...播放 触摸播放 暂停图标 可以暂停播放或继续播放 触摸文件信息图标 可以查看当前录音文件的格式 速率 以及采样率 文件信息查看参考图 触摸当前文件夹图标 可以在 A B C D 文件夹切换 播放过程 拖动 播放进度条 可以快速快进 8 1 变速播放 在播放过程中 短按 键进入变速模式 每按一次变速 值将增加一次 直到最大变速值再循环到初始值 注 变速播放可调值是 1 2 3 4 4 3 2 1 0 当 变速播放的值调到 0 时 播放速度没有变化 当变速播放值调到 1 到 4 时 播放录音速度变快 当变速播放值调到 4 到 1 时 播放录音速度变慢 ...

Page 23: ...ZH 23 中文 9 录像模式 在开机状态下 长按 键 将进入录像模式 录像参考界面如下如所示 录像界面说明 1 录像预览界面 2 录像进度条 3 当前录像时间 4 单个录像文件总时间 5 录像状态 在录像状态 短按 键保存当前录像文件 注意 录像 20 分钟将自动保存 自动进入下一个录像文件 为了保证录像视频质量 建议在录像过程尽量保持机器平 稳 不能随意晃动 当电量提示低于 5 时 录像自动保存 ...

Page 24: ... 10 录像回放模式 录像保存后 将自动进入录像文件选择列表界面 或在主界面 点击 视频回放 应用 进入录像文件列表选择界面 在录像 文件选择列表界面 点击需要播放的录像文件进行回放 录像 文件列表选择界面参考图片如下 注意 点击录像列表后的 图标 出现 修改名称 删 除视频 弹出框 弹出框的参考界面如图 点击 修改名称 可以对当前视频文件名称进行修改 修改视频名称参考图片 点击 删除视频 可以删除当前视频文件 ...

Page 25: ...选择 所需播放的录像文件夹 2 触摸选中文件开始播放 3 播放过程中 使用 键或 键调节音量 4 按返回键结束播放 回到录像文件选择列表界面 5 播放过程中 触摸暂停 播放键暂停播放 再次按下暂停 播放键 将继续先前位置的播放 提示 当耳机插入耳机插孔内 录音笔扬声器将停止工作 触摸播放 暂停图标 可以暂停播放或继续播放 播放录像过程 拖动 播放进度条 可以快进快退播放 录像文件播放参考界面如图 提示 如果录音笔无法正常工作 请确认机器是否没电 当电量指示标志为空格时 请对机器充电 ...

Page 26: ...26 ZH 11 充电方法 使用 USB 数据线将本机与 PC 相连接 使用专用充电器充电 11 1 连接电脑 录音笔可作为存储设备 可使用 USB 数据线将录音笔与电脑相 连对文件进行存储 备份和移动 且无须安装软件 提示 在文件移入或移出录音笔时 请不要断开录音笔与电脑的 连接 否则会损坏文件 因微软对 XP 系统已不作更新及维护 本机不支持 XP 系统 应用 本机不支持连电脑格式化 ...

Page 27: ...软件 录 音设置 主应用参考界面如下 12 1 翻译 翻译包含 对话翻译 文本翻译 拍照翻译 离线翻译 设置 五个模式 详细说明请参考第 6 项翻译模式 12 2 语音转文本 语音转文本包含 录音文件转文本 备忘录转文本 详细说明 请参考第 7 项语音转文本 12 3 录音播放 用于回放录制的音频文件 请参考 7 录音回放模式 12 4 视频回放 用于回放录制的视频文件 请参考 9 录像回放模式 12 5 照相机 用于拍摄照片以及查看照片 1 拍摄界面 点击 照相机 进入拍摄预览界面 点击 拍照 图标 就可 以拍照 拍摄预览界面参下图 ...

Page 28: ...28 ZH 2 照片查看界面 拍照后 在拍摄预览界面的左下角可以看到照片 点击进去 就可以全屏查看照片 拍照后参照界面如下图 12 6 摄像机 用于摄像 打开菜单进去直接录像 12 7 文件 可查看本机的录音 录像 照片 翻译文字 文件功能参考界 面如下 ...

Page 29: ...ZH 29 中文 在此界面可以选择 音频 视频 照片 文本 里的文件进行设置 长按文件将弹出如下界面 1 点击 分享 可以对当前的文件进行分享 分享可以通过蓝 牙 也可以通过第三方软件 用第三方软件分享时 请先安装 第三方软件 2 点击 修改名称 可对当前文件名进行修改 3 点击 删除 可对当前文件直接删除 12 8 录音设置 录音设置里包含 存储路径 录音类型 文件夹选择 声控设置 ...

Page 30: ...30 ZH 录音监听 软件版本 12 9 应用软件 应用软件里包含 设置 文件管理 音乐 图库 应用软件参考界面如图 ...

Page 31: ...ZH 31 中文 13 常见问题 此处列举了常见问题的解答 可帮助解决录音笔出现的简单问 题 如果故障仍无法排除 请咨询经销商或访问我们的官方网站 www philips com support 13 1 无法启动录音笔 电池电量已耗尽请及时充电 13 2 翻译不出来 检查确认网络信号是否正常 13 3 机器死机 长按电源键 8 秒 复位即可 ...

Page 32: ...牙 是 14 2 尺寸和重量 宽 高 厚 61 2 x 122 5 x 15 5 mm 重量 含电池 146 g 14 3 系统要求 操作系统 Windows 7 8 10 Vista 2000 Mac OS X Linux 接口 USB 接口 14 4 录音 PCM 192K 24bit wav 比特率为 9216kbps 格式为 WAV N R 48K 16bit wav 比特率为 1536kbps 格式为 WAV HP 48K 16bit wav 比特率为 1536kbps 格式为 WAV SP 44 1K 16bit mp3 比特率为 128kbps 格式为 MP3 LP 16K 16bit mp3 比特率为 64kbps 格式为 MP3 14 5 运行条件 温度 5 10 空气湿度 10 90 不凝结 ...

Page 33: ... 6 1 Text Translation 47 6 2 Dialogue Translation 48 6 3 Photo Translation 49 6 4 Off line translation 49 6 5 Settings 50 7 Convert Audio to Text 51 7 1 Audio File to Text File 51 7 2 Memo to Text 53 8 Recording Playback Mode 55 8 1 Variable Speed Playback 56 9 Videotaping Mode 57 10 Videotaping Mode 59 10 1 Video Playback 60 11 Charging Method 61 11 1 Connecting with Computer 61 12 Application Ov...

Page 34: ...Recording Setting 65 13 FAQs 66 13 1 Failure in Starting the Recorder 66 13 2 Translation Failure 66 13 3 Device Freeze 66 14 Technical Parameters 67 14 1 Storage 67 14 2 Dimensions Weight 67 14 3 System Requirements 67 14 4 Recording 67 14 5 Operating Conditions 67 ...

Page 35: ...save recorded clip Quick Videotaping You can long press the Videotaping button to achieve videotaping and short press such button to save the clip Has in built high performance decoding chip and supports loss less audio file playback Recorded in common formats MP3 and WA and supporting 192 KHz 24 digit PCM recording Sound controlled recording functionality Supports WIFI and 4G Supports translation...

Page 36: ...and avoid excessive use of the earphone Special attention must be paid in order not to adjust the volume to a level that is unbearable to the human ear Do not increase the volume to a level higher than that of the ambient environment Exercise caution or suspend the use of the earphone in case of danger Do not use earphone when driving a car riding a bicycle or using a skateboard Otherwise you migh...

Page 37: ... Recorder 3 1 Supplied Components 3 2 Overview 6 7 8 9 10 11 12 13 14 15 17 18 19 16 5 4 3 1 2 1 Recording Button 2 Volume Increase Decrease Button 3 Recoding Gain Button 4 Variable Speed Play Button 5 Power Button 6 Earphone Hole ...

Page 38: ... EN 7 Mic 8 Indicator Light 9 YOU Button 10 ME Button 11 Videotaping Button 12 MODE Button 13 Card Ejection Hole 14 Memory Card SM Card 15 USB 16 Camera 17 Overview button 18 Home button 19 Return button ...

Page 39: ...ng the device for the first time you should charge the device for three hours to ensure sufficient power storage Long press the ON OFF button for 2 3 seconds and you will see the Philips logo as shown below Then the device enters the clip playback mode as shown below ...

Page 40: ...hen the recorded data exceeds the capacity of the device the recorder will automatically stop and save the recorded clip Please delete some recordings or relocate some of the recordings to computer before continuing to record During recording do not cut off power supply Otherwise damage will be caused to the recordings or the recorded files If you need to do a long hour recording please charge the...

Page 41: ...g digit 8 Total number of recordings 9 Listen logo 10 Voice control logo 11 Voice Cut logo 12 Current folder 13 Recording logo 14 Current date and time 15 Batter volume Note When the battery shows less columns it means batter is low Low battery will lead to automatic shutdown During recording the system will automatically save the recorded clip and exit the recording mode If the battery is low ple...

Page 42: ...aving path as shown below 1 When the saving path is the memory card the recorded audio video files and photos will be stored within the device 2 When the saving path is SD card the recorded audio video files and photos will be stored in the SD card 3 After selecting SD card there is an SD icon appearing on the left upper corner 4 his device does not support hot plugging SD card Please insert or re...

Page 43: ...R 48K 16bit wav HP 48K 16it wav SP 44 1k 16bit mp3 and LP 16K 16bit mp3 The recording interface is shown below Note During recording in a noisy environment you can choose Noise Reduced recording type to reduce noise 3 Folder Selection The folders to choose from include A B C and D as shown below ...

Page 44: ...is sound the sound will be automatically recorded When there is no sound the recording will stop Turn off Voice Activation by pushing to REC When there is sound or not the recording will not be affected When Voice Activation is enabled the recording interface will display VOR as shown below When Voice Activation is enabled the device only supports N R 48K 16bit wav HP 48K 16bit wav ...

Page 45: ... Listening function by pushing the recording button to REC During recording you can listen the recording by wearing an earphone Turn off Listening function by pushing the recording button to REC During recording you cannot listen the recording by wearing an earphone 6 SoftwareVersion Check the current software version as shown below ...

Page 46: ...46 EN 5 2 Recording Gain Setting During recording press to select from High Medi um and Low The customer can choose different levels of gain according to your own needs ...

Page 47: ...late for translation Dialogue Translation Choose the source and target languages then long press YOU or I button for recording and translation Unleash the button and listen to the translation Photo Translation Aim at the text you want to translate and select the text you want to translate Off line translation In the translation interface switch to the off line state to achieve off line translation...

Page 48: ...the lower box Note The text in photo must be clear and eligible Otherwise the translation quality will be affected Reminder When you press and hold the YOU or ME button to translate please release your hand after translating the text to avoid the last text not playing 6 2 DialogueTranslation Click Dialogue Translation to enter the following interface ...

Page 49: ...to button to jump to the photo gallery Use your finger to touch the area you want to translate The text will first be recognized before being translated 2 Click the Photo button in the lower left corner and enter the gallery 6 4 Off line translation In the translation interface switch the icon to the off line position press and hold the ME button or the YOU button to record the conversation releas...

Page 50: ...k 6 5 Settings Click Settings to enter the WIFI setting and Gain set ting 4G setting Version update etc WIFI Setting Set the network Gain Setting Set the gain for translation Set the 4G network on or off Version update Off line data package upgrade Please pay attention to the PHILIPS website for details Note When the network is unstable or the signal is poor the translation speed and accuracy will...

Page 51: ...xt functions Audio to text Convert the recorded audio clip to text file Memo to text This is real time conversion of audio to text 7 1 Audio File toText File Click Audio File to Text File to enter the conversion inter face as shown below 1 Choose Select File and enter the recorded file selection interface Click the file you want to convert into text The file selection interface is shown below ...

Page 52: ... can only be enabled with internet connection 2 After the Audio to Text conversion is completed the progress at the bottom is white 3 The audio file for conversion can only be WAV format not MP3 format 4 After the Audio to Text conversion is completed click Audio to Text Dialogue to pop up the keyboard on which you can edit the text file before saving it The interface for editing the text is shown...

Page 53: ...on Software in the main menu Open the view 7 When you choose SD card for conversion you need to insert the card first The method of operations Note When the voice is transferred to the text please pay attention to adjust the backlight time of the device to avoid the long time transfer the backlight is off and the writing pause is suspended 7 2 Memo toText Click the Memo to Text button to enter the...

Page 54: ...ick Save File to save the file 3 The editing of the text is in reference to that of the audio to text conversion The text box editing interface is shown below 4 The viewing of the text file is in reference to that of the audio to file conversion Note When the network is unstable or the signal is poor the audio to text conversion speed will be affected You should use this function in a sound networ...

Page 55: ...recording playback interface is shown below Illustration on playback interface 1 Current folder 2 Current file name 3 Play progress bar 4 Previous 5 Current play time 6 Play Pause 7 Next 8 Total play time 9 File info icon 10 Current variable speed 11 Current play cycling mode 12 Current date and time 13 Battery volume 14 Total number of files 15 Current file number ...

Page 56: ... page is shown below Touch the current folder icon to choose from folders A B C and D During play drag Play Progress Bar to fast forward 8 1Variable Speed Playback During playback short press to enter the variable speed mode Press each time to increase the speed by 100 until the maximum speed is reached and reduced Note The variable speed values include 1 2 3 4 4 3 2 1 and 0 When the value is set ...

Page 57: ... the device is on long press to enter the video taping mode as shown below Illustration on videotaping interface 1 Videotaping Preview 2 Videotaping Progress 3 Current Videotaping Time 4 Total Time of One Single Video 5 Videotaping Status ...

Page 58: ... video file Note The device will automatically save the clip after 20 minutes and starts a new clip To ensure videotaping quality it is advised that you keep the device level and avoid shaking When the battery is lower than 5 the video will be automatically saved ...

Page 59: ...e video list In the video file selection interface click the video you want to play back as shown below Note Enter the video list and you will see change name or delete video The popped up dialog box is shown below The interface for changing file name is shown below Click Delete Video to delete the current video file Click Change Name to change the name of the current video file ...

Page 60: ...tion interface 5 During the playback touch Pause Play button to suspend play or press again to resume play Reminder When the earphone is inserted the recorder speaker will stop working Touch the Play Pause icon to stop or resume play During playback drag Play Progress Bar to fast forward The video playing interface is shown below Reminder When the recorder is not working properly please check if i...

Page 61: ...B cable to connect your recorder with a computer for the purposes of storage backup or file removal without the need of installing software Reminder When importing or exporting to or from the recorder do not disconnect the recorder and computer Otherwise it will damage the file Due to the fact that Microsoft has stopped updating XP this device does not support XP system This device cannot support ...

Page 62: ...ranslation Translation includes dialogue translation text translation Off Line Translation photo translation and settings For details please refer to section 6 12 2 Audio toText Audio to Text includes audio to text file memo to text file For details please refer to section 7 12 3 Audio File Playback This is used for playback of the recorded audio file For details please refer to section 8 12 4Vide...

Page 63: ... icon to take a photo The photo preview inter face is shown below 2 PhotoViewing Interface After taking photo you can view the photo in the lower left corner Click it and you will see it full screen The post photo taking interface is shown below 12 6Videotaping It is used for video recording You can enter recording mode by entering from the main menu ...

Page 64: ...owing interface 1 Click Share to share the current file Sharing can be done via Bluetooth or through third party software When sharing with third party software please install third party software first 2 Click Modify Name to modify the current file name 3 Click Delete to delete the current file directly 12 8 Application Application includes Settings File Management Music and Gallery The system ma...

Page 65: ...EN 65 English 12 9 Recording Setting The recording settings include Saving Path Recording Type Folder Selection Voice Control Listening and Software Version ...

Page 66: ...roblem persists please consult our dealers or visit our official website at www philips com support 13 1 Failure in Starting the Recorder The battery is out and you should charge your device 13 2Translation Failure Check if it is caused by poor internet connection 13 3 Device Freeze Long press the Power button for 8 seconds to reset it ...

Page 67: ...dth Height Depth 61 2 x122 5 x 15 5 mm Weight including battery 146 g 14 3 System Requirements Operating System Windows 7 8 10 Vista 2000 Mac OS X Linux Port USB port 14 4 Recording PCM 192K 24bit wav bit rate 9216 kbps WAV format N R 48K 16bit wav bit rate 1536 kbps WAV format HP 48k 16it wav bit rate 1536 kbps WAV format SP 44 1K 16bit mp3 bit rate 128kbps MP3 format LP 16k 16bit mp3 bit rate 64...

Page 68: ......

Page 69: ...VTR8080 ...

Page 70: ......

Page 71: ......

Page 72: ...版权所有文档版本 1 2 2018 12 29 2018 Speech Processing Solutions GmbH www philips com welcome Register your product and get support at ...

Reviews: