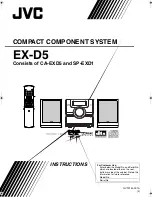
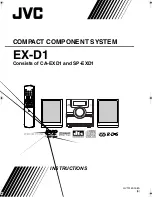
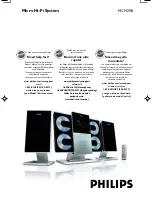
background image

Micro Hi-Fi System

  MCM275

Thank you for choosing Philips.

Need help fast? 

Read your Quick Use Guide and/or

Owner's Manual first for quick tips

 that make using your Philips product 

more enjoyable.

If you have read your instructions 

and still need assistance,

you may access our online help at 

www.philips.com/support

or call

1-888-PHILIPS (744-5477) 

while with your product.

Philips vous remercie de 

votre confiance.

Besoin d'une aide 

rapide? 

Les Guide d'utilisation rapide et Manuel de 

l'utilisateur regorgent d'astuces destinées à 

simplifier l'utilisation de votre produit Philips.

Toutefois, si vous ne parvenez pas à résoudre 

votre probléme, vous pouvez accéder à 

notre aide en ligne à l'adresse 

www.philips.com/support

ou formez le

1-800-661-6162 (Francophone)

1-888-PHILIPS (744-5477) (English speaking)

Veillez à avoir votre produit à

portée de main.

Gracias por escoger Philips

Necesita ayuda 

inmediata? 

Lea primero la Guía de uso rápido o el

Manual del usuario, en donde encontrará

consejos que le ayudarán a disfrutar 

plenamente de su producto Philips.

Si después de leerlo aún necesita ayuda,

consulte nuestro servicio de 

asistencia en línea en 

www.philips.com/support

o llame al teléfono

1-888-PHILIPS (744-5477)

y tenga a mano el producto.

P001-P031_MCM275_37_Eng

12/20/2005, 09:39

1

Summary of Contents for MCM 275

Page 1: ...estinées à simplifier l utilisation de votre produit Philips Toutefois si vous ne parvenez pas à résoudre votre probléme vous pouvez accéder à notre aide en ligne à l adresse www philips com support ou formez le 1 800 661 6162 Francophone 1 888 PHILIPS 744 5477 English speaking Veillez à avoir votre produit à portée de main Gracias por escoger Philips Necesita ayuda inmediata Lea primero la Guía d...

Page 2: ...n la recepción de radio o television que se puede identificar encendiendo y apagando el aparato recomendamos al usuario que intente solucionar las interferencias siguiendo una o más de las siguientes medidas Cambie la posición de la antena receptora Aumente la separación entre el aparato y el receptor Conecte el aparato a una toma de un circuito diferente al que está conectado el receptor Consulte...

Page 3: ...3 1 2 3 9 0 7 6 5 4 8 ...

Page 4: ...4 IMPORTANT SAFETY INSTRUCTIONS Class II equipment symbol This symbol indicates that the unit has a double insulation system Clean only with a piece of dry cloth materials ...

Page 5: ...cluding special money sav ing offers Know these safetysymbols This bolt of lightning indicates uninsulated material within your unit may cause an electrical shock For the safety of everyone in your household please do not remove product covering The exclamation point calls attention to features for which you should read the enclosed literature closely to prevent operating and maintenance problems ...

Page 6: ...e entitled to protection by one of the most comprehensive warranties and outstanding serv ice networks in the industry What s more your purchase guaran tees you ll receive all the information and special offers for which you qualify plus easy access to accessories from our convenient home shopping network Most importantly you can count on our uncompromising commit ment to your total satisfaction A...

Page 7: ...m digital apparatus as set out in the Radio Interference Regulations of the Canadian Department of Communications Français Cet appareil numérique n emet pas de bruits radioélectriques dépassant les limites applicables aux appareils numériques de Class B prescrites dans le Règlement sur le Brouillage Radioélectrique édicté par le Ministère des Communications du Canada ...

Page 8: ...17 Volume control 18 Volume adjustment MUTE Sound control 18 DSC DBB Displaying the clock 18 CD Discs for playback 19 Playing discs 19 20 Selecting and searching 20 Selecting a different track Finding a passage within a track during playback Programming tracks 21 Reviewing the program Erasing the program Different play modes REPEAT SHUFFLE 22 Display track information MP3 WMA only 22 Tuner Tuning ...

Page 9: ...system batteries or discs to excessive moisture rain sand or heat sources caused by heating equipment or direct sunlight No naked flame sources such as lighted candles should be placed on the apparatus No objects filled with liquids such as vases shall be placed on the apparatus If the system is brought directly from a cold to a warm location or is placed in a very damp room moisture may condense ...

Page 10: ... the CD door 6 CD door 7 VOLUME adjusts the volume level Clock Timer adjusts the hours and minutes 8 n n n n n 3 5 mm headphone socket Helpful hints Adjust the volume to a moderate level before you plug in the headphones Connecting headphones will switch off the speakers 9 ALBUM PRESET CD USB selects albums for MP3 WMA only TUNER selects a preset radio station 4 CD USB skips or searches CD tracks ...

Page 11: ...t radio stations DISPLAY CLOCK Clock displays the set time In standby mode enters the clock setting mode press and hold for more than 2 seconds TUNER Audio CD switches between clock display and playback display MP3 WMA files displays disc information during playback Notes for remote control First select the source you wish to control by pressing one of the source select keys on the remote control ...

Page 12: ... stand and by packed wall mounting kit MCM275 allows you to place it in two ways on desktops with stand or on walls without stand Mounting stand onto the set MCM275 is equipped with a stand To mount the stand onto the set 1 Put MCM275 on a flat and firm surface rear side facing up 2 As shown align the stand to the slots at set s bottom 4 FRONT facing down PRESS FRONT FRONT PRESS 3 Push the stand d...

Page 13: ...e of the left speaker to LEFT red and black and the cable of the right speaker to RIGHT red and black as follows a Press the clip of the red terminal and fully insert the stripped portion of the colored or marked speaker cable into the socket then release the clip b Press the clip of the black terminal and fully insert the stripped portion of the black or unmarked speaker cable into the socket the...

Page 14: ...lash players or memory cards to the Hi Fi system you can enjoy the device s stored music through the powerful speakers of Hi Fi system 1 Check you have unfolded the control panel 2 Insert the USB device s USB plug into the socket on the set s foldable control panel Connecting an additional appliance Connecting a USB device or memory card or for the devices with USB cable a Insert one plug of the U...

Page 15: ...ns CAUTION Visible and invisible laser radiation If the cover is open do not look at the beam High voltage Do not open You run the risk of getting an electric shock The machine does not contain any user serviceable parts Modification of the product could result in hazardous radiation of EMC or other unsafe operation 4 Select AUX mode on the set Helpful hints Always refer to the owner s manual of o...

Page 16: ...et 6 Press DISPLAY CLOCK to confirm To exit without storing the clock setting press STOP 9 Helpful hints The clock setting will be erased when the system is disconnected from the power supply The set will exit from the clock setting mode if no button is pressed within 90 seconds Using the remote control IMPORTANT Remove the protective plastic tab before using the remote control Always point the re...

Page 17: ...ne sound settings tuner presets and the volume level up to a maximum volume level of 20 will be retained in the set s memory Auto standby When the set has reached the end of CD playback and remains in the stop position for more than 15 minutes the set will switch off automatically to save power Helpful hints You can also switch on the set by pressing CD OPEN CLOSEç Switching between Standby and EC...

Page 18: ...continues without sound 2 To switch on the sound you can press MUTE again adjust the volume controls change source USB Sound control DSC Digital Sound Control enables you to select predefined sound settings Press DSC repeatedly to select the desired sound setting ROCK JAZZ POP CLASSIC DBB Press DBB Dynamic Bass Boost once or more to switch bass enhancement on or off DBB appears if DBB is activated...

Page 19: ...ollowing Empty albums an empty album is an album that does not contain MP3 WMA files and will not be shown in the display Non supported file formats are skipped This means that e g Word documents doc or MP3 files with extension dlf are ignored and will not be played DRM protected WMA files WMA files in Lossless orVBR format IMPORTANT Make sure that the file names of MP3 files end with mp3 For DRM ...

Page 20: ...ct another source TUNER USB or AUX Selecting and searching Selecting a different track Press 4 once or repeatedly until the desired track number appears in the display MP3 WMA Track information scrolls briefly MP3 WMA Press ALBUM PRESET once or more to select the next or previous album Track information scrolls briefly or In the stop position press ALBUM PRESET and 4 to select the desired album an...

Page 21: ...Display shows briefly the number of tracks programmed Then the display shows the track number you just stored 4 Repeat steps 2 3 to select and store all desired tracks FULL is displayed if you attempt to program more than 40 tracks 5 Press ÉÅ play the program Helpful hints The set will return to the stop position if no button is pressed within 90 seconds disappears To resume programming press PROG...

Page 22: ...SHUFFLE repeatedly until the various modes are no longer displayed CD Helpful hints In the shuffle mode press to select tracks Display track information MP3 WMA only The ID3 tag is part of an MP3 WMA file and contains various track information such as the track s title or the artist s name During playback press DISPLAY CLOCK repeatedly on the remote control Display show title name album name and I...

Page 23: ...m this preset number upwards former programmed tuner stations will be erased The set will only program stations which are not in the memory already USB 1 Press the ALBUM PRESET buttons once or more to select the preset number where programming should start Note If no tuner preset number is selected default is preset 1 and all your presets will be erased 2 Press and hold PROGRAM until AUTO appears ...

Page 24: ... supported file formats are skipped This means that e g Word documents doc or MP3 files with extension dlf are ignored and will not be played AAC WAV PCM audio files DRM protected WMA files WMA files in Lossless format How to transfer music files from PC to a USB mass storage device By dragging and dropping music files you can easily transfer your favorite music from PC to a USB mass storage devic...

Page 25: ...ayback 5 To adjust the sound and volume use the sound controls on your external device and the MCM275 1 Check the USB device has been properly connected See Installation Connecting an additional appliance 2 Press SOURCE once or more to select USB or USB on the remote control The icon appears NO AUDIO appears if no audio file is found in the USB device 3 Play the USB s audio files as you do with th...

Page 26: ...e set will exit from the timer setting mode if no button is pressed within 90 seconds Activating and deactivating TIMER Press TIMER on the remote repeatedly to activate or deactivate the timer If activated the last set source and start time are displayed If deactivated TIMER OFF appears Helpful hints The timer will not work at the set time if the set is switched on the timer is deactivated The set...

Page 27: ...ower 2 x 5 W RMS 10 W 10 W MPO 2 x 4 W FTC 1 Signal to noise ratio 75 dBA Frequency response 50 20 000 Hz 3 dB Input sensitivity AUX 0 5V max 2 V Impedance loudspeakers 4 Ω Impedance headphones 32 Ω 1000 Ω 0 5W 1 4 W 120 12 5 kHz 10 THD CD PLAYER Frequency range 30 18000 Hz Signal to noise ratio 75 dBA TUNER FM wave range 87 5 108 MHz AM wave range 530 1700 kHz Number of presets 40 Antenna FM 300Ω...

Page 28: ...re reversed Problem Solution Insert a disc Wait until the moisture condensation at the lens has cleared Replace or clean the disc see Maintenance Use a finalised CD RW or a correct MP3 WMA CD format disc Check if the number of folders exceeds 99 or the number of titles exceeds 999 If the signal is too weak adjust the antenna or connect an external antenna for better reception Increase the distance...

Page 29: ...he distance between the remote control and the system Insert the battery with its polarities signs aligned as indicated Replace the battery Point the remote control directly toward IR sensor on the front of the system Check the set is switched off Set the clock correctly PressTIMER to switch on the timer Power has been interrupted or the power cord has been disconnected Reset the clock timer Troub...

Page 30: ...T The wall mounting instructions are for the use of the qualified wall mounting person only Ask a qualified person to help you with the wall mounting which includes drilling holes on the wall and mounting the set onto walls 2 x screws What else you ll need Drilling tools e g electric drill Preparation 1 To find a suitable location for mounting try your necessary rear connections see the chapter In...

Page 31: ...ons Damage occurring to product during shipping when improp erly packaged or cost associated with packaging Product lost in shipment and no signature verification of receipt can be provided A product used for commercial or institutional purposes including but not limited to rental purposes Products sold AS IS or RENEWED SHIP IN WARRANTY For Ship In warranty repair ship the product to a Philips aut...

Reviews: