background image

Summary of Contents for DECT 623

Page 1: ......

Page 2: ...gain to select UNMUTE Press the LSK to enter the menu list scroll to Persona lize and press SELECT scroll to Handset Tones and press SELECT Scroll to HS Ringtone and press SELECT Browse through the list to hear the ring tones and select your chosen ring tone Press the LSK to enter the menu list scroll to Clock Alarm and press SELECT press to select Date time Enter the current time HH MM then the c...

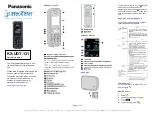
Page 3: ... press to answer an internal call Right Soft key Short press to access the Phonebook from idle mode Short press to select contextual menu DECT 623 DECT 627 Handset Pick up Recall key Press to take the line and answer a call To insert R for operator services when on line Hang up key A short press to hang up the line or to exit return to idle mode A long press to power off the handset Left Soft key ...

Page 4: ...The alarm clock is activated An external call is in progress When blinking this symbol indicates that there is an incoming external call in progress or that the line is already busy An internal call is in progress When blinking this symbol indicates that there is an incoming internal call The keypad is locked The handset loudspeaker is activated Icons on the base display only DECT 627 The remote a...

Page 5: ...ress to switch the answer machine ON or OFF Play Stop key Short press to play message Short press to stop playback while listening to a message Long press to enter answer machine setting mode setting ok Paging key Press to locate all handsets Loudspeaker Skip back Replay key If pressed within 1 second of message playback Skip to pre vious message If pressed after 1 second of message playback Repla...

Page 6: ...cking your DECT 623 627 12 Installing the base station 13 Installing and replacing the batteries in the handset 13 Battery life and range 13 Configuration mode 14 Handset power Off On and keypad lock unlock 14 Introduction Idle mode 15 Understanding the menu system 15 Basic principles 16 In call features 17 Editing systems 18 SMS Write and send new SMS 19 View SMS 20 Inbox 21 Outbox 22 Draft folde...

Page 7: ...s 38 Handset name 40 Auto answer 40 Language 40 Advance settings Dial mode 41 Flash time 41 Voice language only DECT 627 42 Security 42 Registration 43 Unregistration 43 Reset 43 Network service Operator services 44 Answer machine DECT 627 Keys 45 Display 46 Saved messages 46 Delete answer machine messages 47 Answer machine settings 47 Outgoing messages 49 Record and listen to a memo 50 Remote con...

Page 8: ...rom idle mode to enter the menu press the Left soft key LSK MENU Use the Navigation keys to go up or down in the menu list Outbox Resend Save as Draft Delete Delete all Edit Draft Send Delete Delete all Edit SMS Center 3 Clock Alarm Date Time Alarm Off On Once On Daily Enter Date Time Default Center Select SMS center Alarm Tone Alarm tone 1 2 3 ...

Page 9: ...age Enter name Enter number List of names List of names List of names Level 1 2 3 HS RingVolume HS Ringtone KeyTone SMSTone On Off List of languages Enter PIN Adv Settings Flash Time Dial Mode Tone Pulse Short Medium Long Change PIN Enter PIN Handset list Select Group Security Registration Unregistration Reset Call Barring Enter PIN Nr 1 2 3 4 Yes No Enter new PIN Group Melody Select melody for gr...

Page 10: ... key label Function MENU Initiate a menu function SELECT Choose the current selection OK Confirm the current settings entry or function BACK Go back to the previous screen PHBK Access Phonebook list MUTE Mute the handset microphone UNMUTE Unmute the handset microphone SILENT Stop the incoming ring tone CLEAR Clear the current character and shift the cursor to the left SAVE Save in phonebook STOP S...

Page 11: ...ed to high voltages Do not allow the charging contacts or the battery to come into contact with conductive materials Never use any battery type other than the one supplied risk of explosion Handsfree activation could suddenly increase the volume in the earpiece to a very high level Make sure the handset is not too close to your ear Environmental care Please remember to observe the local regulation...

Page 12: ...dio spectrum Radio EN 301 406 V1 5 1 2003 The presumption of conformity with the essential requirements regarding Council Directive 1999 5 EC is ensured Date 20 05 2005 Le Mans Product Quality Manager Home Communication Using GAP standard compliance The GAP standard guarantees that all DECTTM GAP handsets and base stations comply with a minimum operating standard irrespective of their make Your DE...

Page 13: ... handsets chargers with power supply units and additional rechargeable batteries Installing the DECT 623 627 Warning You may find in the box the line adaptor delivered separately from the line cable In this case please connect the line adaptor to the line cable before connecting it to the line socket NiMh AAA 550 mAh rechargeable batteries A power supply unit A line cord Unpacking your DECT 627 s ...

Page 14: ... to 50 metres up to 300 metres The warranty does not apply to the batteries and any other components which have a limited lifetime or are exposed to wear Installing the base station Place your product close enough to the telephone and mains power sockets so that the cables will reach To properly install the base station plug the line cord and the power cable into the base station Plug the cord and...

Page 15: ...t countries Press SELECT to choose the country that suits you Browse through the list of operators Press SELECT to choose your operator Your phone is ready to be used If you need to re configurate your DECT 623 627 see page 40 Note If BACK is pressed the handset will show the country selection screen again Handset power OFF and ON To power the handset OFF or ON long press the key Keypad lock unloc...

Page 16: ... displayed on the screen When there are more than 5 sub menus in the list an arrow is displayed between the soft key labels To reach one particular sub menu use the navigation keys and press the Left Soft Key to SELECT Note in idle mode the Phonebook names list is also directly accessible via the Right Soft Key PHBK the Call log via the Down navigation key and the Redial list via the Up navigation...

Page 17: ... key Take the line Press the Down key to directly access the Call log Choose an entry Make the call End a call Warning Upon incoming calls the handset ringer volume can increase in the earpiece Make sure the handset is not too close to your ear when ringing You can also press the key to answer an incoming external call in handsfree mode If you have activated the Auto Answer Mode see page 40 simply...

Page 18: ...ferent Please contact your network provider for more details To switch the handset loudspeaker ON OFF Caller Line Identification and Call waiting To increase decrease the volume of the earpiece and loudspeaker during a call Press again to resume the conversation UNMUTE Press to select MUTE the caller can no longer hear you Press to put the external call on hold the caller can no longer hear you En...

Page 19: ...ter pressing the corresponding key as many times as necessary to reach the desired character In multi tap mode letters available on the alpha numeric key pressed by the user are shown under the header The current case mode is indicated between the soft key labels a or A Case mode Editing system Multi tap Sequence space 1 _ a b c 2 à ä ç å æ d e f 3 è é N g h i 4 ì Γ j k l 5 7 m n o 6 ñ ò ö p q r s...

Page 20: ...page 25 and the SMS leaflet To write and send an SMS to a phone Select Write a SMS option and press SELECT Enter the phone number and press OK or press LSK PHBK and scroll to retrieve the number from the Phonebook list to send SMS from phonebook see page 30 Write and send new SMS Important informations are also available on the SMS leaflet in the box Select Send otherwise if you want to store your...

Page 21: ... subscribed to the Caller Identification Service CLI the display shows the name or the number of the sender Scroll to Inbox and press SELECT Browse the list of SMS and select the message you want to read To read an SMS by using the Inbox menu Press to reach the menu list and press SELECT Press to select VIEW and to see the content of the message To return to the inbox list press BACK Press to sele...

Page 22: ...eived SMS Scroll to Inbox and press SELECT Press to reach the menu list and press SELECT Select Send To save a sender number in the phonebook Press MENU scroll to Save Number and press SELECT Browse the list of SMS and press VIEW to select the one you want to copy the number Enter the name and press OK Scroll to Inbox and press SELECT Press to reach the menu list and press SELECT The number is ins...

Page 23: ...SELECT Press to reach the menu list and press SELECT Outbox All your successfully sent messages are stored in the Outbox up to 20 messages To review sent messages Browse the list of SMS and press VIEW to read the selected message Scroll to Outbox and press SELECT Press to reach the menu list and press SELECT The list of sent messages is displayed Press MENU press to select Edit Browse the list of ...

Page 24: ...ELECT Press to reach the menu list and press SELECT To delete an SMS from the Outbox Press MENU scroll to Delete and press SELECT Browse the list of SMS and press VIEW to select the one to be deleted Scroll to Outbox and press SELECT Press to reach the menu list and press SELECT The selected message will then be deleted immediately This option enables you to delete all SMS in the Outbox list Press...

Page 25: ... delete an SMS from the Draft folder Press MENU scroll to Delete and press SELECT Browse the list of SMS and press VIEW to select the one to be deleted Scroll to Draft and press SELECT Press to reach the menu list and press SELECT The selected message will then be deleted immediately This option enables you to delete all SMS in the Draft folder list Press SELECT to confirm or BACK if you do not wa...

Page 26: ...orresponding numbers To set the SMS centre number s Scroll to SMS Settings and press SELECT Press to reach the menu list and press SELECT To set the default SMS center Choose an SMS center and press SELECT The SMS center number 1 is the default center If you wish to send your SMS through another SMS center you must have specified the corresponding numbers see above To set the SMS centre number s a...

Page 27: ...ey to switch off the alarm and return in idle mode Clock Alarm Date Time Alarm Alarm Tone Scroll to Clock Alarm and press SELECT Press to reach the menu list Press SELECT to confirm To set the date and time of the handset and base station Date Time Enter the current time HH MM After setting the date and time are shown in idle mode Press to select Date Time Enter the current date DD MM Warning If y...

Page 28: ...LECT Scroll to Clock Alarm and press SELECT Press to reach the menu list Browse through the list of alarm tones to hear them and press to SELECT the appropriate one To set the alarm tone Three alarm tones are available The current alarm tone is heard ...

Page 29: ...lected as group ring tones When ringing the ring tone helps you identify the caller s group and the screen shows the caller s name A subscription to the Caller Line identification is necessary Group ring tone Browse through the list to hear the ring tones and select your chosen group ring tone for this entry No Group or Group A B C To enter a new entry in the phonebook To store a number from predi...

Page 30: ... number is automatically inserted in the number field press OK Browse through the list to hear the ring tones and select your chosen group ring tone for this entry View There are two possibilities of accessing the phonebook list from the Phonebook menu by selecting the sub menu List Entry from the idle mode or when the line is connected by pressing the RSK PHBK The names are listed in alphabetical...

Page 31: ...trieve the number from the Phonebook list Press SELECT to check the number and press OK if you want to store your SMS scroll to Save as Draft and press SELECT The stored SMS can be later retrieved from the Draft folder Enter the text and press OK see page 18 Note To delete a wrong character press CLEAR You can delete and change any character by simply moving the cursor to the left or to the right ...

Page 32: ...croll to Edit Entry and press SELECT Enter the new name see page 18 Editing system and press OK Scroll to Phonebook and press SELECT Press to reach the menu list Enter the new number and press OK Browse through the list to hear the ring tones and select your chosen group ring tone for this entry To edit an entry Browse through the list of names and press SELECT Press CLEAR to delete character by c...

Page 33: ...s empty the screen displays List empty To view the call log Press to call Scroll to select a call log entry Press to view the call log detail directly To call redial Note To be able to call back a caller in the case of an incoming call you need to subscribe to the Caller Line Identification service Note The word New on the right of the entry number indicates the caller s information has not been r...

Page 34: ... tone is heard and the screen will show the call log again To delete all call log entries Press SELECT to select Call log Press to directly reach the call log Scroll to Delete All and press OK Press OK to confirm deletion of the complete call log list A confirmation tone is heard and then the phone returns to the idle mode Press SELECT to select Call log Press MENU to access the menu ...

Page 35: ...se VIEW Press the Up or Down navigation key to view the details of the previous or next record Press to call Browse through the redial list to select the wanted number Press to directly reach the redial list in idle mode To call redial To store a number from redial in the phonebook Press to select MENU Enter the name see page 18 Editing system and press OK Browse through the redial list to select ...

Page 36: ...ach the redial list Scroll to Delete and press SELECT Then the screen will show the redial list again To delete whole redial list Press to select MENU Press to directly reach the redial list Scroll to Delete All and press SELECT Press OK to confirm deletion of the complete redial list List Empty will be shown and then the phone returns to the idle mode ...

Page 37: ...nction may not be available OR Hang up the current internal call and then Press to accept the external call and put the internal call on hold Incoming external call during an intercom call press to accept the incoming external call Call transfer to a specific handset when on line Note If there is no answer from the called handset you can resume the call on the first handset If the called handset t...

Page 38: ...ence The 3 people can share the conversation Conference call via the in call options Note If there is no answer from the called handset you can resume the call on the first handset If the called handset takes the line both internal callers can talk Conference call allows one external call to be shared with two handsets in intercom The 3 people can share the conversation No operator subscription is...

Page 39: ...Personalize and press SELECT Press to reach the menu list The currently selected contrast level is highlighted Browse through the contrast levels to see the difference and press to SELECT the appropriate one To set the display contrast Contrast Three display contrast levels are available To set the handset ring volume or silence mode Handset Tones Three ring volume levels and Ring Off silence are ...

Page 40: ...to SELECT the appropriate one To set the group ring tones Scroll to Group Melody and press SELECT This menu enables you to select and set the melodies to be played in case of an external incoming call with CLI enabled and when the number is known in the phonebook and set as a group There are 3 groups of caller see page 28 Phonebook Group ring tones You can associate 1 ring tone to each group A B C...

Page 41: ... Press to reach the menu list To activate deactivate the auto answer mode Auto Answer Select On or Off and press SELECT Allows you to set Auto Answer ON or OFF If ON you can answer a call by simply lifting the handset from the charging cradle The default setting is Auto Answer Off Scroll to Language and press SELECT Scroll to Personalize and press SELECT Press to reach the menu list To change the ...

Page 42: ...hem Note This setting allows you to select pulse dialling also called Loop disconnect which is used in countries without DTMF tone dialling capability or when using old PABX Scroll to Flash Time and press SELECT Scroll to Adv Settings and press SELECT Press to reach the menu list To change the flash time Flash Time Browse to select Short or Medium or Long and press SELECT This setting is useful wh...

Page 43: ...different barrings numbers Scroll to Call Barring and press SELECT Enter your PIN code and press OK Browse to select the barring Number 1 2 3 or 4 to be changed and press SELECT Enter the barring number e g 00 to bar international calls and press OK Repeat the last 2 steps to enter or change further call barring numbers Note If you have already changed the PIN code you will be prompted to enter th...

Page 44: ...andset first press the paging key on the base for approx 5 seconds when the base is in idle mode Then carry out the following steps on the handset within one minute To unregister a handset Scroll to Unregistration and press SELECT Scroll to Adv Settings and press SELECT Press to reach the menu list Choose the handset to unregister from the list and press SELECT Note If you have your handset servic...

Page 45: ...Service and press SELECT Press to reach the menu list Enter or retrieve from the phonebook the number to which the calls are to be forwarded and press OK The number is automatically chained to the call forward prefix and the phone dials the number To activate deactivate Services Browse through the list of services and press SELECT Scroll to Net Service and press SELECT Press to reach the menu list...

Page 46: ...e all handsets Loudspeaker Skip back Replay key If pressed within 1 second of message playback Skip to pre vious message If pressed after 1 second of message playback Replay cur rent message Volume keys To adjust the base volume level Base 627 Display with backlight Backlight will be ON when there are new answer machine messages or answer machine memory is full Icons see page 46 Delete key Short p...

Page 47: ... to switch the answer machine ON or OFF When the answering machine is ON it will answer the call after a certain number of rings depending on the setting see page 48 After answering the call the answering machine will play your welcome message and record the message left by the caller if any Saved messages To listen to new message s The LCD backlight is ON and the base display shows that there is ...

Page 48: ... and the base LCD backlight will be ON continuously Answer machine settings In the answer machine setting sequence the following items can be modified one after the other in the fixed order all settings must be done in a row 1 Outgoing message selection 1 2 2 Ring delay 1 7 3 Call screening ON OFF 4 Remote access code s e t t i n g o k Volume adjustment Sequence 1 To select the answer mode and the...

Page 49: ...ivate deactivate call screening on the base After having confirmed the number of ring delays see above you may select call screening ON or OFF The loudspeaker icon will flash and all other icons except power will be cleared Press or to select call screening ON or OFF If call screening OFF has been selected the loudspeaker icon will be crossed through setting ok Press to confirm the selected call s...

Page 50: ...lcome message the default welcome message will automatically be restored The maximum recording time for a welcome message is 60 seconds You do not need to delete your previously recorded welcome message to record a new one Once you record a new welcome message the old one will be overwritten To record your personal outgoing message To record welcome message 1 for Answer record mode first check if ...

Page 51: ...the selected outgoing message is automatically played Press to delete the personal outgoing message during playback and to restore the default outgoing message Note The default outgoing messages cannot be deleted Record and listen to a memo This feature allows you to leave local messages for your family on the answer machine The maximum recording time for a memo is 180 seconds Press until a long b...

Page 52: ...e dial Delete dial 4 3 2 1 0 Warning The remote control access is only possible if the remote access code is NOT the default 00 Remote access OFF see page 49 You can access your answering machine when you are away by using any tone dialling phone Default settings Handset Ringer volume Level 2 Handset Ringtone Melody 1 Group A melody Melody 1 Group B melody Melody 2 Group C melody Melody 3 Handset ...

Page 53: ...achine of my Philips phone together with my Fax Both are plugged into the same line Why is this DECT 627 only To avoid this it is recommended to set up the number of rings before the answering machine switches on Example if the network mail box or a fax is set to answer the calls after 4 rings please set up your answering machine on 3 rings To set up the number of rings please see page 48 6 What i...

Page 54: ...does not record the messages left by my callers How do I solve this problem Check the operator voice mail box is not activated If it is activated set the answering machine so that it starts recording first set up the number of rings before the answering machine switches on 11 Which are the conditions required to be able to send an SMS You must first have a subscription to Caller Display CLI servic...

Page 55: ...n reached Base station is already busy with another handset The DECT 623 627 base station or mains power pack are too close to electrical appliances The service is not activated Move the handset slightly Clean the contact with a cloth moistened with alcohol No need to charge SOLUTIONS Check the connections Reset the phone unplug and plug back in the mains Charge the batteries at least 24 hours Mov...

Page 56: ...he wrong DSL filter slot Defective DSL filter s Make sure you have one DSL filter plugged directly on each line socket used in the house Check the modem and the phone are plugged in the correct filter slot one specific for each The filter s can be defective Replace it them and make another test www philips com support CAUSES PROBLEMS SOLUTIONS The answer machine does not record messages The remote...

Page 57: ...unlock 2 14 L Language menus 14 40 Line settings 41 Listening to messages Answer machine 46 Local message Memo 50 Loudspeaker base 4 45 Louspeaker handset 2 17 M Make calls 1 16 17 30 32 34 Memo 50 Menu overview 7 9 Microphone handset 2 Mute 17 N Navigation in menus 15 Network services 44 New entry phonebook 28 Number of rings for answer machine 48 O ON OFF handset 14 ON OFF answer machine 45 46 O...

Page 58: ......

Reviews: