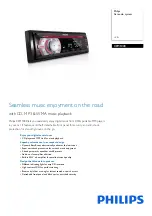
background image

CE131

Register your product and get support at

www.philips.com/welcome

EN 

 User 

manual 

3

ES-AR 

Manual del usuario


23

PT-BR 

Manual do Usuário 

51

=+7:

Ԛ͂ʹ˫

77

=+&1

Ⴌ߀൱Ҭ

97

Summary of Contents for CE131/00

Page 1: ...CE131 Register your product and get support at www philips com welcome EN User manual 3 ES AR Manual del usuario 23 PT BR Manual do Usuário 51 7 Ԛ ʹ 77 1 Ⴌ߀ Ҭ 97 ...

Page 2: ...udio 8 Turn on 12 Set clock 12 4 Listen to radio 13 Tune to a radio station 13 Store radio stations in memory 13 Tune to a preset station 13 Play from USB 14 Insert a card 14 Play options 14 Connect external sound source 15 6 Adjust sound 16 Adjust volume 16 Mute 16 Turn Dynamic Bass Boost DBB on off 16 Turn on off MAX sound 16 Select preset equalizer 16 Switch music listening zone 16 Other sound ...

Page 3: ...recycled and reused 1 Important Safety Read and understand all instructions before you use your apparatus If damage is warranty does not apply This apparatus is designed for negative ground earth 12V DC operation only a safe and comfortable level Improper fuses can cause damage or consult a professional Use only the supplied mounting hardware for a safe and secure installation control batteries to...

Page 4: ...ectronic products The correct disposal of your old product helps prevent potentially negative consequences on the environment and human health Your product contains batteries covered by the be disposed of with normal household waste Please inform yourself about the local rules on separate collection of batteries The correct disposal of batteries helps prevent potentially negative consequences on t...

Page 5: ...M or AM MW radio Audio from USB devices Audio from SD SDHC card Audio from other external devices The unit supports the following media format What s in the box Check and identify the contents of your package a Main unit with a sleeve b Front panel c Trim plate d Carrying case e ISO male connector f Rubber cushion g Screw x 1 pc h Disassembly tools x 2 pcs EN ...

Page 6: ...sound Rotate to adjust volume e ZONE Select tuner band Select MP3 WMA folder Switch music listening zone Overview of the main unit a SOURCE Select audio source b MENU Access system menu c Return to previous menu d m o n g p f e a d c b q r l k j i h EN ...

Page 7: ...leads are connected Ensure that all loose leads are insulated with electrical tape Ensure that the leads do not get caught under screws orin parts that will move e g seat rail Ensure that all ground earth leads are run to a common ground earth point Use only the supplied mounting hardware for a safe and secure installation f MP3 LINK Connect external audio device g Unlock the panel h USB socket i ...

Page 8: ...t all times Note on the power supply lead yellow When you connect other devices to this circuit is higher than the total fuse value of all the connected devices Notes on speaker connection Never connect speaker wires to the metal body or chassis of the car Never connect speaker wires with stripes to one another Connect wires ISO male connectors Caution Ensure that all loose leads are insulated wit...

Page 9: ...nt right speaker 3 FRONT LINE OUT L Socket Front left speaker 4 REAR LINE OUT R Socket Rear right speaker 5 REAR LINE OUT L Socket Rear left speaker 6 OE REMOTE Purple OE Remote 7 TEL MUTING Blue To cellular phone system 8 REAR AUX Yellow Aux right left Tip The pin arrangement for the ISO connectors depends on the type of vehicle you drive Be sure to make proper connections to prevent damage to th...

Page 10: ... side of the panel in the chassis until it is correctly engaged 3 Press the right side of the panel until it is locked into place 4 Install the sleeve into the dashboard and Note 5 Place the supplied rubber cushion over the end of the mounting bolt 6 Slide the unit into the dashboard until you hear a click sound 183 mm 53 5 mm EN ...

Page 11: ...H CLOCK 24H View clock MAX SOUND until the clock is displayed Press any key to cancel the clock display Turn on Press press and hold until the unit is turned off Select country region Note the unit can not work properly 1 Press to turn on the unit SELECT OPERATING REGION is displayed 2 Rotate to select an option USA United States EUR Western Europe RUS Russia AUS Australia EAS Middle East ASI G F ...

Page 12: ...seconds The station is saved in the selected channel Tune to a preset station 1 Press ZONE to select band 2 Press the numeric button to select a preset station 4 Listen to radio Tune to a radio station 1 Press SOURCE repeatedly to select radio mode 2 Press ZONE repeatedly to select band FM1 FM2 FM3 AM1 AM2 3 Press and hold or to tune to a radio station manually The radio station is broadcast To se...

Page 13: ...n current folder 3 Press 5 Play audio files Play from USB Note Ensure that the USB device contains playable music Insert the USB device 1 Slide the USB socket cover marked to the left 2 Insert the USB device into the USB socket The unit starts to play from the USB device automatically Remove the USB device 1 Press to turn off the unit 2 Remove the USB device Insert a card Note This unit supports S...

Page 14: ...onent Search in other folder 1 Press The name of the current folder is displayed 2 Rotate to navigate through all folders 3 Press to access the selected folder from the selected folder automatically Tip View play information DISP repeatedly to view Track number and elapsed play time Folder File Album Artist Title Repeat play 1 REP REP is displayed 2 Rotate to select a setting REP TRK repeat one tr...

Page 15: ...o adjust the preset EQ AUDIO settings 1 Press EQ AUDIO for 3 seconds 2 Press or repeatedly to select the item to be adjusted BAS bass range 7 to 7 TRE treble range 7 to 7 BAL balance range 12L to 12R F 6 Adjust sound Adjust volume Turn clockwise counterclockwise to increase decrease volume Mute You can turn off the sound of your audio again Turn Dynamic Bass Boost DBB on off 1 Press DBB and the cu...

Page 16: ... turn off automatically after the unit is idle for 10 or 20 seconds 1 Press MENU 2 Press repeatedly until BKO is displayed 3 Rotate to select a setting BKO 10 S Turn off the screen automatically 10 seconds after last operation BKO 20 S Turn off the screen automatically 20 seconds after last operation BKO OFF Never turn off the screen Turn demo mode on off 1 Press MENU 2 Press repeatedly until DEMO...

Page 17: ...it is idle for more displayed DEMO OFF Turn off the demo mode Dimmer 1 Press MENU 2 Press or repeatedly until DIMMER is displayed 3 Rotate to select a setting DIMM HIGH dimmer high DIMM LOW dimmer low Dance You can turn on or off the spectrum on the LCD display 1 Press MENU 2 Press or repeatedly until DANCE is displayed 3 Rotate to select a setting DANCE ON Turn on the spectrum DANCE OFF Turn off ...

Page 18: ...itional information Detach the front panel You can detach the front panel to deter theft 1 Press to release the panel 2 Push the left side of the panel rightward 3 Pull the panel towards you to disengage it from the chassis 4 Store the panel in the supplied carry case to protect it from dirt or damage Replace fuse 1 Check the electric connection 2 Buy a fuse that matches the voltage of the damaged...

Page 19: ...oduct information Note Product information is subject to change without prior notice Power supply J F negative ground Fuse 15 A Suitable speaker impedance 4 8 Maximum power output 50 W x 4 channels Continuous power output 22 W x 4 RMS 4 10 T H D Pre Amp output voltage 2 5V Aux in level 500 mV Dimensions W x H x D 182 x 52 x 144 7 mm Weight 0 86 kg Radio Frequency range FM 87 5 108 0 MHz 100kHz per...

Page 20: ...sing this requesting service If the problem remains G F G ensure that your apparatus is nearby and the model number and serial number are available No power or no sound Car engine is not on Turn the car engine on Cable is not correctly connected Check connections Fuse is burnt Replace fuse Volume is too low Adjust volume the RESET button Ensure that the track played is of a compatible format Noise...

Page 21: ... ݧ Ⴙ Ⴙ Ⴙ ݡ ᇍࠋჱෑᄡᆢӌൔႬ ࡵ ߺ ك ഷທྈࠋ ёĶ ሴྔ Ӆ Ⴌ߀ൔ Ⴌ ۂ ሴྔ Ӆ ߺ ࣦߐؗ ᄳӲ ᇛ ಝࠋ ؗ ఇಪപ ґӅᄳӲ ᇛ ෩ ݡ ཏ 7KLV ORJR UHIHUV WR WKH SHULRG HDUV GXULQJ ZKLFK WKH WR LF RU KD DUGRXV VXEVWDQFHV RU HOHPHQWV FRQWDLQHG LQ HOHFWURQLF LQIRUPDWLRQ SURGXFWV ZLOO QRW OHDN RU PXWDWH VR WKDW WKH XVH RI WKHVH VXEVWDQFHV RU HOHPHQWV ZLOO QRW UHVXOW LQ DQ VHYHUH HQYLURQPHQWDO SROOXWLRQ DQ ERGLO LQMXU RU GDPDJH WR DQ DVVHWV Ճሙ 1DPH RI ...

Page 22: ... 2011 Koninklijke Philips Electronics N V All rights reserved CE131_IFU_00_V2 0 ...

Reviews: