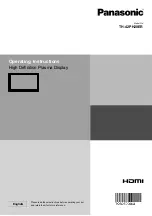
background image

h

TH-42PH20E

Operating Instructions

High De

fi

 nition Plasma Display

Model No.

English

Please read these instructions before operating your set 
 and retain them for future reference.

Summary of Contents for TH42PH20E

Page 1: ...h TH 42PH20E Operating Instructions High Definition Plasma Display Model No English Please read these instructions before operating your set and retain them for future reference ...

Page 2: ...le of Contents Important Safety Notice 3 Safety Precautions 4 Accessories 7 Accessories Supply 7 Remote Control Batteries 7 Connections 8 Speaker connection 8 AC cord connection and fixing cable fixing 8 Video equipment connection 9 VIDEO and COMPONENT RGB IN connection 9 HDMI connection 10 DVI D IN connection 10 PC Input Terminals connection 11 SERIAL Terminals connection 12 Power On Off 13 Selec...

Page 3: ...s noise to appear To avoid the possibility of harm to this appliance keep it away from sources of strong electromagnetic fields IMPORTANT THE MOULDED PLUG IMPORTANT THE MOULDED PLUG FOR YOUR SAFETY PLEASE READ THE FOLLOWING TEXT CAREFULLY This display is supplied with a moulded three pin mains plug for your safety and convenience A 10 amp fuse is fitted in this plug Shall the fuse need to be repla...

Page 4: ...al accessory leave a space of 10 cm or more at the top left and right and 7 cm or more at the rear and also keep the space between the bottom of the display and the floor surface If using some other setting up method follow the manual of it If there is no specific indication of installation dimension in the installation manual leave a space of 10 cm or more at the top bottom left and right and 7 c...

Page 5: ... electric shocks Do not do anything that may damage the power cable When disconnecting the power cable pull on the plug body not the cable Do not damage the cable make any modifications to it place heavy objects on top of it heat it place it near any hot objects twist it bend it excessively or pull it To do so may cause fire and electric shock If the power cable is damaged have it repaired at your...

Page 6: ... from direct or reflected light from your Plasma Display Cleaning and maintenance The front of the display panel has been specially treated Wipe the panel surface gently using only a cleaning cloth or a soft lint free cloth If the surface is particularly dirty wipe with a soft lint free cloth which has been soaked in pure water or water in which neutral detergent has been diluted 100 times and the...

Page 7: ...nstallation can cause battery leakage and corrosion that will damage the remote control transmitter Disposal of batteries should be in an environment friendly manner Observe the following precaution 1 Batteries shall always be replaced as a pair Always use new batteries when replacing the old set 2 Do not combine a used battery with a new one 3 Do not mix battery types example Zinc Carbon with Alk...

Page 8: ...AC cord be absolutely sure to disconnect theAC cord plug at the socket outlet first Using the clamper Secure any excess cables with clamper as required When using the Wall hanging bracket vertical Note When using the Wall hanging bracket vertical TY WK42PV20 use the holes and to secure the cables If the clamper is used on the hole the cables may be caught by the wall hanging bracket AC cord connec...

Page 9: ...SLOT Terminal board optional accessories insert slot see page 4 Note The right side slot is for terminal board with 2 slot width The terminal board with 1 slot width does not function when installed in the right side slot AV IN VIDEO Composite Video Input Terminal see below COMPONENT RGB IN Component RGB Video Input Terminal see below AV IN HDMI HDMI Input Terminal see page 10 DVI D IN DVI D Input...

Page 10: ...D player HDMI cable Stereo mini plug M3 DVI video cable Within 5 m PC with DVI D video out Pin No Signal Name Pin No Signal Name 1 T M D S data 2 13 2 T M D S data 2 14 5 V DC 3 T M D S data 2 shield 15 Ground 4 16 Hot plug detect 5 17 T M D S data 0 6 DDC clock 18 T M D S data 0 7 DDC data 19 T M D S data 0 shield 8 20 9 T M D S data 1 21 10 T M D S data 1 22 T M D S clock shield 11 T M D S data ...

Page 11: ...r computers with DOS V compatible Mini D sub 15P terminal The computer shown in the illustration is for example purposes only Additional equipment and cables shown are not supplied with this set Do not set the horizontal and vertical scanning frequencies for PC signals which are above or below the specified frequency range Component Input is possible with the pin 1 2 3 of the Mini D sub 15P Connec...

Page 12: ... to wait for the response for the first command to come from this unit before sending the next command If an incorrect command is sent by mistake this unit will send an ER401 command back to the computer S1A and S1B of Command IMS are available only when a dual input terminal board is attached COMPUTER RS 232C Straight cable D sub 9p Communication parameters Signal level RS 232C compliant Synchron...

Page 13: ...uring operation of the power management function the power indicator turns orange in the power off state Connecting the plug to the Wall Outlet Notes Main plug types vary between countries The power plug shown at right may therefore not be the type fitted to your set When disconnecting the AC cord be absolutely sure to disconnect the AC cord plug at the socket outlet first Press the Power switch o...

Page 14: ...g on the unit Following screen will be displayed when the unit is turned on for the first time Select the items with the remote control Unit buttons are invalid OSD Language PRESENT TIME Setup Display orientation 1 Select the language 2 Set 1 Select DAY or PRESENT TIME 2 Setup DAY or PRESENT TIME 1 For vertical installation select Portrait 2 Set Notes Once the items are set the screens won t be di...

Page 15: ...back from the equipment which has been connected to the Plasma Display Input signals will change as follows PC COMPONENT DVI HDMI VIDEO PC PC input terminal in PC IN VIDEO Video input terminal in AV IN VIDEO COMPONENT Component or RGB input terminal in COMPONENT RGB IN HDMI HDMI input terminal in AV IN HDMI DVI DVI input terminal in DVI D IN COMPONENT may be displayed as RGB depending on the setti...

Page 16: ...0 Enter Aspect button see page 18 20 Remote control sensor Main Power On Off Switch Power Indicator The Power Indicator will light Power OFF Indicator not illuminated The unit will still consume some power as long as the power cord is still inserted into the wall outlet Standby Red Orange When Slot power is set to On See page 45 Orange Depending on the type of the function board installed when the...

Page 17: ... see page 15 Digital Zoom see page 19 AUTO SETUP button Automatically adjusts the position size of the screen see page 22 SET UP button see page 20 SOUND button see page 26 Volume Adjustment Press the Volume Up or Down button to increase or decrease the sound volume level R button see page 20 Press the R button to return to previous menu screen OFF TIMER button The Plasma Display can be preset to ...

Page 18: ... mode please see List of Aspect Modes page 50 4 3 Zoom 16 9 For PC signal input For SD signal input 525 480 60i 60p 625 575 50i 50p 4 3 Zoom1 16 9 Zoom2 Zoom3 14 9 Just 4 3 Zoom1 16 9 Zoom2 Zoom3 14 9 Just Notes The aspect mode is memorized separately for each input terminal Do not allow the picture to be displayed in 4 3 mode for an extended period as this can cause a permanent image retention to...

Page 19: ...es This is shown in the image being displayed Return to normal display quit Digital Zoom Press to exit from the Digital Zoom The cursor will move Notes When power goes OFF including Off Timer operation Digital Zoom terminates The Digital Zoom function cannot be selected while in the following operation state When MULTI DISPLAY Setup is On see page 36 When Screensaver except for Negative image is r...

Page 20: ...screen will switch Normal Viewing Picture Sound Pos Size Setup 2 Select the item 25 0 0 0 5 Picture Normal Normalise Normal Brightness Sharpness Picture Mode Colour Contrast Hue Colour Management Advanced settings White balance Normal Off Example Picture menu Select Select Press 3 Set Set Set Press 4 Exit the menu Press Press to return to the previous menu MENU Press several times ...

Page 21: ... 21 Overview Note Menu that cannot be adjusted is grayout Adjustable menu changes depending on signal input and menu setting On Screen Menu Displays Page 24 25 25 0 0 0 5 Picture Normal Normalise Normal Brightness Sharpness Picture Mode Colour Contrast Hue Colour Management Advanced settings White balance Normal Off MULTI DISPLAY Setup Off Horizontal Scale 2 Vertical Scale 2 Seam hides video Off L...

Page 22: ...controlled by the Picture Pos Size function 4 Auto Setup H Pos V Pos H Size V Size Dot Clock and Clock Phase are automatically adjusted when the RGB or PC signal is received This setting is enabled under the following conditions This setting only support single screen display Multiple display is not supported When Component RGB in Select or YUV RGB in select in the Setup menu see page 38 is set to...

Page 23: ...d When the Display size is set to On in the Options menu this setting will be invalid see page 44 Notes If the dot clock frequency is 108 MHz or higher Dot Clock and Clock Phase cannot be made When digital RGB signal input Dot Clock and Clock Phase cannot be made Auto Setup may not work when a cropped or dark image is input In such case switch to a bright image with borders and other objects are c...

Page 24: ...e and colour of the selected Picture menu to something else adjust using the items in the Picture menu see next page 1 2 Press to display the Picture menu Press to select the menu to adjust Select the desired level by looking at the picture behind the menu Select to adjust each item Press or button to switch between modes While the Picture menu is displayed if either the N button on the remote con...

Page 25: ...eenish Adjusts for nice skin colour Sharpness Less More Adjusts picture sharpness Notes Carry out W B adjustment as follows 1 Adjust the white balance of the bright sections using the W B High R W B High G and W B High B settings 2 Adjust the white balance of the dark sections using the W B Low R W B Low G and W B Low B settings 3 Repeat steps 1 and 2 to adjust Steps 1 and 2 affect each other s se...

Page 26: ...ds Balance Adjusts left and right volumes 3 Press to exit from adjust mode SDI Sound Output This menu is displayed when HD SDI Terminal Board with audio TY FB10HD is installed to the unit 2 2 Sound Out Left Channel Right Channel Channel 1 Channel 1 Off Level Meter Off SDI Sound Output Item Details Left Channel Channel 1 to Channel 16 Selects left audio channel Right Channel Channel 1 to Channel 16...

Page 27: ...ssing or button once changes PRESENT TIME 1 minute Pressing or button continuously changes PRESENT TIME by 15 minutes Press to select Set Press to store PRESENT TIME Setup Notes Set cannot be selected unless PRESENT TIME is set Unless setting the present time other than 99 99 DAY and PRESENT TIME can not be set The settings of DAY and PRESENT TIME are reset when leaving the display turned off for ...

Page 28: ...s set to On press to select Start Press to start Screensaver The menu screen will disappear and the Screensaver will be activated To stop the Screensaver under On press the R button or any buttons on the main unit Note When the display is turned off the Scrensaver will be deactivated Press to select Mode Press to select each mode items Off Interval OperateswhenPeriodicTimeandOperating Time are set...

Page 29: ...de is On or Off Press to select Start Time Finish Time When Time Designation is selected Press to select Periodic Time Operating Time When Interval is selected Press to select Screensaver duration When Standby after SCR Saver is selected Press to setup button Forward button Back Note Timer function will not work unless PRESENT TIME is set Notes Pressing or button once changes the Time 1 minute How...

Page 30: ...ide panels This function may be applicable to the non picture area Off Darken both ends Low Make it dark gray Mid Make it gray High Make it light gray Notes To reduce the occurrence of image retention set the Side panel to High The side panel may flash alternate black white depending on the picture being shown on the screen Using Cinema mode will reduce such flashing side panel 4 3 Screen Display ...

Page 31: ... Extended life settings 1 select 2 access 2 Select the input to apply the settings Apply to current input Apply to all inputs Extended life settings 1 select 2 set 3 Select Yes Apply to current input No Yes Extended life settings 1 select 2 set NANODRIFT Saver Moves the display position of the screen slightly to reduce image retention on the display panel Off NANODRIFT Saver does not operate Min M...

Page 32: ...ff 30 Recommended settings 1 select 2 adjust When a menu is locked it is grayed out and cannot be set Picture Mode and Contrast will no longer be able to set in the Picture menu and they are labeled with icon to indicate their locked status 30 0 0 0 5 Picture Normal Normalise Brightness Sharpness Picture Mode Colour Contrast Hue Colour Management Advanced settings White balance Normal Off Extended...

Page 33: ...icator lights up orange When pictures HD VD sync signals are subsequently detected Power is turned on the power indicator lights up green Notes This function operates only during PC signal input This function is effective when Sync is set to Auto Component RGB in select is set to RGB and during normal viewing one picture screen DVI D Power management When this function is set to On it operates und...

Page 34: ...ONENT DVD1 DVD2 DVD3 Blu ray1 Blu ray2 Blu ray3 CATV VCR STB Skip HDMI HDMI DVD1 DVD2 DVD3 Blu ray1 Blu ray2 Blu ray3 CATV VCR STB Skip DVI DVI DVD1 DVD2 DVD3 Blu ray1 Blu ray2 Blu ray3 CATV VCR STB Skip PC PC DVD1 DVD2 DVD3 Blu ray1 Blu ray2 Blu ray3 CATV VCR STB Skip Skip The INPUT button press will skip its input 1 SLOT INPUT is displayed when a Terminal Board is installed 2 COMPONENT may be di...

Page 35: ...lect your preferred language Selectable languages Selecting the On Screen Menu Language 1 2 Display orientation Sets the fan control and the display style of on screen menu for vertical installation Press to display the Setup menu Press to select Display orientation Press to select Landscape or Portrait Press to exit from adjust mode 1 2 3 Notes Turn up the power switch for the upward direction wh...

Page 36: ...enlarged picture may be displayed across all screens For this mode of operation each plasma display has to be set up with a Display number to determine its location Example group of 16 4 4 group of 4 2 2 group of 9 3 3 group of 25 5 5 Item Details MULTI DISPLAY Setup Select On or Off Horizontal Scale Select 1 2 3 4 5 Vertical Scale Select 1 2 3 4 5 Seam hides video Select On or Off To hide joints ...

Page 37: ...ss the button on the remote control Press one of for the tens digit setting Press one of for the units digit setting 4 Notes The numbers in 2 3 and 4 should be set up quickly Adjustable ID number range is 0 99 If a number button is pressed more than two times the first two numbers become the ID number for the remote control ID Cancellation Press button on remote control This has the same effect as...

Page 38: ...Component RGB or PC input terminals Y PB PR signals Component RGB signals RGB 1 2 Press to display the Setup menu Press to select the Component RGB in select Press to select the desired input signal Component RGB Press to exit from adjust mode Note Make setting of the selected input terminal COMPONENT RGB IN or PC IN 3 YUV RGB in select Select to match the signals from the source connected to the ...

Page 39: ...Freq kHz Hz 63 98 60 02 Signal Format 1280 1024 60 RGB Cinema reality Noise reduction XGA Mode Auto Off Off Auto 39 3D Y C Filter For NTSC AV images This menu is displayed when BNC Dual Video Terminal Board TY FB9BD is installed to the unit Select Signal from the Setup menu during Video S Video input signal Signal AV menu is displayed Press to select the 3D Y C Filter NTSC Press to set On Off Note...

Page 40: ...setting only affects the following signal input NTSC PAL signal input during AV S Video input signal 525i 480i 625i 575i 1125 1080 60i signal input during Component input signal Colour system Set the colour system to match the input signal When Auto is set Colour system will be automatically selected from NTSC PAL SECAM M NTSC To display PAL60 signal select Auto or PAL Auto SECAM M NTSC NTSC PAL y...

Page 41: ...the following three NR Noise Reduction functions together P NR Mosquito NR Block NR Noise reduction Setup for Input Signals Sets the three NR functions separately Press to select Advanced Press to enter Advanced NR 1 Press to select P NR Mosquito NR or Block NR Press to select Off Min Mid Max 2 P NR Automatically reduces unwanted picture noise Mosquito NR Reduces mosquito noise around subtitles on...

Page 42: ... VBS Uses a synchronized signal of Composite Sync input which is input from the HD connector Setting Component sync signal Confirm that the input is set to Component input this setting is valid only for Component input signal Auto The H and V sync or synchronized signal is automatically selected If both input it is selected the H and V sync on Y Uses a synchronized signal on the Video Y signal whi...

Page 43: ...B depending on the setting of Component RGB in select see page 38 Notes Only the adjusted signal is displayed see page 15 This menu is available only when Input lock is Off Initial VOL level Press button to adjust the volume when the unit is turned on Off On Off Sets normal volume On Sets your preferred volume Notes When Maximum VOL level is On the volume can only be adjusted between 0 and your ma...

Page 44: ... is cancelled Initial Power Mode Normal Standby On Sets the power mode of the unit for when the power recovers from failure or after plugging off and in again Normal Power returns in as the same state as before the power interruption Standby Power returns in standby mode Power Indicator red orange On Power returns in power On Power Indicator green Note When using multiple displays Standby is prefe...

Page 45: ...dby mode and also the power is being supplied to a terminal board the unit will start supplying the power to the board with time delay according to the setting The power indicator lights up red first and it turns orange when the power starts being supplied to the board Clock Display Off Not display the clock On Display the clock The clock is displayed at the lower left of the screen when button is...

Page 46: ...d Timer You can set 7 day timer programming by setting time and command Note Before setting Weekly Command Timer set PRESENT TIME Setup see page 27 Press to select Function Press to select On Note When Function is set to On Set up TIMER see page 27 is unavailable and Interval Time Designation in Mode of Screensaver see page 28 cannot be selected 1 Press to select a day Press to select a program nu...

Page 47: ...d program Pressing or button once changes Time 1 minute Pressing or button continuously changes Time by 15 minutes Command Select a command to execute at the set time This unit has 64 commands to set see page 53 Notes Command is performed in order of execution time regardless of the command number If a command execution time overlaps with that of other commands these commands are performed in numb...

Page 48: ...LOT INPUT A and SLOT INPUT B Image input Audio input SLOT INPUT A SLOT INPUT A VIDEO COMPONENT DVI PC NO AUDIO SLOT INPUT B SLOT INPUT B VIDEO COMPONENT DVI PC NO AUDIO VIDEO SLOT INPUT A SLOT INPUT B VIDEO COMPONENT DVI PC NO AUDIO COMPONENT SLOT INPUT A SLOT INPUT B VIDEO COMPONENT DVI PC NO AUDIO HDMI SLOT INPUT A SLOT INPUT B VIDEO COMPONENT HDMI DVI PC NO AUDIO DVI SLOT INPUT A SLOT INPUT B V...

Page 49: ...expectedly Check the settings of PC Power management DVI D Power management and Auto power off in the Setup menu Any of them may be set to On see page 33 This Plasma Display uses special image processing Hence a slight time lag may occur between image and audio depending on the type of input signal However this is not a malfunction Plasma Display panel Symptoms Check The screen darkens slightly wh...

Page 50: ...e screen is slightly elongated 4 3 4 3 Pictures with a 4 3 aspect ratio are displayed with their original aspect ratio Side panels are displayed at the left and right edges of the screen 4 3 1 4 3 2 The pictures with a 4 3 aspect ratio among the 16 9 aspect ratio signals are displayed with their original aspect ratio The left and right edges of the pictures are masked with side panels 4 3 Full 4 3...

Page 51: ...60 Hz 31 47 59 94 33 54 6 34 24 29 1 024 768 50 Hz 39 55 50 00 51 89 30 1 024 768 60 Hz 48 36 60 00 65 0 65 0 31 1 024 768 70 Hz 56 48 70 07 75 0 32 1 024 768 75 Hz 60 02 75 03 78 75 33 1 024 768 85 Hz 68 68 85 00 94 5 34 1 066 600 60 Hz 37 64 59 94 53 0 53 0 35 1 152 864 60 Hz 53 70 60 00 81 62 36 1 152 864 75 Hz 67 50 75 00 108 0 37 1 280 768 60 Hz 47 70 60 00 80 14 38 1 280 960 60 Hz 60 00 60 0...

Page 52: ...and hold the ENTER button till the Shipping menu is displayed 4 Press the Volume Up or Down button to select YES 5 Press the ENTER button and wait for 10 sec This function allows you to reset the unit to the factory setting Shipping condition 1 2 3 4 Press to display the Setup menu Press to select OSD Language Press for more than 3 seconds Press to select Shipping Press to display the Shipping men...

Page 53: ...WP 1 Swap main picture and sub picture when PIP mode 38 DWA TWN 1 Dual Picture mode Picture and Picture 39 IMS SL1 Input select SLOT INPUT Main Picture when PIP mode 40 IMS S1A Input select SLOT INPUT A Main Picture when PIP mode 41 IMS S1B Input select SLOT INPUT B Main Picture when PIP mode 42 IMS VD1 Input select VIDEO Main Picture when PIP mode 43 IMS YP1 Input select COMPONENT Main Picture wh...

Page 54: ...GA SXGA UXGA compressed Horizontal scanning frequency 15 110 kHz Vertical scanning frequency 48 120 Hz Connection terminals AV IN VIDEO AUDIO L R BNC RCA Pin jack 2 1 0 Vp p 75 Ω 0 5 Vrms HDMI TYPE A Connector COMPONENT RGB IN Y G PB CB B PR CR R AUDIO L R BNC BNC BNC RCA Pin jack 2 with sync 1 0 Vp p 75 Ω 0 7 Vp p 75 Ω 0 7 Vp p 75 Ω 0 5 Vrms DVI D IN AUDIO DVI D 24 Pin Content Protection Stereo m...

Page 55: ...ay be applicable for incorrect disposal of this waste in accordance with national legislation For business users in the European Union If you wish to discard electrical and electronic equipment please contact your dealer or supplier for further information Information on Disposal in other Countries outside the European Union These symbols are only valid in the European Union If you wish to discard...

Reviews: