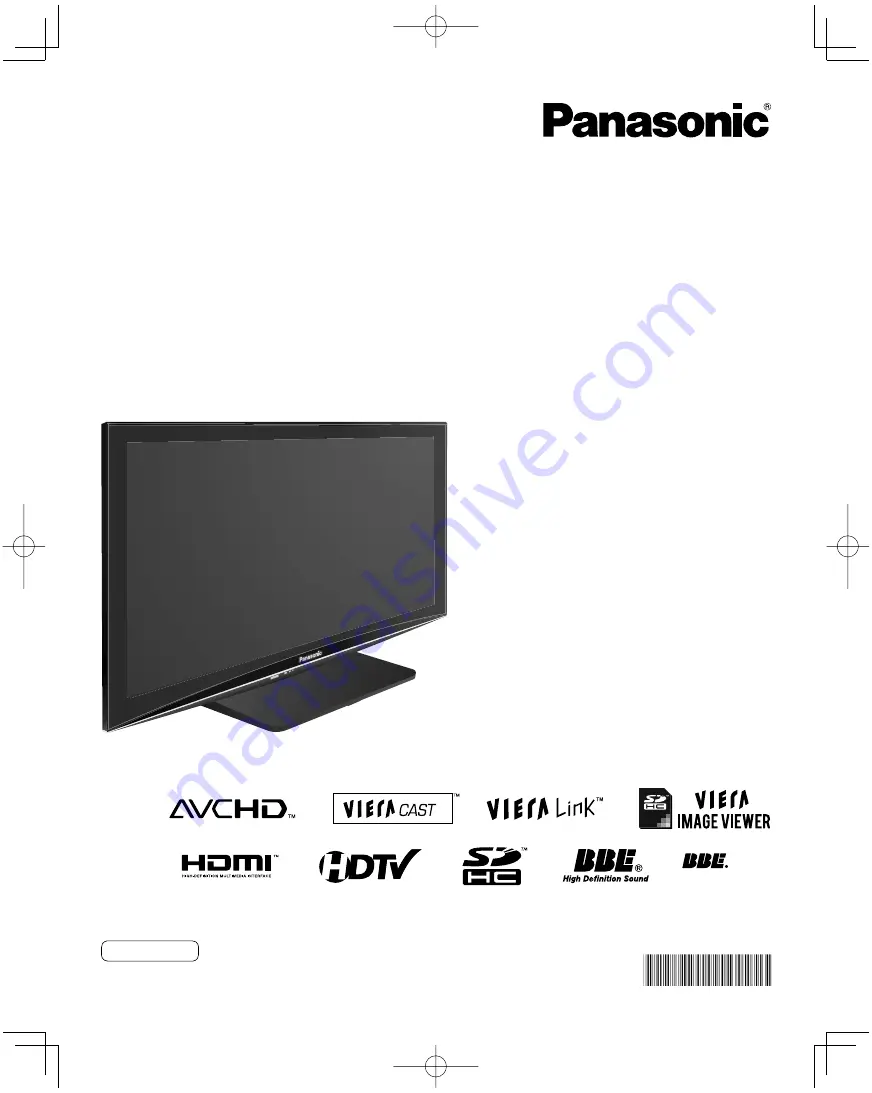
background image

HD3D Sound

ViVA

TM

(Image: TC-P58V10X)

Quick Start Guide

(See page 8-18)

TQB2AA082

9

Operating Instructions

58”/65” Class 1080p Plasma HDTV

(58.0/64.7 inches measured diagonally)

Model No.

TC-P58V10X
TC-P65V10X

English

Please read these instructions before operating your set and retain them for future reference.
The images shown in this manual are for illustrative purposes only.

Summary of Contents for TC-P58V10X

Page 1: ...ating Instructions 58 65 Class 1080p Plasma HDTV 58 0 64 7 inches measured diagonally Model No TC P58V10X TC P65V10X English Please read these instructions before operating your set and retain them for future reference The images shown in this manual are for illustrative purposes only ...

Page 2: ... logo and High Definition Multimedia Interface are trademarks or registered trademarks of HDMI Licensing LLC Manufactured under license from Dolby Laboratories Dolby and the double D symbol are trademarks of Dolby Laboratories Turn your own living room into a movie theater Experience an amazing level of multimedia excitement Image TC P58V10X ...

Page 3: ...dio Out 53 Using Timer 54 Recommended AV Connections 55 Ratings List for Lock 56 Technical Information 57 Care and Cleaning 61 FAQ 62 Specifications 64 Enjoy your TV Basic Features Advanced Features FAQs etc Safety Precautions 4 Notes 7 Please read before using the unit Accessories Optional Accessory 8 Basic Connection 11 Identifying Controls 15 First Time Setup 16 Quick Start Guide Enjoy rich mul...

Page 4: ...point where they exit from the apparatus 11 Only use attachments accessories specified by the manufacturer 12 Use only with the cart stand tripod bracket or table specified by the manufacturer or sold with the apparatus When a cart is used use caution when moving the cart apparatus combination to avoid injury from tip over 13 Unplug this apparatus during lightning storms or when unused for long pe...

Page 5: ...rd plug with wet hands Do not do anything that might damage the power supply cord When disconnecting the power supply cord hold the plug not the cord Do not use the power supply cord if the plug or cord is damaged Replace the cord or contact your Authorized Service Center Handling the power supply cord Insert the power plug fully into the socket outlet If the power plug is loose it could generate ...

Page 6: ... cause a fire This Plasma TV radiates infrared rays therefore it may affect other infrared communication equipment Install your infrared sensor in a place away from direct or reflected light from your Plasma TV The TV will still consume some power as long as the power supply cord is connected to the wall outlet Display panel is made of glass Do not apply strong force or impact to the display panel...

Page 7: ... saver is automatically activated after a few minutes if no signals are sent or no operations are performed p 63 Typical still images Channel number and other logos Image displayed in 4 3 mode SD Card photo Video game Computer image Set up Do not place the unit where it s exposed to sunlight or other bright light including reflections Use of some types of fluorescent lighting may reduce the remote...

Page 8: ...anese batteries Do not use rechargeable Ni Cd batteries Do not burn or break batteries Accessories Cleaning cloth RS232C terminal Specifications Optional Accessory Note In order to maintain the TV s performance and safety be absolutely sure to ask your dealer or a licensed contractor to secure the wall hanging brackets Carefully read the instructions accompanying the plasma TV stand or pedestal an...

Page 9: ...ws firmly B Fix securely with assembly screws B Total 4 screws Rear side Arrow mark Pole Hole for pedestal installation Pole Base Bottom view Image TC P58V10X Warning Do not disassemble or modify the pedestal Otherwise the TV may fall over and become damaged and personal injury may result Caution Do not use any other TV and displays Otherwise the TV may fall over and become damaged and personal in...

Page 10: ...n terminals HDMI terminal green blue red green Firmly tighten by hand Match colors of plugs and terminals Insert firmly Insert firmly Reference of connection To attach To remove Insert it firmly until the tabs on both sides click into place Keep pushing both side snaps and pull down ...

Page 11: ... National Television System Committee Conventional broadcasting ATSC Advanced Television Systems Committee Digital TV Standards include digital high definition television HDTV standard definition television SDTV data broadcasting multi channel surround sound audio and interactive television If no Cable Box AC Cord Connect after all the other connections have been made Back of the TV Cable TV AC 11...

Page 12: ...corder VCR To record playback DVD Recorder If the source has a higher resolution signal 480p 720p 1080i 1080p connection can be made with the use of a Component Video or HDMI cable p 14 VCR Connection can be made with the use of an RF cable and Composite Video S Video cable p 14 VHF UHF Antenna TV AV Equipment e g DVD Recorder or VCR Back of the TV AC Cord AC 110 127 V 60 Hz VHF UHF Antenna AV Equ...

Page 13: ... B D A C Example 3 Connecting DVD recorder VCR and satellite receiver DVD Recorder or VCR Satellite Receiver TV VHF UHF Antenna You can enjoy high definition programming by subscribing to high definition satellite service Connection can be done with the use of HDMI or Component Video cable p 14 Note For details of external equipment connections please refer to the operating manuals for the equipme...

Page 14: ... 39 B To use COMPONENT terminals COMPONENT IN 1 2 VIDEO AUDIO R PR PB Y L R P P Y L VIDEO AUDIO R R P P Y L L R Y PB PR COMPONENT VIDEO OUT AUDIO OUT white red green blue red white red green blue red white red green blue red e g Blu ray Disc player AV Equipment Recorders may also be connected to COMPOSITE or S VIDEO terminals see below C To use S VIDEO terminals VIDEO IN 1 S VIDEO R PR PB Y L R L ...

Page 15: ...RA TOOLS p 21 Selects OK Change Returns to previous menu Channel up down Displays or removes the channel banner p 20 Operates the Favorite channel list function p 20 Numeric keypad to select any channel p 19 or press to enter alphanumeric input in menus p 18 26 30 42 44 46 48 50 53 54 Use for digital channels p 19 Identifying Controls Note The TV consumes a limited amount of power as long as the p...

Page 16: ...are selecting the mode for store demonstration Yes No If you select Yes the picture mode will regularly reset to Vivid and a Picture Refresh message will be displayed on the screen select ok Select No and return to previous screen If you select Yes Screen enters store demonstration mode To display the Please select your viewing environment screen again as shown above and select Home Use do one of ...

Page 17: ... channels Scans digital and analog channels Analog only Scans Analog channels only Digital only Scans Digital channels only Confirm registered channels program Cancel Apply Caption Favorite Add Yes Yes Yes l select Apply ok If OK is not pressed after selecting Apply the channels will not be saved The channel will be saved when no operation is performed for 60 seconds and the Manual program menu wi...

Page 18: ...ock Mode Year Month Day Hour Minute Time zone DST set select item Year Select the year Month Select the month Day Select the day Hour Adjust the hour Minute Adjust the minute Time zone Select your time zone EST CST MST PST AKST HST NST AST Auto setting Auto 2009 2009 6 11 8 07AM Clock Mode Year Est On Timezone DST DST Set DST Daylight Saving Time setting On Off On Advances the clock one hour from ...

Page 19: ...reception between cable TV and antenna p 16 51 The channel number and volume level remain the same even after the TV is turned off Listen with SAP Secondary Audio Program Select Audio Mode for watching TV Digital mode Press SAP to select the next audio track if available when receiving a digital channel Audio track 1 of 2 English Analog mode Press SAP to select the desired audio mode Each press of...

Page 20: ...ith the cursor or use number buttons see below Set Favorite Feature 1 Display the SUB MENU SUB MENU 2 Select Set favorite All Setup SUB MENU Edit CH caption Signal meter Set favorite Channel surf mode select ok 3 Set the displayed channel Set favorite 1 3 26 1 1 2 3 4 5 select the list number save the displayed channel select the list number to save the channel without pressing OK or Delete a favo...

Page 21: ...lect the item select next Displayed DCC setting menu DCC Digital Cinema Color p 34 Select DCC setting Off On Auto Displayed THX setting menu P 59 Select Picture mode setting THX Standard Vivid Studio ref Game Custom Start VIERA CAST p 28 Displayed VIERA Link control menu Select the equipment you want to access VIERA Link control only with the TV s remote control p 42 43 Start Network Camera viewin...

Page 22: ...rd automatically is Off Display SD card Using VIERA TOOLS p 21 or Menu Picture Audio VIERA Link SD card Closed caption Setup Select the item SD card Photo viewer Movie player select ok Photo viewer Go to p 24 Select the movie to be listed Movie player No Date and time Duration 12 20 2008 01 17 2009 03 07 2009 04 24 2009 06 10 2009 08 19 2009 10 02 2009 10 13 2009 12 01 2009 10 26 14 25 07 25 09 25...

Page 23: ...RA Link control Speaker output Record now Stop recording Select change On Movie settings Picture Audio VIERA Link Repeat Select change Repeat Turn the Movie play Repeat function On or Off Change Audio current status In Display current audio status Each press of SAP will change the audio mode If the movie has multiple audio signals stereo Current audio status It may take several seconds to change t...

Page 24: ...11 Pana0012 select view Thumbnail view To Slideshow Selected picture information is displayed Total number of images Note Depending on the JPEG format Information contents may not be displayed correctly Refer to p 58 Data format for SD card browsing for details View Next Rotate Prev RETURN Play Displays one at a time To display hide Navigation area Return to Thumbnail view Accessing Next Prev Rota...

Page 25: ... RETURN Name Pana0001 Date 03 04 2009 Size 1029 1200 Photo viewer All photos 03 04 2009 Total 32 Pana0001 Pana0002 Pana0003 Pana0004 Pana0011 Pana0012 Pana0013 Pana0014 Pana0055 Pana0056 Pana0057 Pana0058 select view Return to previous screen Photo settings In or Adjust the picture Display Photo settings example Picture menu Picture menu Audio menu p 34 0 0 Vivid Picture 1 2 Picture mode Contrast ...

Page 26: ... The terminal and label of the connected equipment are displayed To label each of the inputs please refer to p 53 Note The input label will be displayed on Input select screen if Input label is set on p 53 For side input terminals HDMI 4 Video 2 GAME input label is set as default Picture mode is set to Game refer to p 59 For more details for picture mode setting refer to p 59 For Input label refer...

Page 27: ...sed caption Setup select next Select VIERA Link settings Setup 2 2 VIERA CAST setting About VIERA Link settings Network setting select next Select VIERA Link On Yes Yes TV No No VIERA Link settings VIERA Link Power on link Power off link Default speakers Stand by power save Auto power stand by select Select On default is On change Now you can set each VIERA Link function according to your preferen...

Page 28: ...iew This screen is an example It varies according to the usage conditions Depending on the usage conditions it may take a while to read all the data Other settings To use VIERA Link function 1 Display Menu 2 Select VIERA Link Menu VIERA Link Picture Audio select ok 3 Select the item and set Recorder VIERA Link control Record now Stop recording VIERA Link p 34 42 select set To adjust picture and au...

Page 29: ...m is far from the TV and or you have more TVs in the house you may want to use a wireless network Connecting to the Internet A Basic connection If you are not using the network for connecting anything else but the TV you could just connect the TV directly to the Cable DSL Ethernet connection see schematic below B Advanced wired connection If you are using the network for connecting various PCs Lap...

Page 30: ... Network Camera in VIERA Link Using VIERA TOOLS p 21 Network Camera TV VIERA Link control Speaker output Record now Stop recording select ok There is also an option to start with sensor detection View Multi screen Still image Without Default camera Default camera setting p 31 R 4 cam 8 cam Select OK RETURN 1 9 Camera name Camera 1 Model BL C210A Multi screen 1 9 Select OK RETURN R 4 cam 8 cam Came...

Page 31: ...r this operation please refer to the operating manual for the Network camera Search condition also depends on Network setting p 44 Remove camera information Yes to delete camera information Disconnect to camera Yes to delete camera connection Disconnected will be displayed in Status Set this camera as default camera Yes to set to the default use Displayed Default next to camera name Available only...

Page 32: ...an also listen to PC sound with the audio cable connected To connect PC p 55 Display the Input select menu Input select TV 1 2 3 4 5 6 7 8 Component 1 Component 2 HDMI 1 HDMI 2 HDMI 3 Video 1 Video 2 9 0 PC AUX GAME HDMI 4 GAME GAME Select PC PC Displays PC screen Corresponding signals p 60 To return to TV ...

Page 33: ...artially or is blurred H position Adjusts the horizontal position V position Adjusts the vertical position Clock phase Alleviates the problem if the whole picture appears to flicker or is blurred First adjust the Dot Clock to get the best possible picture then adjust the Clock Phase so that a clear picture appears Note It may not be possible to display a clear picture due to poor input signals Inp...

Page 34: ...D card SD card Closed caption Closed caption Menu list Various menus allow you to make settings for the picture sound and other functions so that you can enjoy watching TV best suited for you Press to exit from a menu screen Press to return to the previous screen Display menu Displays the functions that can be set varies depending on the input signal Select the menu Menu VIERA Link Picture Audio T...

Page 35: ...2 Select Size 1 if noise is generated on the edges of the screen Size 1 Selected item for HD size Scanning 95 Size 2 Selected item for HD size Scanning 100 HD size Size1 Adjust horizontal display range to reduce noise of both side edges of an image Size 1 Size 2 Size 2 Adjust image size according to aspect mode for reducing noise p 60 H size Size 1 Resets Bass Treble and Balance adjustments to fac...

Page 36: ...SD card automatically About Reset to defaults How to Use Menu Functions Menu list Sub menu list Various menus allow you to make settings for the picture sound and other functions so that you can enjoy watching TV best suited for you Press to exit from a menu screen Press to return to the previous screen Display menu Displays the functions that can be set varies depending on the input signal Select...

Page 37: ...equipment p 40 No Yes with reminder Yes no reminder Auto power stand by No Selects the default speakers p 40 TV Theater Default speakers TV Sets Network setting p 44 Network setting Sets VIERA CAST setting p 46 VIERA CAST setting Set Network Camera status Search Registration Connection Deleting Default setting etc p 30 Network cameras list To conserve energy the TV automatically turns off when NO ...

Page 38: ...we have developed and added As such its operation with other manufacturers equipment that supports HDMI CEC cannot be guaranteed Please refer to the individual manuals for other manufacturers equipment supporting the VIERA Link function Version Operations HDAVI Control or later Automatic Input Switching p 41 Power on link p 41 Power off link p 41 Default speakers p 41 One touch theater playback p ...

Page 39: ... HDMI and audio cables If audio cable is not connected you cannot listen to the TV program through the theater system Connecting this unit to a DVD recorder DIGA and AV amp When using a VIERA Link audio video amplifier and a compatible DVD recorder DIGA use a daisy chain connection as shown below One AV amp and one DVD recorder DIGA can be operated with this unit Be sure to connect the AV amp betw...

Page 40: ...ct Select On default is On change Select settings On Yes Yes TV No No VIERA Link settings VIERA Link Power on link Power off link Default speakers Stand by power save Auto power stand by select Set On Yes Yes Theater No No VIERA Link settings VIERA Link Power on link Power off link Default speakers Stand by power save Auto power stand by change Automatic Input Switching Power on link Power off lin...

Page 41: ...t in use TV is the default setting To set the Home Theater system as default speakers change the default speakers setting from TV to Theater Sound will be output from the Home Theater whenever the TV is powered on If the ONE TOUCH PLAY key is pressed on the remote control for Panasonic Home Theater system the following sequence of operations is performed automatically Home Theater power switches O...

Page 42: ...creen Press to return to the previous screen Display VIERA Link menu Select the item Recorder TV VIERA Link control Speaker output Record now Stop recording select set or next Select Home theater TV VIERA Link control Speaker output Record now Stop recording change Set Speaker control VIERA Link control only with the TV s remote control for HDAVI Control 2 or later Direct TV Recording for HDAVI Co...

Page 43: ...items that can be connected is three for recorders and a total of three for Home theater Player Camcorder LUMIX Note There is a limit to the number of HDMI connectors Operate the equipment with the TV s remote control pointing it at the TV To operate the equipment read the manual of the equipment Recorder TV VIERA Link control Speaker output Record now Stop recording select change You can select a...

Page 44: ...ergy saving select Select the item and adjust Network setting 2 2 MAC address 12 34 56 78 80 ab LAN speed setting Automatic LAN speed 10BASE half duplex Software update Network setting 1 2 Connection test Succeeded IP setting mode Automatic IP address 192 168 0 5 Subnet mask 255 255 255 0 Default gateway 192 168 0 254 DNS setting mode OK Primary DNS 192 168 0 20 Automatic Secondary DNS 192 168 0 2...

Page 45: ...matic When DNS automatic acquisition in DHCP can be used Network setting 1 2 Connection test Succeeded IP setting mode Automatic Default gateway 192 168 0 254 DNS setting mode OK Primary DNS 192 168 0 20 Automatic Secondary DNS 192 168 0 21 The acquired address is displayed select ok Each IP address is acquired automatically If you are using a broadband router IP automatic acquisition in DHCP can ...

Page 46: ...caption Setup select set or next Select VIERA CAST setting Setup 2 2 Advanced setup About Reset to defaults VIERA Link settings Network setting VIERA CAST setting Network Cameras list ECO energy saving select Select the item and adjust VIERA CAST setting Proxy address Proxy port 0 Connection test select Connection test Proxy setting Proxy address Proxy port Entering characters ...

Page 47: ...ting is only required if specified by the provider Select Proxy address and Press OK Proxy port This number is specified by the provider together with the proxy address Select Proxy port and Press OK Enter the Port number Proxy port 0 select ok or VIERA CAST setting Proxy address Proxy port 0 Connection test select ok Enter address see Entering characters below Proxy address prI o Select OK If you...

Page 48: ...your 4 digit password A 4 digit code must be entered to view a blocked program or change rating settings RETURN Password Enter password If it is your first time entering the password enter the password twice in order to register it Select the Lock mode Off Off Off Off Off Lock Mode Channel Game VIERA CAST Change password Program set select Off Unlocks all the lock settings of Channel Game Program ...

Page 49: ...lish ratings C F L R Canadian French ratings Select the rating to be locked select Example of MPAA U S movie ratings NR No rating G General Audience All ages admitted PG Parental Guidance Suggested PG 13 Parents Strongly Cautioned Inappropriate for children under 13 R Restricted Under 17 requires accompanying parent or adult guardian NC 17 No one 17 and under admitted X Adults only To get more inf...

Page 50: ...k ANT Cable setup Connected devices Anti image retention Reset to defaults Language All Channel surf mode next select Select the function Cable ANT Cable setup ANT in Auto program Manual program Signal meter next select Set To reset the settings of setup menu Select Reset to defaults in Setup menu and press OK Input your 4 digit password with number buttons Select YES on the confirmation screen an...

Page 51: ...nnel select Press OK to tune to the channel Select Apply program Cancel Apply Caption Favorite Add Yes el select Apply ok Select Edit Manual program Edit Cancel Apply Caption Favorite Add 2 Yes 3 Yes 4 Yes 5 Yes Channel select next Select the item to be edited R G B Y Select RETURN OK Manual program Edit Cancel Apply Caption Favorite Add 2 Yes 3 Yes 4 Yes 5 Yes 6 Yes 7 Yes 8 Yes 9 Yes Channel Prev...

Page 52: ...ct the setting Primary Second Service 3 Service 4 Service 5 Service 6 The settings in Analog or Digital depend on the broadcaster To make more in depth display settings in digital programs Select Digital setting and press OK Select the item and set Automatic Automatic Automatic Automatic Automatic Automatic Automatic Automatic Digital setting Size Foreground Font Style Fore opacity Background Back...

Page 53: ... AUX RECEIVER COMPUTER Blu ray CAMERA DVD REC HOME THTR MONITOR MEDIA CTR MEDIA EXT OTHER For the PC terminal only SKIP is available If SKIP is selected the INPUT button press will skip its input Each selected label will be displayed on Input select screen p 26 Audio out Stop output of the audio To prevent howling stops output of audio specified in this menu p 36 Select the terminal and set Off On...

Page 54: ...et Timer Sleep Timer 1 Timer 2 Timer 3 Timer 4 Timer 5 select next Turns Off automatically Sleep Turns On Off automatically 5 timers can be set Timer 1 Timer 5 Set the timer To set Sleep Off Timer Set to shut the unit off after a pre selected amount of time 60 Sleep Sleep minutes set 0 30 60 90 minutes To set Timer 1 5 On Off Timer Select the item and set On TV 10 3 7 6 FRI 1 15 AM 12 45 AM Timer ...

Page 55: ...tch digital video image DVD Player Set Top Box DVD Player or Set Top Box HDMI compatible machines only Connect with A or B A HDMI cable B HDMI DVI Conversion cable Audio cable 1 or Amplifier OPTICAL IN or Front of the TV 1 Please see p 34 35 for setup when using an external analog audio cable with an HDMI to DVI cable 2 For details about the RS232C command contact Customer Care p 66 67 Note that w...

Page 56: ... ENGLISH RATINGS C E L R E Exempt Exempt programming includes news sports documentaries and other information programming talk shows music videos and variety programming C Programming intended for children under age 8 No offensive language nudity or sexual content C8 Programming generally considered acceptable for children 8 years and over No profanity nudity or sexual content G General programmin...

Page 57: ...e aspect modes This lets you choose the aspect depending on the format of the received signal and your preference p 20 e g in case of 4 3 image FULL JUST FULL JUST Enlarges the 4 3 image horizontally to the screen s side edges Recommended for anamorphic picture Stretches to justify the 4 3 image to the four corners of the screen Recommended for normal TV broadcast H FILL 4 3 H FILL Side bar Enlarg...

Page 58: ...F Exchangeable Image File Format Note Format the card with the recording equipment The picture may not appear correctly on this TV depending on the recording equipment used Display may take some time when there are many files and folders This function cannot display Motion JPEG and still image not DCF formatted i e TIFF BMP Data modified with a PC may not be displayed Images imported from a PC mus...

Page 59: ...umed All signals are reformatted before being displayed on the screen If the connected device has an aspect adjustment function set the aspect ratio to 16 9 These HDMI connectors are type A These HDMI connectors are compatible with HDCP High Bandwidth Digital Content Protection copyright protection A device having no digital output terminal may be connected to the input terminal of either COMPONEN...

Page 60: ...th sides to reduce noise Aspect Ratio FULL JUST H FILL ZOOM Size 1 Size 2 The width will be increased on both sides to reduce noise See pages 34 35 for more information Input signal that can be displayed Mark Applicable input signal for Component Y PB PR HDMI and PC horizontal frequency kHz vertical frequency Hz COMPONENT HDMI PC 525 480 60i 15 73 59 94 525 480 60p 31 47 59 94 750 720 60p 45 00 59...

Page 61: ...otherwise the quality of the cabinet surface may be adversely affected or the coating may peel off Furthermore do not leave it for long periods in contact with articles made from rubber or PVC Pedestal Cleaning Wipe the surfaces with a soft dry cloth If the unit is particularly dirty clean it using a cloth soaked with water to which a small amount of mild liquid dish soap has been added and then w...

Page 62: ...eak check the antenna and consult your local dealer The remote control does not work Are the batteries installed correctly p 8 Are the batteries new Pictures from external equipment are distorted when the unit is connected via HDMI Is the HDMI cable connected properly p 39 55 Turn Off the TV unit and equipment then turn them On again Check an input signal from the equipment p 60 Use equipment comp...

Page 63: ...ometimes a few pixels may be bright or dark These pixels do not indicate a defective panel and will have no impact on the performance of the TV Check nearby electrical products car or motorcycle ignition systems fluorescent lamp etc Check Picture menu p 34 Check the cable connections p 11 14 Check that the correct input has been selected p 26 Check the channel settings p 50 Check the antenna cable...

Page 64: ...ONENT IN 1 2 Y 1 0 V p p including synchronization PB PR 0 35 V p p AUDIO L R RCA PIN Type 2 0 5 V rms HDMI 1 4 TYPE A Connector 4 This TV supports HDAVI Control 4 function PC D SUB 15PIN R G B 0 7 V p p 75 Ω HD VD 1 0 5 0 V p p high impedance RS232C Serial D sub 9pin for external control LAN for VIERA CAST IPTV RJ45 10BASE T 100BASE TX Card slot SD CARD slot 1 AUDIO OUT AUDIO L R RCA PIN Type 2 0...

Page 65: ...65 FAQs etc Specifications Peru ...

Page 66: ...Note ...

Page 67: ...Note ...

Page 68: ...Note ...

Page 69: ...Note ...

Page 70: ...Note ...

Page 71: ...Note ...

Page 72: ...Note ...

Page 73: ...Note ...

Page 74: ...his serial number in the space provided below and retain this book plus your purchase receipt as a permanent record of your purchase to aid in identification in the event of theft or loss and for Warranty Service purposes Model Number Serial Number Web Site http panasonic net Panasonic Corporation 2009 Printed in USA ...

Page 75: ...visión de alta definición de 1080p y clase 58 65 de Plasma 58 0 64 7 pulgadas medidas diagonalmente Número de modelo TC P58V10X TC P65V10X Español Lea estas instrucciones antes de utilizar su televisor y guárdelas para consultarlas en el futuro Las imágenes mostradas en este manual tienen solamente fines ilustrativos ...

Page 76: ...el símbolo HDMI y la Interface de Multimedios de Alta Definición son marcas comerciales o marcas registradas de HDMI Licensing LLC Fabricado bajo licencia de Dolby Laboratories DOLBY y el símbolo de la D doble son marcas comerciales de Dolby Laboratories Convierta su propia sala de estar en un cine Sienta un nivel increíble de excitación multimedia Imagen TC P58V10X ...

Page 77: ...caciones para el bloqueo 56 Información técnica 57 Cuidados y limpieza 61 Preguntas frecuentes 62 Especificaciones 64 Disfrute de su televisor Características básicas Funciones avanzadas Preguntas frecuentes etc Precauciones para su seguridad 4 Notas 7 Asegúrese de leer Accesorios Accesorio opcional 8 Conexión básica 11 Identificación de los controles 15 Configuración por primera vez 16 Guía de in...

Page 78: ...mente los accesorios especificados por el fabricante 12 Utilice solamente el aparato con el carrito base trípode soporte o mesa especificado por el fabricante o vendido con el aparato Cuando se utilice un carrito tenga cuidado al mover la combinación del carrito aparato para evitar heridas en el caso de que ésta se dé la vuelta 13 Desenchufe este aparato durante las tormentas eléctricas o cuando n...

Page 79: ...o haga nada que pueda dañar el cable de alimentación de eléctrico Cuando desenchufe el cable de alimentación de eléctrico sujete del enchufe y no el cable No utilice el cable de alimentación si la clavija o el propio cable están dañados Cambie el cable o póngase en contacto con un centro de servicio técnico autorizado Manejo del cable de alimentación Inserte el enchufe de alimentación completament...

Page 80: ...or de plasma radia rayos infrarrojos y por lo tanto puede afectar a otros equipos de comunicación por infrarrojos Instale su sensor de infrarrojos en un lugar alejado de la luz directa de su televisor de plasma o de la luz reflejada por ella El televisor seguirá consumiendo energía eléctrica mientras el cable de alimentación permanezca conectado a la toma de corriente El panel de la pantalla está ...

Page 81: ...ticamente después de pasar unos pocos minutos si no se envían señales o no se realizan operaciones pág 63 Imágenes fijas típicas Números de canales y otros logotipos Imagen visualizada en el modo 4 3 Fotos de tarjetas SD Videojuego Imagen de ordenador Configuración No ponga la unidad donde quede expuesta a la luz solar directa o a luces brillantes incluyendo reflejos La utilización de algunos tipo...

Page 82: ... AA Cable de CA Manual de instrucciones Tarjeta de garantía México Paño de limpieza Especificaciones del terminal RS232C Pedestal TBLX0102 TC P58V10X Ensamblaje pág 9 TBLX0126 TC P65V10X Accesorio opcional Nota Para mantener el rendimiento y la seguridad de la unidad cerciórese absolutamente de pedir a su concesionario o a un contratista calificado que asegure las abrazaderas de suspensión de pare...

Page 83: ... y nivelada Apriete firmemente los tornillos B Fije firmemente con los tornillos de ensamblaje B 4 tornillos en total Lado trasero Flecha Soporte Orificio para la instalación del pedestal Soporte Base Vista de la parte inferior Imagen TC P58V10X Advertencia No desarme ni modifique el pedestal De lo contrario la unidad podría caerse y dañarse y también podría causar heridas a personas Precaución No...

Page 84: ...de Apriete firmemente a mano Haga que concuerden los colores de las clavijas y las terminales Inserte firmemente Inserte firmemente Referencia de las conexiones Para colocar Para remover Insértelo firmemente hasta que las lengüetas de ambos lados queden fijadas en posición haciendo un ruido seco Mantenga presionados los dos cierres laterales y tire hacia abajo ...

Page 85: ...televisión digital incluyen la televisión de alta definición digital HDTV la televisión de definición estándar SDTV la emisión de datos el audio multicanal de sonido envolvente y la televisión interactiva Si no se utiliza receptor de televisión por cable Cable de alimentación de CA Conecte después de haber terminado todas las demás conexiones Parte posterior de la unidad TV por cable 110 127 V CA ...

Page 86: ...ra DVD Si la fuente tiene una señal de resolución más alta 480p 720p 1080i 1080p la conexión se puede hacer usando un cable de vídeo componente o de HDMI pág 14 Videograbadora La conexión se puede hacer utilizando un cable RF o video compuesto S Vídeo pág 14 Antena de VHF UHF TV Equipo de AV ej Grabadora DVD o Videograbadora Parte posterior de la unidad Cable de alimentación de CA 110 127 V CA 60 ...

Page 87: ...receptor de satélite Grabadora DVD o Videograbadora Receptor de satélite TV Antena de VHF UHF Puede disfrutar de los programas de alta definición suscribiéndose a los servicios de compañías de emisión por satélite de alta definición La conexión se puede hacer utilizando HDMI o video componente pág 14 Nota Para conocer los detalles de las conexiones de los equipos externos consulte los manuales de ...

Page 88: ...g 39 B Para utilizar terminales de VIDEO COMPONENTE COMPONENT IN 1 2 VIDEO AUDIO R PR PB Y L R P P Y L VIDEO AUDIO R R P P Y L L R Y PB PR COMPONENT VIDEO OUT AUDIO OUT blanco rojo verde azul rojo blanco rojo verde azul rojo blanco rojo verde azul rojo ej Reproductor de disco Blu ray Equipo de AV Las grabadoras también se pueden conectar a los terminales de VIDEO COMPUESTO o S VIDEO vea más abajo ...

Page 89: ...21 Selección OK Cambio Sale de la pantalla del menú Selecciona canales en orden Visualiza o elimina la bandera de canal pág 20 Controla la función de la lista de canales favoritos pág 20 Teclado numérico para seleccionar cualquier canal pág 19 o para hacer introducciones alfanuméricas en los menús pág 18 26 30 42 44 46 48 50 53 54 Utilización con canales digitales pág 19 Identificación de los cont...

Page 90: ...cciona Sí el modo de imagen se restaurará regularmente a Vívido y un mensaje de Refrescar imagen se mostrará en la pantalla Seleccione Aceptar Seleccione No y vuelva a la pantalla anterior Si selecciona Sí la pantalla entra en el modo de demostración de mostrador Para visualizar otra vez Por favor seleccione el ambiente de uso como se muestra arriba Realice algo de lo siguiente para volver a selec...

Page 91: ...n automáticamente Todos los canales Explora canales digitales y análogos Sólo analógico Explora canales análogos solamente Sólo digital Explora canales digitales solamente Confirme los canales registrados ma manual Cancelar Aceptar Títulos Favoritos Agregar Sí Sí Sí Seleccione Aceptar Aceptar Si no se pulsa OK después de seleccionar Aceptar los canales no se memorizarán El canal se guardará cuando...

Page 92: ... NST No Reloj Modo Año Mes Día Hora Minuto Huso hor H Verano Establezca Seleccione elemento Año Seleccione el año Mes Seleccione el mes Día Seleccione el día Hora Ajuste la hora Minuto Ajuste el minuto Huso hor Seleccione su zona horaria EST CST MST PST AKST HST NST AST Ajuste Auto Auto 2009 2009 6 11 8 07AM Reloj Modo Año Est Sí Huso hor H Verano H Verano Establezca el ajuste DST Horario de ahorr...

Page 93: ... entre televisión por cable y antena pág 16 51 El número del canal y el nivel del volúmen se fijan incluso después de apagar el televisor Escucha con SAP Programa de audio secundario Seleccione el modo de audio para ver la televisión Modo digital Pulse SAP para seleccionar la siguiente pista de audio si está disponible cuando se recibe un canal digital Pista de audio 1 de 2 Inglés Modo analógico P...

Page 94: ...el cursor o usando las teclas de números vea debajo Configuración de la función de favoritos 1 Visualice el submenú SUB MENU 2 Seleccione Configurar favorito Todos Ajuste SUB MENU Editar título del canal Medidor de señal Configurar favorito Modo de navegación Seleccione Aceptar 3 Ajustar el canal visualizado Configurar favorito 1 3 26 1 1 2 3 4 5 Seleccionar el número de la lista Guardar el canal ...

Page 95: ...cione el elemento Seleccione Siguiente Menú Ajuste DCC visualizado DCC Digital Cinema Color pág 34 Seleccione el ajuste DCC No Sí Auto Menú Ajuste THX visualizado pág 59 Seleccione el ajuste de modo de imagen THX Estándar Vívido Ref estudio Juego Usuario Inicie VIERA CAST pág 28 Menú Control VIERA Link visualizado Seleccione el equipo al que quiera acceder Control VIERA Link sólo con el mando a di...

Page 96: ... SD auto se encuentra en No Visualice Tarjeta SD Utilización de VIERA TOOLS pág 21 o Menú Imagen Audio VIERA Link Tarjeta SD Subtítulos Ajuste Seleccione el elemento Tarjeta SD Visualizador de fotos Reproductor de vídeo Seleccione Aceptar Visualizador de fotos Vaya a pág 24 Seleccione los datos que va a ver Reproductor de vídeo Num Fecha y hora Duración 12 20 2008 01 17 2009 03 07 2009 04 24 2009 ...

Page 97: ... Grabador Interno Control VIERA Link Salida altavoz Iniciar grabación Detener grabación Seleccione Cambie Sí Menu de peliculas Imagen Audio VIERA Link Repetir Seleccione Cambie Repetir Encienda o apague la función Repetir reproducción de película Cambiar el estado del sonido actual En Visualice Estado del sonido actual Cuando se pulsa SAP se visualiza el estado del sonido actual Si la película tie...

Page 98: ... de imagen miniatura a diapositiva Se visualiza información de la imagen seleccionada Número total de imágenes Nota Dependiendo del formato JPEG el contenido de Información puede que no se visualice correctamente Consulte la pág 58 Formato de datos para examinar tarjetas SD para conocer detalles Vea la imagen Siguíente Rota Previo RETURN Repr Visualizado uno cada vez Para visualizar ocultar el áre...

Page 99: ... 2009 Tamaño 1600 1200 Pana0001 Pana0002 Pana0003 Pana0004 Pana0011 Pana0012 Pana0013 Pana0014 Pana0055 Pana0056 Pana0057 Pana0058 Visualizador de fotos Todas las fotos 03 04 2009 Total 32 Seleccione Ver Para volver a la pantalla anterior Menu de imágenes fijas En o Ajustar la imagen Visualice Menu de imágenes fijas Ejemplo Menú Imagen Menú Imagen Menú Audio pág 34 0 0 Vívido Imagen 1 2 Brillo Mod...

Page 100: ...s segundos HDMI 1 JUEGO Terminal ejemplo Etiqueta El terminal y el título del equipo conectado se visualizan Para cambiar la etiqueta de entrada pág 53 Nota Cuando se establezca el título de entrada consulte la pág 53 el título de entrada se visualizará en la pantalla Seleccionar entrada Para terminales de entrada laterales HDMI 4 Video 2 el título de entrada JUEGO se establece de forma predetermi...

Page 101: ...os Ajuste Seleccione Siguiente Seleccione Ajuste VIERA Link Ajuste 2 2 Ajuste VIERA Link Configuración de red Ajuste de VIERA CAST Network Camera Seleccione Siguiente Seleccione VIERA Link Sí Sí Sí Interno No No Ajuste VIERA Link VIERA Link Prende control Apaga control Altavoz inicial Ahorro energía en espera Energía en espera automática Seleccione Seleccione Sí La opción predeterminada es Sí Camb...

Page 102: ...nnel Seleccione ver Esta pantalla es un ejemplo Cambia según las condiciones de uso Dependiendo de las condiciones de uso leer todos los datos puede tardar un rato Otros ajustes Para usar la función VIERA Link 1 Visualice Menú 2 Seleccione VIERA Link Menú VIERA Link Imagen Audio Seleccione Aceptar 3 Seleccione el elemento y establezca Grabador Control VIERA Link Iniciar grabación Detener grabación...

Page 103: ...lejos del televisor y o usted tiene más de un televisor en casa podría elegir utilizar una red inalámbrica Conexión a Internet A Conexión básica Si no está usando la red para conectar otra cosa que no sea el TV podrá conectar directamente el televisor al conector Ethernet de cable DSL vea el dibujo esquemático de abajo B Conexión alámbrica avanzada Si está usando la red para conectar muchos PC ord...

Page 104: ...n de VIERA TOOLS pág 21 Cámara de red Interno Control VIERA Link Salida altavoz Iniciar grabación Detener grabación Seleccione ver También hay un inicio con detección de sensor Vea la imagen Multi pantalla imagen fija Sin cámara predeterminada Configuración de cámara predeterminada pág 31 R 4 o 8 cámaras Selección OK RETURN 1 9 Nombre de cámara Cámera 1 Modelo BL C210A Multi pantalla 1 9 Selección...

Page 105: ... operación consulte el manual de funcionamiento de la cámara de red La condición de búsqueda también depende de Configuración de red pág 44 Borrar la información de la cámara Sí para borrar la información de la cámara Desconectar a cámara Sí para borrar la conexión de la cámara Desconectado se mostrará en Estado Poner como cámara predeterminada Sí para establecer el uso predeterminado Se muestra S...

Page 106: ...sonido del PC con el cable de audio conectado Para conectar el PC pág 55 Visualización del menú de selección de entrada Seleccionar entrada TV 1 2 3 4 5 6 7 8 Componente 1 Componente 2 HDMI 1 HDMI 2 HDMI 3 Video 1 Video 2 9 0 PC AUX JUEGO HDMI 4 JUEGO JUEGO Seleccione PC PC Visualiza la pantalla del PC Señales correspondientes pág 60 Para volver al televisor ...

Page 107: ...anjas verticales o parpadea o queda borrosa parcialmente Pos horiz Ajusta la posición horizontal Posición vert Ajusta la posición vertical Fase de reloj Alivia el problema si toda la imagen parece que parpadea o está borrosa Ajuste primero el reloj de puntos para obtener una imagen tan buena como sea posible y luego ajuste la fase de reloj para que aparezca una imagen clara Nota Tal vez no sea pos...

Page 108: ...arjeta SD Tarjeta SD Subtítulos Subtítulos Lista de menús Varios menús le permiten seleccionar configuraciones para la imagen el sonido y otras funciones para que usted pueda disfrutar viendo la televisión como usted desee Pulse para salir de la pantalla de menú Para volver a la pantalla anterior Visualice el menú Visualiza las funciones que pueden establecerse cambia según la señal de entrada Sel...

Page 109: ...es de la pantalla Tamaño 1 Elemento seleccionado para Tamaño de HD Exploración del 95 Tamaño 2 Elemento seleccionado para Tamaño de HD Exploración del 100 Tamaño de HD Tamaño 1 Ajustar el margen de visualización horizontal para reducir el ruido a ambos lados de una imagen Tamaño 1 Tamaño 2 Tamaño 2 Ajustar el tamaño de la imagen en función del modo de aspecto para eliminar el ruido pág 60 Tamaño d...

Page 110: ...dor de señal Cómo utilizar las funciones de los menús Lista de menús Varios menús le permiten hacer ajustes para la imagen el sonido y otras funciones para poder disfrutar viendo la TV de la forma que a usted más le convenga Pulse para salir de la pantalla de menú Para volver a la pantalla anterior Visualice el menú Visualiza las funciones que pueden establecerse cambia según la señal de entrada S...

Page 111: ...do no se recibe ninguna señal y no se realiza ninguna operación durante más de 10 minutos Sí No Nota No se utiliza cuando se configura Autoencendido Cronómetro Bloqueo Modo SD o el canal digital Si no hay señal por 10 minutos fue activado se visualizará durante unos 10 segundos cuando el televisor se encienda por primera vez después de desconectarse la alimentación mediante Si no hay señal por 10 ...

Page 112: ...lado y agregado Como tal su funcionamiento con equipos de otros fabricantes que soportan HDMI CEC no puede ser garantizado Consulte los manuales individuales de los equipos de otros fabricantes que soportan la función VIERA Link Versión Operaciones HDAVI Control o posterior Cambio de entrada automático pág 41 Prende control pág 41 Apaga control pág 41 Altavoz inicial pág 41 Reproducción de cine pa...

Page 113: ...necte con cable HDMI y con cable de audio Si no conecta el cable de audio no puede oír el programa de televisión a través del sistema de cine para casa Conexión de esta unidad a una Grabadora DVD DIGA y amplificador AV Cuando utilice un receptor de audio vídeo VIERA Link y una Grabadora DVD DIGA compatible utilice una conexión en cadena como se muestra abajo Con esta unidad se puede controlar un a...

Page 114: ...eterminada es Sí Cambie Seleccion ajustes Sí Sí Sí Interno No No Ajuste VIERA Link VIERA Link Prende control Apaga control Altavoz inicial Ahorro energía en espera Energía en espera automática Seleccione Establezca Sí Sí Sí Externo No No Ajuste VIERA Link VIERA Link Prende control Apaga control Altavoz inicial Ahorro energía en espera Energía en espera automática Cambie Cambio de entrada automátic...

Page 115: ...a poner el sistema de cine para casa como altavoces predeterminados cambie la configuración de altavoces predeterminada de Interno a Externo El sonido saldrá del sistema de cine para casa siempre que se suministre alimentación al televisor Si se pulsa la tecla ONE TOUCH PLAY en el control remoto del equipo para el sistema de cine para casa la secuencia de operaciones siguientes se realiza automáti...

Page 116: ...rior Visualización del menú VIERA Link Seleccione el elemento Grabador Interno Control VIERA Link Salida altavoz Iniciar grabación Detener grabación Seleccione Establezca o Siguiente Seleccione Cine para casa Interno Control VIERA Link Salida altavoz Iniciar grabación Detener grabación Cambie Establezca Control de altavoces Control VIERA Link sólo con el mando a distancia del TV para HDAVI Control...

Page 117: ...badora 1 Grabadora 2 Grabadora 3 El número de elementos del equipo que podrán conectarse es tres para grabadoras y tres en total para Cine para casa Reproductor Videocámara LUMIX Nota Hay un límite en el número de conectores HDMI Utilice el equipo con el control remoto del televisor apuntándolo al televisor Para utilizar el equipo lea el manual del mismo Grabador Interno Control VIERA Link Salida ...

Page 118: ...el elemento y ajuste Configuración de red 2 2 Dirección MAC 12 34 56 78 80 ab Ajuste de velocidad LAN Automático Velocidad LAN 10BASE half duplex Actualización de software Configuración de red 1 2 Probar conexión Exitosa Configuración del IP Manual Dirección IP 192 168 0 5 Submáscara de red 255 255 255 0 Gateway predeterminado 192 168 0 254 Configuración del DNS OK DNS primario 192 168 0 20 Automá...

Page 119: ...e usar la asignación automática de DNS en DHCP Configuración de red 1 2 Probar conexión Exitosa Automático Gateway predeterminado 192 168 0 254 Configuración del DNS OK DNS primario 192 168 0 20 Automatic DNS secundario 192 168 0 21 La dirección adquirida se visualiza Seleccione Acceder Cada dirección IP se adquiere automáticamente Si se está usando un enrutador de banda ancha normalmente se puede...

Page 120: ...eccione Establezca o Siguiente Seleccione Ajuste de VIERA CAST Ajuste 2 2 Ajuste avanzado Acerca de Regreso prefijados Ajuste VIERA Link Configuración de red Ajuste de VIERA CAST Cámaras en red Eco ahorro energía Seleccione Seleccione el elemento y ajuste Ajuste de VIERA CAST Dirección proxy Puerto proxy 0 Probar conexión Seleccione Probar conexión Ajuste Proxy Dirección proxy Puerto proxy Introdu...

Page 121: ...o solamente si así lo especifica el proveedor Seleccione Dirección proxy y pulse OK Puerto proxy El proveedor facilita este número junto con la dirección proxy Seleccione Puerto proxy y pulse OK Introduzca el número de puerto Puerto proxy 0 Seleccione Acceder o Ajuste de VIERA CAST Dirección proxy Puerto proxy 0 Probar conexión Seleccione Acceder Introduzca la dirección vea Introducción de caracte...

Page 122: ...ueado o cambiar los ajustes de calificación deberá introducir un código de 4 dígitos RETURN Contraseña Ingresar contraseña Si es la primera vez que introduce una contraseña introduzca el número dos veces en orden para registrarlo Seleccione el modo de bloqueo No No No No No Bloqueo Modo Canal Juego VIERA CAST Cambio de contraseña Programa Establezca Seleccione No Desbloquea toda la configuración d...

Page 123: ...C F L R Clasificaciones para el francés de Canadá Seleccione la clasificación que va a bloquear Seleccione Ejemplo de MPAA clasificaciones para películas de los EE UU No Sin clasificación G Público en general Todos los públicos PG Se recomienda el acompañamiento de los padres PG 13 Aviso para los padres No es apropiado para menores de 13 años R Restringido Los menores de 17 años necesitan ser acom...

Page 124: ...ivos conectados Anti retención de imag Regreso prefijados Idioma Todos Modo de navegación Siguiente Seleccione Seleccione la función Cable Ajuste ANT Cable Entrada ANT Programa auto Programa manual Medidor de señal Siguiente Seleccione Establezca Programa auto Ajuste automático Programa manual Ajuste manual Medidor de señal Compruebe la intensidad de la señal Para restablecer los ajustes del menú ...

Page 125: ...ar Cancelar Aceptar Títulos Favoritos Agregar 2 Sí 3 Sí Canal Seleccione Pulse OK para sintonizar el canal Seleccione Aceptar ma manual Cancelar Aceptar Títulos Favoritos Agregar Sí Seleccione Aceptar Aceptar Seleccione Editar Programa manual Editar Cancelar Aceptar Títulos Favoritos Agregar 2 Sí 3 Sí 4 Sí 5 Sí Canal Seleccione Siguiente Seleccione el elemento que quiera editar R G B Y Selección R...

Page 126: ...icio 4 Servicio 5 Servicio 6 La configuración en Análogo o Digital depende de la emisora Para hacer configuraciones de visualización más a fondo en los programas digitales Seleccione Ajustes digitales y pulse OK Seleccione el elemento y establézcalo Automático Automático Automático Automático Automático Automático Automático Automático Ajustes digitales Tamaño Frente Letra Estilo Opacidad frontal ...

Page 127: ...EPTOR PC Blu ray CAMARA Grab de DVD HOME THTR MONITOR MEDIA CTR MEDIA EXT OTROS Para el terminal de PC sólo BRINCAR está disponible Si se selecciona BRINCAR al pulsar el botón INPUT se omitirá la entrada Cada título seleccionado se visualizará en la pantalla Seleccionar entrada pág 26 Salida Audio Pare la salida de sonido Para impedir el aullido detenga la salida de sonido especificados en este me...

Page 128: ...nómetro 2 Cronómetro 3 Cronómetro 4 Cronómetro 5 Seleccione Siguiente Se apaga automáticamente Apagado Se enciende automáticamente Se pueden establecer 5 temporizadores Cronómetro 1 Cronómetro 5 Establezca el temporizador Para establecer Apagado Temporizador de apagado Pulse para que la unidad se apague automáticamente después de transcurrir un tiempo preseleccionado 60 Apagado Apagado minutos Est...

Page 129: ...e audio 1 o Amplificador OPTICAL IN o Parte delantera de esta unidad 1 Consulte las pág 34 35 para hacer la instalación cuando use un cable de audio analógico externo con un cable HDMI a DVI 2 Para conocer detalles del comando RS232C póngase en contacto con el Centro de atención al cliente Tenga en cuenta que sólo proporcionamos información según nuestras normas para revelar datos Vea la hoja Espe...

Page 130: ...al explícito FV FANTASIA CARICATURAS CON VIOLENCIA V VIOLENCIA S SEXO L LENGUAJE OFENSIVO D DIALOGO CON CONTENIDO SEXUAL GRÁFICA DE CLASIFICACIONES PARA INGLÉS DE CANADÁ C E L R E Exenta La programación exenta incluye noticias deportes documentales y otros programas de información entrevistas vídeos musicales y programas de variedades C Programación para niños menores de 8 años Sin lenguaje ofensi...

Page 131: ... le permite elegir el aspecto dependiendo del formato de la señal recibida y sus preferencias pág 20 ej en el caso de una imagen 4 3 COMP JUSTO COMP JUSTO Amplía horizontalmente la imagen 4 3 hasta los bordes laterales de la pantalla Recomendada para la imagen anamórfica Alarga para justificar la imagen 4 3 a las cuatro esquinas de la pantalla Recomendada para la emisión de televisión normal H LLE...

Page 132: ... fija que no haya sido formateada con DCF a saber TIFF BMP Una datos modificada con un PC no se puede visualizar Las imágenes importadas desde un PC deberán ser compatibles con EXIF 2 0 2 1 y 2 2 Los archivos parcialmente degradados tal vez puedan visualizarse con una resolución reducida Todos los datos con la extensión JPG se leerán en el modo de visión de fotografías Los nombres de carpetas y ar...

Page 133: ...isualizarse en la pantalla Si el equipo conectado tiene una función de ajuste de relación de aspecto ajuste la relación de aspecto a 16 9 Estos conectores HDMI son de tipo A Estos conectores HDMI son compatibles con la protección de los derechos de autor de HDCP protección de contenido digital de elevado ancho de banda Un dispositivo que no tenga terminal de salida digital podrá conectarse al term...

Page 134: ...ra en movimiento Tamaño H Relación de aspecto 4 3 Tamaño 1 Tamaño 2 La anchura se reducirá en ambos lados para reducir el ruido Relación de aspecto COMP JUSTO H LLENO ACERC Tamaño 1 Tamaño 2 La anchura aumentará en ambos lados para reducir el ruido Vea las páginas 34 35 para obtener más información Señal de entrada que puede visualizarse Marca Señal de entrada aplicable para componente Y PB PR HDM...

Page 135: ...mente seca No raye o golpee la superficie del panel con sus uñas u otros objetos duros ya que la superficie puede dañarse Además evite el contacto con sustancias volátiles tales como rociadores de insecticida disolventes y diluyentes de pintura de lo contrario puede verse afectada la calidad de la superficie Mueble Si el mueble se ensucia limpie con un paño suave y seco Si la caja está muy sucia e...

Page 136: ...es débil compruebe la antena y consulte a su concesionario local El mando a distancia no funciona Están instaladas correctamente las pilas pág 8 Son nuevas las pilas La imagen se ve distorsionada cuando el equipo se conecta a través de HDMI Está conectado correctamente el cable HDMI pág 39 55 Apague el televisor y el equipo y luego vuelva a encenderlos Compruebe una señal de entrada procedente del...

Page 137: ...nos pocos píxeles brillantes u oscuros Estos píxeles no indican que un panel esté defectuoso y no causarán ningún impacto sobre el funcionamiento del televisor Compruebe los productos eléctricos cercanos sistemas de encendido de automóviles o motocicletas lámparas fluorescentes etc Compruebe el menú Imagen pág 34 Verifique las conexiones de los cables pág 11 14 Verifique que se haya seleccionado l...

Page 138: ... 5 V rms COMPONENT IN 1 2 Y 1 0 V p p incluyendo sincronización PB PR 0 35 V p p AUDIO L R Tipo RCA PIN 2 0 5 V rms HDMI 1 4 Conector tipo A 4 Este televisor soporta la función HDAVI Control 4 PC D SUB DE 15 R G B 0 7 V p p 75 Ω HD VD 1 0 5 0 V p p alta impedancia RS232C Serial D sub 9 de patillas para el control externo LAN para IPTV VIERA CAST RJ45 10BASE T 100BASE TX Ranura de tarjeta 1 ranura ...

Page 139: ...65 Preguntas frecuentes etc Especificaciones Perú ...

Page 140: ...66 Certificado de Garantía ...

Page 141: ...ser 240 1698 814 8170 Rayson 57 4 412 4250 Servicet JLB 57 2 722 3580 57 2 723 4252 MANIZALES Enlace Digital 57 6 885 7839 ALREDEDORESDEMEDELLIN Rayson 57 4 412 9692 67 Certificado de Garantía Preguntas frecuentes etc ...

Page 142: ...Nota ...

Page 143: ...Nota ...

Page 144: ...Nota ...

Page 145: ...Nota ...

Page 146: ...Nota ...

Page 147: ...Nota ...

Page 148: ...tinuación y guardar este manual más el recibo de su compra como prueba permanente de su adquisición para que le sirva de ayuda al identificarlo en el caso de que le sea sustraído o lo pierda y también para disponer de los servicios que le ofrece la garantía Modelo Número de serie Web Site http panasonic net Panasonic Corporation 2009 Impreso en EE UU ...

Reviews: