


Panasonic Corporation
http://www.panasonic.com
© Panasonic Corporation 2017-2019
AWW9901A3YA0-0A5
AWW9901A3YA0
Model No.
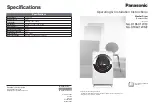
NA-D106X1 WS3
NA-D106X1 WM3
Operating & Installation Instructions
Washer Dryer
(Domestic Use)
It is essential to read these
instructions.
Thank you for purchasing this product.
- Read these instructions carefully for optimum performance and safety before use.
- Keep this manual for future reference.
Specifi cations
Specifi cations
Rated voltage
220 - 240 V
Rated frequency
50 Hz
Maximum power
consumption
Washing: 1660 - 2000 W
Dimensions
600 (W) × 665 (D) × 998 (H) (mm)
Product weight
74 k
g
Maximum wash capacity
10.0 k
g
Maximum spin capacity
10.0 k
g
Maximum dry capacity
6.0 k
g
Water pressure
0.03 - 1 MPa
Water consumption
Washing: 78 L (“ECONAVI” program)
Specifi cations
Specifi cations
Printed in Japan
07-2019
S0719-0
D106X1WS3
D106X1WM3


