


Operating Instructions
Digital Photo Frame
Model No.
MW-20
P
VQT2Z87
Table of contents
Getting started
Read this page
fi
rst ................................................... 3
Control guide ............................................................. 4
About the internal memory and SDs ....................... 6
Preparation for power source ................................... 7
Setting the clock ........................................................ 7
Switching the screen display ................................... 8
Displaying photos vertically ..................................... 9
Operations
Selecting photos to view ........................................ 10
Editing photos ......................................................... 12
Photo playback settings ......................................... 14
Connecting/Recharging an iPod/iPhone ............... 15
Playing back photos, etc. stored on the
iPod/iPhone .......................................................... 16
Playing music on an iPod/iPhone .......................... 16
Playing video on an iPod/iPhone ........................... 17
Audio playback settings ......................................... 18
Using the timer ........................................................ 18
Power saving use .................................................... 20
Using the setup menu ............................................. 20
Using with your PC .................................................. 22
Reference
Using in a wall-mounted state ................................ 23
Product Service ....................................................... 25
Maintenance ............................................................. 25
Troubleshooting guide ............................................ 26
Limited Warranty ...................................................... 27
Speci
fi
cations ........................................... Back cover
Dear customer
Thank you for purchasing this product.
For optimum performance and safety, please read these
instructions carefully.
Before connecting, operating or adjusting this product,
please read the instructions completely. Please keep
this manual for future reference.
If you have any questions contact
1-800-211-PANA (7262)
The warranty can be found on page 27.
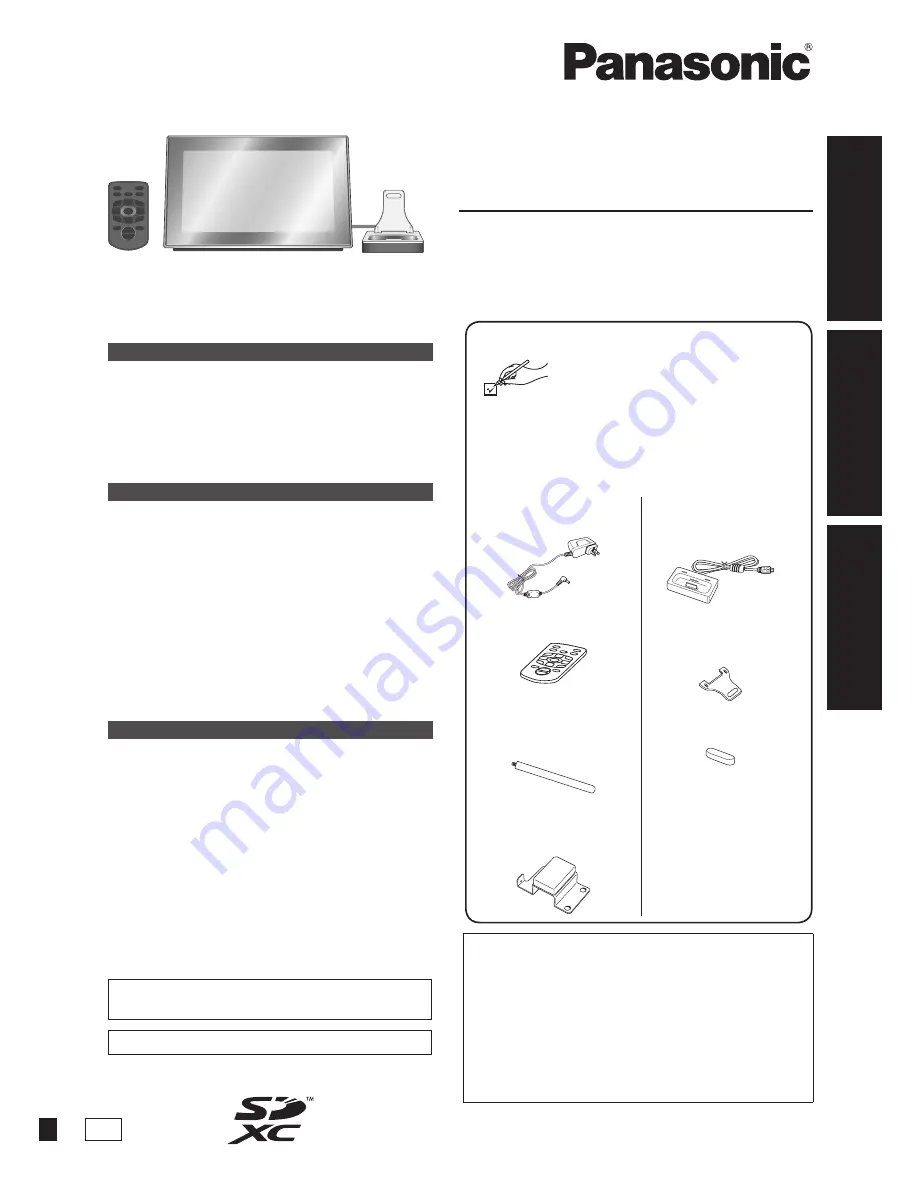
Supplied Accessories
Please check and identify the supplied
accessories.
Use numbers indicated in parentheses when asking
for replacement parts. (Product numbers correct as of
August 2010. These may be subject to change.)
To order accessories, refer to “Accessory Purchases
(United States and Puerto Rico)” on page 27.
Getting star
ted
Ref
erence
Operations
1 AC adaptor
(RFEA608P)
1 Remote control
(N2QAYC000032)
(Battery built-in)
1 Stand for vertical
arrangement
(RFE0216)
1 Fitting for
wall-mounting
(RFA3217)
1 Universal Dock for
iPod
(RFE0223)
1 Backrest for
Universal Dock
(RFE0225)
1 Backrest cushion
(RFE0226)
Included Installation Instructions
The installation should never be done by any
other than a quali
fi
ed installation specialist.
Before commencing work, carefully read these
installation instructions and the operating
instructions to ensure that installation is performed
correctly.
(Please keep these instructions. You may need
them when maintaining or moving this unit.)


