background image

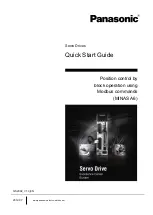
Operating Instructions (Overall)

AC Servo Motor & Driver

MINAS A6N series

Rev.2.00


Thank you for purchasing this Panasonic product.


Before operating this product, please read the instructions carefully.


Read the the Safety Operating Instructions before using the products (P.6 to 9).

Save this manual for future use.

This product is for industrial equipment. Do not use this product other than this(at general household etc.).

Summary of Contents for MINAS A6N Series

Page 1: ...his Panasonic product Before operating this product please read the instructions carefully Read the the Safety Operating Instructions before using the products P 6 to 9 Save this manual for future use This product is for industrial equipment Do not use this product other than this at general household etc ...

Page 2: ...al you will learn how to identify the model of the motor and driver that will be best suitable your application how to wire and set up them how to set parameters and how to locate possible cause of symptom and to take corrective action This is the original instruction 1 Any part or whole of this document shall not be reproduced without written permis sion from us 2 Contents of this document are su...

Page 3: ...control mode and connection diagrams to the host controllor I O settings 4 Trial Run Trial Run and Homing Operation Shows describes method of trial run and homing operation 5 Adjustment Gain Adjustment Auto Tuning Describes various adjusting method including auto tuning and manual gain tuning 6 When in Trouble Read this section when you encounter trouble or error 7 Supplement Contains Absolute sys...

Page 4: ...f Applicable Peripheral Equipments to Driver 2 18 4 Installation 2 22 5 Wiring of the Main Circuit 2 29 6 Wiring to the Connector X1 2 43 7 Wiring to the Connector X2A X2B 2 44 8 Wiring to the Connector X4 2 47 9 Wiring to the Connector X6 2 61 10 Wiring to the Connector X7 2 64 11 Built in Holding Brake 2 65 12 Dynamic Brake 2 67 13 How to Use the Front Panel 2 70 3 Setup 3 1 1 Outline of Command...

Page 5: ...Gain Pre adjustment Protection 6 42 3 About the Protection Function Setting while Returning to the Origin by Using the Z Phase 6 46 4 Troubleshooting 6 48 7 Supplement 7 1 1 Absolute System 7 2 2 Outline of Setup Support Software PANATERM 7 9 3 Motor Characteristics S T Characteristics 7 11 4 Dimensions 7 32 5 Timing Chart 7 62 6 Block Diagram 7 67 7 Options 7 69 Warranty 7 109 Cautions for Proper...

Page 6: ...the motor driver regenerative resistor and dynamic brake resister Do not use the motor in a place subject to exces sive vibration or shock Failure to observe this instruc tion could result in electrical shock injury or fire Do not use cables soaked in water or oil Failure to observe this instruc tion could result in electrical shocks damages and malfunc tion The installation area should be away fr...

Page 7: ...sult in electrical shocks Correctly run and arrange wiring Incorrect wiring will result in short circuit electric shock per sonal injury etc After correctly connecting cables insulate the live parts with insulator Incorrect wiring will result short circuit electric shock fire or malfunction Ground the earth terminal of the motor and driver without fail Floating ground circuit will cause electric s...

Page 8: ...truc tion could result in malfunction Do not give strong impact shock to the motor shaft Failure to observe this instruc tion could result in a failure of the detector etc Do not turn on and off the main power of the driv er repeatedly Failure to observe this instruc tion could result in malfunction Do not run or stop the motor with the electro mag netic contactor installed in the main power side ...

Page 9: ...vide protection device against idling of electro magnetic brake or gear head or grease leakage from gear head No protection will cause per sonal injury damage pollution or fire Use the motor and the driver in the specified com bination Not using the motor and the driver in the specified combina tion will result in fire Trial run the securely fixed motor without loading to verify normal operation a...

Page 10: ...benzine thinner alcohol acidic cleaner and alkaline cleaner because they can discolor or damage the exterior case Inspection Items and Cycles General and normal running condition Ambient conditions 30 C annual average load factor of 80 or lower operating hours of 20 hours or less per day Perform the daily and periodical inspection as per the items below Type Cycles Items to be inspected Daily insp...

Page 11: ...urs or cycles are reference When you experience any error replacement is required even before this standard replacement cycle Cooling fan Approx 2 years Aluminum electrolytic capacitor on PCB Approx 5 years Rush current preventive relay Approx 100000 times depending on working condition Rush current preventive resistor Approx 20000 times depending on working condition Motor Bearing 3 to 5 years 20...

Page 12: ...r working range setting P6 28 6 Support of electronic gear to single turn absolute function infinitely rotatable absolute function P5 71 P5 76 7 Pause function of profile operation A6N series technical reference RTEX communication specification 6 8 4 8 Extend the RTEX alarm command function A6N series technical reference RTEX communication specification 6 6 6 6 4 6 6 5 9 Extend the settable range ...

Page 13: ... RTEX communication specification 2 5 2 3 Addition of RTEX monitor data A6N series technical reference RTEX communication specification 6 7 1 6 9 1 6 9 7 CPU1 Ver1 22 CPU2 Ver1 22 Function extended edition 4 6 0 1 6 or later Additional function Related page 1 Expansion of range of display function of serial number P 1 4 P 1 11 2 Latch mode with stop function P 3 114 P 5 83 3 Extended range of actu...

Page 14: ...14 Rev 2 00 MEMO ...

Page 15: ...ement 1 Before Using the Products 1 Introduction Outline 1 2 On Opening the Product Package 1 3 2 Driver Check of the Model 1 4 Parts Description 1 6 Specifications 1 8 3 Motor Check of the Model 1 11 Parts Description 1 14 4 Check of the Combination of the Driver and the Motor Absolute Specifications 23 bit 1 15 ...

Page 16: ...ng and mechanical drive Meanwhile to simplify the debug settings it comes standard equipped with the feature of 2DOF Two degree of freedom control scheme which became popular in A5 Ⅱ series MINAS A6N series equip with autoadjustment function of various setting programs and make possible some simple adjustment of multifunction MINAS A6N series have so far improved stability at low stiffness machine...

Page 17: ...ortation Check if the Safety Operating Instructions are included or not Check if the power connector motor connectors connector for external regenerative resistor connection E frame and safety by pass plug are included or not Neither the short circuit wire of motor connector are included to A B frame Neither the plug of XC connentor is not in cluded to C frame and D frame Neither the power connect...

Page 18: ...output voltage Rated output of applicable motor Rated input output current Input output frequency Number of phase Manufacture date e g 2016 0201 Manufacture date Manufacture year Manufacture month The range of the lot number in serial number is 1 to 33999 but on the nameplate it is written in 4 digits in the following format In the four digits alphabet I eye and O o are not used Lot number value D...

Page 19: ...D Frame Symbol A frame B frame C frame D frame E frame F frame Series L Series name A6 series Symbol Safety function N T 1 No functional safety Safety torque off Specifications Symbol Display the difference of matching motor or rating of output Difference of Output Power supply Specifications Symbol 1 3 5 Single phase 100 V 3 phase 200 V Single 3 phase 200 V N RTEX Interface specifications Specifi...

Page 20: ...s for motor connection Screws for earth x2 Connector X7 Monitor connector Charge lamp Connector X4 Parallel I O connector Connector X2B TX connector Connector X2A RX connector Connector X7 Monitor connector Connector X1 USB connector Front panel P RB B Charge lamp Connector XA for main power connection 05JFAT SAXGGKK A JST Connector XB for motor connection 06JFAT SAXGGKK A JST Terminals for extern...

Page 21: ...JST Terminals for external regenerative resistor Normally short circuit RB to B Terminals for motor connection Control power input terminals Main power input terminals P RB B N Control power input terminals Main power input terminals Terminals for motor connection Screws for earth x2 Terminals for external regenerative resistor Normally short circuit RB to B Charge lamp N is no connect Details of ...

Page 22: ...orporation Heidenhain K K Renishaw K K Magnescale Co Ltd Nidec Sankyo Corporation Fagor Automation S Coop Control signal Input Each 8 input can be assigned by the parameter Output Each 3 output can be assigned by the parameter Analog signal Output 2 outputs for analog monitors 1 and 2 Pulse signal Output Line driver output for encoder pulses A B phase signal or external scale pulses Communication ...

Page 23: ...available It can be used in Multi function type Latch mode with stop function Available Servo on No hindrance for the motor s normal run State in which communication cycle is set to 0 5 ms and command update cycle to 1 0 ms State in which the electronic gear ratio is set to 1 or larger Velocity control Control input Positive direction drive inhibit negative direction drive inhibit latch signal etc...

Page 24: ...limit switching function Unavailable Motor operatable setup function Unavailable Torque saturation protection function Unavailable External scale position information monitor Unavailable Latch mode with stop function Unavailable Common Auto tuning Identifies the load inertia real time and automatically sets up the gain that meets the stiffness setting when the motor is running with controllor and ...

Page 25: ...anufacture month Model Rated output Rated input voltage current Rated frequency Rated rotational speed Applicable international certification standard mark etc Country of origin The range of the lot number in serial number is 1 to 33999 but on the nameplate it is written in 4 digits in the following format In the four digits alphabet I eye and O o are not used Lot number value Display on Nameplate...

Page 26: ...structure Voltage specifications Specifications Type Series Symbol Symbol Series name Symbol Motor rated output Design order Symbol Specifications Output Rotary encoder specifications Specifications Symbol Format Pulse count Resolution Wire count Absolute Standard Specifications Symbol 100 V 200 V 100 200 V common 50 W only Low inertia 50 W to 5 0 kW Middle inertia 100 W to 400 W Middle inertia 1 ...

Page 27: ... 6 7 8 5 6 7 8 Motor I F Connector type Leadwire type Motor structure Holding brake Oil seal Symbol Shaft Without With Key way Round Without With With Protective lip 10 dig 11 dig Motor I F Connector JN2 Connector JL10 Holding brake Oil seal Symbol Shaft Without With Key way Round Threaded With With Protective lip Model Designation 3 Motor Check of the Model Note Related page For details of specif...

Page 28: ...2 Motor frame Mounting holes X4 Motor frame Mounting holes X4 Motor frame Mounting holes X2 Connector for motor Connector for encoder Oil seal Motor frame Flange Mounting holes X4 Note For details of specific model refer to the Dimensions of Supplement P 7 38 to 7 61 MSMF 50 W to 1 0 kW 80 MQMF 100 W to 400 W MHMF 50 W to 1 0 kW 80 MSMF 1 0 kW 100 to 5 0 kW MDMF 1 0 kW to 5 0 kW MGMF 850 W to 4 4 ...

Page 29: ...r min MQMF011L1 100 W MADL 11N A frame MQMF021L1 200 W MBDL 21N B frame MQMF041L1 400 W MCDL 31N C frame Single 3 phase 200 V MQMF012L1 100 W MADL 05N A frame MQMF022L1 200 W MADL 15N MQMF042L1 400 W MBDL 25N B frame Single 3 phase 200 V MDMF Middle inertia 2000 r min MDMF102L1 1 0 kW MDDL 45N D frame MDMF152L1 1 5 kW MDDL 55N 3 phase 200 V MDMF202L1 2 0 kW MEDL 83N E frame MDMF302L1 3 0 kW MFDL A...

Page 30: ...1 16 Rev 2 00 MEMO ...

Page 31: ...27 5 System Configuration and Wiring A to B frame 100 V 200 V Type 2 29 C to D frame 100 V 200 V Type 2 32 E frame 200 V Type 2 35 F frame 200 V Type 2 37 Wiring Method to Driver Connector 2 39 Specifications of Motor Connector 2 40 6 Wiring to the Connector X1 Connecting Host Computer 2 43 7 Wiring to the Connector X2A X2B Connecting Communication Cable 2 44 8 Wiring to the Connector X4 Connectin...

Page 32: ...external protective apparatus such as thermal fuse without fail Mount the regenerative resistor on incombustible material such as metal Remarks Connection to external components Wiring to the Connector XB P 2 29 Connection to input power Wiring to the Connector XA P 2 29 Mains Residual current device Mains and Residual current device RCD Apply the voltage designated on the nameplate from the power...

Page 33: ...der Junction cable for motor Connection to motor driving phase and ground Wiring to the Connector XB P 2 29 Charge lamp Red LED 1 Handle lever Use this for connector connection Store this after connection for other occasions Refer to P 2 39 for connection U phase red V phase white W phase black These colors are used for optional cable Remarks Junction cable for brake DC Power supply for brake DC24...

Page 34: ... suppression units together with this Do not start or stop the servo motor with this Magnetic Contactor Reactor L Reduces harmonic current of the main power Mains Residual current device Wiring to the Connector XB P 2 32 P Pin 6 B Pin 4 L1 Pin 5 L2 Pin 4 L3 Pin 3 L1C Pin 2 L2C Pin 1 Mains and Residual current device RCD Apply the voltage designated on the nameplate from the power source Note Note ...

Page 35: ...lectric shock 2 When you use an external regenerative resistor disconnect a short circuit wire Connection to motor driving phase and ground Wiring to the Connector XB P 2 32 Short circuit wire 2 X1 to X7 are used for the secondary circuit To connect these terminals to the primary power supply particularly 24 VDC power supply for brake insulation is required Do not connect these terminals to the sa...

Page 36: ...rvo motor with this Magnetic Contactor Reactor L Reduces harmonic current of the main power Remarks Con Wirin Connection to input power Wiring to the Connector XA P 2 35 Connection to external components Wiring to the Connector XC P 2 35 L1 Pin 5 L2 Pin 4 L3 Pin 3 L1C Pin 2 L2C Pin 1 Mains Residual current device Mains and Residual current device RCD Apply the voltage designated on the nameplate f...

Page 37: ...hock 2 When you use an external regenerative resistor disconnect a short circuit wire nnection to motor ng to the Connector XB P 2 35 Wiring to the Connector X6 P 2 61 Short circuit wire 2 X1 to X7 are used for the secondary circuit To connect these terminals to the primary power supply particularly 24 VDC power supply for brake insulation is required Do not connect these terminals to the same pow...

Page 38: ...nstall an external protective apparatus such as thermal fuse without fail Mount the regenerative resistor on incombustible material such as metal Remarks Mains Residual current device Connection with input power supply Connection to external components P 2 37 P 2 37 Note Mains and Residual current device RCD Apply the voltage designated on the nameplate from the power source Note The regenerative ...

Page 39: ...ownload from our web site Connection to encoder Wiring to the Connector X6 P 2 61 Connection to motor driving phase and ground These colors are used for optional cable X1 to X7 are used for the secondary circuit To connect these terminals to the primary power supply particularly 24 VDC power supply for brake insulation is required Do not connect these terminals to the same power supply Remarks Gro...

Page 40: ...nment Use the driver in an environment of Pollution Degree 2 prescribed in IEC60664 1 Make sure to install a circuit breaker MCCB or fuse which are UL recognized on the power supply Use a copper cable with temperature rating of 75 C or higher 2 Short Circuit Current Rating SCCR This driver conform to the power source witch is less than the maximum input voltage less than 5000 A symmetrical current...

Page 41: ...c Compatibility UL Underwriters Laboratories CSA Canadian Standards Association Pursuant to the directive 2004 108 EC article 9 2 Panasonic Testing Centre Panasonic Service Europe a division of Panasonic Marketing Europe GmbH Winsbergring 15 22525 Hamburg F R Germany When export this product follow statutory provisions of the destination country 1 A6N series standard type do not correspond to the ...

Page 42: ...e driver in control panel with IP54 protection structure Mandatory requirements to conform to EMC directive Install the servo driver on the metallic casing control board Install noise filter and lightning surge absorber in the power supply line Use braided shield cable tin plated annealed copper wire for I O signal cable and encoder cable Provide the ferrite coil as shown in the figure for each ca...

Page 43: ... Encoder cable 20 m ー Attached Unattached Sensor etc Servo driver I O cable 3 m ー Attached Unattached Earth Noise filter FG Line 1 m ー Unattached Unattached Earth Servo driver FG Line 1 m ー Unattached Unattached I O signal power Servo driver Power Line 1 m ー Unattached Unattached RTEX Communcation Servo driver Communcation cable 100 m ー Attached Unattached The List of Peripheral Equipments refer t...

Page 44: ...er cable Twisted Servo driver L1C L2C Closely bundled cable United Servo driver L2 L3 L1 Power cable and signal wires must be sufficiently isolated from each other Circuit Breaker MCCB Install a circuit breaker MCCB which complies with IEC Standards and UL recognized Listed and marked between power supply and noise filter The short circuit protection circuit on the product is not for protection of...

Page 45: ...oise filter at the common pow er source consult with the noise filter manufacturer Do not run the input and output wiring on the same passage noise resistance will drop Figure at lower right Isolate the input and output line from each other Figure at lower left 1 Isolate the input and output 2 3 4 5 6 E Noise Filter AC input AC output Ground 1 The effect of the noise filter is a little Do not plac...

Page 46: ...se the number of signal noise filters including power line dedicated filters See figure below Motor line When installing the ferrite coil including motor line dedicated filter to our optional cable remove the sheath jacket to the length so that wires can be wound on the ferrite coil including power line dedicated filter For effective noise reduction function U V and W should be wound togeth er If ...

Page 47: ...r All units installed in the casing should be grounded to the case Increasing Noise Resistance of Control I O Signal When noise is applied to the control input output it causes displacement and malfunc tioning of I O signal X1 to X7 are secondary side circuit which should be isolated from the primary power source 24 VDC control power source 24 VDC braking power source and 24 VDC for regenerative r...

Page 48: ...50 DV0P1460 60 A 3P 1a 4 0 kW approx 6 4 kVA 4 5 kW approx 6 8 kVA 100 A 3P 1a 5 0 kW approx 7 8 kVA List of Applicable diameter cables Driver Voltage 1 Rated output Required Power at the rated load Diameter and withstand voltage of main circuit cable Crimp terminal for main circuit terminal block Diameter and withstand voltage of control power supply cable Crimp terminal for control power supply ...

Page 49: ...ds and UL recognized Listed and marked Suitable for use on a circuit capable of delivering not more than 5 000 Arms symmetrical amperes be low the maximum input voltage of the product Remarks Select a circuit breaker MCCB and noise filter which match to the capacity of power supply including a load condition Terminal block and protective ground terminals Use a copper conductor cables with temperat...

Page 50: ...thickness mm Sheath thickness mm Reference Finish O D mm Max conductor resistance 20 C Ω km Test voltage V 1 min Minimum insulation resistance MΩ km Reference Approx mass kg km Nominal cross section mm2 Structure or shape wires mm2 Outside diameter mm 2 7 0 6 1 8 0 8 1 5 12 0 9 42 1500 2500 170 3 5 7 0 8 2 4 0 8 1 5 13 5 5 30 1500 2500 250 5 5 7 1 0 3 0 1 0 1 5 16 0 3 40 1500 2500 360 8 7 1 2 3 6 ...

Page 51: ... bear tangled by other cable etc causing unpredictable troubles Cable distortion Keep the cable free from twists or kinks Distorted cable will cause loose connection lowering performance and reliability Lamination factor of cable in cable bear Place cables on a flat surface in parallel without bringing them into contact with each other and measure the dimension necessary to cover these cables Then...

Page 52: ... than 1000 m 1 Extreme temperatures are permissible only for short period such as during transportation 2 Air containing water vapor will become saturated with water vapor as the temperature falls causing dew How to Install 1 Rack mount type Install in vertical position and reserve enough space around the servo driver for ventilation 2 Base mount rear mount is standard for A B C D frame driver 3 T...

Page 53: ... using a rod terminals or a round terminals If stranded wires are used as they are unexpected accidents such as an electric shock and short circuit or injury may result Be sure to install a circurt breaker MCCB in the power supply In addition be sure to ground the grounding terminal or grounding wire provided In order to prevent electric shock and mal functions Class D grounding grounding resistan...

Page 54: ...y damage the built in dynamic brake circuit in the driver Pay attention to the ambient temperature of the amplifier meeting the operating temperature range The driver will generate heat while the motor is in operation Using the driver in a sealed control box may cause an abnormal heating of the control box There is a possibility that the motor will be damaged by heat or emit smoke or dust due to a...

Page 55: ...midity 20 to 85 RH free from condensation 4 Vibration Motor only Lower than 5 0 kW Lower than 49 m s2 5 G at running 24 5 m s2 2 5 G at stall More than 5 0 kW Lower than 24 5 m s2 2 5 G at running 24 5 m s2 2 5 G at stall Impact Motor only Lower than 98 m s2 10 G Enclosure rating Motor only Connector type IP67 except rotating portion of output shaft and connecting pin part of the motor connector a...

Page 56: ... to each model 2 Pay an extra attention when you use a rigid coupling Excess bending load may dam age the shaft or deteriorate the bearing life 3 Use a flexible coupling with high stiffness designed exclusively for servo application in order to make a radial thrust caused by micro misalignment smaller than the permis sible value For permissible load of each model refer to P 2 27 Permissible Load a...

Page 57: ... 98 MDMF 1 0 kW to 2 0 kW 980 588 686 490 196 3 0 kW 784 343 4 0 kW 5 0 kW 1666 784 980 MGMF 850 W to 1 8 kW 980 588 686 686 196 2 4 kW 1666 784 980 1176 490 2 9 kW 4 4 kW 1470 MHMF 50 W 147 88 117 6 68 6 49 100 W 58 8 200 W 400 W 392 147 196 245 98 750 W 1 0 kW 80 686 294 392 392 147 1 0 kW 130 1 5kW 980 588 686 490 196 2 0 kW to 5 0 kW 1666 784 980 784 343 Note When the load point varies calcula...

Page 58: ...P 36848 L 14 5 MQMF 100 W P 3420 L 28 8 200 W P 14639 L 36 400 W P 17579 L 48 MDMF 1 0 kW to 2 0 kW P 19110 L 11 5 3 0 kW P 34496 L 11 5 4 0 kW 5 0 kW P 42336 L 19 Motor series Motor output Formula of Load and load point relation MGMF 850 W to 1 8 kW P 26754 L 11 5 2 4 kW P 63504 L 19 2 9 kW P 63504 L 19 4 4 kW P 79380 L 19 MHMF 50 W P 3240 L 29 100 W P 4380 L 43 200 W P 15741 L 41 400 W P 20176 L...

Page 59: ...se 100 V and 200 V and do not use L2 Match the colors of the motor lead wires to those of the corresponding motor output terminals U V W Do not connect anything to N Avoid shorting and grounding Do not connect the main power Earth ground this To prevent electric shock be sure to connect the ground terminal of the driver and the ground terminal ground plate of the control panel The ground terminal ...

Page 60: ...other is connected with the earth line of the motor System Configuration and Wiring When the alarm is generated the main power supply has to be turned off Noise filter Main power supply Control power supply 37 ALM L2 L3 L1C L2C P MC MCCB ALM OFF N B U V W L1 Coil surge suppression units ALM Motor connection 172159 1 172167 1 XA XB X4 36 L ON MC ALM Built in thermal protector of an external regener...

Page 61: ...regenerative resistor In Case of Leadwire type Noise filter Main power supply Control power supply 37 ALM L2 L3 L1C L2C P MC MCCB ALM OFF N B U V W L1 Coil surge suppression units ALM M Motor connection XA XB X4 36 L ON MC ALM Built in thermal protector of an external regenerative resistor light yellow In Case of connector type Insulated DC12 to 24 V 5 Insulated DC12 to 24 V 5 172159 1 172167 1 Re...

Page 62: ...onnect this only when the external regenerative register is used Avoid shorting and grounding Do not connect the main power Earth ground this To prevent electric shock be sure to connect the ground terminal of the driver and the ground terminal ground plate of the control panel The ground terminal must not be shared with other equipment Two ground terminals are provided Do not connect the earth ca...

Page 63: ...ystem Configuration and Wiring When the alarm is generated the main power supply has to be turned off Noise filter MC MCCB L Main power supply Control power supply 37 ALM L2 L3 L1C L2C P ALM OFF RB B U V W L1 Coil surge suppression units ALM Motor connection XA XB X4 36 ON MC ALM Built in thermal protector of an external regenerative resistor light yellow External regenerative resistor Note 1 Shor...

Page 64: ...its ALM Motor connection XA XB X4 36 L ON MC ALM Built in thermal protector of an external regenerative resistor light yellow External regenerative resistor In Case of connector type Insulated DC12 to 24 V 5 Insulated DC12 to 24 V 5 For manu facturer s use N P XC Do not connect anything For manu facturer s use N P XC Do not connect anything 172159 1 172167 1 Red White Black Green M 1 2 3 4 1 2 3 4...

Page 65: ...inserting slot nor make them touch Compose a duplex Brake Control Circuit so that the brake can also be activated by an external immediate stop signal The holding brake has no polarities For the holding brake power supply capacity and how to use the brake refer to Built in Holding Brake on P 2 65 Provide a varistor Connect a 10 A fuse in series with the varistor Ground resistance 100 Ω max For app...

Page 66: ...e V 2 W 1 Earth terminal Earth terminal for grounding Two terminals are arranged one of them connect to the ground and the other is connected with the earth line of the motor System Configuration and Wiring When the alarm is generated the main power supply has to be turned off The regenerative resistor is built into E frame or can use external regenerative resistor 5 Wiring of the Main Circuit E f...

Page 67: ...ke Control Circuit so that the brake can also be activated by an external immediate stop signal The holding brake has no polarities For the holding brake power supply capacity and how to use the brake refer to Built in Holding Brake on P 2 65 Provide a varistor Connect a 10 A fuse in series with the varistor Ground resistance 100 Ω max For applicable wire refer to P 2 18 DC power supply for brake ...

Page 68: ... U 10 Connect each phase of the motor winding U U phase V V phase W W phase V 11 W 12 Earth terminal Earth terminal for grounding Two terminals are arranged one of them connect to the ground and the other is connected with the earth line of the motor System Configuration and Wiring When the alarm is generated the main power supply has to be turned off Built in thermal protector of an external rege...

Page 69: ...the ferrule and cable If the conductors of the cable stick out from the insulation cover or protrude excessively from the tip of the ferrule accidents such as an electric shock and fire from a short circuit may result A to C 100 V 200 V D 200 V specifications Cables Compatible with Connector Conductor Size AWG18 to 14 Sheath Outline φ 2 1 mm to φ 3 8 mm Recommended Connector Bar Terminal Conductor...

Page 70: ...nector for brake Tightening torque of the screw M2 0 19 N m to 0 21 N m Be sure to use only the screw supplied with the connector to avoid damage Tightening torque of the screw M2 0 19 N m to 0 21 N m Be sure to use only the screw supplied with the connector to avoid damage 1 2 3 4 5 6 7 FG SHIELD BAT E0V PS BAT E5V PS PIN No Application Electromagnetic brake is a nonpolar device 172167 1 172169 1...

Page 71: ...tion U phase V phase W phase Brake Brake Ground PE PE 3 4 5 2 1 3 4 5 2 1 PE Connector for motor Connector for motor Motor with brake Connector for motor and brake Motor with brake Connector for motor and brake MQMF MHMF 200 W to 1 0 kW 80 MHMF 50 W 100 W Tightening torque of the screw M2 0 085 N m to 0 095 N m screwed to plastic Be sure to use only the screw supplied with the connector to avoid d...

Page 72: ...E20 4PE B JL10 2E22 22PE B U phase V phase W phase Ground PIN No Application B C D A Connector for motor JL10 2E20 18PE B JL10 2E24 11PE B G H A F I B E D C NC U phase V phase W phase Ground Ground NC with Brake Brake without Brake NC PIN No Application with Brake Brake without Brake NC with Brake Brake without Brake NC with Brake Brake without Brake NC A B C D E F G H I NC U phase V phase W phase...

Page 73: ...l terminal VBUS 1 Use for communication with personal computer D 2 D 3 4 Do not connect GND 5 Connected to ground of control circuit Use commercially available USB mini B connector for the driver 2 Preparation 6 Wiring to the Connector X1 Connecting Host Computer Caution Remarks X1 to X7 are used for the secondary circuit To connect these terminals to the primary power supply particularly the 24 V...

Page 74: ...onnector of receiving side node Unused 2 Connect to pin 2 on RX connector of receiving side node Network output TX 3 Connect to pin 3 on RX connector of receiving side node Unused 4 Connect to pin 4 on RX connector of receiving side node Unused 5 Connect to pin 5 on RX connector of receiving side node Network output TX 6 Connect to pin 6 on RX connector of receiving side node Unused 7 Connect to p...

Page 75: ...e cannot be met consult with us Because specifications such as flexural characteristic temperature range and insulation material differ from manufacturer to manufacturer select the cable best suitable for your application Select the cable for movable application according to your operating condition Communication cable used in our evaluation Manufacturer Sanwa Supply Inc Part No KB STP LBN Categor...

Page 76: ...ircuit Connector X2A When A6N servo driver is used in the subsequent circuit RJ45 plug RJ45 plug Shield on connector Shield on connector Connector X2A Shielded twisted pair cable of 5e or higher category Servo driver Shield on connector Shield on connector Shielded twisted pair cable of 5e or higher category TX TX RX RX 3 6 1 2 5 4 7 8 3 6 1 2 5 4 7 8 8 1 Higher level device or servo driver in the...

Page 77: ...is required Do not connect these terminals to the same power supply Tips on Wiring I COM GND OA OA Connector X4 VDC Peripheral apparatus such as host controller should be located within 3 m Separate the main circuit at least 30 cm away Do not pass them in the same duct nor bind them together Power supply for control signals VCC between COM and COM VDC should be prepared by customer Vdc 12 to 24 V ...

Page 78: ...K OFF SO1 BRK OFF SO1 5 4 7 kΩ 1 kΩ 7 4 7 kΩ 1 kΩ 8 4 7 kΩ 1 kΩ 9 4 7 kΩ 1 kΩ 10 4 7 kΩ 1 kΩ 11 4 7 kΩ 1 kΩ 12 4 7 kΩ 1 kΩ 13 4 7 kΩ 1 kΩ 1 2 EX OUT SO2 EX OUT SO2 25 26 ALM SO3 OA OA OB OB OA OB A B GND FG ALM SO3 3 4 17 18 20 19 16 DC 12 24 V 6 Shell The functions of the pins on below can be assigned by parameter refer to P 3 64 Input 5 7 8 9 10 11 12 13 Output 1 2 3 4 25 26 The function of pins...

Page 79: ...onnect the power for multi turn data storage to the absolute encoder through BTP O pin 3 and BTN O pin 4 of encoder connector X6 Directly connect the encode connection cable to the battery or connect to battery connector RTEX communications monitor in the table is the response of RTEX communication and therefore monitor No allocation is made to the response status flag of RTEX communication and th...

Page 80: ...SI4 Input Symbol SI4 Pin No 10 Title of signal SI5 Input Symbol SI5 Pin No 11 Title of signal SI6 Input Symbol SI6 Pin No 12 Title of signal SI7 Input Symbol SI7 Pin No 13 Title of signal SI8 Input Symbol SI8 Connect to contacts of switches and relays or open collector output transistors When you use contact inputs use the switches and relays for micro current to avoid contact failure Make the low...

Page 81: ... value Title of signal Negative direction over travel inhibition input Related control mode P S T Symbol NOT RTEX communications monitor Positive direction over travel inhibit input The operation with this input turned ON is set up in Pr5 04 Setup of over travel inhibit input When using setup of over travel inhibit input by the host controller set Pr5 04 to 1 and comferm sepesfication of the host ...

Page 82: ...e method and condification of assignation refer to P 3 64 Class 4 I F Monitor setting When using this signal to execute a homing operation the detail of the latch of actual motor position refer to technical reference of controller Title of signal General purpose monitor input 1 Related control mode P S T Symbol SI MON1 RTEX communications monitor Title of signal General purpose monitor input 2 Rel...

Page 83: ... Logic 1 Title of signall Logic 1 Title of signall Logic 1 SI1 5 Pr4 00 00323232h 3289650 SI MON5 a contact SI MON5 a contact SI MON5 a contact SI2 7 Pr4 01 00818181h 8487297 POT b contact POT b contact POT b contact SI3 8 Pr4 02 00828282h 8553090 NOT b contact NOT b contact NOT b contact SI4 9 Pr4 03 002E2E2Eh 3026478 SI MON1 a contact SI MON1 a contact SI MON1 a contact SI5 10 Pr4 04 00222222h 2...

Page 84: ...annot be directly connected since it does not meet VIL The current flowing to each output and input should be rated current 40 mA maximum current 50 mA inrush current 90 mA or less Install toward the direction as the fig 12 to 24 V SO1 ALM etc 10 ALM etc Max 30 V Function allocatable to control output Title of signal Servo Alarm output Related control mode 1 P S T Symbol ALM Alarm RTEX communicati...

Page 85: ...ue in limit signal Turns ON the output transistor upon limit of torque Title of signal Zero speed detection output signal Related control mode 1 P S T Symbol ZSP RTEX communications monitor 2 Outputs the zero speed detection signal Turns ON the output transistor upon detection of Zero speed Title of signal Speed coincidence output Related control mode 1 P S T Symbol V COIN RTEX communications moni...

Page 86: ...ted control mode 1 P S T Symbol V LIMIT RTEX communications monitor 2 Turns on output transistor when the speed command is applied while the speed is controlled Turns on the output transistor when velocity is limited Title of signal Alarm clear attribute output Related control mode 1 P S T Symbol ALM ATB RTEX communications monitor 2 The signal is output if an alarm has occurred and if it can be c...

Page 87: ...is OFF Refer to next page Note 3 Title of signal Servo on status output Related control mode 1 P S T Symbol SRV ST Servo_Active RTEX communications monitor 2 Turns on the output transistor during servo on Refer to next page Note 4 Title of signal Position comparison output Related control mode 1 P S T Symbol CMP OUT RTEX communications monitor 2 The output transistor is turned ON or OFF when the a...

Page 88: ...rning of RTEX communication is turned ON whenever any warning is generated regardless of setting value of Pr 4 40 or Pr 4 41 The designation in in Sign column in the table shows the symbol used in RTEX communications Notice that detection conditions of external output signal and RTEX communication signal are not the same For details refer to Technical Reference of controller 3 The following shows ...

Page 89: ...on comparison output 2 Related control mode P S T Symbol Pin No 20 OB OCMP2 Pin No 19 OB OCMP2 RTEX communications monitor Pin No 21 22 Title of signal Position comparison output 3 Related control mode P S T Symbol Pin No 21 OCMP3 Pin No 22 OCMP3 RTEX communications monitor Encoder signal processed with frequency division is outputted by differential line driver signal equivalent to RS422 Ground f...

Page 90: ...ymbol FG RTEX communications monitor This output is connected to the earth terminal inside of the driver Pin No 23 24 Title of signal Manufacturer s use Related control mode P S T Symbol RTEX communications monitor Do not connect anything 8 Wiring to the Connector X4 Output Signal and Pin No ...

Page 91: ...fer to the back cover Keep this wiring away from the main circuit by 30 cm or more Do not guide this wiring through the same duct with the main nor bind them together When you make your own encoder junction cable for connectors refer to P 7 92 Options Connector Kit for Motor Encoder Connection of Supplement 1 Refer to the Wiring Diagram below 2 Cable to be Shielded twisted pair cable with core dia...

Page 92: ...y connection cable should be the option cable or prepared by the user Twisted pair Twisted pair 5 V 0 V 1 2 3 4 5 6 4 1 3 7 Encoder cable Motor Driver E5V E0V PS PS 9 PS 5 BAT 6 S T BAT PS FG E5V E0V 5 V 0 V 1 2 3 4 5 6 6 3 7 2 5 4 Encoder cable Motor Driver E5V E0V PS PS 1 PS BAT BAT PS FG E5V E0V Motor Driver 5 V 0 V 1 2 3 4 5 6 7 8 1 2 4 5 3 Twisted pair Encoder cable 172161 1 by Tyco Electroni...

Page 93: ... FG PS PS Motor Black Purple Yellow Green White Light blue Pink Red H G K L J Connector 3E206 0100 KV Shell kit 3E306 3200 008 Sumitomo 3M or equivalent Connector 3E106 2230 KV Sumitomo 3M or equivalent Connector 3E206 0100 KV Shell kit 3E306 3200 008 Sumitomo 3M or equivalent Connector 3E106 2230 KV Sumitomo 3M or equivalent Connector 3E206 0100 KV Shell kit 3E306 3200 008 Sumitomo 3M or equivale...

Page 94: ...nitor for analog monitor 1 4 17 Analog monitor 1 output gain Set up the output gain of analog monitor 1 4 18 Type of analog monitor 2 Select the type of monitor for analog monitor 2 4 19 Analog monitor 2 output gain Set up the output gain of analog monitor 2 4 21 Analog monitor output setup Select output format of the analog monitor Specifications of the Connector X6 Cable Connector Manufacturer P...

Page 95: ... of Supplement 5 Recommended components are specified to measure the brake releasing time Reactance of the cable varies depending on the cable length and it might generate surge voltage Select a surge absorber so that relay coil voltage max rating 30 V 50 mA and ter minal voltage may not exceed the rating 6 The current flowing to SO terminal should be rated current 40 mA maximum current 50 mA inru...

Page 96: ...00 5440 5 0 kW 44 1 or more 4 1 150 or less 30 or less 3100 5108 MGMF 850 W 1 3 kW 1 8 kW 13 7 or more 1 12 100 or less 50 or less 0 79 DC2 V or more 1470 2160 10000 2 4 kW 2 9 kW 25 0 or more 4 7 80 or less 25 or less 1 29 1800 3000 5440 4 4 kW 44 1 or more 3 93 150 or less 30 or less 3100 5108 MHMF 50 W 100 W 0 38 or more 0 002 35 or less 20 or less 0 30 DC1 V or more 39 2 4 9 30000 200 W 400 W ...

Page 97: ...ated during high speed run ning E F frame 200 V built in dynamic brake resistor is capable of handling up to 3 con tinuous halts at the rated revolutions with max permissible inertia When overheated under more critical operating conditions the brake will blow out and should be re placed with a new one You can activate the dynamic brake in the following cases 1 When the main power is turned off 2 A...

Page 98: ... After stalling During deceleration Pr6 36 0 Pr6 36 1 Contents of deviation counter D B D B Free run Free run D B D B Free run Free run D B Free run Free run D B D B Clear Clear Clear Clear Clear Clear Clear Clear Free run Free run D B 0 Setup value of Pr5 06 1 2 3 4 5 6 7 Sequence at main Servo OFF Pr5 06 Emergency stop Clear D B Emergency stop Clear Free run 8 9 After stalling During deceleratio...

Page 99: ...ter Emergency stop Hold Torque limit and torque command are as usual Torque command to inhibited direction is 0 Torque command to inhibited direction is 0 D B D B Free run Free run D B Free run Free run D B Clear Clear Clear Clear 0 Setup value of Pr5 10 1 2 3 4 5 6 7 Sequence at over travel inhibit input Pr5 10 Contents of deviation counter Clear Clear Clear Clear Engaged A Emergency stop Engaged...

Page 100: ...e setting for rotary switch to be using a flat blade screwdriver Edge width less than 2 6 mm Thickness less than 0 6 mm Node address MAC ID set with the rotary switch will be loaded once when the control power is turned on Therefore a change made after the power up will not be reflected to the control but will become active upon the next power up To avoid unnecessary trouble after the power supply...

Page 101: ... Alternately blinks main and sub with a dot at the left of the alarm code in decimal number e g overload Main power is OFF or RTEX communication is not synchronized Servo ON Servo OFF Alarm occurred Main code Sub code with left dot Alarm cleared right side dot is lit 00 right side dot is lit Displays warning code hexadecimal and normal display alternately at a slow rate Right dot blinks when warni...

Page 102: ...error warning The No of detected continuous reading errors CRC error of the data delivered to the local node reaches the number specified by Pr 7 26 RTEX continuous error warning setup C1 RTEX accumulated communication error warning The accumulated number of detected reading errors CRC error of the data delivered to the local node reaches the number specified by Pr 7 27 RTEX accumulated error warn...

Page 103: ... alarm occurs Lit red RTEX communication related unclearable alarm occurs While an alarm e g Err 16 0 other than RTEX communication related occurs if an alarm relating to RTEX communication occurs the COM LED blinks red or lights up red according to the above However in this case be aware that the 7 segment LED indicates the previous alarm which is not relating to RTEX communication The LINK LED l...

Page 104: ...2 74 Rev 2 00 MEMO ...

Page 105: ...tup Connection 3 15 List of Parameters 3 16 4 Details of Parameter Class 0 Basic Setting 3 39 Class 1 Gain Adjustment 3 47 Class 2 Damping Control 3 54 Class 3 Velocity Torque Control 3 62 Class 4 I F Monitor Setting 3 64 Class 5 Enhancing Setting 3 78 Class 6 Special Setting 3 91 Class 7 Special Setting 2 3 104 Class 8 Special Setting 3 3 117 Class 9 For Manufacturer s Use 3 120 Class 14 For Manu...

Page 106: ...In this Position Control Mode the target position target speed and acceleration decelera tion speed are specified and the servo driver internally generates the position command Position command Generation process Target position Target speed Acceleration parameter Deceleration parameter RTEX communication Command position Position control section Velocity control section Torque control section Sem...

Page 107: ...on profile Generation process Position control section Velocity control section Torque control section Motor Encoder Cyclic torque control CT mode In this Torque Control Mode the host controller generates the command torque and up dates it or transmits updated command at the communication cycle Target speed Target position command torque RTEX communication Acceleration parameter Deceleration param...

Page 108: ...e command position during communication cycle PP CV CT Processes commands and responses at the communication cycle regardless of the command updating cycle Slaves to be connected axes Max 4 when communication cycle time is 0 0625 ms Max 8 when communication cycle time is 0 125 ms Max 16 when communication cycle time is 0 250 ms Max 32 when communication cycle time is 0 5 1 0 or 2 0 ms Notes Number...

Page 109: ...nication cycle of RTEX communication in a unit of ns Do not set other value than 62500 0 0625 ms 125000 0 125 ms 250000 0 25 ms 500000 0 5 ms 1000000 1 0 ms 2000000 2 0 ms Set to other value Err93 5 Parameter setting error protection 4 is generated Example of Mode Setup Communication cycle of 0 5 ms command updating cycle 1 0 ms semi closed control 16 byte mode and interaxis semi synchronous mode ...

Page 110: ...lectronic gear function The electronic gear is a function to receive a position command from an upper controller and multiplies it by an electronic gear ratio specified by a parameter to produce a position command to a position control section By using this function the number of revolutions and travel of the motor per command can be set to the desired value Setup by the number of pulses per motor...

Page 111: ...gnal is not compatible with pulse regeneration Relevant parameters Panameter No Title Range Unit Function Pr0 11 Output pulse counts per one motor revolution 1 to 2097152 pulse r Set the resolution of pulse output by the number of output pulses per revolution of OA and OB respectively Pr0 12 Reversal of pulse output logic output source selection 0 to 3 Set the B phase logic and the output source o...

Page 112: ...n be checked also in positioning completion In_Position of RTEX communication status the absolute value of the positional deviation parameter is equal to or below the position ing complete range by the parameter the output is 1 Presence and absence of positional command can be specified as one of judgment conditions Relevant parameters Panameter No Title Range Unit Function Pr4 31 Positioning comp...

Page 113: ...and acceleration deceleration setting function This function controls the velocity by adding acceleration or deceleration command in the driver to the input velocity command Using this function it is possible to can use the soft start when inputting stepwise velocity command or when using internal velocity setup Also it is possible to use S shaped accel eration deceleration function to minimize sh...

Page 114: ...when the difference from the velocity command before after acceleration deceleration is within the range specified by Pr 4 35 Speed coincident range Relevant parameters Panameter No Title Range Unit Function Pr4 35 Speed coincidence range 10 to 20000 r min Set the speed coincidence V COIN output detection timing For Details of Parameter refer to P 3 72 Details of Parameter 2 Outline of Control Mod...

Page 115: ...imit while the torque is controlled While the speed limit is used to control the motor the torque command applied to the motor is not directly proportional to the analog torque command Torque command should have the following result the motor speed is equal to the speed limit The default speed limit value is 0 Be sure it is set higer than the maximum operating speed The speed limit is disabled whe...

Page 116: ...in Command positional deviation PERR Command unit Command position Upstream of filter CMD_POS Instruction unit Torque feed forword TFF 0 1 Target position TPOS Command unit Latch position 1 LPOS1 Command unit Actual position APOS Command unit command position after filter MPOS Command unit Position instruction generation process Profile position control mode PP Cyclic position control mode CP Posi...

Page 117: ...2 26 5th Adaptive mode Torque limit 0 13 1st 5 21 Selection 5 22 2nd Load variation suppression 6 23 Compensation gain Frequency1 Number of times 6 24 6 73 6 74 6 75 6 76 Frequency2 Compensation filter Estimate filter Torque filter 1 04 1st 1 09 2nd Two staged torque filter 6 42 Time constant 6 43 Damping term Gain switching 1 14 2nd setup 1 20 Mode 1 21 Delay time 1 22 Level 1 23 Hysteresis Veloc...

Page 118: ...08 3rd 2 09 2 12 4th 2 24 2 25 2 26 5th Two staged torque filter 6 42 Time constant 6 43 Damping term Torque filter 1 04 1st 1 09 2nd Velocity control 1 01 1st ProportionIntegration 1 06 1 02 1 07 2nd 0 04 Inertia ratio Velocity detection filte 1 03 1st 1 08 2nd Velocity detection Motor velocity r min Sum of feedback pulses Encoder pulse Torque instruction TRQ 0 1 Electronic gear positive conversi...

Page 119: ...by PANATERM Setup and storage of parameters and writing to the memory EEPROM Monitoring of I O pulse input and load factor Display of the present alarm and reference of the error history Data measurement of the wave form graphic and bringing of the stored data Normal auto gain tuning Frequency characteristic analysis of the machine system JOG function and Z phase search Troubleshooting Motor does ...

Page 120: ... setting Parameter of Interface monitor P 3 64 5 03 to 78 Enhancing setting Parameter of Enhancing setting P 3 78 6 02 to 98 Special setting Parameter of Special setting P 3 91 7 00 to 110 Special setting 2 P 3 104 8 00 to 19 Special setting 3 P 3 117 9 00 to 50 For manufacturer s use Parameter of manufacturer s use P 3 120 14 2 00 to 29 For manufacturer s use 15 00 to 35 For manufacturer s use 1 ...

Page 121: ...lection 0 to 3 0 R 0 13 1st torque limit 0 to 500 500 1 B 3 45 0 14 Position deviation excess setup 0 to 230 83886080 command unit A 0 15 Absolute encoder setup 0 to 4 1 C 0 16 External regenerative resistor setup 0 to 3 3 0 C 3 46 0 17 Load factor of external regenerative resistor selection 0 to 4 0 C 0 18 For manufacturer s use 0 Class 1 Gain Adjustment Parametr No Title Range Default Unit Attri...

Page 122: ... position control switching 0 to 10000 10 0 1 ms B 3 50 1 17 Level of position control switching 0 to 20000 0 B 1 18 Hysteresis at position control switching 0 to 20000 0 B 1 19 Position gain switching time 0 to 10000 10 0 1 ms B 3 51 1 20 Mode of velocity control switching 0 to 5 0 B 1 21 Delay time of velocity control switching 0 to 10000 0 0 1 ms B 3 52 1 22 Level of velocity control switching ...

Page 123: ...turer s use 0 1 37 For manufacturer s use 0 1 38 For manufacturer s use 0 1 39 For manufacturer s use 0 1 40 For manufacturer s use 0 1 41 For manufacturer s use 0 1 42 For manufacturer s use 0 1 43 For manufacturer s use 0 1 44 For manufacturer s use 0 1 45 For manufacturer s use 0 1 46 For manufacturer s use 0 1 47 For manufacturer s use 0 1 48 For manufacturer s use 0 1 49 For manufacturer s us...

Page 124: ...manufacturer s use 0 1 63 For manufacturer s use 0 1 64 For manufacturer s use 0 1 65 For manufacturer s use 0 1 66 For manufacturer s use 0 1 67 For manufacturer s use 0 1 68 For manufacturer s use 0 1 69 For manufacturer s use 0 1 70 For manufacturer s use 0 1 71 For manufacturer s use 0 1 72 For manufacturer s use 0 1 73 For manufacturer s use 0 1 74 For manufacturer s use 0 1 75 For manufactur...

Page 125: ...dth selection 0 to 20 2 B 2 06 2nd notch depth selection 0 to 99 0 B 2 07 3rd notch frequency 50 to 5000 5000 Hz B 2 08 3rd notch width selection 0 to 20 2 B 2 09 3rd notch depth selection 0 to 99 0 B 2 10 4th notch frequency 50 to 5000 5000 Hz B 3 56 2 11 4th notch width selection 0 to 20 2 B 2 12 4th notch depth selection 0 to 99 0 B 2 13 Selection of damping filter switching 0 to 6 0 B 3 57 2 1...

Page 126: ...g width setting 0 to 1000 0 B 2 28 2nd damping width setting 0 to 1000 0 B 3 61 2 29 3rd damping width setting 0 to 1000 0 B 2 30 4th damping width setting 0 to 1000 0 B 2 31 For manufacturer s use 0 2 32 For manufacturer s use 0 2 33 For manufacturer s use 0 2 34 For manufacturer s use 0 2 35 For manufacturer s use 0 2 36 For manufacturer s use 0 2 37 For manufacturer s use 0 Class 3 Velocity Tor...

Page 127: ...nufacturer s use 0 3 28 For manufacturer s use 16000 3 29 For manufacturer s use 0 Class 4 I F Monitor Setting Parametr No Title Range Default Unit Attribute Related control mode Detail page Class No A B type C type D E F type P S T 4 00 SI1 input selection 0 to 00FFFFFFh 3289650 C 3 64 4 01 SI2 input selection 0 to 00FFFFFFh 8487297 C 3 65 4 02 SI3 input selection 0 to 00FFFFFFh 8553090 C 4 03 SI...

Page 128: ...2 Positioning complete output setup 0 to 10 0 A 4 33 INP hold time 0 to 30000 0 1 ms A 3 71 4 34 Zero speed 10 to 20000 50 r min A 4 35 Speed coincidence range 10 to 20000 50 r min A 3 72 4 36 At speed Speed arrival 10 to 20000 1000 r min A 4 37 Mechanical brake action at stalling setup 0 to 10000 0 1 ms B 3 73 4 38 Mechanical brake action at running setup 0 to 32000 0 1 ms B 4 39 Brake release sp...

Page 129: ...sition comparison value 7 2147483648 to 2147483647 0 command unit A 4 55 Position comparison value 8 2147483648 to 2147483647 0 command unit A 4 56 Position comparison output delay compensation amount 32768 to32767 0 0 1 us R 4 57 Position comparison output assignment setting 2147483648 to 2147483647 0 R 3 77 Class 5 Enhancing Setting Parametr No Title Range Default Unit Attribute Related control ...

Page 130: ...ufacturer s use 2 5 31 USB axis address 0 to 127 1 C 5 33 Pulse regenerative output limit setup 0 to 1 0 C 5 34 For manufacturer s use 4 5 36 For manufacturer s use 0 5 45 Quadrant glitch positive direction compensation value 1000 to 1000 0 0 1 B 5 46 Quadrant glitch negative direction compensation value 1000 to1000 0 0 1 B 3 87 5 47 Quadrant glitch compensation delay time 0 to 1000 0 ms B 5 48 Qu...

Page 131: ... A 5 69 Deterioration diagnosis unbalanced load upper limit 1000 to 1000 0 0 1 A 5 70 Deterioration diagnosis unbalanced load lower limit 1000 to 1000 0 0 1 A 5 71 Deterioration diagnosis dynamic friction upper limit 1000 to 1000 0 0 1 A 5 72 Deterioration diagnosis dynamic friction lower limit 1000 to 1000 0 0 1 A 3 89 5 73 Deterioration diagnosis viscous friction upper limit 0 to 10000 0 0 1 100...

Page 132: ...ime at alarm 0 to 1000 200 ms B 3 93 6 15 2nd over speed level setup 0 to 20000 0 r min B 6 18 Power up wait time 0 to 100 0 0 1 s R 6 19 For manufacturer s use 0 6 20 For manufacturer s use 0 6 21 For manufacturer s use 0 6 22 For manufacturer s use 0 6 23 Load change compensation gain 100 to 100 0 B 6 24 Load change compensation filter 10 to 2500 53 0 01 ms B 3 94 6 27 Warning latch state setup ...

Page 133: ...r 0 to 2000 A type 11 B C type 12 17 0 1 ms B 6 49 Command response Adjust filter attenuation term 0 to 99 15 B 6 50 Viscous friction compensation gain 0 to 10000 0 0 1 10000 r min B 3 99 6 51 Immediate cessation completion wait time 0 to 10000 0 ms B 6 52 For manufacturer s use 0 6 53 For manufacturer s use 0 6 54 For manufacturer s use 0 6 57 Torque saturation anomaly detection time 0 to 5000 0 ...

Page 134: ... 5000 0 0 1 Hz B 6 75 Torque compensation frequency 2 0 to 5000 0 0 1 Hz B 6 76 Load estimation count 0 to 8 0 B 3 103 6 87 For manufacturer s use 0 6 88 Absolute encoder multi turn data upper limit value 0 to 65534 0 C 6 97 Function expansion setup 3 2147483648 to 2147483647 0 B 6 98 Function expansion setup 4 2147483648 to 2147483647 0 R Class 7 Special Setting 2 Parametr No Title Range Default ...

Page 135: ...1 ms C 7 15 Positioning adjacent range 0 to 1073741823 10 command unit A 7 16 Torque saturation error protection frequency 0 to 30000 0 time B 3 107 7 20 RTEX communication cycle setup 1 to 12 3 R 7 21 RTEX command updating cycle setup 1 to 2 2 R 7 22 RTEX function extended setup 1 32768 to 32767 0 R 3 108 7 23 RTEX function extended setup 2 32768 to 32767 18 B 7 24 RTEX function extended setup 3 ...

Page 136: ...ng setting for latch trigger with stop function 0 to 3 0 C 3 114 7 87 For manufacturer s use 0 7 91 RTEX communication cycle expansion setting 0 to 2000000 500000 ns R 7 92 Correction time of latch delay 2 2000 to 2000 0 25 ns B 7 93 Home position return limit speed 0 to 20000 0 r min C 7 95 Number of RTEX continuous communication error protection 1 detections 0 to 17 4 time R 3 115 7 96 Number of...

Page 137: ...8 03 For manufacturer s use 0 8 04 Profile linear deceleration constant 1 to 429496 100 10000 command unit s2 B 8 05 For manufacturer s use 0 8 10 Amount of travel after profile position latch detection 1073741823 to 1073741823 0 command unit B 8 12 Profile return to home position mode setup 0 to 1 0 B 3 118 8 13 Profile home position return velocity 1 0 to 2147483647 50 command unit s or r min B ...

Page 138: ... For manufacturer s use 0 9 11 For manufacturer s use 1 9 12 For manufacturer s use 80 9 13 For manufacturer s use 50 9 14 For manufacturer s use 10 9 17 For manufacturer s use 0 9 18 For manufacturer s use 0 9 19 For manufacturer s use 0 9 20 For manufacturer s use 0 9 21 For manufacturer s use 0 9 22 For manufacturer s use 200 9 23 For manufacturer s use 50 9 24 For manufacturer s use 100 Relate...

Page 139: ...100 9 34 For manufacturer s use 0 9 35 For manufacturer s use 0 9 48 For manufacturer s use 0 9 49 For manufacturer s use 0 9 50 For manufacturer s use 0 Class 14 For Manufacturer s Use Parametr No Title Range Default Unit Attribute Related control mode Detail page Class No A B type C type D E F type P S T 14 00 For manufacturer s use 0 3 120 14 01 For manufacturer s use 0 14 02 For manufacturer s...

Page 140: ...turer s use 0 14 16 For manufacturer s use 0 14 17 For manufacturer s use 0 14 18 For manufacturer s use 0 14 19 For manufacturer s use 0 14 20 For manufacturer s use 0 14 21 For manufacturer s use 0 14 22 For manufacturer s use 0 14 23 For manufacturer s use 0 14 24 For manufacturer s use 0 14 25 For manufacturer s use 0 14 26 For manufacturer s use 0 14 27 For manufacturer s use 0 Related contro...

Page 141: ...Attribute Related control mode Detail page Class No A B type C type D E F type P S T 15 00 For manufacturer s use 0 3 120 15 16 For manufacturer s use 2 15 17 For manufacturer s use 4 15 30 For manufacturer s use 0 15 31 For manufacturer s use 5 15 33 For manufacturer s use 0 15 34 For manufacturer s use 0 15 35 For manufacturer s use 1 Related control mode is thant P Position control S Velocity c...

Page 142: ...ommand When this command is received in servo on status it causes the command error 0045h While processing the command keep servo off status When servo is turned on Servo_On 1 during processing of this command Err 27 7 Position information initialization error protection will occur After execution of the command all position information including actual position is initialized This means that retu...

Page 143: ...onse to positive direction command CCW when viewed from load side shaft end This parameter is set in accordance with the specification of the controller If change the parameters in the case of Pr 7 23 RTEX function extended setup 2 bit 3 must be changed Be sure to check the host controller Positive direction CCW Negative direction CW Default Setup value Command direction Motor rotational direction...

Page 144: ... control is the same as in the standard mode 3 Velocity control is the same as in the vertical axis mode Torque control is the same as in the standard mode 4 Certain function s is not available in a specific control mode Refer to description in Pr6 32 Two degree of freedom control mode standard type For Two degree of freedom control mode refer to Pr6 47 P 3 98 Set up the action mode of the real ti...

Page 145: ... to this mode 4 Load characteristics update Use this mode when applying only inertia ratio dynamic friction compensation and viscous friction compensation among load characteristics while holding gain filter setting 5 Load characteristic measurement Estimate load characteristics without changing basic gain setting or friction compensation setting with the help of the setup support software 6 Load ...

Page 146: ...tment Invalidation of Real Time Auto Gain Tuning Please start to set from automatic Gain Adjustment invalidation Pr0 08 Command pulse counts per one motor revolution Range Unit Attribute Default Related control code 0 to 223 pulse C 0 P S T Set the command pulses that causes single turn of the motor shaft When this setting is 0 Pr0 09 1st numerator of electronic gear and Pr0 10 Denominator of elec...

Page 147: ... setting value encoder resolution Position command Position command input When Pr0 08 and 0 09 0 this operation is processed according to setup value of Pr0 10 1 1073741824 1 1073741824 Pr0 09 setting value Pr0 10 setting value Position command input Position command When Pr0 08 and 0 09 0 this operation is processed according to setup value of Pr0 09 and Pr0 10 Pr0 08 0 Pr0 09 0 Position command ...

Page 148: ...c Pr0 12 B phase logic Output source CCW direction rotation CW direction rotation 0 Non reversal Encoder A phase B phase A phase B phase 1 Reversal Encoder A phase B phase A phase B phase Setup value 2 and 3 are for manufacturer s use Pulse regeneration function Maximum frequency of regenerated pulse output is 4 Mpps after multiplied by 4 If the movement speed exceeds this frequency the regenerati...

Page 149: ...ged set up with the encoder pulse counts at the position control Err24 0 Error detection of position deviation excess becomes invalid when you set up this to 0 For description of command unit and encoder unit refer to P 3 85 Pr5 20 Pr0 15 Absolute encoder setup Range Unit Attribute Default Related control code 0 to 4 C 1 P S T You can set up the using method of absolute encoder Setup value Functio...

Page 150: ...ssing circuit is activated and its active ratio exceeds 10 2 External resistor Regenerative processing circuit is activated but no regenerative over load protection is triggered 3 A B frame No resistor Both regenerative processing circuit and regenerative protection are not activated and built in capacitor handles all regenerative power Install an external protection such as thermal fuse when you ...

Page 151: ...tup of this velocity loop gain as well However too high setup may cause oscillation When the inertia ratio of Pr0 04 is set correctly the setup unit of Pr1 01 becomes Hz Pr1 02 1st time constant of velocity loop integration Range Unit Attribute Default Related control code 1 to 10000 0 1 ms B A to C frame 210 D to F frame 310 P S T You can set up the integration time constant of velocity loop Smal...

Page 152: ...trol code 0 to 6400 0 01 ms B 0 P Multiply the velocity control command calculated according to the internal positional command by the ratio of Pr1 10 and add the result to the speed command resulting from the positional control process Set the time constant of 1st delay filter which affects the input of velocity feed forward by Pr1 11 The details of velocity feed forward function refers to P 5 49...

Page 153: ...ute value of the speed command was kept below level hysteresis r min previously during delay time with the 2nd gain 6 Position deviation is large Shift to the 2nd gain when the absolute value of the positional deviation exceeded level hysteresis pulse previously with the 1st gain Return to the 1st gain when the absolute value of the positional deviation was kept below level hysteresis pulse previo...

Page 154: ...Caution Relatedpage For position controlling Set up triggering level when Pr1 15 Position control switching mode is set at 3 5 6 9 or 10 Unit of setting varies with switching mode Set the level equal to or higher than the hysteresis The switching condition of 1st gain and 2nd gain refer to P 5 36 Adjustment Gain Switching Function Pr1 18 Hysteresis at position control switching Range Unit Attribut...

Page 155: ...B 0 S For velocity controlling Set the condition to trigger gain switching Setup value Switching condition Gain switching condition 0 Fixed to the 1st gain Fixed to the 1st gain Pr1 00 to Pr1 04 1 Fixed to the 2nd gain Fixed to the 2nd gain Pr1 05 to Pr1 09 2 RTEX communication gain switching command 1st gain when gain switching command Gain_SW with RTEX communication is 0 2nd gain when Gain_SW is...

Page 156: ...g Range Unit Attribute Default Related control code 0 to 20000 Mode dependent B 0 S Caution Relatedpage For velocity controlling Set up triggering hysteresis when Pr1 20 Velocity control gain switching mode is set at 3 to 5 Unit of setting varies with switching mode When level hysteresis the hysteresis is internally adjusted so that it is equal to level The switching condition of 1st gain and 2nd ...

Page 157: ... Relatedpage For torque controlling Set up triggering level when Pr1 24 Torque control gain switching mode is set at 3 Unit varies depending on the setup of mode of control switching Set the level equal to or higher than the hysteresis The switching condition of 1st gain and 2nd gain refer to P 5 36 Adjustment Gain Switching Function Pr1 27 Hysteresis at torque control switching Range Unit Attribu...

Page 158: ...f adaptation Parameters related to the 3rd and 4th notch filter are disabled and results of adaptive operation are cleared 5 High precision adaptive filter Two adaptive filters are enabled Parameters related to the 3rd and 4th notch filters will be updated based on the results of adaptive performance Use of this setup value is recommended when using 2 adaptive filters 6 For manufacturer s use PANA...

Page 159: ...the 2nd notch filter Higher the setup shallower the notch depth and smaller the phase delay you can obtain Pr2 07 3rd notch frequency Range Unit Attribute Default Related control code 50 to 5000 Hz B 5000 P S T Caution Set the depth of notch at the center frequency of the 3th notch filter In no resonance point is found the frequency is set to 5000 Notch frequency is automatically set to the 1st re...

Page 160: ...y of the 4th notch filter Higher the setup larger the notch width you can obtain Use with default setup in normal operation When the applicable filter function is used parameter value is automatically set Pr2 12 4th notch depth selection Range Unit Attribute Default Related control code 0 to 99 B 0 P S T Caution Set the depth of notch at the center frequency of the 4th notch filter Higher the setu...

Page 161: ...n as set value 0 Position control Two degree of freedom control mode enabled Setup value 1st model 2nd model 4 5 For manufacturer s use Setup value Position command direction 1st model 2nd model 6 Positive direction Negative direction Switching of Damping Controls will be done on the rising edge of the command whose number of pulses 0 125 ms has been changed from 0 while the positioning complete s...

Page 162: ...n at load edge Setup unit is 0 1 Hz The setup frequency is 0 5 to 300 0 Hz Setup of 0 to 0 4 Hz becomes invalid Refer to P 5 39 Suppression of Machine Resonance as well before using this parameter Pr2 15 1st damping filter setup Range Unit Attribute Default Related control code 0 to 1500 0 1 Hz B 0 P Pr2 17 2nd damping filter setup Range Unit Attribute Default Related control code 0 to 1500 0 1 Hz...

Page 163: ...Vc 0 368 1 Positional command smoothing filter setup time ms Pr2 22 0 1 ms Time Positional command before filter Positional command after filter Filter switching waiting time 2 1 Actual filter time constant setup value 0 1 ms has the maximum absolute error of 0 4 ms for a time constant below 100 ms and the maximum relative error of 0 2 for a time constant 20 ms or more 2 Switching of Pr2 22 Positi...

Page 164: ...d until the command pulse less state has continued for the filter switching wait time 3 Even if Pr2 23 Command FIR filter is changed it is not applied immediately If the switching as described in 2 occurs during this delay time the change of Pr2 23 will be suspended Pr2 24 5th notch frequency Range Unit Attribute Default Related control code 50 to 5000 Hz B 5000 P S T Caution Set the center freque...

Page 165: ...rol function Pr2 30 4th vibration control width setting Range Unit Attribute Default Related control code 0 to 1000 B 0 P To conduct fine tuning of 4th vibration suppression control function Pr2 31 For manufacturer s use Range Unit Attribute Default Related control code 0 Pr2 32 For manufacturer s use Range Unit Attribute Default Related control code 0 Pr2 33 For manufacturer s use Range Unit Attr...

Page 166: ...computed from the formula shown below Acceleration time ms Vc 1000 Pr3 12 1 ms Deceleration time ms Vc 1000 Pr3 13 1 ms 1000 Stepwise input speed command Speed r min Speed command after acceleration deceleration process Time Pr3 13 1 ms Pr3 12 1 ms Pr3 14 Sigmoid acceleration deceleration time setup Range Unit Attribute Default Related control code 0 to 1000 ms B 0 S Set S curve time for accelerat...

Page 167: ... value of motor max velocity 1 2 Pr3 22 Speed limit value 2 Range Unit Attribute Default Related control code 0 to 20000 r min B 0 T Pr3 17 Selection of speed limit 1 set to velocity limit value when RTEX communication command SL_SW is 1 But it is limited by setting value of Pr5 13 and Pr6 15 min value of motor max velocity 1 2 Pr3 23 For manufacturer s use Range Unit Attribute Default Related con...

Page 168: ...ut value is 131586 for converting to 10 decimal number For easier setting use the USB communication PANATERM Do not setup to a value other than that specified in the table The same signal can t be assigned to multiple pins Otherwise duplicated assignment will cause Err 33 0 Input multiple assignment error 1 protection or Err 33 1 Input multiple assignment error 2 protection EXT1 can be allocated o...

Page 169: ...2236962 P S T Pr4 05 SI6 input selection Range Unit Attribute Default Related control code 0 to 00FFFFFFh 0 to 16777215 C 00212121h 2171169 P S T Pr4 06 SI7 input selection Range Unit Attribute Default Related control code 0 to 00FFFFFFh 0 to 16777215 C 002B2B2Bh 2829099 P S T Pr4 07 SI8 input selection Range Unit Attribute Default Related control code 0 to 00FFFFFFh 0 to 16777215 C 00313131h 3223...

Page 170: ...NP In_Position 04h At velocity output AT SPPED 05h Torque in limit signal output TLC Torque_Limited 06h Zero speed detection output signal ZSP 07h Speed coincidence output V COIN 08h Alarm output1 WARN1 Warning 09h Alarm output2 WARN2 Warning 0Ah Positional command ON OFF output P CMD In_Progress 0Bh Positioning complete 2 INP2 0Ch Speed in limit output V LIMIT 0Dh Alarm clear attribute output ALM...

Page 171: ...lated control code 0 to 28 A 0 P S T Select the type of monitor for analog monitor 1 See the table shown on the next page Default Mortor velocity Pr4 17 Analog monitor 1 output gain Range Unit Attribute Default Related control code 0 to 214748364 A 0 P S T Set up the output gain of analog monitor 1 Default For Pr4 16 0 Motor speed 1 V is output at the motor speed r min 500 r min setup value Pr4 18...

Page 172: ...tput voltage V Pr4 16 Pr4 18 Type of monitor Unit Output gain for setting Pr4 17 Pr4 19 0 0 Motor speed r min 500 1 Positional command speed 2 r min 500 2 Internal positional command speed 2 r min 500 3 Velocity control command r min 500 4 Torque command 33 5 Command positional deviation 3 pulse Command unit 3000 6 Encoder positional deviation 3 pulse Encoder unit 3000 7 Reservation 8 Reservation ...

Page 173: ...nd filter Position control Command input Encoder feedback Command position deviation command unit Pr7 23 bit14 1 Encoder positional deviation encoder unit Command position deviation command unit Pr7 23 bit14 0 Electronic gear reverse conversion Electronic gear reverse conversion 4 For monitor types No 23 and 24 digital signals are monitored using an analog monitor Therefore the output gain is as f...

Page 174: ...l 0 The signal will turn on when the positional deviation is smaller than Pr4 31 Positioning complete range 1 6 The signal will turn on when there is no position command and the positional deviation is smaller than Pr4 31 Positioning complete range 2 7 The signal will turn on when there is no position command the zero speed detection signal is ON and the positional deviation is smaller than Pr4 31...

Page 175: ... of positioning complete signal 0 Positioning detection delay time becomes 0 and positioning completion decision is started immediately upon a change from With position command to Without position command 1 to 30000 Positioning decision start time is delayed by a setting value ms If a position command is received during the delay time the delay time is reset When the position command becomes 0 the...

Page 176: ...d command after acceleration deceleration process Speed command Speed r min Pr4 35 1 Speed coincidence range Speed coincidence output V COIN Pr4 35 1 Speed coincidence range 1 Because the speed coincidence detection is associated with 10 r min hysteresis actual detection range is as shown below Speed coincidence output OFF ON timing Pr4 35 10 r min Speed coincidence output ON OFF timing Pr4 35 10 ...

Page 177: ...sequence so as the driver turns to Servo OFF after the brake is actually activated ON SRV ON BRK OFF actual brake motor energization release OFF hold release energized hold non energized Pr4 37 tb Pr4 38 Mechanical brake action at running setup Range Unit Attribute Default Related control code 0 to 32000 1 ms B 0 P S T When the motor turns to Servo OFF you can set up the time from when servo on si...

Page 178: ... reading errors CRC error of the data delivered to the local node reaches the number specified by Pr 7 26 RTEX continuous error warning setup 12 RTEX accumulated communication error warning The accumulated number of detected reading errors CRC error of the data delivered to the local node reaches the number specified by Pr 7 27 RTEX accumulated error warning setup 13 RTEX_Update_Counter error warn...

Page 179: ... Sets the signal width of position comparison output No signal will be output when 0 Pr4 45 Position comparison output polarity selection Range Unit Attribute Default Related control code 0 to 7 R 0 P S T Sets position comparison output polarity by each bit of the output terminal Set bits 1 2 bit Designation bit0 SO1 OCMP1 bit1 SO2 OCMP2 bit2 SO3 OCMP3 Set value for each bit Setup value Designatio...

Page 180: ...elated control code 2147483648 to 2147483647 Command unit A 0 P S T Sets comparison value for position compare 4 Pr4 52 Position comparison value 5 Range Unit Attribute Default Related control code 2147483648 to 2147483647 Command unit A 0 P S T Sets comparison value for position compare 5 Pr4 53 Position comparison value 6 Range Unit Attribute Default Related control code 2147483648 to 2147483647...

Page 181: ...son values can be set by one single output terminal Set bits bit Designation bit0 to bit3 Position com 1 bit4 to bit7 Position com 2 bit8 to bit11 Position com 3 bit12 to bit15 Position com 4 bit16 to bit19 Position com 5 bit20 to bit23 Position com 6 bit24 to bit27 Position com 7 bit28 to bit31 Position com 8 Set value for each bit 1 2 Setup value Designation 0000b Invalid output 0001b Assigned t...

Page 182: ...Denominator of pulse output division Pr0 11 Pr5 03 Pulse regeneration output operation 1 to 2097152 0 When the output source is encoder Pr0 11settingvalue 4 Encoder resolution Encoder feedback pulse pulse Output pulse pulse When Pr 5 03 0 the above process is made according to Pr 0 11 setup value The number of pulses of reproduced pulse output OA and OB are the number of pulses set in Pr 0 11 The ...

Page 183: ...NOT inhibits CCW drive When POT is input during CW driving stops the drive according to Pr 5 05 Sequence at over travel inhibit The similar function NOT is applied in reverse direction 1 POT and NOT are disabled having no effect on operation 1 2 POT or NOT input activates Err 38 0 Run inhibition input protection The Pr5 04 Over travel inhibit input setup and Pr5 05 Sequence at over travel inhibit ...

Page 184: ...viations accumulated during deceleration are cleared 4 When setting value of Pr 5 04 Over travel inhibit input setup is 2 Err 38 0 Over travel inhibit input protect occurs when POT or NOT is turned on Therefore the system operates according to Pr 5 10 Sequence at alarm but not to this setting Pr 5 10 Sequence at alarm has always priority if any other error occurs 5 Emergency stop refers to a contr...

Page 185: ...During deviation clearing process the system causes the internal command position to follow up the feedback position When executing the interpolation feed system command after servo ON re set the command coordinate of the host controller The motor may operate sharply 3 Emergency stop refers to a controlled immediate stop with servo on The torque command value is limited during this process by Pr 5...

Page 186: ...will activate This input will become invalid for Servo ON during trips safety state or when the main power supply is switched ON and will follow the normal sequence setting Pr5 08 LV trip selection at main power OFF Range Unit Attribute Default Related control code 0 to 3 B 1 P S T To select whether to trip LV or Servo Off in case of main power supply alarm In addition also sets conditions for det...

Page 187: ... 3 Free run DB OFF Clear 2 1 During deceleration sequence or at the stop during alarm or servo OFF the system must control the position and stop the generation of internal position command 2 During deviation clearing process the system causes the internal command position to follow up the feedback position When executing the interpolation feed system command after servo ON first re set the command...

Page 188: ...le motor is set The internal value is limited to the over speed level of applicable motor Pr5 14 Motor working range setup Range Unit Attribute Default Related control code 0 to 1000 0 1 revolution A 10 P Sets the allowable motor operating range corresponding to the position command input range Err34 0 Allowable motor operating range abnormal protection will be triggered when the set value is exce...

Page 189: ...ttribute Default Related control code 0 to 4 B 1 P S You can set up the torque limiting method Setup value of RTEX communication command TL SW torque limit switching command as follows But for torque control switching function is invalid Pr0 13 1st torque limit is fixed For RTEX communication command check to content of contorllor setup value TL_SW 0 TL_SW 1 Negative direction Positive direction N...

Page 190: ... code 2 Pleses fixed to 2 Pr5 31 USB axis address Range Unit Attribute Default Related control code 0 to 127 C 1 P S T Set up the axis number for USB communication Pr5 33 Pulse regenerative output limit setup Range Unit Attribute Default Related control code 0 to 1 C 0 P S T Enable disable detection of Err28 0 Pulse regenerative limit protection 0 Invalid 1 Valid Pr5 34 For manufacturer s use Rang...

Page 191: ... P To set compensation value LPF time constant for quadrant projection Pr5 49 Quadrant projection compensation filter setting H Range Unit Attribute Default Related control code 0 to10000 0 1 ms B 0 P To set compensation value HPF time constant for quadrant projection Pr5 50 For manufacturer s use Range Unit Attribute Default Related control code 0 Pr5 51 For manufacturer s use Range Unit Attribut...

Page 192: ...ribute Default Related control code 0 to 10000 A 0 P S T Sets the lower limit values for inertia ratio estimate in deterioration diagnosis judgment of load characteristics estimate after completion of convergence when deterioration diagnosis warning is valid Pr6 97 bit 1 1 Pr5 69 Deterioration diagnosis unbalanced load upper limit Range Unit Attribute Default Related control code 1000 to 1000 0 1 ...

Page 193: ...is viscous friction lower limit Range Unit Attribute Default Related control code 0 to 10000 0 1 10000 r min A 0 P S T Sets the upper and lower limit values for viscous friction coefficient estimate in deterioration diagnosis judgment of load characteristics estimate after completion of convergence when deterioration diagnosis warning is valid Pr6 97 bit 1 1 Pr5 75 Deterioration diagnosis velocity...

Page 194: ...Connector X4 Pr5 78 Deterioration diagnosis torque lower limit Range Unit Attribute Default Related control code 1000 to 1000 0 1 A 0 P S T Sets the lower limit values for torque command average value when deterioration diagnosis warning is valid Pr6 97 bit 1 1 and deterioration diagnosis velocity output V DIAG is ON 4 Details of Parameter Class 5 Enhancing Setting ...

Page 195: ... valid and Set up the 3rd gain by a multiplying factor of the 1st gain 3rd gain 1st gain Pr6 06 100 When not using this parameter set Pr6 05 to 0 and Pr6 06 to 100 This is valid for only position control P 5 54 3rd Gain Switching Function Pr6 07 Torque command additional value Range Unit Attribute Default Related control code 100 to 100 B 0 P S Set up the offset load compensation value usually add...

Page 196: ...t used Fixed to 0 bit 7 For manufacturer s use Fixed to 0 bit 8 Not used Fixed to 0 bit 9 For manufacturer s use Fixed to 0 bit 10 Positional deviation of falling prevention function during alarm Invalid Valid bit 11 Encoder overheat abnormality protectiondetection Invalid Valid 1 bit 12 Not used Fixed to 0 bit 13 For manufacturer s use 0 Fixed to 0 bit 14 Load variation suppression functionautoma...

Page 197: ...ergency Stop upon Occurrence of Alarm Pr6 15 2nd over speed level setup Range Unit Attribute Default Related control code 0 to 20000 r min B 0 P S T Relatedpage When the motor speed exceeds this setup time during emergency stop sequence in an alarm condition Err26 1 2nd overspeed protection will be activated When setting value is 0 the internal value of over speed leve is used P 6 32 Emergency Sto...

Page 198: ...Code Pr6 30 For manufacturer s use Range Unit Attribute Default Related control code 0 Please fixed to 0 Pr6 31 Real time auto tuning estimation speed Range Unit Attribute Default Related control code 0 to 3 B 1 P S T Set up the load characteristics estimation speed with the real time auto tuning being valid A higher setup value assures faster response to a change in load characteristics but incre...

Page 199: ...pdate Set up update to be made based on result of the load characteristics estimation of Pr0 04 Inertia ratio Setup value Function 0 Use the current setup 1 Update by the estimated value 6 to 4 Torque compensation Set up the update to be made according to the results of load characteristics estimation of Pr6 07 Torque command additional value Pr6 08 positive direction torque compensation value and...

Page 200: ... procedure 1 Identify the LSB of the setup Example LSB of the torque compensation function is 4 2 Multiply the setup value by power of 2 LSB Example To set the torque compensation function to friction compensation middle 24 4 64 3 Perform steps 1 and 2 for every setups sum up the values which are to be Pr6 32 setup value Example Load characteristics measurement enable inertia ratio update enable t...

Page 201: ... if the setting value is 0 As the setting value increases the depth decreases As the depth increases the damping effect increases but the delay also increases As the depth decreases the delay decreases but the damping effect also decreases Use the parameter to fine adjust the damping effect and delay Pr6 42 Two stage torque filter time constant Range Unit Attribute Default Related control code 0 t...

Page 202: ... selection the function is available only when bit0 is set to 1 Enabled 1 For details of the type refer to P 5 11 Real time auto tuning two degree of freedom control standard type and P 5 19 Real time auto tuning two degree of freedom control synchronous type Pr6 48 Adjust filter Range Unit Attribute Default Related control code 0 to 2000 0 1 ms B Size A 11 Size B C 12 Size D to F 17 P S Set time ...

Page 203: ...d by this setting and the result is added to the torque command as compensation value The unit is Rated torque 0 1 10000 r min Pr6 51 Immediate cessation completion wait time Range Unit Attribute Default Related control code 0 to 10000 ms B 0 P S T When immediate stop alarm is occurs turn off brake release output BRK OFF and set the time during which the current flows through the motor Pr6 52 For ...

Page 204: ...he time until Err16 1 occurs A6N is longer than A5N For example if setting is 5000 Err16 1 will generate when torque saturation continues longer than 5 sec During torque controlling this function is disabled and Err16 1 will not generate During immediate stop alarm this function is disabled and Err16 1 is not generated Torque Torque limit Torque command Torque controlling signal output TLC Servo A...

Page 205: ...nit Attribute Default Related control code 0 to 3000 0 1 Hz B 0 P Sets the antiresonance frequency of the 1st model type resonance oppression notch filter Pr6 64 1st antiresonance damping ratio Range Unit Attribute Default Related control code 0 to 1000 B 0 P Sets the antiresonance damping ratio of the 1st model type resonance oppression notch filter Pr6 65 1st response frequency Range Unit Attrib...

Page 206: ...Range Unit Attribute Default Related control code 0 to1000 B 0 P Sets the damping depth of the 4th resonance oppression notch filter Pr6 73 Load estimation filter Range Unit Attribute Default Related control code 0 to 2500 0 01 ms B 0 P S Set the filter time constant T2 for load estimation Pr6 74 Torque compensation frequency 1 Range Unit Attribute Default Related control code 0 to5000 0 1 Hz B 0 ...

Page 207: ...s lower than 0 Internal value will be set to 65535 in case Pr0 15 is set to 0 or 2 absolute mode For actual position of absolute encoder refer to technical reference Realtime Express RTEX Communication Specification MINAS A6N series RTEX communication type Pr6 97 Function expansion setting 3 Range Unit Attribute Default Related control code 2147483648 to 2147483647 B 0 P S T function Setup value 0...

Page 208: ... 00 and restarted Will be cleared upon turning OFF of the control power source 5 Encoder Accumulated communication error counts 4 Node address value Displays the value set on rotary switch node address and read upon power up in decimal number After power up the value cannot be changed from the rotary switch 10 Overload load rate Displayed by 0 to FF hex Indicates the ratio against rated load Will ...

Page 209: ...tection This parameter can be switched by Pr7 24 bit5 bit5 0 The correction time is reflected in both the latch signal rising edge detection and the latch signal falling edge detection bit5 1 The correction time is reflected in the latch signal rising edge detection Note Signal state of edge detection means the following The rising edge detection means the photocoupler is turned ON The falling edg...

Page 210: ...g absolute encoder and mechanical coordinate system position Pr7 14 Main power off warning detection time Range Unit Attribute Default Related control code 0 to 2000 1 ms C 0 P S T Caution Specifies a time to wait until a main power off warning is detected when main power shut off continues RTEX communication status AC_OFF becomes 1 when main power off is detected setup value Content 0 to 9 2000 W...

Page 211: ...ault Related control code 1 to 12 R 3 P S T Set up the RTEX communication cycle setup value Content setup value Content 1 Setup by Pr7 91 is enabled 3 0 5 ms 0 For manufacturer s use is not allowed to set 4 5 For manufacturer s use is not allowed to set 1 For manufacturer s use is not allowed to set 6 1 0 ms 2 For manufacturer s use is not allowed to set 7 to 12 For manufacturer s use is not allow...

Page 212: ...pt NOP command is invalid bit5 Command pulse saturation function selection setup value Content 0 Invalid 1 Valid bit6 Return to origin operation velocity restriction function activation setup value Content 0 Invalid 1 Valid bit7 10 Not used Pleses fixed to 0 bit11 13 For manufacture use Pleses fixed to 0 bit14 15 Not used Pleses fixed to 0 Please set the value that matches the controller sepecific...

Page 213: ...setup value Content 0 No inversion 1 Inversion bit7 PSL NSL RTEX status logic setting setup value Content 0 No inversion 1 Inversion bit8 RTEX status selection between In_Progress and AC_OFF setup value Content 0 In_Progress 1 AC_OFF bit9 Selects whether to return a command error in over travel inhibit direction when a command is received after a deceleration stop caused by over travel inhibit inp...

Page 214: ...Active servo on state signal of RTEX Communication setup value Content 0 Same as before 1 Turns on in command receivable state after servo ON bit5 The correction function for detection delay of latch position setup value Content 0 The correction time of both the latch signal rising edge detection and the latch signal falling edge detection is set by Pr7 09 1 The correction time of the latch signal...

Page 215: ...g when the No of accumulated errors reaches the setting of this parameter When the setting value is 0 this function is disabled and no warning is generated Pr7 28 RTEX_Update_Counter error warning setup Range Unit Attribute Default Related control code 0 to 32767 times A 0 P S T If Update_Counter is accumulated exceeding the setting value of this parameter and correct update fails WngC2h RTEX_Upda...

Page 216: ...T Selects a monitor type of Sub Response Data2 in 32 byte mode If the setup value is 0 0 is returned Pr7 34 RTEX monitor select 6 Range Unit Attribute Default Related control code 0 to 32767 A 0 P S T Selects a monitor type of Sub Response Data3 in 32 byte mode If the setup value is 0 0 is returned Pr7 35 RTEX command setting 1 Range Unit Attribute Default Related control code 0 to 2 C 0 P S T Spe...

Page 217: ... for this parameter and is not updated correctly Err 86 2 RTEX_Update_Counter error protection will be activated If the setup value is 0 or 1 this function will be disabled and an alarm will not be activated Pr7 39 For manufacturer s use Range Unit Attribute Default Related control code 0 Pleses fixed to 0 Pr7 40 For manufacturer s use Range Unit Attribute Default Related control code 0 Pleses fix...

Page 218: ... be set If other value is set Err93 5 parameter setting error protection 4 occurs Pr7 92 Correction time of latch delay 2 Range Unit Attribute Default Related control code 2000 to 2000 25 ns B 0 P S T Set the correction time for delay of the latch trigger signal detection This parameter can be switched by Pr7 24 bit5 bit5 0 Invalid bit5 1 The correction time is reflected in the latch signal fallin...

Page 219: ...r 1 is set for this parameter 2 is internally set Pr7 97 Number of RTEX communication timeout error protection detections Range Unit Attribute Default Related control code 0 to 17 times R 4 P S T Set the number of times for RTEX communication timeout error protection detection If 0 or 1 is set for this parameter 2 is internally set Pr7 98 Number of RTEX cyclic data error protection 1 2 detections ...

Page 220: ... code 0 to 7 R 7 P S T Setup value Content 0 Extended settings Err96 4 is detected when a delay occurs in transmission reception processing by the amplifier due to unstable transmission timing from the host device and so forth If delay cannot be tolerated please use this setting 1 to 6 For manufacturer s use 7 Normal setting Pr7 109 For manufacturer s use Range Unit Attribute Default Related contr...

Page 221: ...urer s use Range Unit Attribute Default Related control code 0 Pr8 03 For manufacturer s use Range Unit Attribute Default Related control code 0 Pleses fixed to 0 Pr8 04 Profile linear deceleration constant Range Unit Attribute Default Related control code 1 to 429496 10000 Command unit s2 B 100 P Note Specifies deceleration during profile position control PP Be sure to set before starting operati...

Page 222: ...etting is in r min it is converted to command unit s through internal computation and the equivalent value is limited within the range as shown below 00000001h to 7FFFFFFFh 1 to 2147483647 If setting value is 0 control is performed with an assumption that the setting value is 1 Parameters are determined according to using the controller Please setup according to the instruction manual Pr8 14 Profi...

Page 223: ...ult Rev 2 00 1 Before Using the Products 2 Preparation 3 Setup 4 Trial Run 5 Adjustment 6 When In Troubie 7 Supplement Pr8 15 For manufacturer s use Range Unit Attribute Default Related control code 0 Pleses fixed to 0 Pr8 19 For manufacturer s use Range Unit Attribute Default Related control code 0 Pleses fixed to 0 4 Details of Parameter Class 8 Special Setting 3 ...

Page 224: ...s 14 before the software version 1 05 3 4 Details of Parameter Setup Class 15 For Manufacturer s Use Parameters are all manufacturer s use Please do not change the default parameters 3 4 Details of Parameter Setup Class 9 For Manufacturer s Use 1 Parameters are all manufacturer s use Please do not change the default parameters 1 There are of parameters of Class 9 after the software version 1 21 ...

Page 225: ...o reset the torque limit setup because the rated toque of the motor is different from the previ ous motor see e g 1 Frame Model No Applicable motor value of torque limit Frame Model No Applicable motor value of torque limit A MADL 01 MHMF5AZL1 350 C MCDL 31 MQMF041L1 350 MHMF041L1 350 MADL 11 MQMF011L1 350 MCDL 35 MHMF082L1 350 MHMF011L1 350 MADL 05 MHMF5AZL1 350 D MDDL 45 MGMF092L1 264 MQMF012L1 ...

Page 226: ...0 09 and Pr0 10 to any values between 1 to 230 3 The desired setting can be determined by selecting value of numerator and denomina tor of electronic gear However an excessively high division or multiplication ratio can not guarantee the operation The ratio should be in a range between 1 1000 and 1000 Excessively high multiplication ratio will cause Err27 2 command pulse multiplication error prote...

Page 227: ... 60 E D M L E D R 1 D 500000 60 2000 223 2000 500 30 2000 223 15000 8388608 Lead of ball screw L 10 mm Gear reduction ratio R 1 Position resolution M 0 005 mm Encoder 23 bit E 223 P r Lead of ball screw L 20 mm Gear reduction ratio R 1 Position resolution M 0 0005 mm Line driver pulse input 500 kpps Encoder 23 bit Ditto To make it to 2000 r min D Pr0 10 Pr0 09 750 500000 60 20 0 0005 2 1 23 2 1 23...

Page 228: ...3 124 Rev 2 00 MEMO ...

Page 229: ...nt 6 When In Troubie 4 1 Rev 1 00 4 Trial Run 1 Trial Run Inspection Before Trial Run 4 2 Setting of Servor Diver 4 3 Trial Run 4 6 Trial Run by PANATERM 4 6 Setup of Motor Rotational Speed and Input Pulse Frequency 4 7 2 Homing Operation Outline of Homing Operation 4 8 Profile Homing Operation 4 9 ...

Page 230: ...ulling force on the cable wire Is I O connector X4 pin added to the voltage over DC24 V power supply and voltage Rated voltage or Within this range Motor Is the mounting portion of the motor or the shaft coupling loosened Can motor and its equipment moving In the case of the brake is the brake released Wiring Example Motor POT HOME NOT USB AC A6N L1 L3 RX TX TX RX L1C L2C The controller RTEX DC24 ...

Page 231: ...Pr0 08 Command pulse counts per one motor revolution Pr0 09 Numerator of electronic gear Pr0 10 Denominator of electronic gear The parameters of communication cycle Pr7 20 RTEX communication cycle setup Pr7 21 RTEX command updating cycle setup Pr7 91 RTEX communication cycle expansion setting The parameters of communication data size and the synchronization mode Pr7 22 RTEX function extended setup...

Page 232: ...re to adjust the position instruction FIR filter Pr2 23 please smooth the position of the electronic gear after the command At this point please confirm the effect of the filter to adjust by the PANATERM waveform display position command speed before filtering and internal position command speed after filtering P 4 7 Setup of Motor Rotational Speed and Input Pulse Frequency The seeting of communic...

Page 233: ...irection the change of wiring POT NOT Positive Direction Note According to the controller used In order to have interchangeability with the old product A4N CW as a positive direction the need to change the Pr7 23 bit3 Below Be sure to confirm the controller specifications RTEX communication response byte 3 Pr7 23 bit3 0 factory default settings bit 1 bit 0 POT NOT in the case of a positive CCW Pr0...

Page 234: ... the power supply of the controller is not connected the RTEX communication cable is not connected etc RTEX communication state trial run is compatible by PANATERM please set bit0 of Pr7 99 to1 For PANATERM settings refer to PANATERM s manual for PANATERM of HELP The current position of the motor is the position of the servo ON as 0 command unit position Please after read the trial run operation o...

Page 235: ...xcessively high multiplication ratio will cause Err27 2 command pulse multiplication error protection due to varying command pulse input or noises even if the other settings are within the specified range With load of total reduction ratio 18 365 output shaft rotates 60 60 Pulley ratio Gear ratio Total reduction ratio Gear 18 60 12 73 18 365 When setting the command division and multiplication rat...

Page 236: ...itle Range Unit Function Pr8 01 Profile linear acceleration constant 1 to 429496 10000 command unit s2 Set acceleration for profile position control PP Be sure to set this parameter before starting operation Pr8 04 Profile linear deceleration constant 1 to 429496 10000 command unit s2 Set deceleration for profile position control PP Be sure to set this parameter before starting operation Pr8 12 Pr...

Page 237: ...ion trigger signal detection Start area Velocity 1 Pr 8 13 Profile home position return velocity 1 Velocity 2 Pr 8 14 Profile home position return velocity 2 Z phase Velocity1 Velocity2 NOT ON HOME ON POT ON Homing direction positive direction CASE1 CASE2 CASE3 CASE4 Home position Velocity2 Velocity2 Velocity2 Velocity1 Velocity1 Velocity1 Velocity1 Example Pr8 12 0 Positive direction trigger sign...

Page 238: ... stop upon detecting the 1st Z phase Actually detected position is determined by repositioning 10 Initialize the position information so that the detected Z phase becomes 0 and Homing_ Complete becomes 1 and profile homing is finished Precautions If Z phase is close to a point where HOME changes the 1st Z phase may not be detected as home due to reading delay of HOME sensor Place Z phase far away ...

Page 239: ...度2 Err94 2 Homing error protection will occur upon detection of POT Err94 2 Homing error protection will occur at startup Start area Homing direction positive direction NOT ON HOME ON POT ON CASE1 CASE2 CASE3 CASE4 Velocity1 Velocity1 Velocity1 Velocity 1 Pr 8 13 Profile home position return velocity 1 Velocity 2 Pr 8 14 Profile home position return velocity 2 Home position Example Pr8 12 0 Positi...

Page 240: ...tion return velocity 2 and stop at the position where HOME sensor ON rising edge is detected Actually detected position is determined by repositioning 10 Initialize the position information so that the detected HOME sensor rising edge is at 0 and Homing_Complete becomes 1 and profile homing is finished Precautions Set Pr8 14 Profile home position return velocity 2 to the lowest possible velocity H...

Page 241: ... error protection will occur upon detection of POT Err94 2 Homing error protection will occur at startup Start area Homing direction positive direction NOT ON POT ON Z phase Velocity2 Velocity2 Velocity2 CASE1 CASE2 CASE3 CASE4 Velocity 1 Pr 8 13 Profile home position return velocity 1 Velocity 2 Pr 8 14 Profile home position return velocity 2 Home position Example Pr8 12 0 Positive direction trig...

Page 242: ... opposite to the homing direction Z phase is not detected or ignored During profile homing 3 Z phase when the detected POT NOT and the direction of homing are the same direction Err94 2 Homing error protection will occur and cancel homing process When using this function without using the over travel inhibit input do not allocate POT NOT to general purpose input Simply setting Pr5 04 to 1 will not...

Page 243: ...es in the following figure as a result of the changes in the region during the start area Example Pr8 12 0 Homing direction positive direction trigger signal detection Start area Homing direction positive direction NOT ON HOME ON POT ON CASE1 CASE2 CASE3 CASE4 Velocity1 Velocity1 Velocity1 Velocity1 Velocity2 Velocity2 Velocity2 Velocity2 Velocity 1 Pr 8 13 Profile home position return velocity 1 ...

Page 244: ...that the detected HOME sensor rising edge is at 0 and Homing_Complete becomes 1 and profile homing is finished Precautions Set Pr8 14 Profile home position return velocity 2 to the lowest possible velocity Higher velocity may cause error due to delay in reading HOME sensors should be so arranged that once they detect something nothing will pass through them until deceleration and stop complete Dur...

Page 245: ...it NOT Ignore Z phase until reverse direction limit NOT 速度2 Home position Start area Homing direction positive direction Velocity 1 Pr 8 13 Profile home position return velocity 1 Velocity 2 Pr 8 14 Profile home position return velocity 2 Velocity2 Velocity2 Velocity2 Velocity1 Velocity1 Velocity1 Z phase NOT ON POT ON Ex See the next page Example Pr8 12 0 Positive direction trigger signal detecti...

Page 246: ... return 6 POT NOT Z phase the setup of Pr5 04 Over travel inhibit input setup and Pr5 05 Sequence at over travel inhibit is temporarily invalid During POT NOT detection reversal operation is automatically started after a deceleration to stop If an error such as the detection of drive disable input ON on the reverse side while failing to detect the home position during reversal operation with the d...

Page 247: ... Suppression of Machine Resonance 5 39 5 Manual Gain Tuning Application Damping Control 5 43 Model type Damping Filter 5 45 Feed Forward Function 5 49 Load Variation Suppression Function 5 51 3rd Gain Switching Function 5 54 Friction Torque Compensation 5 56 Quadrant Projection Suppression Function 5 58 Two degree of freedom Control Mode Position Control Mode 5 60 Two degree of freedom Control Mod...

Page 248: ... gain 500 0 1 Hz Time constant of V loop integration 500 0 1 ms Velocity loop feed forward 500 0 10 Inertia ratio 100 2000 2000 0 0 0 375 250 125 0 0 375 250 125 0 0 375 250 125 r min Command Speed Motor actual speed Gain setup Low Gain setup High Gain setup High feed forward setup No Start adjustment Adjust by using fit gain function Yes Yes Fit gain function No Fit gain function is a function of...

Page 249: ...ce by switching the gains by internal data or external signals P 5 36 Suppression of machine resonance When the machine stiffness is low vibration or noise may be gener ated due to the distorted axis hence you cannot set the higher gain You can suppress the resonance with two kinds of filter P 5 39 Manual gain tuning application You can obtain the higher performance while you are not satisfied wit...

Page 250: ...le the real time auto gain tuning Real time auto gain tuning may not be executed properly under the conditions described in the table below Under these conditions change the load condition or operation pattern or start manual gain tuning refer to P 5 31 Conditions which obstruct real time auto gain tuning action Load inertia The load is too small or large compared to the rotor inertia less than 3 ...

Page 251: ... details refer to P 5 6 and 5 7 3 Turn on servo and start the machine Estimation of load characteristics starts 4 When the load characteristics are determined Pr0 04 Inertia ratio is updated In a specific mode the following parameters are changed Pr6 07 Torque command additional value Pr6 08 Positive direction torque compensation value Pr6 09 Negative direction torque compensation value 5 When val...

Page 252: ...eal time auto tuning is valid Parameters which are updated to setup value corresponding to stiffness setup The real time auto tuning function updates the following basic gain setup parameters according to Pr0 03 Real time auto tuning stiffness setup Class No Title Function 1 00 1st gain of position loop When stiffness setup is valid updates the parameter based on the setup value Refer to P 5 9 Bas...

Page 253: ...el of torque control switching 1 27 Hysteresis at torque control switching Parameters which are set in response to load variation suppression function The following settings and parameters are set automatic for enable disable state of Pr 6 10 Function expansion setup load variation suppression function automatic adjustment Class No Title Function 6 10 Function expansion setup When set to Pr6 10 bi...

Page 254: ...Positive direction torque compensation value Pr6 09 Negative direction torque compensation value will be written to EE PROM every 30 minutes When you turn on the power again the auto gain tuning will be executed using the latest data as initial values 4 Because the control gain is updated while the motor stops changed setting value of Pr0 03 Real time auto tuning stiffness setup may not be reflect...

Page 255: ...140 110 500 200 175 110 10000 200 1450 10 175 140 400 200 220 140 10000 200 1140 11 1 320 180 310 126 380 180 10000 126 880 12 390 220 250 103 460 220 10000 103 720 13 1 480 270 210 84 570 270 10000 84 590 14 630 350 160 65 730 350 10000 65 450 15 720 400 140 57 840 400 10000 57 400 16 900 500 120 45 1050 500 10000 45 320 17 1080 600 110 38 1260 600 10000 38 270 18 1350 750 90 30 1570 750 10000 30...

Page 256: ...te value following may become quicker regardless of Pr6 31 Real time auto tuning estimation speed until operation data effective for the estimation of load characteristics is sufficiently accumulated When real time auto gain tuning is effective an estimate value may become abnormal due to disturbance If you want to obtain stable operation from when the power is turned on it is recommended to disab...

Page 257: ...ation command after about 100ms When the load characteristic is correctly estimated Pr 0 04 Inertia ratio is updated With certain mode settings Pr 6 07 Torque command addition value Pr 6 08 Positive direction compensation value Pr6 09 Negative direction torque compensation value and Pr6 50 Viscous friction compensation gain will be changed When value of Pr0 03 Selection of machine stiffness at rea...

Page 258: ... In addition to the high responce mode 2 settling time of positioning is reduced for a load where frictions are high 5 Load characteristic measurement Basic gain settings and friction compensation settings are not changed and load characteristic estimation only is made This is used in combination with set up support software PANATERM 6 Fit gain mode Use this mode to fine adjust the stiffness setti...

Page 259: ...n in the load characteristics but also increases estimation fluctuation due to disturbance The result of estimation is stored in the EEPROM every 30 minutes Setting Mode Description 0 No change Terminates estimation of load characteristic 1 Little change Responded against change of load characteristic on the order of minutes 2 Gradual change Responded against change of load characteristic on the o...

Page 260: ...r0 03 Real time auto tuning stiffness setup Dtails refer to basic gain parameter setup table Class No Title Function 1 00 1st gain of position loop When real time auto tuning is valid Pr0 02 1 to 4 6 updates the setup value according to the stiffness Refer to P 5 10 Basic gain parameter setup table 1 01 1st gain of velocity loop 1 02 1st time constant of velocity loop integration 1 04 1st time con...

Page 261: ...02 1 to 4 1 18 Hysteresis at position control switching 1 19 Position gain switching time Sets to 10 if real time auto tuning is valid Pr0 02 1 to 4 1 20 Mode of velocity control switching Sets to 0 if real time auto tuning is valid Pr0 02 1 to 4 1 21 Delay time of velocity control switching 1 22 Level of velocity control switching Sets to 10 if real time auto tuning is valid Pr0 02 1 to 4 1 23 Hy...

Page 262: ...tiffness setting is enabled sets to 90 When set to Pr 6 10 bit14 0 set to 0 6 24 Load variation compensation filter When set to Pr 6 10 bit14 1 in case of stiffness setting is enabled updates to match rigidity When set to Pr 6 10 bit14 0 value is held 6 73 Load estimation filter When set to Pr 6 10 bit14 1 in case of stiffness setting is enabled sets to 0 13 ms When set to Pr 6 10 bit14 0 set to 0...

Page 263: ... in these cases 3 The results of real time automatic gain tuning such as Pr0 04 Inertia ratio Pr6 07 Torque command additional value Pr6 08 Positive direction torque compensation value Pr6 09 Negative direction torque compensation value and Pr6 50 Viscous friction compensation gain are written in EEPROM in every 30 minutes Upon re starting of power auto tuning is performed using the data for initi...

Page 264: ... 668 267 54 2500 6 75 60 900 400 496 198 44 2500 7 95 75 700 300 394 158 34 2120 8 115 90 600 300 327 131 34 1770 9 140 110 500 200 268 107 24 1450 10 175 140 400 200 212 85 23 1140 11 320 180 310 126 139 55 16 880 12 390 220 250 103 113 45 13 720 13 480 270 210 84 92 37 11 590 14 630 350 160 65 71 28 9 450 15 720 400 140 57 62 25 8 400 16 900 500 120 45 50 20 7 320 17 1080 600 110 38 41 17 6 270 ...

Page 265: ...hly Caution After the power is turned on estimate value following may become quicker regardless of Pr6 31 Real time auto tuning estimation speed until operation data effective for the estimation of load characteristics is sufficiently accumulated When real time auto gain tuning is effective an estimate value may become abnormal due to disturbance If you want to obtain stable operation from when th...

Page 266: ... about 100 ms has elapsed after the servo was turned ON When the load characteristic is correctly estimated Pr0 04 Inertia ratio is updated With certain mode settings Pr6 07 Torque command additional value Pr6 08 Positive direction torque compensation value Pr6 09 Negative direction torque compensation value and Pr6 50 Viscous friction compensation gain will also be changed When the value of Pr0 0...

Page 267: ...setup Inertia ratio estimation offset load compensation and friction compensation are not performed and only the gain filter setup corresponding to the stiffness table is updated For a load with large inertia variations estimate the inertia in the synchronization mode etc and then use this mode 4 Load characteristic update In the gain filter setup only the inertia ratio and dynamic friction viscou...

Page 268: ... estimation is stored in the EEPROM every 30 minutes Setting Mode Description 0 No change Terminates estimation of load characteristic 1 Little change Responded against change of load characteristic on the order of minutes 2 Gradual change Responded against change of load characteristic on the order of seconds 3 Steep change Appropriate estimation is made against change of load characteristic If o...

Page 269: ...nd load characteristic update mode Pr0 02 4 this parameter will be updated 6 09 Negative direction torque compensation value 6 50 Viscous friction com pensation gain Parameters which are updated to setup value corresponding to stiffness setup The real time auto tuning function updates the following basic gain setup parameters according to Pr0 03 Selection of machine stiffness at real time auto gai...

Page 270: ...itching Sets to 10 if the case of the synchronization mode synchronous friction compensation mode stiffness setup mode or load change support mode Pr0 02 1 to 3 6 1 16 Delay time of position control switching Sets to 0 if the case of the synchronization mode synchronous friction compensation mode stiffness setup mode or load change support mode Pr0 02 1 to 3 6 1 17 Level of position control switch...

Page 271: ...atch rigidity When set to Pr 6 10 bit14 0 value is held 6 73 Load estimation filter When set to Pr6 10 bit14 1 in case of stiffnesssetting is enabled ses to 0 13 ms When set toPr6 10 bit14 0 set to 0 ms 6 74 Torque compensation frequency 1 Regardless value of the Pr6 10 bit14 sets to 0 6 75 Torque compensation frequency 2 Regardless value of the Pr6 10 bit14 sets to 0 6 76 Load estimation count Wh...

Page 272: ...g Pr0 04 Inertia ratio Pr6 07 Torque command additional value Pr6 08 Positive direction torque compensation value Pr6 09 Negative direction torque compensation value and Pr6 50 Viscous friction compen sation gain will be written to EEPROM every 30 minutes When you turn on the power again auto tuning will be executed using the latest data as initial values If power is turned off within 30 minutes a...

Page 273: ... 59 17 5 55 45 1200 500 54 2500 45 440 76 22 6 75 60 900 400 44 2500 60 330 104 30 7 95 75 700 300 34 2120 75 270 129 37 8 115 90 600 300 34 1770 90 220 153 44 9 140 110 500 200 24 1450 110 180 184 53 10 175 140 400 200 23 1140 140 140 231 66 11 320 180 310 126 16 880 180 110 290 83 12 390 220 250 103 13 720 220 90 346 99 13 480 270 210 84 11 590 270 70 413 118 14 630 350 160 65 9 450 350 60 512 1...

Page 274: ...mally Caution In the following condition normal operation may not be expected manually set the notch filter to prevent resonance Conditions which obstruct adaptive filter action Resonance point Resonance frequency is lower than 3 times Resonance peak is low or control gain is low where the motor speed is not affected by this Multiple resonance of 3 or more points exist Load Motor velocity variatio...

Page 275: ...frequency Result of measurement can be checked with PANATERM Parameters related to the 3rd and 4th notch filter hold the current value 4 Clear result of adaptation Parameters related to the 3rd and 4th notch filter are disabled and results of adaptive operation are cleared 5 High precision adaptive filter Two adaptive filters are enabled Parameters related to the 3rd and 4th notch filters will be ...

Page 276: ...tuning 3 Invalidate the adaptive filter by setting Pr2 00 Adaptive filter mode setup to 0 4 Set up the notch filter manually 2 Abnormal sound or oscillation may excessively change the setup value of 3rd and 4th notch filters If such change occurs disable the adaptive filter as described in step 3 above change setup value of Pr 2 07 3rd notch frequency and Pr 2 10 4th notch fre quency to 5000 disab...

Page 277: ...o measure and monitor function can be quickly adjusted 1 Analog monitor output The actual motor speed torque speed speed difference an analog voltage pulse can be measured by using an oscilloscope Set to type of output single and output voltage level by the setting of Pr4 16 Pr4 21 2 Waveform graphic function of PANATERM For command of motor the motion of motor motor speed torque command and the e...

Page 278: ...election 0 2 10 4st notch frequency 5000 2 11 4st notch width selection 2 2 12 4st notch depth selection 0 Even if the factory setting value above table also happen vibration please reduce 1st velocity gain gain Pr1 01 and 1st position loop gain Pr1 00 to 50 Setup of inertia ratio Please set to inertia ratio Pr0 04 When using the automatic gain adjustment function to determine the inertia ratio Pr...

Page 279: ...ing settling time can be accelerated but please be careful that if the value is too large the oscillation or vibration can occur If the vibration or oscillation occurs please reduce 1st position loop gain Pr1 00 to 80 If want to shorten the positioning settling time please continue step Please change parameter when motor stops Setup of 1st velocity loop integration time constant Please reduce inte...

Page 280: ...FFT of PANATERM To reduce the resonance peak so as to set up the notch filter In the case of multiple resonance peak please set vibration frequency to 2nd 4th notch frequency Pr2 04 2 07 2 10 In the event of more than 600 Hz vibration please increase 1st torque filter time constant Pr1 04 C The vibration frequency is 400 600 Hz Determine the resonance frequency by FFT of PANATERM please set the re...

Page 281: ... Set up by using speed limit value 1 Pr3 21 Pr3 17 1 SL_SW 0 speed limit value 1 Pr3 21 SL_SW 1 Set up by using speed limit value 2 Pr3 22 RTEX Communication command SL_SW speed limit switch command When the motor speed approaches to the speed limiting value torque control follow ing the analog torque command shifts to velocity control based on the speed limiting value In order to stabilize the mo...

Page 282: ...g value Switching condition to 2nd gain Position Velocity torque Position Velocity Torque Delay time 1 Level Hysteresis 2 Delay time 1 Level Hysteresis 2 Delay time 1 Level Hysteresis 2 Pr1 15 Pr1 20 Pr1 24 Pr1 16 Pr1 17 Pr1 18 Pr1 21 Pr1 22 Pr1 23 Pr1 25 Pr1 26 Pr1 27 0 0 0 Fixed to 1st gain Invalid 6 Invalid 6 Invalid 6 1 1 1 Fixed to 2nd gain Invalid 6 Invalid 6 Invalid 6 2 2 2 RTEX communicati...

Page 283: ...me Actual velocity Pr1 17 level Actual velocity Pr1 17 level Pr1 18 hysteresis Actual velocity Pr1 17level Pr1 18 hysteresis 1st gain Operation 2nd gain Setting Stop near Only velocity integral is 2nd gain other 1st gain B C D E G F Switch level Level Level Level Switch level 2nd 1st gain 2nd 1st Delay 2nd gain 1st 1st 1st Delay 2nd gain Velocity N Delay 1st 1st 2nd gain 2nd gain 1st 1st Delay 2nd...

Page 284: ...5 300 50 630 350 160 0 65 1 7 20 0 0 0 630 270 160 0 84 300 50 630 350 160 0 65 1 7 20 0 0 0 1st gain of position loop 1st gain of velocity loop 1st time constant of velocity loop integration 1st filter of velocity detection 1st time constant of torque filter Velocity feed forward gain Velocity feed forward filter 2nd gain of position loop 2nd gain of velocity loop 2nd time constant of velocity lo...

Page 285: ...d notch depth selection Pr2 10 4th notch frequency Notch frequency is automatically set to the 2nd resonance frequency estimated by the adaptive filter In no resonance point is found the frequency is set to 5000 Pr2 11 4th notch width selection Automatically set when 2 adaptive filters are active Pr2 12 4th notch depth selection Notch filter Pr2 01 to 2 12 Pr2 24 to 2 26 MINAS A6N series feature 5...

Page 286: ...in frequency velocity response Machine which resonance point varies by each machine or by aging Gain frequency Gain frequency Machine which has small peak nearby velocity response Machine which has multiple resonance points Example of application machine Notch Notch filter characteristics Machine characteristics at resonance gain gain frequency frequency Resonance Anti resonance Pr2 24 5th notch f...

Page 287: ...ully received with setup value 100 The table below shows this value in dB on the right Notch width Band width center frequency Notch depth I O ratio dB A6 series 0 0 5 0 0 1 0 59 1 0 01 40 2 0 71 2 0 02 34 3 0 84 3 0 03 30 5 4 1 4 0 04 28 5 1 19 5 0 05 26 6 1 41 6 0 06 24 4 7 1 68 7 0 07 23 1 8 2 8 0 08 21 9 9 2 38 9 0 09 20 9 10 2 83 10 0 1 20 11 3 36 15 0 15 16 5 12 4 20 0 2 14 13 4 76 25 0 25 1...

Page 288: ...is not established the power is not input RTEX communication cable is not connected etc can be carried out For example If you want to measure after the RTEX communication is established once the RTEX communication cable is pulled out from driver need to determine after alarm is cleared When you set a larger value of offset than the amplitude setup and make the motor run to the one direction at all...

Page 289: ...ation frequency is out of the range of 0 5 300 0 Hz Servo driver Motor position Motor Coupling Ball screw Work travel Driver PLC Setup of front edge vibration frequency Motor Encoder Load Position command Damping filter Position Velocity control Torque command Current control Machine base Front edge vibrates Vibration measurement with displacement sensor Motor current How to Use 1 Setup of damping...

Page 290: ...appropriate 4 Setup of damping filter switching selection Pr2 13 In accordance with the state of the device from 1st damping filter to 4th damping filter can be switched Pr2 13 1st 2nd 3rd 4th 0 Pr2 13 Position conmmand direction 1st 2nd 3rd 4th 3 positive direction negative direction Do not set Pr2 13 to1 or 2 Not to be used Two degree of freedom control mode disabled Only position control Pr2 13...

Page 291: ...tire equipment by removing the vibration frequency components specified by the positional command The model type damping filter can also remove resonance frequency components as well as anti resonance frequency components enhancing the effect of a conventional damping filter to generate smooth torque commands and offering a better damping effect In addition the removal of anti resonance frequency ...

Page 292: ...nance oppression notch filter become the previous damping filter When the damping filter works in a conventional manner the three parameters of anti esonance frequency anti resonance attenuation ratio and response frequency will be used for damping frequency damping depth and damping filter setting To completely disable this function all of the five parameters of resonance frequency resonance atte...

Page 293: ...results in an attenuation of 1 no peak The smaller the setup value the smaller the attenuation ratio higher resonance peak 6 65 1st response frequency Defines the response frequency of the model type damping filter s load The unit is 0 1 Hz 6 66 2nd resonance frequency Defines the 2nd resonance frequency of the model type damping filter s load The unit is 0 1 Hz 6 67 2nd resonance damping ratio De...

Page 294: ...i resonance fre quency 4 Specify a value of 4 to 6 in Pr 2 13 Damping filter switching selection to enable model type damping control 5 Activate the motor and fine tune the parameters in the following sequence so that vi bration components including command position deviation become small 1 Anti resonance frequency 2 Anti resonance attenuation ratio 3 Resonance frequency 4 Resonance attenuation ra...

Page 295: ...ss 1 11 Velocity feed forward filter Set the time constant of 1st delay filter which affects the input of velocity feed forward 1 12 Torque feed forward gain Multiply the torque command calculated according to the velocity control command by the ratio of this parameter and add the result to the torque command resulting from the velocity control process 1 13 Torque feed forward filter Set up the ti...

Page 296: ...approx 50 The velocity feed forward will become effective Positional deviation at a constant acceleration deceleration can be minimized close to 0 by increasing the torque forward gain This means that positional deviation can be maintained at near 0 over entire operation range while driving in trapezoidal speed pattern under ideal condition where disturbance torque is not active Because there is a...

Page 297: ...isturbance torque Load variation Torque command Load fluctuation supported function Motor speed Applicable Range This function can be applicable only when the following conditions are satisfied Conditions under which the load variation suppression function is activated Control mode Should be either position control or velocity control Others Should be in servo on condition Parameters except for co...

Page 298: ...ity control output Torque compensation is enabled when the relation between Pr 6 74 Torque compensation frequency 1 and Pr 6 75 Torque compensation frequency 2 satisfies the following formula Pr 6 75 x 32 Pr 6 74 Pr 6 75 1 0 Hz 6 75 Torque compensating frequency 2 Defines the filter frequency 2 F2 against the velocity control output Torque compensation is enabled when the relation between Pr 6 74 ...

Page 299: ...eviation When an abnormal sound at high frequency 1 kHz or above is generated increase the value in Pr 6 76 Load estimation count When vibration at low frequency 10 Hz or below is produced after operation stops increase the value in Pr 6 23 Load variation compensation gain No change is required for Pr 6 73 Load estimation filter in normal cases but you can set the optimum point by fine tuning with...

Page 300: ...nditions are satisfied Conditions under which the 3rd gain switching function is activated Control mode Should be position control Others Should be in servo on condition Parameters except for controls such as torque limit setup are correctly set assuring that the motor can run smoothly Related Parameter Class No Title Function 6 05 Position 3rd gain valid time Set up the time at which 3rd gain bec...

Page 301: ...3rd gain scale fac tor with reference to 1st gain to Pr6 06 Position 3rd gain magnification ratio Each upgrade 5 from 100 please check to positioning waveform by the waveform graphic function of PANATERM If 3rd gain is not used set Pr6 05 to 0 and Pr6 06 to 100 The 3rd gain is enabled only for position control or full closed control During the 3rd gain period only position loop gain speed proporti...

Page 302: ...r Combine the following 4 parameters to setup appropriate friction torque compensation Class No Title Function 6 7 Torque command additional value Set up the offset load compensation value usually added to the torque command in a control mode except for the torque control mode 6 8 Positive direction torque compensation value Set up the dynamic friction compensation value to be added to the torque ...

Page 303: ...be minimized by setting the friction torque of every rotating direction into individual pa rameters Pr6 08 Positive direction torque compensation value and Pr6 09 Negative direction torque compensation value can be used for this purpose The sum of the value of the compensation torque and friction compensation Each upgrade 1 from 0 please check to positioning waveform by the waveform graphic functi...

Page 304: ...n non linearity of load is strong from existence of backlash etc When action patterns are changed Related Parameter Class No Title Function 5 45 Quadrant projection positive direction compensation amount Sets amount of compensation to be added to torque command when the position command is in positive direction and quadrant projection compensation function is enabled 5 46 Quadrant projection negat...

Page 305: ...d How to Use Load fluctuation suppression function is adjusted through disturbance suppression setting to measure quadrant projection If the level is unsatisfactory fine adjustment can be conducted using the quadrant projection suppression function 1 Reclose control power supply after enabling quadrant projection suppression function Pr 6 47 bit14 1 2 Set initial values to Pr 5 47 0 Pr 5 48 Pr 1 0...

Page 306: ... degree of freedom control mode Ad just the gain by using the real time auto tuning refer to P 5 10 If further improvement is necessary manually fine tune the following parameters while checking the response Class No Title Function 6 47 Function expansion settings 2 Set up various functions bit by bit bit 0 Two degree of freedom control mode 0 Invalid 1 Valid bit 3 Two degree of freedom control re...

Page 307: ...nd 2nd digit sets adjustment filter Value of digit 0 to 4 Without attenuation term functions as 1st filter Value of digit 5 to 9 The 2nd filter attenuation term ζ is 1 0 0 86 0 71 0 50 and 0 35 in that order but Pr2 13 Selection of damping filter switching is 4 model type damping filter two effective the damping ratio is fixed to 1 0 during the secondary filter selection Example To set command fil...

Page 308: ...g parameters while checking the response Class No Title Function 6 47 Function expansion settings 2 Set up various functions bit by bit bit 0 Two degree of freedom control mode 0 Invalid 1 Valid bit 3 Two degree of freedom control real time auto tuning select 0 Standard type 1 Synchronous type The least significant bit is represented by bit0 For bit3 two degree of freedom control real time auto tu...

Page 309: ...of torque filter Pr1 04 1st gain selected Torque command Applicable Range This function can be applicable only when the following condition are satisfied 2 stage torque filter operating condition Control Mode Can be used in any control mode Others Should be servo on condition Parameters except for controls such as torque limit setup are correctly set assuring that the motor can run smoothly Cautio...

Page 310: ...o 2500 as 159 100 Hz 6 43 Two stage torque filter Attenuation term Setting range 0 to 1000 Set the attenuation term of 2 stage torque filter This setup value is used to switchover between 1st and 2nd filter of 2 stage filter 0 to 49 Operates as 1st filter 50 to 1000 Operates as 2nd filter with ζ 1 0 when setup value is 1000 Standard value is 1000 smaller setup value will cause oscillation How to O...

Page 311: ... torque limit You can set up the 1st limit value of the motor output torque 5 21 Selection of torque limit You can set up the torque limiting method Setup value TL_SW 0 TL_SW 1 Negative direction Positive direction Negative direction Positive direction 1 Pr0 13 2 Pr5 22 Pr0 13 Pr5 22 Pr0 13 3 Pr0 13 Pr5 22 4 Pr5 22 Pr0 13 Pr5 26 Pr5 25 If 0 is set for this parameter 1 is internally set 5 22 2nd to...

Page 312: ... switching setup 2 is applied when the second torque limit is switched to the first torque limit The sign of the change rate gradient is automatically switched in the driver in accordance with the magnitude relationship between the first torque limit and the second torque limit Setting Pr5 23 Torque limit switching setup 1 or Pr5 24 Torque limit switching setup 2 to 0 instantaneously switches the ...

Page 313: ...put Pulse width Parameter set 0 1 to 3276 7 ms in 0 1 ms units Delay compensation Available Compare source Encoder comms Available External scale comms Unavailable External scale A B phase Unavailable Compare value Set quantity 8 points Set range 32 bit with sign Applicable Range This function is available only when the following conditions are satisfied Conditions where position comparison output...

Page 314: ...rom the pulse output terminal or position comparison output terminal 2 0 Encoder output signal OA OB 1 Position comparison output signal OCMP1 to 3 4 48 Position comparison output polarity select 1 Sets position compare 1 comparison value 4 49 Position comparison output polarity select 2 Sets position compare 2 comparison value 4 50 Position comparison output polarity select 3 Sets position compar...

Page 315: ...on compare 2 bit8 to 11 Position compare 3 bit12 to 15 Position compare 4 bit16 to 19 Position compare 5 bit20 to 23 Position compare 6 bit24 to 27 Position compare 7 bit28 to 31 Position compare 8 Set value 1 2 0000b Output disabled 0001b Allocated to SO1 or OCMP1 0010b Allocated to SO2 or OCMP2 0011b Allocated to SO3 or OCMP3 Other than above For manufacturer s use Do not set 1 When general purp...

Page 316: ... output pulse width set value is reached When stopped at the same position as the position comparison value a single pulse will be output similar to the case of passing over The position comparison output function sends outputs while automatically compensating based on the previous motor speed the errors caused by the time of delay of encoder serial communication etc In addition the amount of corr...

Page 317: ...pped according to Pr5 10 Sequence at alarm If the command position for RTEX communication is set to the outside of the motor working range a command error is returned When this function is enabled multi turn data for the absolute encoder is not used Thus alarms related to multi turn data Err40 0 Absolute system down error protection Err41 0 Absolute counter over error protection Err42 0 Absolute o...

Page 318: ...Note that the value below is the input range when the electronic gear ratio is 1 1 and the ab solute home position offset is 0 For the input range when the electronic gear ratio and absolute home position offset are set refer to the operation example method Pluse Position command input range Absolute encoder 23bit 0 223 1 8388607 6 Application Functions Single turn Absolute Function ...

Page 319: ...ffset 10000 Motor Load Occurrence of Err34 1 Actual position command unit 1 0 223 1 Motor working range single turn If a position command outside the working range is input a command error is returned Position upon power ON Encoder position 1 0 2 23 223 1 2 23 Occurrence of Err34 1 9999 10000 1 0 223 1 2 23 If a position command outside the working range is input a command error is returned Motor ...

Page 320: ...he power is turned on when the power ON position is near the limit of the motor working range the motor working range is exceeded if the motor operates even if only slightly causing Err34 1 Single turn absolute working range error protection 6 Application Functions Single turn Absolute Function Single turn data Occurrence of Err34 1 Position upon power ON Motor working range 0 2 23 1 CCW direction...

Page 321: ...e power is re powered on is unnecessary Applicable Range This function can be applicable only when the following condition Operating conditions for continuous rotating absolute encoder function Control Mode Position control velocity control torque control Others The encoder is a 23bit resolution absolute encoder The following equation holds and the solution is an integer Command position per turn ...

Page 322: ...lid when Pr0 15 is set to 3 When Pr0 15 is set to 4 Pr6 88 0 makes a motion equivalent to that of Pr6 88 1 7 13 Absolute home position offset When using an absolute encoder set up the offset value on the encoder position and mechanical coordinate system position Caution This function is available when Pr0 15 Absolute encoder setup is set to 4 with control power cycle or RTEX reset command attribut...

Page 323: ...nction OFS When set to 0 CW is positive direction 23bit APOS M 223 S Electronic gear reverse conversion function OFS 1 When electronic gear is 1 1 effective bit length of multi turn data is 9bit When electronic gear is 2 1 effective bit length of multi turn data is 10bit When setting to electronic gear APOS converge to the signed 32bit width 6 Application Functions Continuous Rotating Absolute Enc...

Page 324: ...enable command The upper limit value of the multi turn data on the encoder side is automatically updated when the driver is started up Err 92 3 Multi turn data upper limit value disagreement error protection occurs Re power on the driver control power The multi turn data upper limit value is enabled and the RTEX actual position is generated as shown in the figure below The host device reads the RT...

Page 325: ... 1 Pr6 88 Absolute en coder multi turn data upper limit value 2 Pr7 13 Absolute home position offset 10000 ii CW Positive direction electronic gear ratio Pr0 09 Pr0 10 1 1 Pr6 88 Absolute encoder multi turn data upper limit value 2 Pr7 13 Absolute home position offset 10000 Absolute encoder data 223 1 0 2 1 2 3 1 23 10000 Pr7 13 Absolute encoder data Multi turn data RTEX actual position RTEX comma...

Page 326: ... load characteristics estimate will be invalid 5 67 Deterioration diagnosis inertia ratio upper limit value Sets the upper and lower limit values for inertia ratio estimate in deterioration diagnosis judgment when deterioration diagnosis warning is valid Pr6 97 bit 1 1 and load characteristics estimate convergence has been completed The set resolution shall be in units of 0 2 5 68 Deterioration di...

Page 327: ...e when deterioration diagnosis warning is valid Pr6 97 bit 1 1 and diagnosis velocity output V DIAG is ON Time from diagnosis velocity output V DIAG ON to the start judgment for upper and lower value of torque command average value is also a part of the set time for this parameter If the setting value is 0 the torque command average value is not calculated 5 77 Deterioration diagnosis torque upper...

Page 328: ... values for changes in load characteristics estimate it generates deterioration diagnostic warning number AC 4 1 1 4 1 2 4 1 3 4 1 4 Inertia ratio Unbalanced load Dynamic friction Viscous fric Upper limit value Pr5 67 Pr5 69 Pr5 71 Pr5 73 Lower limit value Pr5 68 Pr5 70 Pr5 72 Pr5 74 Set resolution for the upper and lower limit of friction torque estimates unbalanced load dynamic friction and visc...

Page 329: ...e deterioration diagnosis warning cccured Pr5 77 upper limit Torque command velocity Pr5 75 Pr4 35 Pr4 35 Torque command average deterioration diagnosis valid section Pr5 76 Deterioration diagnosis torque average time Deterioration diagnosis velocity output V DIAG Torque command average Pr5 78 lower limit Deterioration diagnosis velocity output V DIAG velocity Pr5 76 Deterioration diagnosis torque...

Page 330: ...er to technical document RTEX Communication Specification Section 6 5 5 Applicable Range This function can be applicable only in the following condition Operating conditions for Latch Mode with Stop Function Control Mode Position control Others The software version shall be function extended version 4 or later Should be in servo on condition Parameters except for controls are correctly set assurin...

Page 331: ...h Mode with Stop Function is executed set up so that the value of multiplying the command position of the host device and actual position of the motor by the electronic gear ratio is between 2 147 483 648 and 2 147 483 647 Err91 3 RTEX command error protection 2 is generated if cancellation of latch mode with stop function is executed between input of the trigger signal and completion of operation...

Page 332: ...nction 6 34 Warning Functions 6 38 List of Warning Code 6 40 2 Setup of Gain Pre adjustment Protection 6 42 3 About the Protection Function Setting while Returning to the Origin by Using the Z Phase 6 46 4 Troubleshooting Motor Does Not Run 6 48 Unstable Rotation Not Smooth 6 49 Positioning Accuracy Is Poor 6 49 Origin Point Slips 6 50 Abnormal Motor Noise or Vibration 6 50 Overshoot Undershoot Ov...

Page 333: ...otor Isn t the holding brake engaged Machine Motor Isn t the connection loose Ground Is the wiring to Connector X6 correct Or aren t any wires pulled off Is the wiring to Connector X2A and X2B and X4 correct Or aren t any wires pulled off Is the seeting of node address and parameter correct RTEX Communication Peripheral Devices It is normal when the light of LINK and COM is green Is that right now...

Page 334: ...ection Main code Sub code Left dot Alarm status can be cleared by RTEX communication or USB communication Attribute Can be cleared only When overload protection is triggered you can clear it by Alarm clear input A CLR in 10sec or longer after the error occurs RTEX communication under the clear alarm is accepted as command but can be cleared after the state cleared In addition You can clear the Ove...

Page 335: ... error protection 6 14 41 0 Absolute counter over error protection 42 0 Absolute over speed error protection 6 15 44 0 Absolute single turn counter error protection 45 0 Absolute multi turn counter error protection 47 0 Absolute status error protection 70 0 U phase current detector error protection 1 W phase current detector error protection 72 0 Thermal protector error protection 80 3 PLL incompl...

Page 336: ...age between P and N of the converter portion of the control power supply has exceeded the specified value Source voltage is high Voltage surge due to the phase advancing capacitor or UPS Uninterruptible Power Supply have occurred 100 V version approx 200 VDC approx 140 VAC 200 V version approx 400 VDC approx 280 VAC 1 Disconnection of the regeneration discharge resistor 2 External regeneration res...

Page 337: ... power supply under voltage protection AC 14 0 Over current protection Current through the converter portion has exceeded the specified value 1 Failure of servo driver failure of the circuit IGBT or other components 2 Short of the motor wire U V and W 3 Earth fault of the motor wire 4 Burnout of the motor 5 Poor contact of the motor wire 6 Welding of contact of dynamic braking relay due to frequen...

Page 338: ...d hunching action due to poor adjustment of gain Motor vibration abnormal noise Inertia ratio Pr 0 04 setup error 3 Miswiring disconnection of the motor 4 Machine has collided or the load has gotten heavy Machine has been distorted 5 Electromagnetic brake has been kept engaged 6 While wiring multiple axes miswiring has occurred by connecting the motor cable to other axis 7 P5 12 Over load level se...

Page 339: ... the driver and the motor and loosen the deceleration time Use the external regenerative resistor 2 Check the running pattern speed monitor Check the load factor of the regenerative resistor Increase the capacity of the driver and the motor and loosen the deceleration time Lower the motor rotational speed Use an external regenerative resistor 3 Set up Pr0 16 to 2 1 Regenerative transistor error pr...

Page 340: ...ference between the internal positional command speed and actual speed speed deviation exceeds the setup vale of Pr6 02 Note If the internal positional command speed is forcibly set to 0 due to instantaneous stop caused by the command pulse inhibit input INH or CW CCW over travel inhibit input the speed deviation rapidly increases at this moment Pr6 02 setup value should have sufficient margin bec...

Page 341: ...tive is 0 Check whether parameter settings related to the communication cycle or the command update cycle are consistent with the specifications of the host controller 5 Command generation error protection Position command generation process exceeded the computation range Make sure that the electronic gear ratio and velocity control conform to limit requirements 6 Operation commands contention pro...

Page 342: ...or revolution and Pr5 03 Denominator of pulse output division To disable the detection set Pr5 33 Pulse regenerative output limit setup to 0 29 1 Counter overflow protection 1 The calculated value of the absolute encoder position in pulse units or the electric gear ratio exceeded 32 bits in position information initialization that was performed after turning on the control power in absolute mode a...

Page 343: ...function number error 1 protection Output signals SO1 are assigned with undefined number 5 Output function number error 2 protection Output signals SO2 SO3 are assigned with undefined number 8 Latch input allocation error protection Error has occurred during function assignment of latch correction pins SI5 SI6 and SI7 EXT1 must be allocated to SI5 EXT2 to SI6 and EXT3 to SI7 but these are assigned...

Page 344: ...At the time of absolute encoder is used When Pr0 15 Absolute encoder setup 3 the motor encoder position crossed motor working range encoder 1 revolution data The working range of an absolute encoder absolute scale position including absolute home position offset is checked A motor encoder position is returned in motor working range inside of encoder 1 revolution data 36 0 EEPROM parameter error pr...

Page 345: ...o 24 VDC is not slow 2 Over travel inhibit input protection 3 With POT allocated to SI6 or NOT to SI7 Pr 5 04 Over travel inhibit input setup is set to a value other than 1 disabled When POT is allocated to SI6 or NOT allocated to SI7 make sure that Pr 5 04 Over travel inhibit input setup is set to 1 disabled 40 0 Absolute system down error protection Voltage of the built in capacitor has fallen b...

Page 346: ... the absolute encoder is set to 1 44 0 Single turn counter error protectio Single turn counter error was detected Replace the motor 45 0 multi turn counter error protection Multi turn counter error has been detected Replace the motor If you use the incremental system Pr 0 15 sets the absolute encoder is set to 1 47 0 Absolute status error protection Encoder has been running at faster speed than th...

Page 347: ...e of RTEX communication data from the host unit Design the accuracy of RTEX communication data transmission cycle from the host device within 0 05 If the communication cycle is 250 us or less Update_Counter must be varied correctly even when the command update cycle equals the communicate cycle Please check if there is a problem in Update_Counter Shut down and reclose the power supply It may be a ...

Page 348: ...iving failure or cyclic data error occurs 84 0 RTEX communication timeout error protection 2 The condition in which the receive interrupt startup signal was not output from the RTEX communication IC with no reception of communication data continued for the number of times set for Pr7 97 Number of RTEX communication timeout error protection detections If the frequency of occurrence is changed by th...

Page 349: ...ribed on the left column Check process performed on the host device Increase the value set for Pr7 98 1 RTEX cyclic data error protection 2 The condition in which there is an error in the cyclic command code continued for the number of times set for Pr7 98 Number of RTEX cyclic data error protection 1 2 detections 2 RTEX_ Update_ Counter error protection The setup value for Pr 7 38 RTEX_ Update_Co...

Page 350: ...tion Type_Code 10h 11h 20h Type_Code was changed during profile position control pp Type_Code 1 h 2 h for home position return command 4th was performed at the time of speed control CV torque control CT the control mode is except NOP and the external scale position information monitoring facility at the semi closed control is effective and the communication cycle is 0 0625ms or less at 16 byte mod...

Page 351: ...ic gear ratio exceeds the allowable range Check the setting value of the parameter Electronic gear ratio must be in the range 1 1000 to 8000 5 Parameter setup error protection 4 The combination conditions of Pr 7 20 RTEX communication cycle setup Pr7 91 RTEX communication cycle expansion setting Pr 7 21 RTEX command updating cycle setup and bit0 RTEX communication data size of Pr 7 22 RTEX functio...

Page 352: ...e safety set Pr7 41 bit 7 setting of detection of run inhibit input when returning to the origin of Z phase to 0 disabled 95 0 4 Motor automatic recognition error protection The motor and the driver have not been matched Replace the motor which matches to the driver 96 2 Control unit error protection 1 An error occurred in the servo driver control unit Turn the power off and then on again Return t...

Page 353: ...otor and the driver Return the products to the dealer or manufacturer 2 RTEX hardware error protection 2 3 RTEX hardware error protection 3 Other No Other error Control circuit has malfunctioned due to excess noise or other causes Some error has occurred inside of the driver while triggering self diagnosis function of the driver Turn off the power once then re enter If error repeats this might be ...

Page 354: ...n 0 1 1 10 100 1000 100 150 200 250 300 350 Time s Torque MSMF10 15 20 30 40 50 MSMF30 When the servo lock MSMF10 15 20 30 40 50 During the rotaption MSMF10 15 20 40 50 When the servo lock 115 120 125 0 1 1 10 100 1000 100 150 200 250 300 350 Time s Torque MQMF01 115 MQMF01 When the servo lock Duringthe rotaption 0 1 1 10 100 1000 100 150 200 250 300 350 Time s Torque MQMF02 04 115 125 MQMF02 When...

Page 355: ...DMF40 50 During the rotaption MDMF40 When the servo lock 115 120 0 1 1 10 100 1000 100 150 200 250 300 350 Time s Torque MGMF09 13 18 115 MGMF09 13 18 When the servo lock Duringthe rotaption 0 1 1 10 100 1000 100 150 200 250 300 350 Time s Torque MGMF24 29 44 115 MGMF24 29 44 When the servo lock Duringthe rotaption Time characteristics of Err16 0 Overload protection Caution Use the motor so that a...

Page 356: ...rvo lock MHMF09 When the servo lock MHMF08 09 During the rotaption 0 1 1 10 100 1000 100 150 200 250 300 350 Time s Torque MHMF10 15 20 MHMF10 15 When the servo lock MHMF10 15 20 During the rotaption MHMF20 When the servo lock 115 125 MHMF Overload protection time characteristics 0 1 1 10 100 1000 100 150 200 250 300 350 Time s Torque MHMF30 40 50 MHMF50 When the servo lock MHMF30 40 50 During the...

Page 357: ...in When both settings are the same or margin is small Err26 0 and Err26 1 may be detect ed at the same time In this case Err26 0 is displayed but because Err26 1 is also gener ated internally immediate stop unsupported alarm is given priority and immediate stop is not performed Furthermore if the setup value of Pr6 15 is lower than that of Pr5 13 Err26 1 is gener ated before Err26 0 disabling imme...

Page 358: ...et Err16 1 occurs if the torque saturation condition continues for 7 5 seconds The count is cleared when the torque saturation condition is removed When the value set for Pr6 57 is other than 0 the value set for Pr6 57 is enabled Set both Pr6 57 and Pr7 16 to 0 to make this function disabled When torque is controlled this function is disabled and Err 16 1 will not be activated If the immediate sto...

Page 359: ...s activated the motor decelerates and stops ac cording to Pr 5 10 Sequence at alarm The work load may collide to the machine end and be damaged depending on the load during this deceleration hence set up the range of Pr 5 14 including the decel eration movement When changing the control mode for the purpose of only to control velocity or torque do not use this function Instead use software limit f...

Page 360: ...ng deceleration to stop due to over travel inhibit input When returning to home 1 However it is possible to generate Err34 0 by force even when the Err34 0 detection process is disabled by enabling the following setting Pr6 97 Function expansion setup 3 bit2 Expansion of Allowable motor operating range abnormal protection 0 Invalid 1 Valid 4 Relevant parameters Panameter No Title Range Unit Functi...

Page 361: ...he right direction is entered the motor movable range will be expanded by entered position command and the movable range will be the position command input range Pr5 14 setups in both sides 3 When the load moves to the left at Servo ON When the position command to the left direction the motor movable range will be expanded further Motor Load Motor movable range Position command input range Pr5 14 ...

Page 362: ...it is designated as bit0 6 51 Immediate stop completion wait time When alarm that must respond to an immediate stop is generated after turning OFF the brake release output BRK OFF set the time to maintain the motor energization In the case of zero setting the drop prevention function is disabled Drop prevention function action when alarm that must respond to an immediate stop Motor stops at 30 r m...

Page 363: ...ver speed level setup 0 to 20000 r min When the motor speed exceeds this setup time during emergency stop sequence in an alarm condition Err 26 1 2nd over speed protection will be activated The over speed level becomes internal value of the over speed protection level speed by setting up this to 0 2 Emergency stop sequence upon occurrence of an alarm requiring emergency stop Speed r min Stop refer...

Page 364: ...is insufficient or the set value is the same both Err26 0 and Err26 1 may be detected In this case Err26 0 will be displayed However because Err26 1 is also activated internally priority is given to the alarm that does not require emergency stop and emergency stop is not executed When there is a plurality of alarm LED front panel will display the information previously generated When confirmed by ...

Page 365: ...name Set range Units Functions Pr5 05 Sequence at over travel inhibit 0 to 2 ー When Pr 5 04 Over travel inhibit input setup 0 specify the status during deceleration and stop after application of the over travel inhibition POT NOT Set up emergency stop to enable Slow Stop function Pr5 06 Sequence at Servo Off 0 to 9 ー Specify the status during deceleration and after stop after servo off Set up emer...

Page 366: ... allowable time for stopping when alarm is triggered for immediate stop Exceeding this set value will trigger a forced alarm condition In case the set value is 0 zero no immediate stop will be made but an alarm condition will immediately occur In case the slow stop function is to be used set it to a length sufficiently longer than the maximum deceleration time as the motor velocity will have a del...

Page 367: ...ciently long in length than the completion of slow stop operation The stop judgment under slow stop operation is based on actual velocity Therefore the time required for the actual deceleration may take longer than the maximum deceleration time In the immediate stop operation from immediate stop response alarm in case the immediate stop continuation duration exceeds Pr6 14 Immediate stop time unde...

Page 368: ...e stop Slow Stop ts ms Pr5 57 Slow stop S shape acceleration deceleration setting td 2 Use in the range where 1 In case of linear deceleration Pr5 57 0 Linear deceleration brake distance revolution Linear decelerating time s 60 2 1000 1000 2 For S shape deceleration Pr5 57 0 60 2 1000 Velocity control command at time of starting deceleration r min Pr5 57 ms Velocity control command at time of star...

Page 369: ...tput 2 0 to 40 Select the type of alarm issued as the alarm output 2 WARN2 Setup value 0 ORed output of all alarms For 1 and subsequent see the table in the next page Pr6 27 Warning latch state setup 0 to 3 Set the latching state of warning General warning and extended warning can be specified bit 0 Extended warning 0 unlatch 1 latch bit 1 General warning 0 unlatch 1 latch Pr6 37 Oscillation detec...

Page 370: ...ated communication errors reaches the para meter setting When the setting is 0 the function is disabled and warning is not generated Pr7 28 RTEX_Update_ Counter error warning setup 0 to 32767 No of times If Update_Counter is accumulated exceeding the setting value of this parameter and correct update fails WngC2h RTEX_Update_Counter error warning is issued When the setting is 0 or 1 the function i...

Page 371: ... exceeded the set range 22 Pr6 39 bit7 Extend Warning Alarm No Hex Alarm Content Warning latch Output setting Waning mask Pr6 27 1 Pr4 38 Pr4 39 2 Pr6 38 Pr6 39 Corresponding bit 3 C0 RTEX continuous communication error warning The No of detected continuous reading errors CRC error of the data delivered to the local node reaches the number specified by Pr 7 26 RTEX continuous error warning setup 1...

Page 372: ...of setting value 0 OR output of all warnings will be obtained In addition do not use the setup values other than those listed in the above table 3 Each warning detection can be disabled by Pr6 38 Warning mask setup and Pr6 37 Warning mask setting 2 The corresponding bits are indicated in the table The warning detection will be disabled by bit 1 4 When the single turn absolute function is enabled a...

Page 373: ...ired during the actual application the following two protective features will be triggered over speed protection when overshoot occurs and excess positional deviation protection when response to the command delays By allocating the torque in limit output TLC of interface specification to the output sig nal torque limit condition can be detected externally P 2 55 TLC P 3 45 Pr0 13 P 3 85 Pr5 21 3 S...

Page 374: ... bit14 0 In this case the position deviation cannot be obtained through calculation formu la Set the value including allowance by estimating the maximum value of com mand position deviation Pmax from the actual operation waveform that could be used Pr 0 14 Setup of positional deviation excess Vc Kp 1 2 to 2 0 Factor in is margin to prevent frequent activation of excess positional deviation protect...

Page 375: ...ation P1 Vc Kp 100 set value for Pr1 10 10 100 Vc maximum frequency of positional command pulse pulse command unit s Kp Position loop gain 1 s When switching position loop gain Kp select the smallest value for calculation Using command positional deviation before filter Pr7 23 bit14 1 Pr0 14 Setup of positional deviation excess P1 P2 P3 P4 1 2 to 2 0 Factor in is margin to prevent frequent activat...

Page 376: ...op gain 1 s When switching position loop gain Kp select the smallest value for calculation Setting of command filter and damping control will not have any effect in case Pr 5 20 1 Notes When switching from the velocity control to position control position deviation correcting function is used which will increase calculation value and error To cope with these problems increase the margin 5 Setup of...

Page 377: ...reated as the origin In this case the position at run inhibit is input needs to be separated from the Z phase which is treated as the position for completing return to the origin therefore be sure to prevent occurrence of returning operation in the vicinity of run inhibit input POT NOT If the above value is not set for the parameter detection of run inhibit input POT NOT while returning to the Z p...

Page 378: ... Pr5 04 Over travel inhibit input setup and Pr5 05 Sequence at over travel inhibit are temporarily disabled therefore we recommend setting Pr7 41 bit 7 to 1 When using the function for returning to the profile origin without using the run inhibit input do not assign the run inhibit input POT NOT to general purpose input This setting is not disabled only if Pr5 04 is set to 1 Relevant protective fu...

Page 379: ...tion over travel inhibit input of Connector X4 NOT POT is open The monitor mode 0f USB communication PANATERM is the Pin No corresponding to NOT POT in A state 1 Check and make a wiring so as to connect NOT POT inputs signal 2 Set up Pr5 04 to 1 invalid and reset the power Installation Main power is shut off The monitor mode of USB communication PANATERM is the Pin No corresponding to S RDY in sta...

Page 380: ...osition loop gain is small Check the position deviation with the monitor function of the USB communication PANATERM or at the monitor mode of the console Increase the setup of Pr1 00 within the range where no oscillation occurs Parameter Setup of the positioning complete range is large Lower the setup of Pr4 31 within the range where no chattering of complete signal occurs Setup of the division mu...

Page 381: ...ignal lines 6 4 Troubleshooting When in Trouble Abnormal Motor Noise or Vibration Classification Causes Measures Adjustment Gain setup is large Lower the gain by setting up lower values to Pr1 01 and 1 06 of velocity loop gain and Pr1 00 and Pr1 05 of position loop gain Installation Resonance of the machine and the motor Re adjust Pr1 04 and 1 09 Check if the machine resonance exists or not with f...

Page 382: ...does not generate rumbling noise while turning it by hand after shutting off the power Replace the motor and request for repair if the noise is heard Electromagnetic brake is kept engaged brake un released Check the voltage at brake terminals Apply the power DC24 V to release the brake Motor failure oil water or others Avoid the installation place where the motor is subject to high temperature hum...

Page 383: ...leshooting When in Trouble Parameter Returns to Previous Setup Classification Causes Measures Parameter No writing to EEPROM has been carried out before turning off the power Refer to P 3 38 Detail of Attribute of Preparation ...

Page 384: ...E frame 7 36 F frame 7 37 Motor 7 38 5 Timing Chart Power ON 7 62 Alarm 7 63 Servo Lock 7 65 Servo ON OFF 7 66 6 Block Diagram A B frame 100 V 200 V 7 67 C D frame 100 V 200 V 7 67 E frame 200 V 7 68 F frame 200 V 7 68 7 Options Noise Filter 7 69 Surge Absorber 7 71 Ferrite Core 7 72 Junction Cable for Encoder 7 73 Junction Cable for Motor Without Brake 7 78 Junction Cable for Motor With Brake 7 8...

Page 385: ...a motor with and ab solute encoder Absolute data is transmitted to the controller at the current position of the RTEX communica tion response drive to controller Relevant parameters No Title Function Pr7 13 Absolut homing position offset Set encoder position when using absolute encoder and offset of mechanical coordinate position Position information after initialization All position information A...

Page 386: ...bsolute encoder 0 Use as an absolute system absolute mode 1 Use as an incremental system incremental mode 2 Use as an absolute system absolute mode however ignore the multi turn counter over 3 Use as an absolute system however not use the multi turn counter single turn absolute mode 4 Used as an absolute system absolute mode however any upper limit value can be set for the multiturn counter and ig...

Page 387: ...he Battery It is necessary to replace the battery for absolute encoder when battery alarm occurs Replace while turning on the control power Data stored in the encoder might be lost when you replace the battery while the control power of the driver is off Afer replacing the battery clear the battery alarm Press the PANATERM can download from official website in the monitor window to clear the alarm...

Page 388: ...ry is highly corrosive and if it should leak out it will not only corrode the surrounding parts but also give rise to the danger of short circuiting since it is electrically conductive For this reason ensure that the battery is replaced periodically 3 Do not disassemble the battery or throw it into a fire Do not disassemble the battery since fragments of the interior parts may fly into your eyes w...

Page 389: ...condition 1 2 cycles day Annual consumption capacity 10 H A 0 0014 H B 2 H C 2 313 days 24 H C 52 days 75 1 mAh Battery life 2000 mAh 75 1 mAh year 26 6 year 2 1 cycle day 2nd cycle of the above 1 is for rest calculation of battery life for example Annual consumption capacity 10 H A 0 0014 H B 14 H C 313 days 24 H C 52 days 168 9 mAh Battery life 2000 mAh 168 9 mAh year 11 8 11 841 year A Current ...

Page 390: ...arge motor 6 3 5 2 7 4 1 6 1 6 5 3 7 9 H G T S K L J 1 Absolute System Battery for Backup Installation When you Make Your Own Cable for 23bit Absolute Encoder When you make your own cable for 23bit absolute encoder connect the optional battery for absolute encoder DV0P2990 as per the wiring diagram below Connector of the bat tery for absolute encoder shall be provided by customer as well Install a...

Page 391: ... installing the battery to the absolute en coder clear the encoder data multi turn data to 0 at the origin by following the procedure described below Clear the absolute encoder from PANATERM or RTEX communication Turn off power and then on again Through RTEX communication to clear the absolute encoder method and process please confirm the controller specifications P 2 47 Wiring to the Connector X4...

Page 392: ...f the wave form graphic and bringing of the stored data 5 Normal auto gain tuning 6 Frequency characteristic measurement of the machine system Distribution media such as CD ROM for this software are not prepared Download the software from our web site and install it to your PC Use option LAN dongle DVOPM20105 for wireless connection For details see the website of Panasonic How to Connect Connect t...

Page 393: ...Chinese or Korean version CPU Pentium III 512 MHz or better Memory 256 MB or more 512 MB recommended Hard disk 512 MB or more free space Serial communication USB port Display Resolution 1024 768 pixel or more No of colors 24 bit color True Color or better Please confirm the latest system requirements on the homepage Note In additon to PANATERM you can debug Panasonic Motor Setup App through iPhone...

Page 394: ...t temp C 50 100 10 0 20 30 40 Continuous running range orque N m orque N m speed r min speed r min 0 6 0 3 0 3 ratio vs rated torque Peak running range 0 3000 6000 Continuous running range 0 6 have brake and no brake have same characteristics 0 08 0 08 torque speed When you lower the torque limit setup Pr0 13 and 5 22 running range at high speed might be lowered as well Continuous running range Ru...

Page 395: ...ning range Continuous running range speed r min 1 0 0 56 0 4 0 16 0 16 4300 3700 0 5 0 3000 6000 95 50 100 10 0 20 30 40 have brake and no brake have same characteristics ratio vs rated torque with brake without brake Continuous torque vs ambient temp ambient temp C 50 70 100 75 10 0 20 30 40 orque N m speed r min Peak running range Continuous running range 1 0 0 56 0 4 0 16 4300 3700 0 5 0 3000 6...

Page 396: ...ltage to driver AC200 V Dotted line represents torque at 10 less voltage 50 100 10 0 20 30 40 Continuous torque vs ambient temp ambient temp C 50 100 80 70 10 0 20 30 40 Continuous torque vs ambient temp ambient temp C with brake without brake have brake and no brake have same characteristics orque N m speed r min Peak running range 4600 0 3000 6000 Continuous running range 1 0 2 0 speed r min Pea...

Page 397: ...0 0 3000 6000 Continuous running range 2 0 4 0 orque N m speed r min Peak running range 3100 3600 0 3000 6000 Continuous running range 2 0 4 0 speed r min have brake and no brake have same characteristics have brake and no brake have same characteristics have brake and no brake have same characteristics have brake and no brake have same characteristics 50 90 100 10 0 20 30 40 ratio vs rated torque...

Page 398: ... and no brake have same characteristics have brake and no brake have same characteristics orque N m speed r min 3200 3600 0 3000 6000 8 0 4 0 speed r min orque N m speed r min 4200 3600 0 3000 6000 10 5 0 ratio vs rated torque MSMF092L1 Input voltage to driver AC200 V Dotted line represents torque at 10 less voltage Continuous torque vs ambient temp ambient temp C 50 100 10 0 20 30 40 have brake a...

Page 399: ... N m Peak running range Continuous running range speed r min 3600 3200 0 1000 2000 3000 4000 5000 15 7 5 ratio vs rated torque Continuous torque vs ambient temp ambient temp C 50 100 10 0 20 30 40 orque N m Peak running range Continuous running range speed r min 0 1000 2000 3000 4000 5000 20 10 3700 3300 MSMF series 1 0 kW 口100 to 2 0 kW have brake and no brake have same characteristics have brake...

Page 400: ...s ambient temp ambient temp C 50 100 10 0 20 30 40 orque N m Peak running range Continuous running range speed r min 0 1000 2000 3000 4000 5000 40 20 3100 2800 ratio vs rated torque Continuous torque vs ambient temp ambient temp C 50 100 10 0 20 30 40 orque N m Peak running range Continuous running range speed r min 0 90 1000 2000 3000 4000 5000 50 25 3200 35 2800 MSMF series 3 0 kW to 5 0 kW have...

Page 401: ... Continuous running range 1 0 0 5 0 3000 6000 orque N m speed r min 3100 3700 Peak running range Continuous running range 1 0 0 5 0 3000 6000 have brake and no brake have same characteristics have brake and no brake have same characteristics speed r min 50 100 10 0 20 30 40 speed r min ratio vs rated torque 50 70 100 75 10 0 20 30 40 with brake without brake ratio vs rated torque orque N m 3100 37...

Page 402: ...ut voltage to driver AC200 V Dotted line represents torque at 10 less voltage MQMF022L1 Input voltage to driver AC200 V Dotted line represents torque at 10 less voltage 50 100 10 0 20 30 40 ratio vs rated torque Continuous torque vs ambient temp ambient temp C orque N m speed r min Peak running range 4100 3300 0 3000 6000 Continuous running range 1 0 2 0 have brake and no brake have same character...

Page 403: ...30 40 ratio vs rated torque ambient temp C speed r min ratio vs rated torque Continuous torque vs ambient temp ambient temp C speed r min 3400 0 3000 6000 2 0 4 0 have brake and no brake have same characteristics have brake and no brake have same characteristics have brake and no brake have same characteristics have brake and no brake have same characteristics orque N m 2500 0 3000 6000 2 0 4 0 or...

Page 404: ... 10 less voltage MDMF152L1 Input voltage to driver AC200 V Dotted line represents torque at 10 less voltage have brake and no brake have same characteristics have brake and no brake have same characteristics have brake and no brake have same characteristics ratio vs rated torque Continuous torque vs ambient temp ambient temp C 50 100 10 0 20 30 40 orque N m speed r min 0 1000 2000 3000 30 15 16 19...

Page 405: ...2000 3000 50 25 13 1 1900 2100 0 1000 2000 3000 70 35 28 36 4 3 1900 2100 50 100 10 0 20 30 40 ratio vs rated torque Continuous torque vs ambient temp ambient temp C orque N m speed r min 50 100 95 10 0 20 30 40 have brake and no brake have same characteristics have brake and no brake have same characteristics have brake and no brake have same characteristics Peak running range Continuous running ...

Page 406: ...orque N m speed r min 0 1000 2000 3000 15 10 5 3 9 8 6 1500 2200 50 100 10 0 20 30 40 ratio vs rated torque Continuous torque vs ambient temp ambient temp C orque N m 0 1000 2000 3000 30 15 14 17 8 3 1500 2200 speed r min 0 1000 2000 3000 20 10 12 5 1 14 23 3 1500 2300 have brake and no brake have same characteristics have brake and no brake have same characteristics have brake and no brake have s...

Page 407: ... have brake and no brake have same characteristics orque N m 0 1000 2000 3000 70 35 14 1 37 45 1500 2100 1900 Peak running range Continuous running range ambient temp C 50 100 10 0 20 30 40 have brake and no brake have same characteristics MGMF242L1 Input voltage to driver AC200 V Dotted line represents torque at 10 less voltage ratio vs rated torque Continuous torque vs ambient temp speed r min o...

Page 408: ...peed r min 0 3000 6000 ratio vs rated torque orque N m speed r min 0 6 0 3 0 3 have brake and no brake have same characteristics 0 3000 6000 orque N m Peak running range 0 6 0 08 0 08 Peak running range Continuous running range Continuous running range torque speed When you lower the torque limit setup Pr0 13 and 5 22 running range at high speed might be lowered as well Continuous running range Ru...

Page 409: ...t temp C without brake 50 100 10 0 20 30 40 ambient temp C 1 0 0 5 4200 0 3000 6000 ratio vs rated torque ratio vs rated torque ratio vs rated torque orque N m speed r min speed r min 1 0 0 5 3700 3100 0 3000 6000 orque N m have brake and no brake have same characteristics have brake and no brake have same characteristics speed r min 1 0 0 5 3700 3100 0 3000 6000 orque N m 1 0 0 5 4200 0 3000 6000...

Page 410: ...0 30 40 ambient temp C ratio vs rated torque ratio vs rated torque speed r min speed r min have brake and no brake have same characteristics have brake and no brake have same characteristics speed r min orque N m 2 0 1 0 2400 0 3000 6000 orque N m 2 0 1 0 3800 4600 0 3000 6000 ratio vs rated torque with brake 50 70 100 80 10 0 20 30 40 without brake ratio vs rated torque with brake 50 70 100 80 10...

Page 411: ...e ratio vs rated torque ratio vs rated torque speed r min speed r min have brake and no brake have same characteristics have brake and no brake have same characteristics have brake and no brake have same characteristics have brake and no brake have same characteristics 50 100 75 10 0 20 30 40 ratio vs rated torque speed r min orque N m 3400 0 3000 6000 2 0 4 0 orque N m 2500 0 3000 6000 2 0 4 0 or...

Page 412: ...in have brake and no brake have same characteristics have brake and no brake have same characteristics ratio vs rated torque ratio vs rated torque Continuous torque vs ambient temp speed r min ambient temp C 50 100 10 0 20 30 40 have brake and no brake have same characteristics 6000 orque N m 3300 0 3000 10 5 0 ratio vs rated torque Continuous torque vs ambient temp speed r min ambient temp C 50 1...

Page 413: ... 50 100 10 0 20 30 40 speed r min MHMF series 1 0 kW 口130 to 2 0 kW have brake and no brake have same characteristics have brake and no brake have same characteristics have brake and no brake have same characteristics orque N m 0 1000 2000 3000 15 10 5 2200 6 0 7 7 3 0 2300 orque N m 0 1000 2000 3000 20 10 5 6 12 0 1000 2000 3000 30 15 6 7 16 19 2200 orque N m Peak running range Continuous running...

Page 414: ...ient temp ambient temp C 50 100 10 0 20 30 40 speed r min have brake and no brake have same characteristics 50 100 10 0 20 30 40 ratio vs rated torque Continuous torque vs ambient temp ambient temp C speed r min have brake and no brake have same characteristics 0 1000 2000 3000 50 25 29 10 9 2400 2200 orque N m 0 1000 2000 3000 50 25 13 13 8 1900 2100 orque N m orque N m 0 1000 2000 3000 70 35 28 ...

Page 415: ... 150 4 4 φ 5 2 A frame Rack mounting Type 150 180 5 170 28 5 2 28 7 7 40 70 109 21 2 5 15 41 φ 5 2 Mounting bracket Option Mounting bracket Option Mass 0 8 kg Mass 0 8 kg Unit mm Related page P 1 4 Driver P 1 15 Check of the Combination of the Driver and the Motor P 2 18 List of Applicable Peripheral Equipments to Driver ...

Page 416: ... 70 n 5 2 Mounting bracket Option Mounting bracket Option 150 130 55 150 90 10 4 14 14 4 90 10 140 5 43 5 2 6 70 φ 5 2 4 Dimensions Driver B frame Base mounting Type B frame Rack mounting Type Mass 0 9 kg Mass 1 0 kg Unit mm Related page P 1 4 Driver P 1 15 Check of the Combination of the Driver and the Motor P 2 18 List of Applicable Peripheral Equipments to Driver ...

Page 417: ... 2 60 150 170 5 180 φ 5 2 Mounting bracket Option Mounting bracket Option 70 150 7 5 50 5 2 5 140 127 4 4 14 23 14 23 127 4 4 191 170 65 18 φ 5 2 C frame Base mounting Type 4 Dimensions Driver C frame Rack mounting Type Mass 1 6 kg Mass 1 5 kg Unit mm ...

Page 418: ...7 Supplement 40 150 85 19 151 18 70 2 5 15 10 40 60 10 40 60 2 5 2 170 5 180 2 φ5 2 Mounting bracket Option Mounting bracket Option 18 191 170 70 5 2 5 140 85 150 7 5 14 23 14 23 127 4 127 4 4 4 70 φ 5 2 4 Dimensions Driver D frame Base mounting Type D frame Rack mounting Type Mass 1 9 kg Mass 2 0 kg Unit mm ...

Page 419: ...ting bracket to shipping specification 70 18 196 5 5 15 168 85 50 2 5 2 188 198 50 2 5 2 2 5 216 3 5 φ 5 2 φ5 2 E frame Rack mounting Type Mass 2 7 kg 4 Dimensions Driver E frame Base mounting Type Mass 2 7 kg Unit mm Related page P 1 4 Driver P 1 15 Check of the Combination of the Driver and the Motor P 2 18 List of Applicable Peripheral Equipments to Driver ...

Page 420: ... frame Rack mounting Type Unit mm 16 204 219 5 15 20 5 100 2 5 2 250 240 100 2 5 2 130 220 2 5 3 5 φ 5 2 φ5 2 16 31 20 6 6 169 2 5 30 70 162 220 130 2 5 2 100 240 250 2 5 2 100 30 70 162 5 15 47 φ 5 2 φ 5 2 Mounting bracket to shipping specification Mounting bracket to shipping specification F frame Base mounting Type Mass 5 2 kg Mass 5 2 kg ...

Page 421: ...put 50 W 100 W Motor model MSMF 5AZL1 2 01 L1 2 LL Without brake 72 92 With brake 102 122 LR 25 S 8 LA 45 LB 30 LC 38 LE 3 LF 6 LH 32 LN 26 5 46 5 LZ 3 4 Key way dimensions LW 14 LK 12 5 KW 3 KH 3 RH 6 2 TP M3 depth 6 Mass kg Without brake 0 32 0 47 With brake 0 53 0 68 Connector specifications Refer to P 2 40 Specifications of Motor Connector Caution Related page Reduce the moment of inertia rati...

Page 422: ...act us or a dealer for the latest information Unit mm MSMF series Low inertia Motor output 50 W 100 W Motor model MSMF 5AZL1 1 01 L1 1 LL Without brake 72 92 With brake 102 122 LR 25 S 8 LA 45 LB 30 LC 38 LE 3 LF 6 LH 46 6 LM Without brake 48 68 With brake 78 98 LT 24 LN 23 43 LZ 3 4 Key way dimensions LW 14 LK 12 5 KW 3 KH 3 RH 6 2 TP M3 depth 6 Mass kg Without brake 0 32 0 47 With brake 0 53 0 6...

Page 423: ... 2 092L1 2 LL Without brake 79 5 99 112 2 127 2 With brake 116 135 5 149 2 164 2 LR 30 35 S 11 14 19 LA 70 90 LB 50 70 LC 60 80 LE 3 LF 6 5 8 LH 43 53 LZ 4 5 6 Key way dimensions LW 20 25 25 LK 18 22 5 22 KW 4 5 6 KH 4 5 6 RH 8 5 11 15 5 TP M4 depth 8 M5 depth 10 Mass kg Without brake 0 82 1 2 2 3 2 8 With brake 1 3 1 7 3 1 3 6 Connector specifications Refer to P 2 40 Specifications of Motor Conne...

Page 424: ...Motor output 200 W 400 W 750 W 1 0 kW Motor model MSMF 02 L1 1 04 L1 1 082L1 1 092L1 1 LL Without brake 79 5 99 112 2 127 2 With brake 116 135 5 148 2 163 2 LR 30 35 S 11 14 19 LA 70 90 LB 50 70 LC 60 80 LE 3 LF 6 5 8 LH 52 5 60 LM Without brake 56 5 76 86 2 101 2 With brake 93 112 5 122 2 137 2 LT 23 26 LZ 4 5 6 Key way dimensions LW 20 25 LK 18 22 5 22 KW 4 5 6 KH 4 5 6 RH 8 5 11 15 5 TP M4 dept...

Page 425: ...39 With brake 163 181 5 200 5 210 232 267 LR 55 65 S 19 22 24 LA 115 145 LB 95 110 LC 100 120 130 LD 135 162 165 LE 3 6 LF 10 12 LG 60 LH Without brake 90 113 118 With brake 101 113 118 LM Without brake 92 110 5 129 5 141 160 195 With brake 119 137 5 156 5 166 188 223 LZ 9 Key way dimensions LW 45 55 LK 42 41 51 KW 6 8 KH 6 7 RH 15 5 18 20 Mass kg Without brake 3 6 4 6 5 6 8 7 11 5 14 5 With brake...

Page 426: ...1 502L1 LL Without brake 137 155 5 174 5 186 205 240 With brake 164 182 5 201 5 211 233 268 LR 55 65 S 19 22 24 LA 115 145 LB 95 110 LC 100 120 130 LD 135 162 165 LE 3 6 LF 10 12 LG 84 LH Without brake 90 113 118 With brake 101 113 118 LM Without brake 92 110 5 129 5 141 160 195 With brake 119 137 5 156 5 166 188 223 LZ 9 Key way dimensions LW 45 55 LK 42 41 51 KW 6 8 KH 6 7 RH 15 5 18 20 Mass kg ...

Page 427: ... With oil seal Without brake 59 7 65 8 78 3 With brake 81 89 4 101 9 LR 25 30 S 8 11 14 LA 70 90 LB 50 70 LC 60 80 LE 3 LF 5 7 8 LH 43 53 LZ 4 5 6 Key way dimensions LW 14 20 25 LK 12 5 18 22 5 KW 3 4 5 KH 3 4 5 RH 6 2 8 5 11 TP M3 depth 6 M4 depth 8 M5 depth 10 Mass kg Without oil seal Without brake 0 54 1 1 1 5 With brake 0 79 1 5 2 0 With oil seal Without brake 0 57 1 2 1 6 With brake 0 82 1 6 ...

Page 428: ...65 8 78 3 With brake 81 89 4 101 9 LR 25 30 S 8 11 14 LA 70 90 LB 50 70 LC 60 80 LE 3 LF 5 7 8 LH 44 54 LM Without oil seal Without brake 39 7 45 8 58 3 With brake 61 69 4 81 9 With oil seal Without brake 43 2 49 3 61 8 With brake 64 5 72 9 85 4 LT 16 5 LZ 4 5 6 Key way dimensions LW 14 20 25 LK 12 5 18 22 5 KW 3 4 5 KH 3 4 5 RH 6 2 8 5 11 TP M3 depth 6 M4 depth 8 M5 depth 10 Mass kg Without oil s...

Page 429: ... LL With oil seal With protect lip Without brake 56 2 62 3 74 8 With brake 77 5 85 9 98 4 LR 30 35 S 8 11 14 LA 70 90 LB1 50 70 LB2 49 4 69 4 LC 60 80 LE1 1 5 LE2 12 1 LF 5 7 8 LH 43 53 LZ 4 5 6 Key way dimensions LW 14 20 20 5 LK 12 5 18 18 KW 3 4 5 KH 3 4 5 RH 6 2 8 5 11 TP M3 depth 6 M4 depth 8 M5 depth 10 Mass kg Without brake 0 57 1 2 1 6 With brake 0 82 1 6 2 1 Connector specifications Refer...

Page 430: ... 04 L1 3 LL With oil seal With protect lip Without brake 56 2 62 3 74 8 With brake 77 5 85 9 98 4 LR 30 35 S 8 11 14 LA 70 90 LB1 50 70 LB2 49 4 69 4 LC 60 80 LE1 1 5 LE2 12 1 LF 5 7 8 LH 44 54 LM Without brake 39 7 45 8 58 3 With brake 61 69 4 81 9 LT 16 5 LZ 4 5 6 Key way dimensions LW 14 20 20 5 LK 12 5 18 18 KW 3 4 5 KH 3 4 5 RH 6 2 8 5 11 TP M3 depth 6 M4 depth 8 M5 depth 10 Mass kg Without b...

Page 431: ...With brake 149 163 177 205 189 204 LR 55 65 70 S 22 24 35 LA 145 200 LB 110 114 3 LC 130 176 LD 165 233 LE 6 3 2 LF 12 18 LG 60 LH Without brake 105 118 140 With brake 116 118 140 LM Without brake 77 91 105 133 116 131 With brake 105 119 133 161 145 160 LZ 9 13 5 Key way dimensions LW 45 55 LK 41 51 50 KW 8 10 KH 7 8 RH 18 20 30 Mass kg Without brake 4 6 5 7 6 9 9 3 13 4 15 6 With brake 6 1 7 2 8 ...

Page 432: ...402L1 502L1 LL Without brake 122 136 150 178 161 176 With brake 150 164 178 206 190 205 LR 55 65 70 S 22 24 35 LA 145 200 LB 110 114 3 LC 130 176 LD 165 233 LE 6 3 2 LF 12 18 LG 84 LH Without brake 105 118 140 With brake 116 118 140 LM Without brake 77 91 105 133 116 131 With brake 105 119 133 161 145 160 LZ 9 13 5 Key way dimensions LW 45 55 LK 41 51 50 KW 8 10 KH 7 8 RH 18 20 30 Mass kg Without ...

Page 433: ...135 149 160 175 With brake 149 163 177 189 204 LR 55 70 S 22 35 LA 145 200 LB 110 114 3 LC 130 176 LD 165 233 LE 6 3 2 LF 12 18 LG 60 LH Without brake 105 140 With brake 116 140 LM Without brake 77 91 105 116 131 With brake 105 119 133 145 160 LZ 9 13 5 Key way dimensions LW 45 55 LK 41 50 KW 8 10 KH 7 8 RH 18 30 Mass kg Without brake 4 6 5 7 6 9 13 4 15 6 With brake 6 1 7 5 8 4 16 8 19 0 Connecto...

Page 434: ...L1 132L1 182L1 242L1 292L1 442L1 LL Without brake 122 136 150 161 176 With brake 150 164 178 190 205 LR 55 70 S 22 35 LA 145 200 LB 110 114 3 LC 130 176 LD 165 233 LE 6 3 2 LF 12 18 LG 84 LH Without brake 105 140 With brake 116 140 LM Without brake 77 91 105 116 131 With brake 105 119 133 145 160 LZ 9 13 5 Key way dimensions LW 45 55 LK 41 50 KW 8 10 KH 7 8 RH 18 30 Mass kg Without brake 4 6 5 7 6...

Page 435: ...e 53 5 67 5 With brake 87 4 101 4 With oil seal Without brake 57 5 71 5 With brake 91 4 105 4 LR 25 S 8 LA 46 LB 30 LC 40 LE 3 LF 5 LH 33 LZ 4 3 Key way dimensions LW 14 LK 12 5 KW 3 KH 3 RH 6 2 TP M3 depth 6 Mass kg Without oil seal Without brake 0 29 0 4 With brake 0 51 0 62 With oil seal Without brake 0 31 0 42 With brake 0 53 0 64 Connector specifications Refer to P 2 40 Specifications of Moto...

Page 436: ...1 1 01 L1 1 LL Without oil seal Without brake 53 5 67 5 With brake 87 4 101 4 With oil seal Without brake 57 5 71 5 With brake 91 4 105 4 LR 25 S 8 LA 46 LB 30 LC 40 LE 3 LF 5 LH 34 5 LM Without oil seal Without brake 36 9 50 9 With brake 70 8 84 8 With oil seal Without brake 40 9 54 9 With brake 74 8 88 8 LT 16 6 LZ 4 3 Key way dimensions LW 14 LK 12 5 KW 3 KH 3 RH 6 2 TP M3 depth 6 Mass kg Witho...

Page 437: ... 100 W Motor model MHMF 5AZL1 4 01 L1 4 LL With oil seal With protect lip Without brake 53 5 67 5 With brake 87 4 101 4 LR 30 S 8 LA 46 LB1 30 LB2 29 6 LC 40 LE1 1 5 LE2 12 1 LF 5 LH 33 LZ 4 3 Key way dimensions LW 14 LK 12 5 KW 3 KH 3 RH 6 2 TP M3 depth 6 Mass kg Without brake 0 31 0 42 With brake 0 53 0 64 Connector specifications Refer to P 2 40 Specifications of Motor Connector Caution Related...

Page 438: ...dealer for the latest information Unit mm MHMF series High inertia Motor output 50 W 100 W Motor model MHMF 5AZL1 3 01 L1 3 LL With oil seal With protect lip Without brake 53 5 67 5 With brake 87 4 101 4 LR 30 S 8 LA 46 LB1 30 LB2 29 6 LC 40 LE1 1 5 LE2 12 1 LF 5 LH 34 5 LM Without brake 36 9 50 9 With brake 70 8 84 8 LT 16 6 LZ 4 3 Key way dimensions LW 14 LK 12 5 KW 3 KH 3 RH 6 2 TP M3 depth 6 M...

Page 439: ...125 5 138 3 With oil seal Without brake 71 88 95 4 108 2 With brake 100 3 117 3 129 141 8 LR 30 35 S 11 14 19 LA 70 90 LB 50 70 LC 60 80 LE 3 LF 6 5 8 LH 43 53 LZ 4 5 6 Key way dimensions LW 20 25 LK 18 22 5 22 KW 4 5 6 KH 4 5 6 RH 8 5 11 15 5 TP M4 depth 8 M5 depth 10 Mass kg Without oil seal Without brake 0 75 1 1 2 2 2 7 With brake 1 1 1 5 2 9 3 4 With oil seal Without brake 0 78 1 2 2 3 2 8 Wi...

Page 440: ...88 95 4 108 2 With brake 100 3 117 3 129 141 8 LR 30 35 S 11 14 19 LA 70 90 LB 50 70 LC 60 80 LE 3 LF 6 5 8 LH 44 54 LM Without oil seal Without brake 51 68 75 4 88 2 With brake 80 3 97 3 109 121 8 With oil seal Without brake 54 5 71 5 78 9 91 7 With brake 83 8 100 8 112 5 125 3 LT 16 5 LZ 4 5 6 Key way dimensions LW 20 25 LK 18 22 5 22 KW 4 5 6 KH 4 5 6 RH 8 5 11 15 5 TP M4 depth 8 M5 depth 10 Ma...

Page 441: ... 4 LL With oil seal With protect lip Without brake 67 5 84 5 91 9 104 7 With brake 96 8 113 8 125 5 138 3 LR 35 40 S 11 14 19 LA 70 90 LB1 50 70 LB2 49 4 69 4 LC 60 80 LE1 1 5 LE2 12 1 LF 6 5 8 LH 43 53 LZ 4 5 6 Key way dimensions LW 20 20 5 25 LK 18 18 22 KW 4 5 6 KH 4 5 6 RH 8 5 11 15 5 TP M4 depth 8 M5 depth 10 Mass kg Without brake 0 78 1 2 2 3 2 8 With brake 1 2 1 6 3 0 3 5 Connector specific...

Page 442: ...L1 3 092L1 3 LL With oil seal With protect lip Without brake 67 5 84 5 91 9 104 7 With brake 96 8 113 8 125 5 138 3 LR 35 40 S 11 14 19 LA 70 90 LB1 50 70 LB2 49 4 69 4 LC 60 80 LE1 1 5 LE2 12 1 LF 6 5 8 LH 44 54 LM Without brake 51 68 75 4 88 2 With brake 80 3 97 3 109 121 8 LT 16 5 LZ 4 5 6 Key way dimension LW 20 20 5 25 LK 18 18 22 KW 4 5 6 KH 4 5 6 RH 8 5 11 15 5 TP M4 depth 8 M5 depth 10 Mas...

Page 443: ...05 5 With brake 177 191 189 204 218 5 234 5 LR 70 80 S 22 35 LA 145 200 LB 110 114 3 LC 130 176 LD 165 233 LE 6 3 2 LF 12 18 LG 60 LH Without brake 105 140 With brake 116 140 LM Without brake 105 119 116 131 145 5 161 5 With brake 133 147 145 160 174 5 190 5 LZ 9 13 5 Key way dimensions LW 45 55 LK 41 50 KW 8 10 KH 7 8 RH 18 30 Mass kg Without brake 6 1 7 7 11 3 13 8 16 2 19 6 With brake 7 6 9 2 1...

Page 444: ...1 402L1 502L1 LL Without brake 150 164 161 176 190 5 206 5 With brake 178 192 190 205 219 5 235 5 LR 70 80 S 22 35 LA 145 200 LB 110 114 3 LC 130 176 LD 165 233 LE 6 3 2 LF 12 18 LG 84 LH Without brake 105 140 With brake 116 140 LM Without brake 105 119 116 131 145 5 161 5 With brake 133 147 145 160 174 5 190 5 LZ 9 13 5 Key way dimensions LW 45 55 LK 41 50 KW 8 10 KH 7 8 RH 18 30 Mass kg Without ...

Page 445: ...t POT NOT or external scale input so as to decide their logic until this term The lapse time can be changed with Pr 6 18 Power up w ait time 4 Note that the servo on status output signal is to let you know of the receipt of servo on command and is not an output to let you know that command input is possible Control power supply L1C L2C Internal control power supply Action of driver CPU Main power ...

Page 446: ...t you know of the receipt of servo on command and is not an output to let you know that command input is possible Alarm Servo On status output 3 Normal ON OFF Alarm Dynamic brake Motor energization Released Energized Output Tr ON Ready Output Tr ON Not Alarm Engaged 2 Non energized Output Tr OFF Not ready Output Tr OFF Alarm Servo Ready output S RDY RTEX status Servo Alarm output ALM RTEXス status ...

Page 447: ...tput S RDY RTEX status Servo Alarm outpu ALM RTEX status Approx 60 ms Energized Not energized Output Tr OFF Brake engage Output Tr ON Brake release Output Tr OFF Not ready Output Tr ON Ready Output Tr OFF Alarm Output Tr ON Not alarm No input entry Input enabled Position Speed Torque instruction RTEX command 100 ms or longer Approx 4 ms 1 Note that the servo on status output signal is to let you k...

Page 448: ...f Pr 5 06 Sequence at Servo off 3 Servo ON will not be activated until the motor speed falls below approx 30 r min 4 Note that the servo on status output signal is to let you know of the receipt of servo on command and is not an output to let you know that command input is possible Dynamic brake Servo ON command EX SON RTEX command Servo ON status output 4 Approx 2 ms Approx 23 ms 1 6 ms ON ON OFF...

Page 449: ...hart Supplement Servo ON OFF Servo ON OFF Action while the Motor Is in Motion Timing at emergency stop or trip Do not repeat this sequence 1 t1 will be a shorter time of either the setup value of Pr 4 38 Mechanical brake action at running setup or elapsing time for the motor speed to fall below Pr 4 39 Brake release speed setup 2 Even when the servo ON command is turned on again while the motor is...

Page 450: ...1C L2C P B N Voltage detection Communication control Alarm signal Position command Speed command Torque command DC DC USB RX TX Encoder signal processing limit M RE X1 X2A X2B X4 X6 U V W L1 L2 L3 L1C L2C P B N P N Resistance RB Fuse Fuse Fuse Voltage detection Inside power Front panel Communication control Alarm signal Position command Speed command Torque command Control input Control output Pus...

Page 451: ...ed command Torque command Control input Control output Pusle output Front panel DC DC USB RX TX M RE X1 X2A X2B X4 X6 U V W L1 L2 L3 L1C L2C P RB N B Fuse Fuse Fuse Voltage detection Inside power Resistance Fuse Front panel Gate drive Current detection Control Circuit Encoder signal processing limit Communication control Alarm signal Position command Speed command Torque command Control input Cont...

Page 452: ...Ind Single phase 100 V 200 V 3 phase 200 V C frame DV0P4220 Single 3 phase 200 V 3SUP HU30 ER 6 D frame DV0PM20043 3 phase 200 V 3SUP HU50 ER 6 E fram Unit mm Label Terminal cover transparent 2 ø4 5 R Cx Cx Cy L L Cy 2 ø4 5 x 6 75 53 1 1 0 100 0 2 0 88 0 75 0 5 0 12 0 10 0 50 0 60 0 7 0 2 0 11 6 13 0 6 M4 2 1 3 4 Circuit diagram IN OUT A B C D E F G H 115 DV0PM20042 DV0PM20042 DV0P4220 DV0PM20043 ...

Page 453: ...P3410 3 phase 200 V 3SUP HL50 ER 6B F frame Okaya Electric Ind 7 Options Noise Filter Select a noise filter of capacity that exceeds the capacity of the power source also check for load condition For detailed specification of the filter contact the manufacturer Remarks Caution Use options correctly after reading operation manuals of the options to better understand the precautions Take care not to...

Page 454: ...pecifications for driver Manufacturer s part No Manufacturer DV0P4190 Single phase 100 V 200 V R A V 781BWZ 4 Okaya Electric Ind Circuit diagram Circuit diagram 1 ø4 2 0 2 41 1 UL 1015 AWG16 28 1 5 5 1 11 1 28 5 1 4 5 0 5 200 30 0 2 3 ø4 2 0 2 41 1 UL 1015 AWG16 28 1 5 5 1 11 1 28 5 1 4 5 0 5 200 30 0 1 2 1 1 3 Unit mm Unit mm Take off the surge absorber when you execute a dielectric test to the m...

Page 455: ...turer DV0P1460 ZCAT3035 1330 TDK Corp Unit mm 39 1 34 1 30 1 13 1 Mass 62 8 g To connect the noise filter to the connector XB connection cable adjust the sheath length at the tip of the cable as required Remarks Remarks Fix the signal line ferrite core in place to eliminate excessive stress to the cables ...

Page 456: ...nd 10 0 40 0 00 MFECA0100EAE Connector pin 170365 1 20 0 60 0 00 MFECA0200EAE Cable 0 20 mm2 4P 8 wire Hitachi Electric Cable Co Ltd Part No MFECA0 0EAD Compatible motor output MSMF 50 W 1 0 kW 80 MQMF 100 W 400 W MHMF 50 W 1 0 kW 80 Leadwire type Specifications For encode Without battery box Unit mm L ø6 5 14 16 4 4 Title Part No Manufacturer L m Part No Connector Driver side 3E206 0100 KV Sumito...

Page 457: ...2P Hitachi Electric Cable Co Ltd Part No MFECA0 0MJE Highly bendable type Direction of motor shaft MFECA0 0MKE Highly bendable type Opposite direction of motor shaft MFECA0 0TJE Standard bendable type Direction of motor shaft MFECA0 0TKE Standard bendable type Opposite direction of motor shaft Compatible motor output MSMF 50 W 1 0 kW 80 MQMF 100 W 400 W MHMF 50 W 1 0kW 80 Connector type Specificat...

Page 458: ... MFECA0100EPD Connector pin JL04 2022CK 09 R 20 0 60 0 00 MFECA0200EPD Cable 0 2 mm2 3P 6 wire Oki Electric Cable Co Ltd Part No MFECA0 0ESD Compatible motor output MSMF 1 0 kW 100 5 0 kW MDMF 1 0 kW 5 0 kW MHMF 1 0 kW 130 5 0 kW MGMF 0 85 kW 4 4 kW Specifications For encode Without battery box screwed type Unit mm 7 Options Junction Cable for Encoder L ø6 5 ø37 3 Title Part No Manufacturer L m Pa...

Page 459: ...ctor Motor side JL10 6A20 29S EB Japan Aviation Electronics Ind Connector pin JL04 2022CK 09 R Cable 0 2 mm2 4P 8 wire Oki Electric Cable Co Ltd Part No MFECA0 0ESE Compatible motor output MSMF 1 0 kW 100 to 5 0 kW MDMF 1 0 kW to 5 0 kW MHMF 1 0 kW 130 to 5 0 kW MGMF 0 85 kW to 4 4 kW Specifications For encode With battery box screwed type Unit mm ø8 ø37 3 L 110 300 Title Part No Manufacturer L m ...

Page 460: ...MFECA0100ETD Connector pin JN1 22 22S PKG100 20 0 60 0 00 MFECA0200ETD Cable 0 2 mm2 3P Oki Electric Cable Co Ltd Part No MFECA0 0ETE Compatible motor output MSMF 1 0 kW 100 to 5 0 kW MDMF 1 0 kW to 5 0 kW MHMF 1 0 kW 130 to 5 0 kW MGMF 0 85 kW to 4 4 kW Specifications For encode With battery box JN2 One touch lock type Unit mm L 110 300 ø8 ø20 Title Part No Manufacturer L m Part No Connector Driv...

Page 461: ...Connector type MFMCA0 0NKD Highly bendable type Opposite direction of motor shaft MFMCA0 0RJD Standard bendable type Direction of motor shaft MFMCA0 0RKD Standard bendable type Opposite direction of motor shaft Unit mm L 50 28 8 ø6 Direction of motor shaft Opposite direction of motor shaft Motor cable for opposite direction of motor shaft cannot be used with a motor 50 W and 100 W Remark Identific...

Page 462: ...s Wire Co Ltd Part No MFMCA0 0UFD Highly bendable type Direction of motor shaft MFMCA0 0UGD Highly bendable type Opposite direction of motor shaft MFMCA0 0WFD Standard bendable type Direction of motor shaft MFMCA0 0WGD Standard bendable type Opposite direction of motor shaft Applicable model MQMF 100 W to 400 W MHMF 200 W to 1 0 kW 80 Connector type Unit mm Direction of motor shaft Opposite direct...

Page 463: ...nector JL10 6A22 22SE EB Japan Aviation Electronics Ind 3 0 26 0 00 MFMCE0032EUD Connector pin JL04 2022CK 14 R 5 0 30 0 00 MFMCE0052EUD Rod terminal NTUB 2 J S T Mfg Co Ltd 10 0 40 0 00 MFMCE0102EUD Nylon insulated round terminal N2 M4 J S T Mfg Co Ltd 20 0 60 0 00 MFMCE0202EUD Cable ROBO TOP 600 V 2 0 mm2 4 wire Dyden Corporation Unit mm Caution Related page Option cable does not conform to IP65...

Page 464: ... model MSMF 3 0 kW to 5 0 kW MDMF 3 0 kW to 5 0 kW MHMF 3 0 kW to 5 0 kW MGMF 2 9 kW 4 4 kW Screwed type 50 L ø40 5 ø14 Title Part No Manufacturer L m Part No Connector JL04V 6A22 22SE EB R Japan Aviation Electronics Ind 3 0 26 0 00 MFMCA0033ECT Cable clamp JL04 2022CK 14 R 5 0 30 0 00 MFMCA0053ECT Nylon insulated round terminal N5 5 5 J S T Mfg Co Ltd 10 0 40 0 00 MFMCA0103ECT Cable ROBO TOP 600V...

Page 465: ...rt No MFMCD0 3FUT Applicable model MGMF 2 4 kW One touch lock type Title Part No Manufacturer L m Part No Connector JL04V 6A24 11SE EB R Japan Aviation Electronics Ind 3 0 26 0 00 MFMCD0033FUT Cable clamp JL04 2428CK 17 R 5 0 30 0 00 MFMCD0053FUT Rod terminal TMENTC3 5 11S NICHIFU Co Ltd 10 0 40 0 00 MFMCD0103FUT Nylon insulated round terminal Earth N5 5 5 J S T Mfg Co Ltd 20 0 60 0 00 MFMCD0203FU...

Page 466: ...4 Cable ROBO TOP 600V 3 5 mm2 4 wire ROBO TOP 600V 0 75 mm2 2 wire Dyden Corporation L 50 L 50 ø14 3 ø 9 8 ø43 7 Part No MFMCE0 3ECT Applicable model MGMF 2 4 kW Screwed type Title Part No Manufacturer L m Part No Connector JL10 6A22 22SE EB Japan Aviation Electronics Ind 3 0 26 0 00 MFMCE0033ECT Connector pin JL04 2022CK 14 R 5 0 30 0 00 MFMCE0053ECT Rod terminal TMENTC3 5 11S NICHIFU Co Ltd 10 0...

Page 467: ... type Direction of motor shaft MFMCA0 0VGD Highly bendable type Opposite direction of motor shaft MFMCA0 0XFD Standard bendable type Direction of motor shaft MFMCA0 0XGD Standard bendable type Opposite direction of motor shaft Applicable model MQMF 100 W to 400 W MHMF 200 W to 1 0 kW 口 80 Connector type Unit mm Direction of motor shaft Opposite direction of motor shaft 25 9 20 50 L1 ø6 8 Identific...

Page 468: ...able ROBO TOP 600 V 0 75 mm2 2 wire ROBO TOP 600 V 2 0 mm2 4 wire Dyden Corporation Part No MFMCA0 2FCD Applicable model MSMF 1 0 kW 口 100 to 2 0 kW MDMF 1 0 kW to 2 0 kW MHMF 1 0 kW 口 130 to 1 5 kW MGMF 0 85 kW to 1 8 kW Screwed type Unit mm L 50 L 50 ø12 5 ø 9 8 ø37 3 Title Part No Manufacturer L m Part No Connector JL04V 6A20 18SE EB R Japan Aviation Electronics Ind 3 0 26 0 00 MFMCA0032FCD Cab...

Page 469: ...td 20 0 60 0 00 MFMCE0202FCD Brake N1 25 M4 Cable ROBO TOP 600V 2 0 mm2 4 wire ROBO TOP 600V 0 75 mm2 2 wire Dyden Corporation 7 Options Junction Cable for Motor With Brake Title Part No Manufacturer L m Part No Connector JL10 6A24 11SE EB Japan Aviation Electronics Ind 3 0 26 0 00 MFMCE0032FUD Cable clamp JL04 2428CK 17 R 5 0 30 0 00 MFMCE0052FUD Rod terminal NTUB 2 J S T Mfg Co Ltd 10 0 40 0 00 ...

Page 470: ...2 wire ROBO TOP DP6 2501 3 5 mm2 4 wire Dyden Corporation Part No MFMCA0 3FCT Applicable model MSMF 3 0 kW to 5 0 kW MDMF 3 0 kW to 5 0 kW MHMF 3 0 kW to 5 0 kW MGMF 2 9kW 4 4 kW Screwed type Unit mm L 50 L 50 ø43 7 ø14 ø 9 8 Title Part No Manufacturer L m Part No Connector JL04V 6A24 11SE EB R Japan Aviation Electronics Ind 3 0 26 0 00 MFMCA0033FCT Cable clamp JL04 2428CK 17 R 5 0 30 0 00 MFMCA00...

Page 471: ...rection of motor shaft MFMCB0 0SJT Standard bendable type Direction of motor shaft MFMCB0 0SKT Standard bendable type Opposite direction of motor shaft Applicable model MSMF 50 W to 1 0 kW 80 Connector type L 50 26 6 Direction of motor shaft Opposite direction of motor shaft ø4 3 Identification label Title Part No Manufacturer L m Part No Connector JN4FT02SJMR Japan Aviation Electronics Ind 3 0 26...

Page 472: ...0800 1 13 26 14 37 2 2000 50 39 12 7 14 ø 10 9 Unit mm Connector cover 10326 52A0 008 Sumitomo 3M or equivalent Connector 10126 3000PE Sumitomo 3M or equivalent This 2 m connector cable contains AWG26 conductors Table for wiring Pin No Signal color Pin No Signal color Pin No Signal color 1 SO1 Orange Red1 10 SI5 Pink Black1 19 OB Pink Red2 2 SO1 Orange Black1 11 SI6 Yellow Red2 20 OB Pink Black2 3...

Page 473: ...it Connector Shell FG 33 0 37 4 0 8 7 8 18 8 18 8 12 0 6 PS 5 PS 2 E0V 1 E5V 4 NC 3 NC 5 8 5 4 1 7 7 1 2 0 2 0 11 0 10 1 4 5 18 2 13 7 2 4 Do not connect anything to NC pins Remarks Remarks Connector X1 use with commercially available cable Configuration of connector X1 USB mini B For crimp tool etc necessary to produce a cable access the web site of the manufacturer or consult with the manufactur...

Page 474: ...the sum of the current value does not exceed the rated current 11 25 A of DV0PM20033 When using drivers MDDL 55 in single phase power supply do not use DV0PM20033 Unit mm Remarks Part No DV0PM20044 For E frame 200 V Components Title Part No Number Manufacturer Note Connector 05JFAT SAXGSA L 1 J S T Mfg Co Ltd For Connector XA Handle lever J FAT OT L 2 Driver part No Power supply Rated input curren...

Page 475: ...r J FAT OT L 2 Connector Kit for Motor Encoder Connection Part No DV0P4290 Applicable model MSMF 50 W to 1 0 kW 口 80 MQMF 100 W to 400 W MHMF 50 W to 1 0 kW 口 80 Without brake Components Title Part No Number Manufacturer Note Connector Driver side 3E206 0100 KV 1 Sumitomo 3M or equivalent For Connector X6 6 pins Shell kit 3E306 3200 008 1 Connector 172161 1 1 Tyco Electronics For Encoder cable 9 p...

Page 476: ...l kit 3E306 3200 008 1 Encoder Connector JN2DS10SL1 R 1 Japan Aviation Electronics Ind For Encoder cable Connector pin JN1 22 22S PKG100 5 Motor Connector JL04V 6A 20 4SE EB R 1 Japan Aviation Electronics Ind For Motor cable Cable clamp JL04 2022CK 14 R 1 1 Old model number Connector 55100 0670 Japan Molex Inc When IP65 or IP67 are necessary the customer must give approriate processing For crimp t...

Page 477: ...For Motor cable Cable clamp JL04 2022CK 14 R 1 1 Old model number Connector 55100 0670 Japan Molex Inc Part No DV0PM20039 Applicable model MSMF 3 0 kW to 5 0 kW MDMF 3 0 kW to 5 0 kW MHMF 2 0 kW to 5 0 kW MGMF 2 9 kW 4 4 kW With brake Components Title Part No Number Manufacturer Note Connector Driver side 3E206 0100 KV 1 Sumitomo 3M or equivalent 1 For Connector X6 6 pins Shell kit 3E306 3200 008 ...

Page 478: ...Components Title Part No Number Manufacturer Note Connector Driver side 3E206 0100 KV 1 Sumitomo 3M or equivalent 1 For Connector X6 6 pins Shell kit 3E306 3200 008 1 Encoder Connector N MS3106B20 29S 1 Japan Aviation Electronics Ind For Encoder cable Connector pin N MS3057 12A 1 Motor Connector N MS3106B20 18S 1 Japan Aviation Electronics Ind For Motor cable Cable clamp N MS3057 12A 1 1 Old model...

Page 479: ...n JN11S35H3A1 6 Connector Kit for Motor Encoder Connection Part No DV0PM24583 Applicable model MSMF 1 0 kW to 2 0 kW MDMF 1 0 kW to 2 0 kW MHMF 1 0 kW to 2 0 kW MGMF 0 85 kW to 1 8 kW For Encoder connector JN2 One touch lock type Without brake Components Title Part No Number Manufacturer Note Connector Driver side 3E206 0100 KV 1 Sumitomo 3M or equivalent For Connector X6 6 pins Shell kit 3E306 32...

Page 480: ...2S PKG100 5 Connector JL10 6A24 11SE EB 1 Japan Aviation Electronics Ind For Motor cable Cable clamp JL04 2428 CK 17 R 1 Part No DV0PM24587 Applicable model MSMF 1 0 kW 口 100 to 2 0 kW MDMF 1 0 kW to 2 0 kW MHMF 1 0 kW 口 130 to 1 5 kW MGMF 0 85 kW to 1 8 kW For Encoder connector JL10 One touch lock type Without brake Components Title Part No Number Manufacturer Note Connector Driver side 3E206 010...

Page 481: ...lock type With brake Components Title Part No Number Manufacturer Note Connector Driver side 3E06 0100KV 1 Sumitomo 3M or equivalent For Connector X6 6 pins Shell kit 3E306 3200 008 1 Connector JL10 6A20 29S EB 1 Japan Aviation Electronics Ind For Encoder cable Connector pin JL04 2022 CK 09 R 1 Connector JL10 6A24 11SE EB 1 Japan Aviation Electronics Ind For Motor cable Connector pin JL04 2428 CK ...

Page 482: ...g of the following has been applied inside the plug 12 8 7 3 6 6 8 2 24 PIN No 8 6 4 2 7 5 3 1 Connector Kit for External Scale Not Applicable to A6N Standard Type Part No DV0PM20026 Components Title Part No Manufacturer Note Connector MUF PK10K X J S T Mfg Co Ltd For Connector X5 Pin disposition of connector connector X5 Dimensions Unit mm 10 5 32 18 5 13 6 10 4 11 9 7 1 1 3 5 7 2 4 6 8 9 10 PS E...

Page 483: ...one prevent the charging diode to DVOP2990 This battery is categorized as hazardous substance and you may be required to present an application of hazardous substance when you transport by air both passenger and cargo airlines Battery Box for Absolute Encoder Part No DV0P4430 Components Unit mm DV0P4430 P04090001 R5 112 110 31 27 7 7 Options Supplement Battery for Absolute Encoder Caution Related ...

Page 484: ... C 5 Part No DV0PM20101 Frame symbol of applicable driver C frame D frame Mounting screw Upper side 2pcs Bottom side 2pcs M4 L6 Pan head 4pcs Dimensions Upper sid Unit mm R 1 o r l e s s 2 R2 3 Φ 5 2 2 C 5 2 M4 Pan head 10 40 20 60 15 10 25 9 33 4 2 5 23 14 0 1 Bottom side Unit mm R 1 o r l e s s 6 R1 2 C 5 2 M4 Pan head 10 20 10 40 3 5 2 2 5 23 33 4 25 9 14 0 1 2 R2 15 3 R 7 7 Options Supplement ...

Page 485: ...227 55 0 7 80 1 66 5 1 110Max 90 41 2 55 2 4 5φ 10 M4 4 02 5 DV0P228 55 0 7 80 1 66 5 1 110Max 95 46 2 60 2 4 5φ 10 M4 2 8 DV0PM20047 55 0 7 80 1 66 5 1 110Max 105 56 2 70 2 4 5φ 10 M4 1 39 11 Driver series Power supply Rated output Part No Driver series Power supply Rated output Part No MADL口 01N口 single phase 100V 50 W DV0P227 MADL口 05N口 3 phase 200 V 50 W DV0P220 MADL口 11N口 100 W MADL口 05N口 100...

Page 486: ...rical appliances and general purpose articles was abolished on September 6 2016 We are pleased to inform you that the procedure to execute the harmonic restraint on general purpose inverter and servo driver was modified as follows 1 All types of the general purpose inverters and servo drivers used by specific users are under the control of the Guidelines for harmonic restraint on heavy consumers w...

Page 487: ...V0P4285 RH450F 20 1 2 52 130 Manufacturer Iwaki Musen Kenkyusho 1 Power with which the driver can be used without activating the built in thermal protector A built in thermal fuse and a thermal protector are provided for safety The built in thermal fuse blows depending on changes in heat dissipation condition operating temperature limit power supply voltage or load Mount the regenerative resistor ...

Page 488: ...ermal protector of the regenerative resistor works Because it is automatic reset thermal protector please apply a self holding circuit to the outside in order to maintain safety in case of sudden activation During the failure of the driver the surface temperature of the regenerative resistor may exceed the operating temperature before thermal protector starts to work Built in thermal fuse of regen...

Page 489: ... 0 kW 3 0 kW TNR9G820K NIPPON CHEMI CON CORPORATION 4 0 kW Z15D151 SEMITEC Corporation 5 0 kW NVD07SCD082 KOA Corporation MGMF 0 85 kW 1 8 kW TNR9G820K NIPPON CHEMI CON CORPORATION 2 4 kW 2 9 kW Z15D151 SEMITEC Corporation 4 4 kW NVD07SCD082 KOA Corporation MHMF 50 W 1 0 kW 口 80 TND15G271K NIPPON CHEMI CON CORPORATION 1 0 kW 口 130 1 5 kW TNR9G820K NIPPON CHEMI CON CORPORATION 2 0 kW 4 0 kW Z15D151...

Page 490: ...area 81 6 6632 8140 Noise filter for signal lines MICROMETALS Nisshin Electric Co Ltd 81 4 2934 4151 KK CORP CO JP 81 184 53 2307 Okaya Electric Industries Co Ltd Kanto area 81 3 4544 7040 Kansai area 81 6 6341 8815 Surge absorber Noise filter Japan Aviation Electronics Industry Ltd Kanto area 81 3 3780 2717 Midland 81 565 34 0600 Kansai area 81 6 6447 5268 Connector Sumitomo 3M Kanto area 81 3 57...

Page 491: ...7 108 Rev 2 00 MEMO ...

Page 492: ...such as wa ter oil or metallic particles Parts exceeding their standard lifetime specified in this document are excluded Warranty Scope Panasonic warrants the replacement of the defected parts of the Product or repair of them when the defects of the Product occur during the Warranty Period and when the defects are under Panasonic responsibility This Warranty only covers the Product itself and does...

Page 493: ...trial equipments Don t use this product under special conditions such as nuclear energy control aerospace equipments transporta tion medical equipment various safety equipments or special equipments The wiring condition earth wire method and cables length and shield cable condition of signal lines may affect the noise resistance please confirm the noise resistance of the machine If the servo motor...

Page 494: ... Apr 2017 Rev 1 00 Newly issued Oct 2017 Rev 2 00 12 1 7 1 8 1 09 3 16 3 32 3 33 3 73 3 89 3 95 3 105 3 110 3 112 3 116 5 80 5 82 6 4 6 9 6 10 6 11 6 29 6 33 Software upgrades correspond to extensions 1 7 3 15 7 9 Additional USB communication function 1 4 1 10 Additional nameplate production number corresponding table ー Error correcting Revisions ...

Page 495: ...hased the product for details of repair When the product is incorporated to the machine or equipment you have purchased consult to the manufacturer or the dealer of the machine or equipment Consult Technical consultation Selection and use of motor and drive Free telephone hotline 0120 70 3799 TEL 072 870 3057 FAX 072 870 3120 Mobile phones smart mobilephone parts of the IP phone can not call a fre...

Reviews: